一、准备工作
实验环境:Redhat 6.6 Oracle 12c 12.2.0.1
1、官网下载
2、安装所需rpm包
# rpm -q binutils compat-libcap1 gcc-c++ compat-libstdc++-33 gcc gcc-c++e2fsprogs e2fsprogs-libs glibc glibc-devel ksh libaio-devel libaio libgcc libstdc++ libstdc++-devel libxcb libX11 libXau libXi libXtst make net-tools nfs-utils smartmontools sysstat
所需要镜像中都包含,所以可以通过本地yum方式进行安装
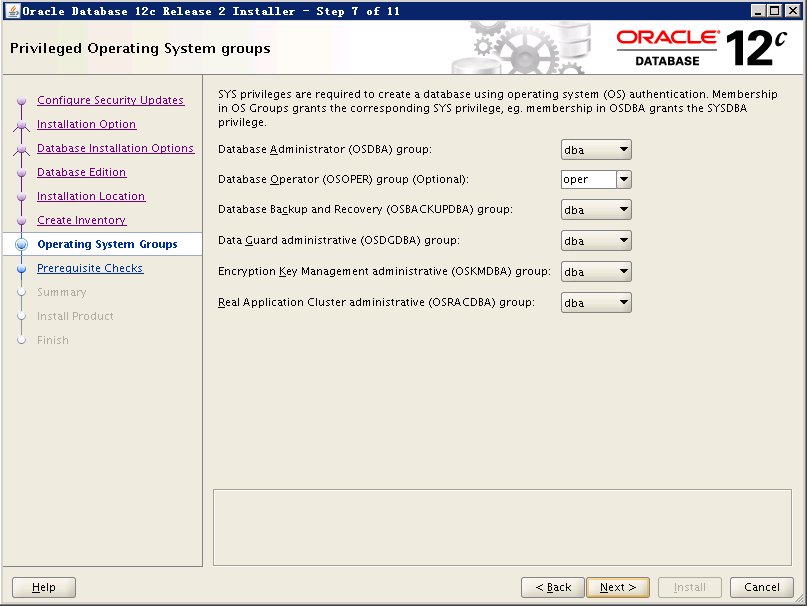
3、创建用户组
[root@RmanDB tools]# groupadd -g 54321 oinstall
[root@RmanDB tools]# groupadd -g 54322 dba
[root@RmanDB tools]# groupadd -g 54323 oper
4、创建用户
[root@RmanDB tools]# useradd -u 54321 -g oinstall -G dba,oper oracle
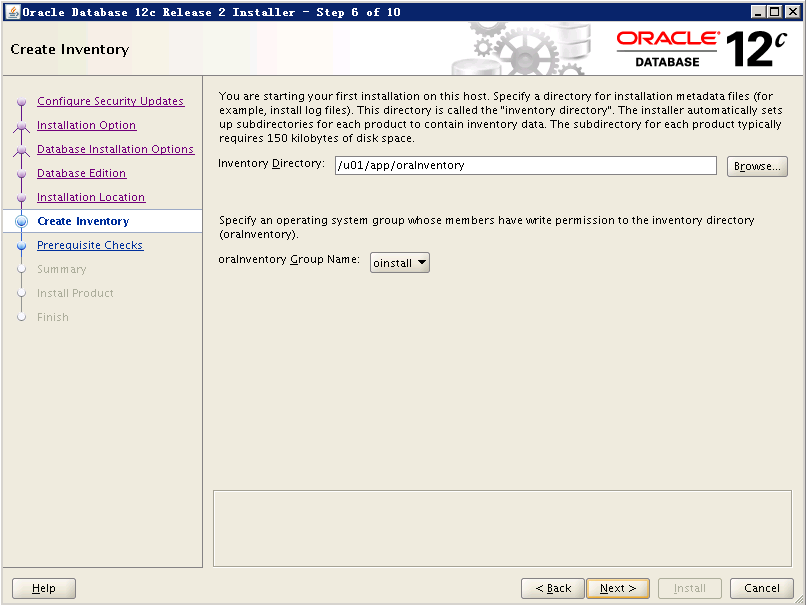
5、创建目录
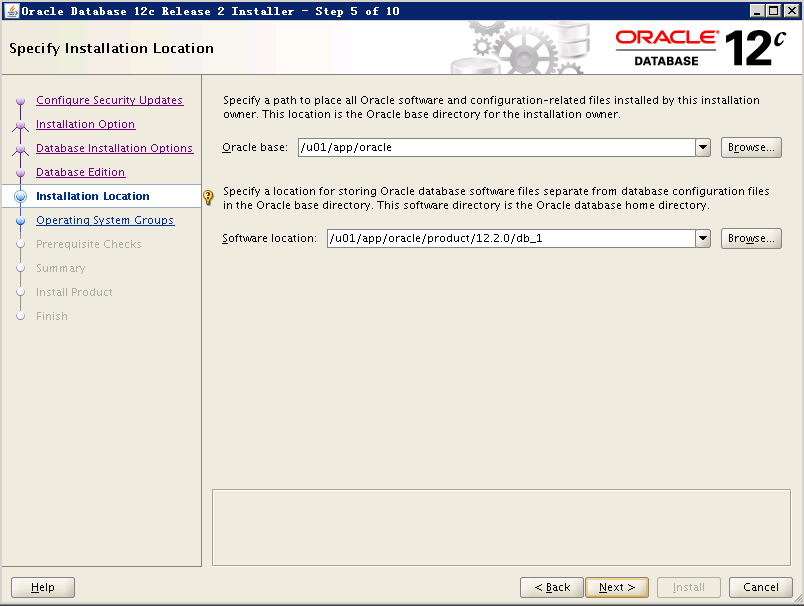
mkdir -p /u01/app/oracle/product/12.2.0/db_1
[root@RmanDB tools]# chown -R oracle:oinstall /u01/app
[root@RmanDB tools]# chmod -R 775 /u01/app
6、配置环境变量
配置oracle用户
vim .bash_profile
#ORACLE
PATH=$PATH:$HOME/bin
export PATH
export ORACLE_BASE=/u01/app/oracle
export ORACLE_HOME=$ORACLE_BASE/product/12.2.0/db_1
export PATH=$ORACLE_HOME/bin:$ORACLE_HOME/Apache/bin:$PATH
export ORACLE_SID=gnnt1
ORACLE_HOSTNAME=RmanDB
export ORACLE_OWNER=oracle
export ORACLE_TERM=vt100
export LD_LIBRARY_PATH=$ORACLE_HOME/lib:$LD_LIBRARY_PATH
export NLS_LANG=AMERICAN_AMERICA.ZHS16GBK
export DISPLAY=192.168.10.2:0.0
7、配置内核
注意:配置大于系统数据需要配置更改,否则不需要配置。
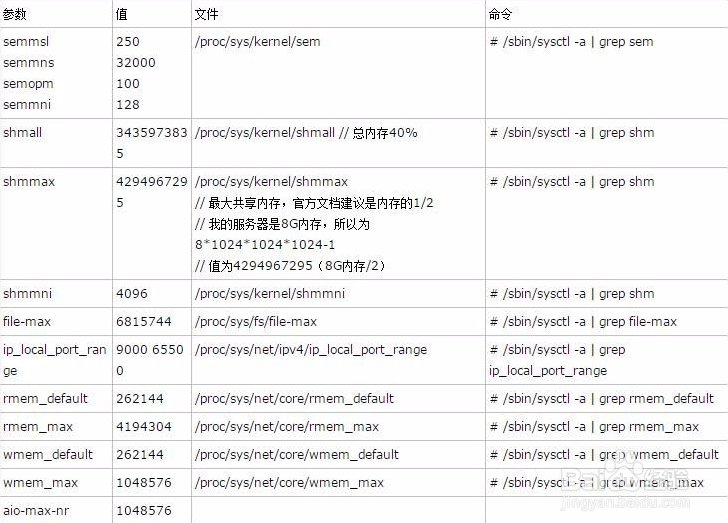
vim /etc/sysctl.conf
添加如下配置
#ORACLE

fs.aio-max-nr = 1048576
fs.file-max = 6815744
kernel.sem = 250 32000 100 128
kernel.shmmni = 4096
kernel.shmall = 1073741824
kernel.shmmax = 6597069766656
kernel.panic_on_oops = 1
net.ipv4.ip_local_port_range = 9000 65500
net.core.rmem_default = 262144
net.core.rmem_max = 4194304
net.core.wmem_default = 262144
net.core.wmem_max = 1048576
配置完成 sysctl -p 刷新生效
8、设置进程数和最大会话数
vi /etc/security/limits.conf

添加使用如下设置。
oracle soft nproc 2047
oracle hard nproc 16384
oracle soft nofile 1024
oracle hard nofile 65536
oracle soft stack 10240
oracle hard stack 10240
二、安装过程
1、解压
[root@RmanDB tools]# mkdir -p /u01/app/tmp
[root@RmanDB tools]# chown -R oracle:oinstall /u01/app/tmp
[root@RmanDB tools]# chmod -R 775 /u01/app/tmp
将下载的安装包解压
[oracle@RmanDB tmp]$ unzip /tools/linuxx64_12201_database.zip

[oracle@RmanDB tmp]$ ll
total 4
drwxr-xr-x. 7 oracle oinstall 4096 Jan 27 2017 database
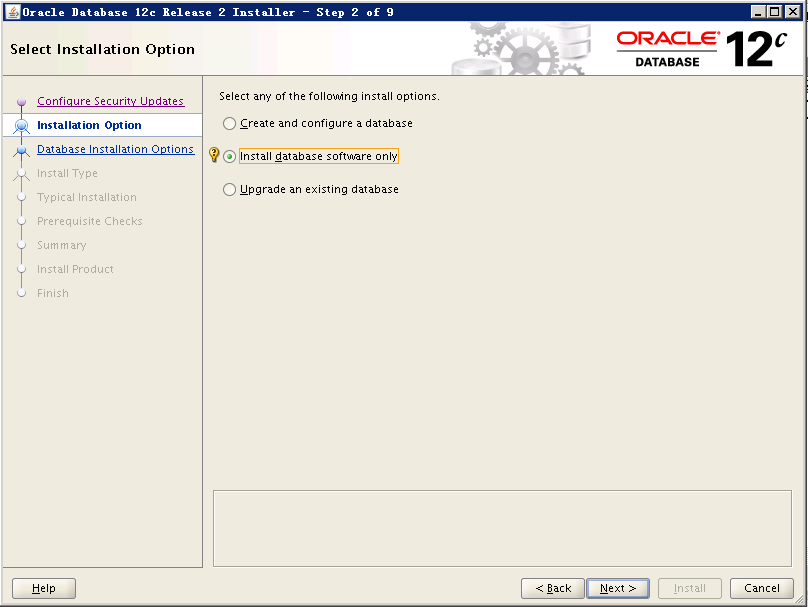
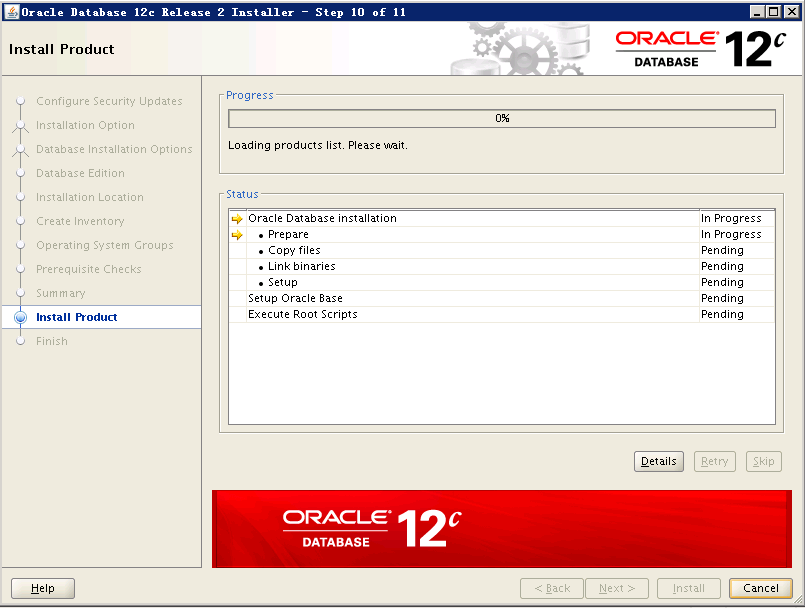
2、执行安装
[oracle@RmanDB ~]$ /u01/app/tmp/database/runInstaller
Starting Oracle Universal Installer...

Checking Temp space: must be greater than 500 MB. Actual 175476 MB Passed
Checking swap space: must be greater than 150 MB. Actual 81019 MB Passed
Checking monitor: must be configured to display at least 256 colors
>>> Could not execute auto check for display colors using command /usr/bin/xdpyinfo. Check if the DISPLAY variable is set. Failed <<<<

Some requirement checks failed. You must fulfill these requirements before

continuing with the installation,

Continue? (y/n) [n] y


>>> Ignoring required pre-requisite failures. Continuing...
Preparing to launch Oracle Universal Installer from /tmp/OraInstall2018-11-23_04-21-02PM. Please wait ...

看你的需求选择是要只安装数据库软件还是软件+配置库
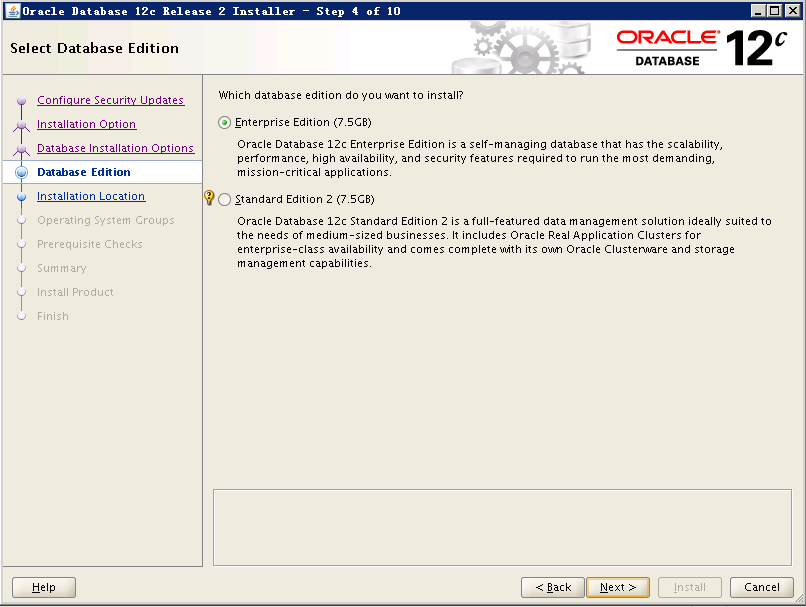
安装单实例

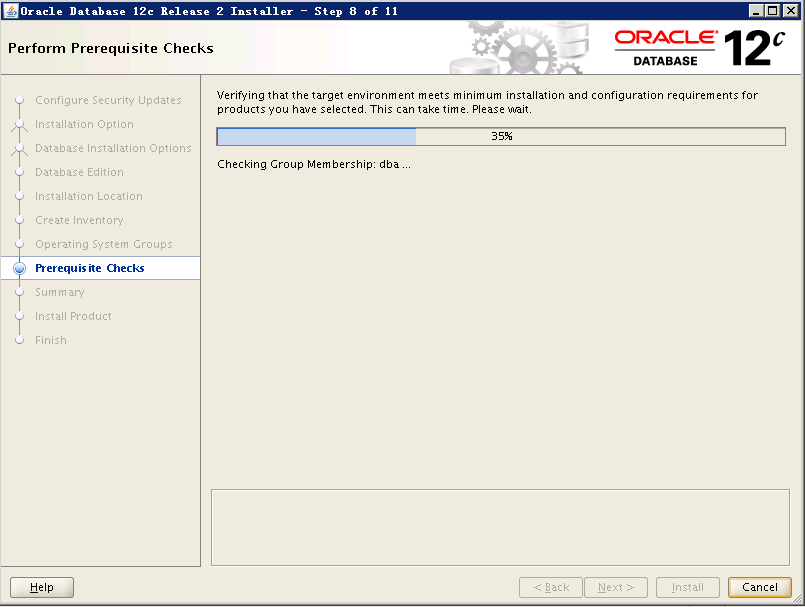
如果检查出问题,请先解决再行安装否则可能安装失败

等待安装
使用root用户执行脚本
[root@RmanDB tmp]# /u01/app/oraInventory/orainstRoot.sh
Changing permissions of /u01/app/oraInventory.
Adding read,write permissions for group.
Removing read,write,execute permissions for world.

Changing groupname of /u01/app/oraInventory to oinstall.
The execution of the script is complete.


[root@RmanDB tmp]# /u01/app/oracle/product/12.2.0/db_1/root.sh
Performing root user operation.

The following environment variables are set as:
    ORACLE_OWNER= oracle
    ORACLE_HOME=  /u01/app/oracle/product/12.2.0/db_1

Enter the full pathname of the local bin directory: [/usr/local/bin]:
The contents of "dbhome" have not changed. No need to overwrite.
The contents of "oraenv" have not changed. No need to overwrite.
The contents of "coraenv" have not changed. No need to overwrite.

Entries will be added to the /etc/oratab file as needed by
Database Configuration Assistant when a database is created
Finished running generic part of root script.
Now product-specific root actions will be performed.
Do you want to setup Oracle Trace File Analyzer (TFA) now ? yes|[no] :
yes
Installing Oracle Trace File Analyzer (TFA).
Log File: /u01/app/oracle/product/12.2.0/db_1/install/root_RmanDB_2018-11-23_16-58-31-820480200.log
Finished installing Oracle Trace File Analyzer (TFA)
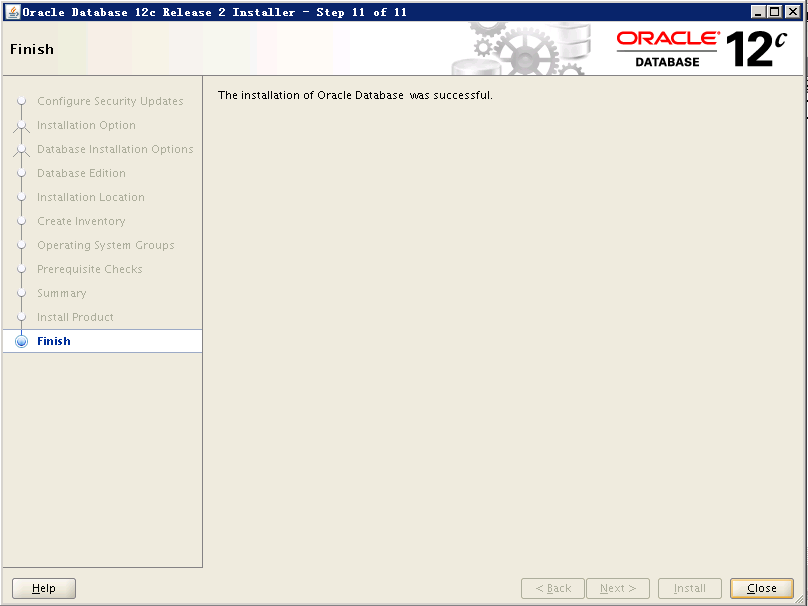
到此,数据库软件安装完成!