1.
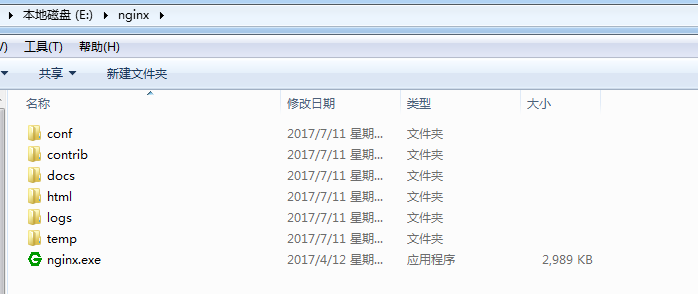
首先去Nginx官网下载一个最新版本的Nginx,下载地址:http://nginx.org/en/download.html。我这里下载的版本是:nginx/Windows-1.12.0。下载完成之后,得到一个.zip的压缩包,把压缩包解压到E盘根目录。如图1-1

2.
打开目录 E: ginxconf ,编辑nginx.conf文件,修改成如下:
#user  nobody;
worker_processes  1;

#error_log  logs/error.log;
#error_log  logs/error.log  notice;
#error_log  logs/error.log  info;

#pid        logs/nginx.pid;


events {
    worker_connections  1024;
}


http {
    client_max_body_size 100M;
    include       mime.types;
    default_type  application/octet-stream;

    #log_format  main  '$remote_addr - $remote_user [$time_local] "$request" '
    #                  '$status $body_bytes_sent "$http_referer" '
    #                  '"$http_user_agent" "$http_x_forwarded_for"';

    #access_log  logs/access.log  main;

    sendfile        on;
    #tcp_nopush     on;

    #keepalive_timeout  0;
    keepalive_timeout  65;

    #gzip  on;


    server {
        listen       80;                            # nginx访问端口
        server_name  localhost;                        # nginx访问域名

        location / {
            proxy_pass   http://127.0.0.1:8020;        # 前端静态页面地址
            proxy_redirect default;
            #设置主机头和客户端真实地址,以便服务器获取客户端真实IP
            proxy_set_header Host $host;
            proxy_set_header X-Real-IP $remote_addr;
            proxy_set_header X-Forwarded-For $proxy_add_x_forwarded_for;
        }

        location /apis {                            # 自定义nginx接口前缀
            rewrite  ^/apis/(.*)$ /$1 break;        # 监听所有/apis前缀,是则转发后台api接口地址
            include  uwsgi_params;
            proxy_pass   http://127.0.0.1:8080;        # 后台api接口地址
            #设置主机头和客户端真实地址,以便服务器获取客户端真实IP
            proxy_set_header Host $host;
            proxy_set_header X-Real-IP $remote_addr;
            proxy_set_header X-Forwarded-For $proxy_add_x_forwarded_for;
        }

        error_page   500 502 503 504  /50x.html;
        location = /50x.html {
            root   html;
        }
    }

}
注: 如果项目接口路径后面带前缀的,需要如下设置:
        location /apis/ {                                # 自定义nginx接口前缀
            rewrite  ^/apis//(.*)$ /$1 break;             # 监听所有/apis前缀,是则转发后台api接口地址
            include  uwsgi_params;
            proxy_pass   http://127.0.0.1:8080/ser/;     # 后台api接口地址
            #设置主机头和客户端真实地址,以便服务器获取客户端真实IP
            proxy_set_header Host $host;
            proxy_set_header X-Real-IP $remote_addr;
            proxy_set_header X-Forwarded-For $proxy_add_x_forwarded_for;
        }
http://chenwenming.blog.51cto.com/327092/1203537
在nginx中配置proxy_pass时,当在后面的url加上了/,相当于是绝对根路径,则nginx不会把location中匹配的路径部分代理走;如果没有/,则会把匹配的路径部分也给代理走。

下面四种情况分别用http://192.168.1.4/proxy/test.html 进行访问。
第一种:
location  /proxy/ {
          proxy_pass http://127.0.0.1:81/;
}
会被代理到http://127.0.0.1:81/test.html 这个url

第二咱(相对于第一种,最后少一个 /)
location  /proxy/ {
          proxy_pass http://127.0.0.1:81;
}
会被代理到http://127.0.0.1:81/proxy/test.html 这个url

第三种:
location  /proxy/ {
          proxy_pass http://127.0.0.1:81/ftlynx/;
}
会被代理到http://127.0.0.1:81/ftlynx/test.html 这个url。

第四种情况(相对于第三种,最后少一个 / ):
location  /proxy/ {
          proxy_pass http://127.0.0.1:81/ftlynx;
}
会被代理到http://127.0.0.1:81/ftlynxtest.html 这个url

上面的结果都是本人结合日志文件测试过的。从结果可以看出,应该说分为两种情况才正确。即http://127.0.0.1:81 (上面的第二种) 这种和 http://127.0.0.1:81/.... (上面的第1,3,4种) 这种。


-----------------------------------------------------------------------------------------
nginx proxy_pass末尾神奇的/
http://backend;和http://backend/;有什么区别呢?

        location /service/ {
            proxy_pass   http://backend;
            proxy_next_upstream error timeout invalid_header http_500 http_503 http_404;
        }
        location /service/ {
            proxy_pass   http://backend/;
            proxy_next_upstream error timeout invalid_header http_500 http_503 http_404;
        }
同样访问:http://neverstay.com/service/add.php
前者配置,在后端的机器,收到的是http://neverstay.com/service/add.php
后者配置,在后端的机器,收到的是http://neverstay.com/add.php
如果换成下面这样,会报错:
        location ~ ^/(service)/ {
            proxy_pass   http://backend/;
            proxy_next_upstream error timeout invalid_header http_500 http_503 http_404;
        }
"proxy_pass" may not have URI part in location given by regular expression, or inside named location, or inside the "if" statement, or inside the "limit_except" block in nginx.conf:
但是,这样就没问题了:
        location ~ ^/(service)/ {
            proxy_pass   http://backend;
            proxy_next_upstream error timeout invalid_header http_500 http_503 http_404;
        }
把proxy_pass末尾的斜线去掉,就可以了。
3.
启动nginx,进入目录 E: ginx,点击空白处,按住Shift + 鼠标右键 --> 点击“在此处打开命令窗口”,输入命令:
启动:start nginx
停止:nginx -s stop
重启:nginx -s reload
4.
访问 http://localhost/前端项目名/index.html
5.
ajax接口访问地址由原来的 http://127.0.0.1:8080/api/xxx...
变成:/apis/api/xxx...

附:使用nginx后,后台获取请求头的一些信息。
###### 不用nginx代理
referer--------------http://localhost:8066/index.html
accept-language--------------zh-CN,zh;q=0.9
cookie--------------Hm_lvt_b393d153aeb26b46e9431fabaf0f6190=1510729582; Idea-d796403=72c2352f-4ec9-4a5f-8ccf-15f7de01060b; JSESSIONID=ae31cfd7-b6d7-4c89-af96-a1496fff62c3
host--------------localhost:8066
upgrade-insecure-requests--------------1
connection--------------keep-alive
accept-encoding--------------gzip, deflate, br
user-agent--------------Mozilla/5.0 (Windows NT 6.1; WOW64) AppleWebKit/537.36 (KHTML, like Gecko) Chrome/62.0.3202.94 Safari/537.36
accept--------------text/html,application/xhtml+xml,application/xml;q=0.9,image/webp,image/apng,*/*;q=0.8


###### 使用nginx代理,但不配置可获取客户端真实ip地址
referer--------------http://127.0.0.1/soeasy/soeasy-web/src/main/webapp/index.html
accept-language--------------zh-CN,zh;q=0.9
cookie--------------Idea-d796403=72c2352f-4ec9-4a5f-8ccf-15f7de01060b; JSESSIONID=c36ff1a3-f4f6-46aa-936f-26474a4b31b2
host--------------127.0.0.1:8066
upgrade-insecure-requests--------------1
connection--------------close
accept-encoding--------------gzip, deflate, br
user-agent--------------Mozilla/5.0 (Windows NT 6.1; WOW64) AppleWebKit/537.36 (KHTML, like Gecko) Chrome/62.0.3202.94 Safari/537.36
accept--------------text/html,application/xhtml+xml,application/xml;q=0.9,image/webp,image/apng,*/*;q=0.8


###### 使用nginx代理,并且配置可获取客户端真实ip地址
x-real-ip--------------127.0.0.1
referer--------------http://localhost/soeasy/soeasy-web/src/main/webapp/index.html
accept-language--------------zh-CN,zh;q=0.9
cookie--------------Hm_lvt_b393d153aeb26b46e9431fabaf0f6190=1510729582; Idea-d796403=72c2352f-4ec9-4a5f-8ccf-15f7de01060b; JSESSIONID=c0de95b1-71da-41d9-a70b-62e8fb5d2a66
host--------------localhost
upgrade-insecure-requests--------------1
connection--------------close
x-forwarded-for--------------127.0.0.1
accept-encoding--------------gzip, deflate, br
user-agent--------------Mozilla/5.0 (Windows NT 6.1; WOW64) AppleWebKit/537.36 (KHTML, like Gecko) Chrome/62.0.3202.94 Safari/537.36
accept--------------text/html,application/xhtml+xml,application/xml;q=0.9,image/webp,image/apng,*/*;q=0.8