1. 实验平台使用百为的STM32F103开发板
2. 例程目录百为stm32开发板光盘stm32_gui_libProjectEmbedded_GUI_ExampleEWARM
3. 直接编译遇到一个问题
Error[Pe147]: declaration is incompatible with "__nounwind __interwork __softfp unsigned int __iar_builtin_REV16(unsigned int)"
(declared at line 197 of "D:IAR Systems E:MCUSTM32百为stm32开发板光盘stm32_gui_libLibrariesCMSISCM3CoreSupportcore_cm3.h 1124
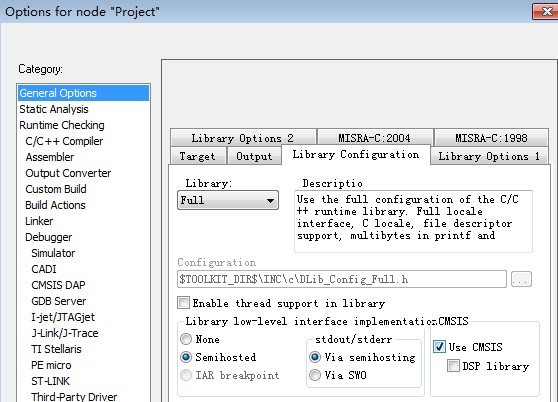
4. 解决办法如下,勾选Use CMSIS
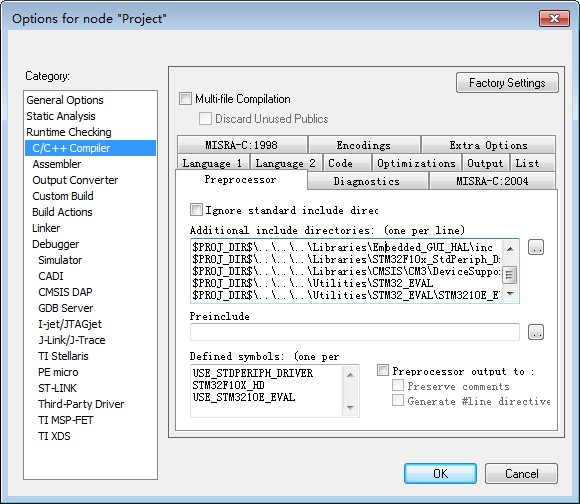
5. 去掉 $PROJ_DIR$......LibrariesCMSISCM3CoreSupport,编译通过。
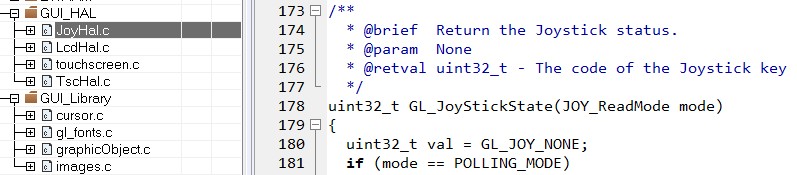
6. 打开工程,分为GUI_HAL和底层有关的,GUI_Library是上层的鼠标,文字,图像等处理,其实看起来蛮简单的。 JoyHal.c是处理板子上面的一个方向按键,
7. 看下主函数
 1 int main(void)
 2 {
 3   RCC_ClocksTypeDef RCC_Clocks;
 4
 5   /* Set the Vector Table base location at 0x08000000 */
 6   NVIC_SetVectorTable(NVIC_VectTab_FLASH, 0x0000);
 7   NVIC_PriorityGroupConfig(NVIC_PriorityGroup_2);
 8
 9   /* Setup SysTick Timer for 10 msec interrupts  */
10   RCC_GetClocksFreq(&RCC_Clocks);
11   if (SysTick_Config(RCC_Clocks.SYSCLK_Frequency / 100))
12   {
13     /* Capture error */
14     while (1);
15   }
16   /* configure Systick priority */
17   NVIC_SetPriority(SysTick_IRQn, 0x0B);
18
19   /* Set HW structure parameters */
20   HWConfig_SetHardwareParams();
21
22
23   /* If the LCD Panel has a resolution of 320x240 this command is not needed, it's set by default */
24   /* Set_LCD_Resolution( 320, 240 ); */
25
26   /* Initialize the LCD */
27   GL_LCD_Init();
28
29   GL_Clear(GL_White);
30
31   InputInterface_Init();
32
33   ShowLoadingLogo();
34
35 #if TOUCH_SCREEN_CAPABILITY
36   /* Check if Calibration has been done*/
37   TS_CheckCalibration();
38 #endif
39
40   /*Initialize cursor*/
41   GL_Clear(White);
42   CursorInit(GL_NULL);
43
44   /* Menu Initialisation*/
45   Show_HomeScreen();
46   CursorShow(195, 80);
47
48   /* Infinite main loop ------------------------------------------------------*/
49   while (1)
50   {
51
52 #if defined(USE_STM3210C_EVAL) || defined(USE_STM32100E_EVAL)
53     /* Catching touch events */
54     if ( TS_IsCalibrationDone() == SET )
55 #endif
56     {
57       ProcessInputData();
58     }
59
60     /* Time out calculate for power saving mode */
61     TimeOutCalculate();
62
63     CatchInputEvents();
64   }
65 }
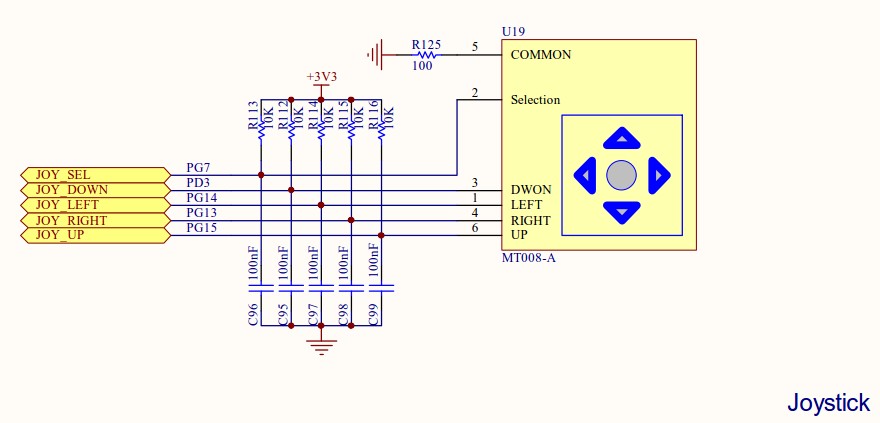
8. 方向按键的原理图,程序对应的就是JoyHal.c,joystick翻译成中文就是操纵杆。
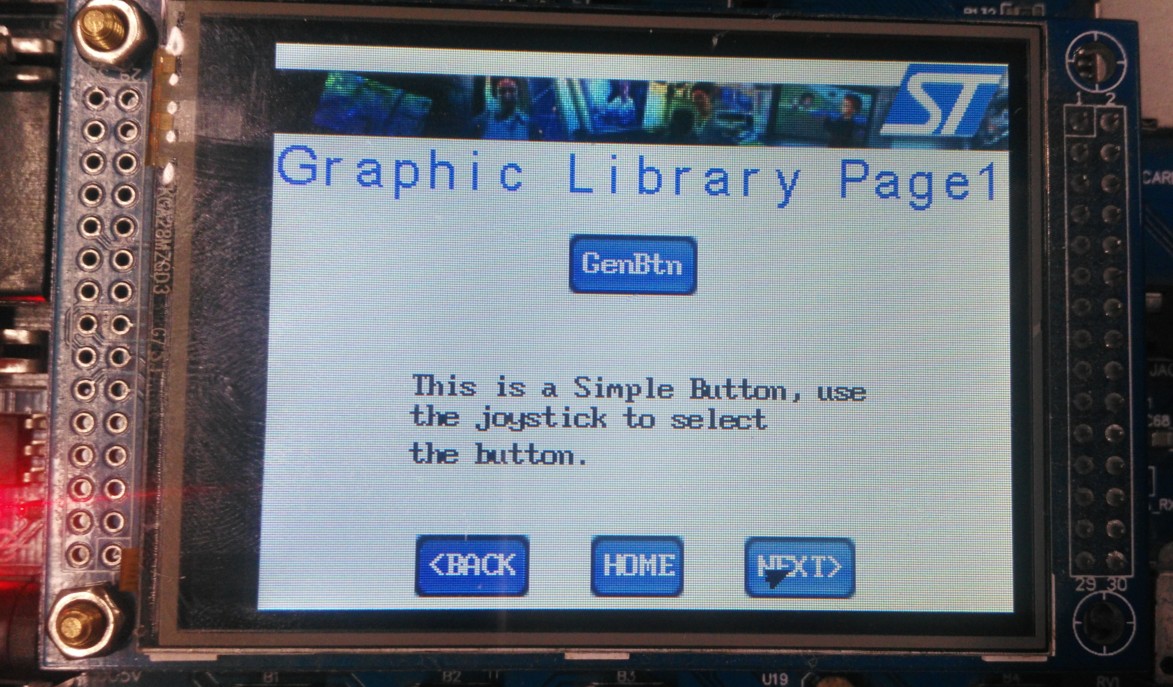
9. 看下实际效果,主要用操纵杆移动鼠标,不知道为啥触摸屏没用。可能是板子跳线帽不对。看了一下cursor.c这个文件,里面只有读操纵杆的函数,估计触摸屏本来就没用。
10. LCD接口是FSMC接口,FSMC本来是存储器的接口,也可以用来驱动LCD。

11. LCD引脚配置
 1 void LCD_CtrlLinesConfig(void)
 2 {
 3   GPIO_InitTypeDef GPIO_InitStructure;
 4   /* Enable FSMC, GPIOD, GPIOE, GPIOF, GPIOG and AFIO clocks */
 5   RCC_AHBPeriphClockCmd(RCC_AHBPeriph_FSMC, ENABLE);
 6   RCC_APB2PeriphClockCmd(RCC_APB2Periph_GPIOD | RCC_APB2Periph_GPIOE |
 7                          RCC_APB2Periph_GPIOF | RCC_APB2Periph_GPIOG |
 8                          RCC_APB2Periph_AFIO, ENABLE);
 9   /* Set PD.00(D2), PD.01(D3), PD.04(NOE), PD.05(NWE), PD.08(D13), PD.09(D14),
10      PD.10(D15), PD.14(D0), PD.15(D1) as alternate function push pull */
11   GPIO_InitStructure.GPIO_Pin = GPIO_Pin_0 | GPIO_Pin_1 | GPIO_Pin_4 | GPIO_Pin_5 |
12                                 GPIO_Pin_8 | GPIO_Pin_9 | GPIO_Pin_10 | GPIO_Pin_14 |
13                                 GPIO_Pin_15;
14   GPIO_InitStructure.GPIO_Speed = GPIO_Speed_50MHz;
15   GPIO_InitStructure.GPIO_Mode = GPIO_Mode_AF_PP;
16   GPIO_Init(GPIOD, &GPIO_InitStructure);
17   /* Set PE.07(D4), PE.08(D5), PE.09(D6), PE.10(D7), PE.11(D8), PE.12(D9), PE.13(D10),
18      PE.14(D11), PE.15(D12) as alternate function push pull */
19   GPIO_InitStructure.GPIO_Pin = GPIO_Pin_7 | GPIO_Pin_8 | GPIO_Pin_9 | GPIO_Pin_10 |
20                                 GPIO_Pin_11 | GPIO_Pin_12 | GPIO_Pin_13 | GPIO_Pin_14 |
21                                 GPIO_Pin_15;
22   GPIO_Init(GPIOE, &GPIO_InitStructure);
23   /* Set PF.00(A0 (RS)) as alternate function push pull */
24   GPIO_InitStructure.GPIO_Pin = GPIO_Pin_0;
25   GPIO_Init(GPIOF, &GPIO_InitStructure);
26   /* Set PG.12(NE4 (LCD/CS)) as alternate function push pull - CE3(LCD /CS) */
27   GPIO_InitStructure.GPIO_Pin = GPIO_Pin_12;
28   GPIO_Init(GPIOG, &GPIO_InitStructure);
29 }
12. FSMC配置
 1 void LCD_FSMCConfig(void)
 2 {
 3   FSMC_NORSRAMInitTypeDef  FSMC_NORSRAMInitStructure;
 4   FSMC_NORSRAMTimingInitTypeDef  p;
 5 /*-- FSMC Configuration ------------------------------------------------------*/
 6 /*----------------------- SRAM Bank 4 ----------------------------------------*/
 7   /* FSMC_Bank1_NORSRAM4 configuration */
 8   p.FSMC_AddressSetupTime = 1;
 9   p.FSMC_AddressHoldTime = 0;
10   p.FSMC_DataSetupTime = 2;
11   p.FSMC_BusTurnAroundDuration = 0;
12   p.FSMC_CLKDivision = 0;
13   p.FSMC_DataLatency = 0;
14   p.FSMC_AccessMode = FSMC_AccessMode_A;
15   /* Color LCD configuration ------------------------------------
16      LCD configured as follow:
17         - Data/Address MUX = Disable
18         - Memory Type = SRAM
19         - Data Width = 16bit
20         - Write Operation = Enable
21         - Extended Mode = Enable
22         - Asynchronous Wait = Disable */
23   FSMC_NORSRAMInitStructure.FSMC_Bank = FSMC_Bank1_NORSRAM4;
24   FSMC_NORSRAMInitStructure.FSMC_DataAddressMux = FSMC_DataAddressMux_Disable;
25   FSMC_NORSRAMInitStructure.FSMC_MemoryType = FSMC_MemoryType_SRAM;
26   FSMC_NORSRAMInitStructure.FSMC_MemoryDataWidth = FSMC_MemoryDataWidth_16b;
27   FSMC_NORSRAMInitStructure.FSMC_BurstAccessMode = FSMC_BurstAccessMode_Disable;
28   FSMC_NORSRAMInitStructure.FSMC_AsynchronousWait = FSMC_AsynchronousWait_Disable;
29   FSMC_NORSRAMInitStructure.FSMC_WaitSignalPolarity = FSMC_WaitSignalPolarity_Low;
30   FSMC_NORSRAMInitStructure.FSMC_WrapMode = FSMC_WrapMode_Disable;
31   FSMC_NORSRAMInitStructure.FSMC_WaitSignalActive = FSMC_WaitSignalActive_BeforeWaitState;
32   FSMC_NORSRAMInitStructure.FSMC_WriteOperation = FSMC_WriteOperation_Enable;
33   FSMC_NORSRAMInitStructure.FSMC_WaitSignal = FSMC_WaitSignal_Disable;
34   FSMC_NORSRAMInitStructure.FSMC_ExtendedMode = FSMC_ExtendedMode_Disable;
35   FSMC_NORSRAMInitStructure.FSMC_WriteBurst = FSMC_WriteBurst_Disable;
36   FSMC_NORSRAMInitStructure.FSMC_ReadWriteTimingStruct = &p;
37   FSMC_NORSRAMInitStructure.FSMC_WriteTimingStruct = &p;
38   FSMC_NORSRAMInit(&FSMC_NORSRAMInitStructure);
39   /* BANK 4 (of NOR/SRAM Bank 1~4) is enabled */
40   FSMC_NORSRAMCmd(FSMC_Bank1_NORSRAM4, ENABLE);
41 }
13. 画按钮的函数
1 void GL_DrawButtonBMP(uint16_t maxX, uint16_t minX, uint16_t maxY, uint16_t minY, uint8_t* ptrBitmap)
2 {
3   GL_SetDisplayWindow(maxY, maxX, maxY - minY, maxX - minX);
4   GL_DrawBMP(ptrBitmap);
5   GL_SetDisplayWindow(LCD_Height - 1, LCD_Width - 1, LCD_Height, LCD_Width);
6 }
14. 总结起来,这个库其实功能简单,用起来也不复杂的。