在进行源码分析前,先写一个使用mybatis进行开发的demo,方便我们后面进行分析。
一 关于mybatis的demo
pom.xml文件
<project xmlns="http://maven.apache.org/POM/4.0.0" xmlns:xsi="http://www.w3.org/2001/XMLSchema-instance"
    xsi:schemaLocation="http://maven.apache.org/POM/4.0.0 http://maven.apache.org/xsd/maven-4.0.0.xsd">
    <modelVersion>4.0.0</modelVersion>

    <groupId>com.yht</groupId>
    <artifactId>mybatisTest</artifactId>
    <version>0.0.1-SNAPSHOT</version>
    <packaging>jar</packaging>

    <name>mybatisTest</name>
    <url>http://maven.apache.org</url>

    <properties>
        <project.build.sourceEncoding>UTF-8</project.build.sourceEncoding>
    </properties>

    <dependencies>
        <dependency>
            <groupId>junit</groupId>
            <artifactId>junit</artifactId>
            <version>3.8.1</version>
            <scope>test</scope>
        </dependency>


        <!-- 添加log4j -->
        <dependency>
            <groupId>log4j</groupId>
            <artifactId>log4j</artifactId>
            <version>1.2.16</version>
        </dependency>

        <!-- 添加mybatis -->
        <dependency>
            <groupId>org.mybatis</groupId>
            <artifactId>mybatis</artifactId>
            <version>3.2.6</version>
        </dependency>

        <!-- 添加mysql驱动 -->
        <dependency>
            <groupId>mysql</groupId>
            <artifactId>mysql-connector-java</artifactId>
            <version>5.1.12</version>
        </dependency>

    </dependencies>

</project>
配置文件spring-ibatis:
<?xml version="1.0" encoding="UTF-8" ?>
<!DOCTYPE configuration
  PUBLIC "-//mybatis.org//DTD Config 3.0//EN"
  "http://mybatis.org/dtd/mybatis-3-config.dtd">
<configuration>

    <properties resource="db.properties"></properties>

    <environments default="development">
        <environment id="development">
            <transactionManager type="JDBC" />
            <dataSource type="POOLED">
                <property name="driver" value="${driver}" />
                <property name="url" value="${url}" />
                <property name="username" value="${username}" />
                <property name="password" value="${password}" />

            </dataSource>
        </environment>
    </environments>

    <!-- 映射文件  -->
    <mappers>
        <mapper resource="com/yht/mybatisTest/dao/goods.xml" />
    </mappers>

</configuration>
数据库连接信息 db.properties
driver=com.mysql.jdbc.Driver
url=jdbc:mysql://localhost:3306/silk
username=root
password=123456
创建一张Goods商品表
CREATE TABLE `goods` (
  `id` varchar(50) NOT NULL COMMENT '商品ID',
  `name` varchar(255) NOT NULL COMMENT '商品标题',
  `detail` varchar(20) DEFAULT NULL,
  `remark` varchar(255) DEFAULT NULL COMMENT '备注',
  PRIMARY KEY (`id`)
) ENGINE=InnoDB DEFAULT CHARSET=utf8 COMMENT='商品信息';
创建Goods实体类
public class Goods {

    private String id;
    private String name;
    private String remark;
    private String detail;
    public String getId() {
        return id;
    }
    public void setId(String id) {
        this.id = id;
    }
    public String getName() {
        return name;
    }
    public void setName(String name) {
        this.name = name;
    }
    public String getRemark() {
        return remark;
    }
    public void setRemark(String remark) {
        this.remark = remark;
    }
    public String getDetail() {
        return detail;
    }
    public void setDetail(String detail) {
        this.detail = detail;
    }

}
创建GoodsDao接口
public interface GoodsDao {

    public Goods selectGoodsById(String goodsId);

}
Mapper配置文件goods.xml
<?xml version="1.0" encoding="UTF-8" ?>
<!DOCTYPE mapper
PUBLIC "-//ibatis.apache.org//DTD Mapper 3.0//EN"
"http://ibatis.apache.org/dtd/ibatis-3-mapper.dtd">
<mapper namespace="com.yht.mybatisTest.dao.GoodsDao">
   <select id="selectGoodsById" resultType="com.yht.mybatisTest.entity.Goods" >
      select * from goods where id = #{id}
   </select>
</mapper>
编写测试用例:
public class GoodsDaoTest {

    @Test
    public void selectGoodsTest(){
// 共有四个步骤,接下来就针对这四个步骤进行分析
// 1.加载配置文件
// 2.加载Mapper映射文件
// 3.生成Mapper代理对象
// 4.调用方法执行sql的过程
        SqlSession sqlSession = getSqlSessionFactory().openSession();
        GoodsDao goodsMapper = sqlSession.getMapper(GoodsDao.class);
        Goods goods = goodsMapper.selectGoodsById("1");
        System.out.println("id="+goods.getId()+";name="+goods.getName());
    }

    public static SqlSessionFactory getSqlSessionFactory() {
        SqlSessionFactory sqlSessionFactory = null;
        String resource = "spring-ibatis.xml";

        try {
            sqlSessionFactory = new SqlSessionFactoryBuilder().build(Resources
                    .getResourceAsReader(resource));
        } catch (IOException e) {
            // TODO Auto-generated catch block
            e.printStackTrace();
        }
        return sqlSessionFactory;
    }

}
目录结构如图:
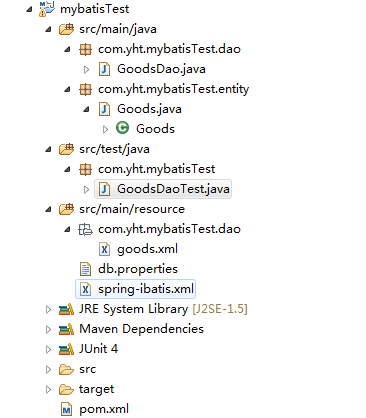
以上就是所有的代码部分,接下来进行源码分析。
二 源码分析
由测试用例可知,在对数据库进行操作前,已经把相关的配置文件信息进行了加载解析,这个加载解析过程是怎样的呢?
从这行代码 new SqlSessionFactoryBuilder().build(Resources.getResourceAsReader(resource)); 入手,配置文件resource转化为Reader,然后传参到build方法中,那么就进入build这个方法:
public class SqlSessionFactoryBuilder {

  //可以看到 build 方法可以接受多种参数组合
  public SqlSessionFactory build(Reader reader) {
    return build(reader, null, null);
  }

  public SqlSessionFactory build(Reader reader, String environment) {
    return build(reader, environment, null);
  }

  public SqlSessionFactory build(Reader reader, Properties properties) {
    return build(reader, null, properties);
  }

  public SqlSessionFactory build(Reader reader, String environment, Properties properties) {
    try {
      // 将配置文件包装成了XMLConfigBuilder类,进入该构造器可知,其实是把配置文件封装到了XPathParse中
      XMLConfigBuilder parser = new XMLConfigBuilder(reader, environment, properties);
      // 进入parser.parse方法
      return build(parser.parse());
    } catch (Exception e) {
      throw ExceptionFactory.wrapException("Error building SqlSession.", e);
    } finally {
      ErrorContext.instance().reset();
      try {
        reader.close();
      } catch (IOException e) {
        // Intentionally ignore. Prefer previous error.
      }
    }
  }public SqlSessionFactory build(Configuration config) {
    return new DefaultSqlSessionFactory(config);
  }
进入XMLConfigBuilder类:
// 这是它的三个属性
private boolean parsed; //表示此XMLConfigBuilder是否经过解析
private XPathParser parser;//资源文件信息其实是封装到了这个类中
private String environment;

//这个就是解析配置文件的方法,重点就是在这里
// parser.evalNode("/configuration")的作用就是获取此配置文件的根节点configuration
public Configuration parse() {
    if (parsed) {
      throw new BuilderException("Each XMLConfigBuilder can only be used once.");
    }
    parsed = true;
    parseConfiguration(parser.evalNode("/configuration"));
    return configuration;
  }
在这个用例中configuration根节点是什么样的呢?看下图:
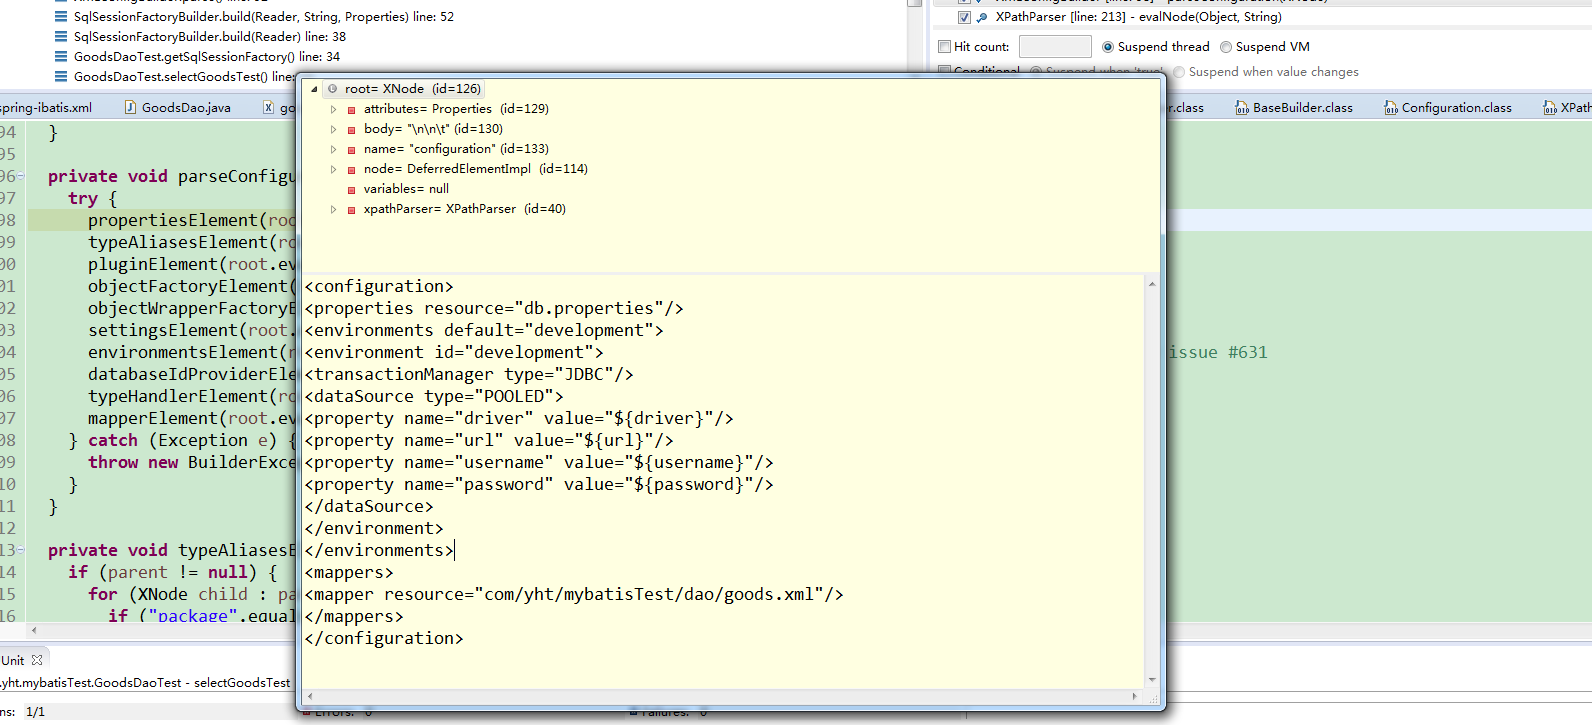
然后进入parseConfiguration方法:这个方法就是对configuration根节点下所有的子节点进行解析,并把数据存放起来方便后面使用,子节点共有十种类型。
  private void parseConfiguration(XNode root) {
    try {
      propertiesElement(root.evalNode("properties")); //issue #117 read properties first
      typeAliasesElement(root.evalNode("typeAliases"));
      pluginElement(root.evalNode("plugins"));
      objectFactoryElement(root.evalNode("objectFactory"));
      objectWrapperFactoryElement(root.evalNode("objectWrapperFactory"));
      settingsElement(root.evalNode("settings"));
      environmentsElement(root.evalNode("environments")); // read it after objectFactory and objectWrapperFactory issue #631
      databaseIdProviderElement(root.evalNode("databaseIdProvider"));
      typeHandlerElement(root.evalNode("typeHandlers"));
      mapperElement(root.evalNode("mappers"));
    } catch (Exception e) {
      throw new BuilderException("Error parsing SQL Mapper Configuration. Cause: " + e, e);
    }
  }
现在相当于进入了大门,里面有十个小门等着我们进去一个个去探究,接下来的文章将对这十种子节点的解析过程进行讲解。