llsyncd 是一个支持实时、双向、多机器的多模式文件同步工具。使用 Lua 语言封装了 inotify 和 rsync 工具,采用了 Linux 内核(2.6.13 及以后)里的 inotify 触发机制,然后通过 rsync 去差异同步,达到实时的效果。
1.安装
(使用之前需确保主备都有安装rsync,之前忘记了还排错<_>)
源码在github,
或者
https://ww.lanzous.com/ickjw0d 下载之后上传解压
下载解压
[root@localhost opt]# unzip master.zip
[root@localhost opt]# ls
lsyncd-master lsyncd-master.zip
yum install -y gcc gcc-c++ lua lua-devel cmake libxml2 libxml2-devel
[root@localhost opt]# cd lsyncd-master
执行
cmake -DCMAKE_INSTALL_PREFIX=/usr/local/lsyncd
make
make install

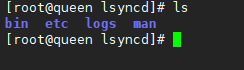
默认只有bin man 两个目录
在创建两个要用到
配置无密码登录(保证lsyncd能将数据传输到要同步的服务器)
ssh-keygen
ssh-copy-id -i .ssh/id_rsa.pub 172.16.0.198
[root@localhost lsyncd]# vim etc/lsyncd.conf
1.远程同步rsyncssh模式配置方案:
settings {
logfile = "/usr/local/lsyncd/logs/lsyncd.log", //日志路径
statusFile = "/var/logs/lsyncd.status", //状态文件
pidfile = "/var/run/lsyncd.pid", //pid文件路径
statusInterval = 1, //状态文件写入最短时间
nodaemon = false, //daemon运行
maxProcesses = 1, //最大进程
maxDelays = 1, //最大延迟
}
sync {
default.rsyncssh,
source = "/opt", //源目录
delete = true, //保持完全同步
host = "root@172.16.0.197", //保持同步的另一台服务器
targetdir = "/opt/data/", //目标目录
exclude={
".txt" //排除的文件
},
rsync = {
binary = "/usr/bin/rsync", //需先安装好rsync
archive = true, //归档
compress = false, //压缩
owner = true, //属主
perms = true, //权限
whole_file = false
},
ssh = {
port = 22
}
}
settings # 是全局配置
sync # 定义同步参数
rsync # 定义同步文件参数
ssh # 定义服务器远程端口
========================================
我成功的远程配置文件
settings {
    logfile = "/usr/local/lsyncd/logs/lsyncd.log",
    pidfile = "/var/run/lsyncd.pid",
    statusInterval = 1,
    nodaemon = false,
    maxProcesses = 1,
    maxDelays = 1,
}
sync {
    default.rsyncssh,
    source = "/etc/",
    targetdir = "/opt/data/www/etc",
    delete = true,
    host = "root@118.89.X.X"
};
rsync = {
    binary = "/usr/bin/rsync",
    archive = true,
    compress = false,
    owner = true,
    perms = true,
    whole_file = false
    }
ssh = {
    port = 22
}
2.本地目录同步
settings {
    logfile = "/usr/local/lsyncd/logs/lsyncd.log",
    pidfile = "/var/run/lsyncd.pid",
    statusInterval = 1,
    nodaemon = false,
    maxProcesses = 1,
    maxDelays = 1,
}
sync {
    default.rsync,
    source = "/usr/local/nginx/logs/",
    target = "/opt/data/www/",
}
rsync = {
    binary = "/usr/bin/rsync",
    archive = true,
    compress = false,
    owner = true,
    perms = true,
    whole_file = false
    }
启动,lsyncd/bin目录下执行
./lsyncd -log Exec /usr/local/lsyncd/etc/lsyncd.conf
=========================================
补充:
可以配置ststemd启动
$ vim /etc/sysconfig/lsyncd
添加如下内容:
LSYNCD_OPTIONS="/usr/local/lsyncd/etc/lsyncd.conf"
创建启动文件:
$ vim /usr/lib/systemd/system/lsyncd.service
添加如下内容:
[Unit]
Description=Live Syncing (Mirror) Daemon
After=network.target
[Service]
Type=simple
EnvironmentFile=-/etc/sysconfig/lsyncd
ExecStart=/usr/local/lsyncd/bin/lsyncd -nodaemon $LSYNCD_OPTIONS
[Install]
WantedBy=multi-user.target
systemctl start lsyncd
当服务端目录文件删除时客户端会直接删除
当客户端删除文件或目录时,不会在继续同步服务端的相同的文件或目录,但,在服务端的目录或文件发生变化会在客户端继续同步
例如在clent的/opt/data/下刚刚同步了一个目录dir ,删除了dir,接下来不会继续同步server端的dir目录,只有在dir目录发生变化的时候才会继续同步,如在dir目录下新增file1文件,或者修改了file1文件