<?xml version="1.0" encoding="UTF-8" ?>
<!DOCTYPE configuration
  PUBLIC "-//mybatis.org//DTD Config 3.0//EN"
  "http://mybatis.org/dtd/mybatis-3-config.dtd"><!--Config约束-->
<configuration>
  <environments default="development">
    <environment id="development">
      <transactionManager type="JDBC" />
            <!-- 数据库连接池 -->
            <dataSource type="POOLED">
                <property name="driver" value="com.mysql.cj.jdbc.Driver" />
                <property name="url"
                          value="jdbc:mysql://localhost:3306/mybatis?characterEncoding=utf-8" />
                                                          <!--所要连接的数据库名-->
                <property name="username" value="root" />
                <property name="password" value="root" />
      </dataSource>
    </environment>
  </environments>
  <mappers>
    <mapper resource="org/mybatis/example/BlogMapper.xml"/>
  </mappers>
</configuration>
映射文件 Mapper.xml
<?xml version="1.0" encoding="UTF-8" ?>
<!DOCTYPE mapper
  PUBLIC "-//mybatis.org//DTD Mapper 3.0//EN"
  "http://mybatis.org/dtd/mybatis-3-mapper.dtd"><!--Mapper约束-->
<mapper namespace="org.mybatis.example.BlogMapper">
  <select id="selectBlog" resultType="Blog">
    select * from Blog where id = #{id}
  </select>
</mapper>
log4j.properties文件:mybatis默认使用log4j作为输出日志信息。
# Global logging configuration
log4j.rootLogger=DEBUG, stdout
#Consoleoutput...
log4j.appender.stdout=org.apache.log4j.ConsoleAppender
log4j.appender.stdout.layout=org.apache.log4j.PatternLayout
log4j.appender.stdout.layout.ConversionPattern=%5p [%t] - %m%n
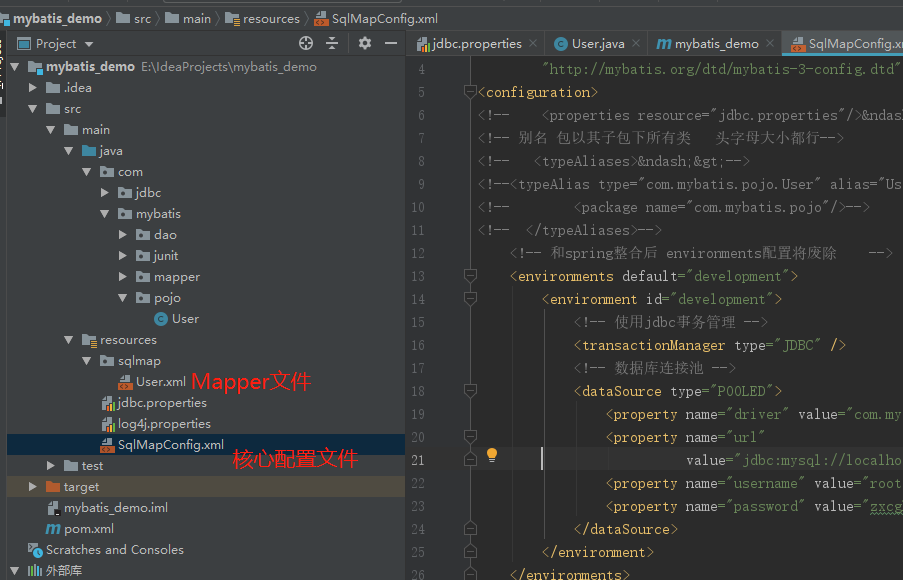
1. 配置
configuration(配置)
-
properties(属性)
-
settings(设置))
-
typeAliases(类型别名)
-
typeHandlers(类型处理器)
-
objectFactory(对象工厂)
-
plugins(插件)
-
environments(环境配置)
-
environment(环境变量)
-
transactionManager(事务管理器)
-
dataSource(数据源)
-
-
-
databaseIdProvider(数据库厂商标识)
-
mappers(映射器
2.属性(properties)
这些属性都是可外部配置且可动态替换的,既可以在典型的 Java 属性文件中配置,亦可通过 properties 元素的子元素来传递
-
在配置文件中的配置
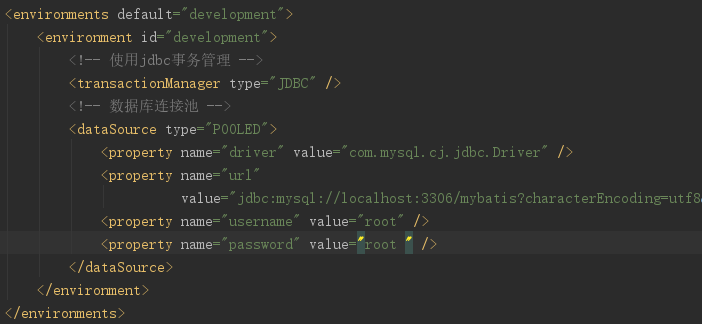
MyBatis 可以配置成适应多种环境,这种机制有助于将 SQL 映射应用于多种数据库之中, 现实情况下有多种理由需要这么做。例如,开发、测试和生产环境需要有不同的配置;或者想在具有相同 Schema 的多个生产数据库中 使用相同的 SQL 映射。有许多类似的使用场景。
不过要记住:尽管可以配置多个环境,但每个 SqlSessionFactory 实例只能选择一种环境。
所以,如果你想连接两个数据库,就需要创建两个 SqlSessionFactory 实例,每个数据库对应一个。而如果是三个数据库,就需要三个实例,依此类推,记起来很简单:
-
每个数据库对应一个 SqlSessionFactory 实例
为了指定创建哪种环境,只要将它作为可选的参数传递给 SqlSessionFactoryBuilder 即可。可以接受环境配置的两个方法签名是:
-
SqlSessionFactory factory = new SqlSessionFactoryBuilder().build(reader, environment);
SqlSessionFactory factory = new SqlSessionFactoryBuilder().build(reader, environment, properties);
-
SqlSessionFactory factory = new SqlSessionFactoryBuilder().build(reader);
SqlSessionFactory factory = new SqlSessionFactoryBuilder().build(reader, properties);
-
默认使用的环境 ID(比如:default="development")。
-
每个 environment 元素定义的环境 ID(比如:id="development")。
-
事务管理器的配置(比如:type="JDBC")。
-
数据源的配置(比如:type="POOLED")。
默认的环境和环境 ID 是自解释的,因此一目了然。 你可以对环境随意命名,但一定要保证默认的环境 ID 要匹配其中一个环境 ID。
事务管理器(transactionManager)
在 MyBatis 中有两种类型的事务管理器(也就是 type=”[JDBC|MANAGED]”):
-
JDBC – 这个配置就是直接使用了 JDBC 的提交和回滚设置,它依赖于从数据源得到的连接来管理事务作用域。
-
MANAGED – 这个配置几乎没做什么。它从来不提交或回滚一个连接,而是让容器来管理事务的整个生命周期(比如 JEE 应用服务器的上下文)。 默认情况下它会关闭连接,然而一些容器并不希望这样,因此需要将 closeConnection 属性设置为 false 来阻止它默认的关闭行为。例如:
-
<transactionManager type="MANAGED">
  <property name="closeConnection" value="false"/>
</transactionManager>
提示:如果你正在使用 Spring + MyBatis,则没有必要配置事务管理器, 因为 Spring 模块会使用自带的管理器来覆盖前面的配置。
数据源(dataSource)
dataSource 元素使用标准的 JDBC 数据源接口来配置 JDBC 连接对象的资源。
-
许多 MyBatis 的应用程序会按示例中的例子来配置数据源。虽然这是可选的,但为了使用延迟加载,数据源是必须配置的。
有三种内建的数据源类型(也就是 type=”[UNPOOLED|POOLED|JNDI]”):
UNPOOLED
POOLED– 这种数据源的实现利用“池”的概念将 JDBC 连接对象组织起来,避免了创建新的连接实例时所必需的初始化和认证时间。 这是一种使得并发 Web 应用快速响应请求的流行处理方式。
JNDI – 这个数据源的实现是为了能在如 EJB 或应用服务器这类容器中使用,容器可以集中或在外部配置数据源,然后放置一个 JNDI 上下文的引用
详细解释请到mybatis官网
<properties resource="jdbc.properties">
    <!-- 在properties内部用property定义属性 -->
    <!-- 如果外部配置文件有该属性,则内部定义属性被外部属性覆盖 -->
    <property name="jdbc.username" value="root" />
    <property name="jdbc.password" value="root" />
</properties>
jdbc.driver=com.mysql.cj.jdbc.Driver
jdbc.url=jdbc:mysql://localhost:3306/mybatis?characterEncoding=utf8&useUnicode=true&useJDBCCompliantTimezoneShift=true&useLegacyDatetimeCode=false&serverTimezone=UTC
jdbc.username=root
jdbc.password=root
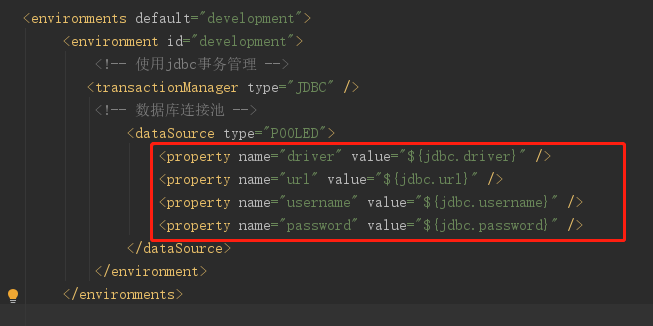
注意: MyBatis 将按照下面的顺序来加载属性:
-
在 properties 元素体内定义的属性首先被读取。
-
然后会读取properties 元素中resource或 url 加载的属性,它会覆盖已读取的同名属性。
3.mapper(映射器)
定义 SQL 映射语句了, 但是首先我们需要告诉 MyBatis 到哪里去找到这些语句。 Java 在自动查找这方面没有提供一个很好的方法,所以最佳的方式是告诉 MyBatis 到哪里去找映射文件。 你可以使用相对于类路径的资源引用, 或完全限定资源定位符(包括 file:/// 的 URL),或类名和包名等。例如:
<!-- 使用相对于类路径的资源引用 -->
<mappers>
  <mapper resource="org/mybatis/builder/AuthorMapper.xml"/>
  <mapper resource="org/mybatis/builder/BlogMapper.xml"/>
  <mapper resource="org/mybatis/builder/PostMapper.xml"/>
</mappers>
<!-- 使用完全限定资源定位符(URL) -->
<mappers>
  <mapper url="file:///var/mappers/AuthorMapper.xml"/>
  <mapper url="file:///var/mappers/BlogMapper.xml"/>
  <mapper url="file:///var/mappers/PostMapper.xml"/>
</mappers>
<!-- 使用映射器接口实现类的完全限定类名 -->
<mappers>
  <mapper class="org.mybatis.builder.AuthorMapper"/>
  <mapper class="org.mybatis.builder.BlogMapper"/>
  <mapper class="org.mybatis.builder.PostMapper"/>
</mappers>
<!-- 将包内的映射器接口实现全部注册为映射器 -->
<mappers>
  <package name="org.mybatis.builder"/>
</mappers>
类似的其他标签可在mybatis官网查询
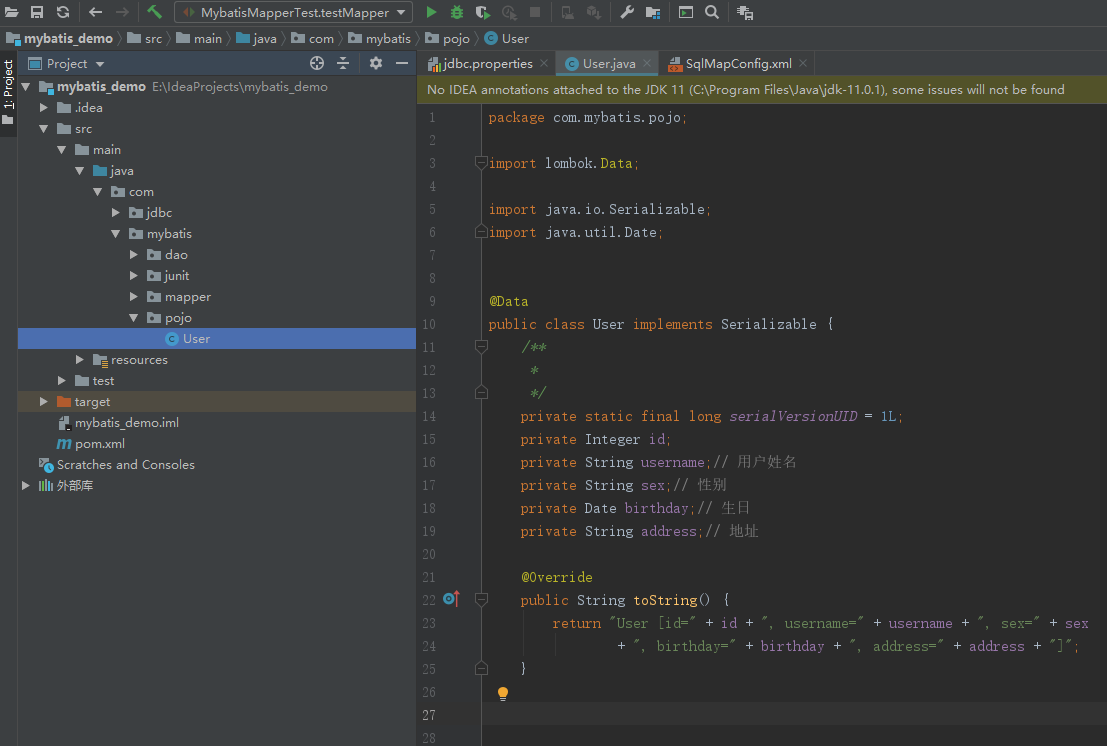
创建实体类
数据库中的字段定义


加载映射文件
mybatis框架需要加载Mapper.xml映射文件
将users.xml添加在SqlMapConfig.xml,如下:

简单的增删改查
1. 查
根据用户id查询用户
1.1映射文件
<?xml version="1.0" encoding="UTF-8" ?>
<!DOCTYPE mapper        PUBLIC "-//mybatis.org//DTD Mapper 3.0//EN"
"http://mybatis.org/dtd/mybatis-3-mapper.dtd">
<!-- 写Sql语句  命名空间 -->
<mapper namespace="test">
<!-- 通过ID查询一个用户,resultType返回类型为自动,值为实体类的全类路径,里面定义数据要与数据库中的字段一致-->
    <select id="findUserById" parameterType="Integer" resultType="com.mybatis.pojo.User">
        select * from user where id = #{v}
    </select>
@Test
public void testMybatis() throws Exception {
    //加载核心配置文件
    String resource = "SqlMapConfig.xml";
    InputStream in = Resources.getResourceAsStream(resource);
    //创建SqlSessionFactory
    SqlSessionFactory sqlSessionFactory = new SqlSessionFactoryBuilder().build(in);
    //创建SqlSession
    SqlSession sqlSession = sqlSessionFactory.openSession();
    //执行Sql语句
    User user = sqlSession.selectOne("test.findUserById", 26);
    System.out.println(user);
}
2.增
2.1映射文件
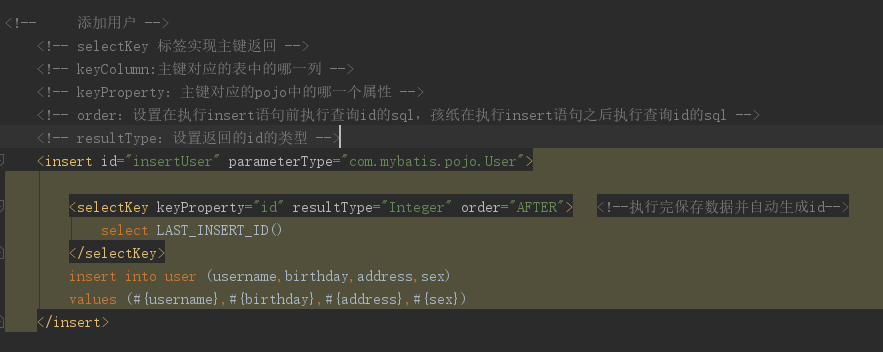
@Test
public void testInsertUser() throws Exception {
//加载核心配置文件
String resource = "sqlMapConfig.xml";
InputStream in = Resources.getResourceAsStream(resource);
//创建SqlSessionFactory
    SqlSessionFactory sqlSessionFactory = new SqlSessionFactoryBuilder().build(in);
    //创建SqlSession
    SqlSession sqlSession = sqlSessionFactory.openSession();
    //执行Sql语句
    User user = new User();
    user.setUsername("广州");
    user.setBirthday(new Date());
    user.setAddress("广州市");
    user.setSex("男");
    int i = sqlSession.insert("test.insertUser", user);
    //插入数据
    sqlSession.commit();
    //执行
    // 提交事务 增删改 需要commit,查询无需commit
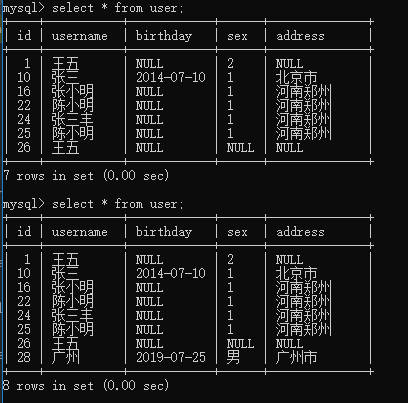
    System.out.println(user.getId());}

3.改
3.1映射文件

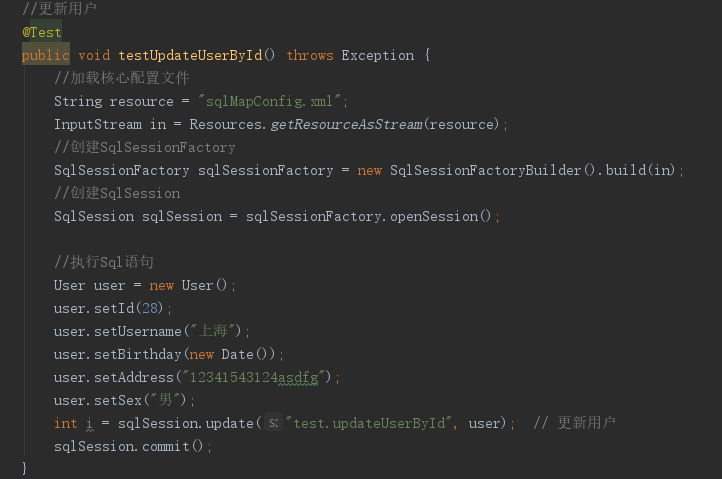
3.2测试程序


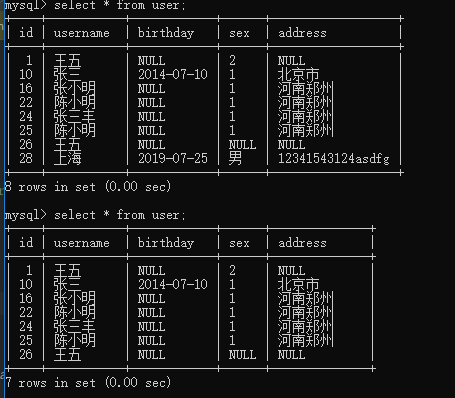
4.删
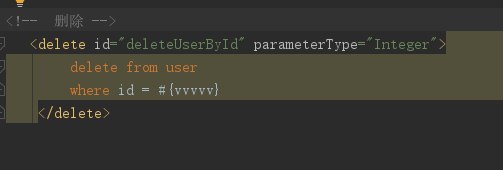
4.1映射文件

小结
1. #{}和${}
#{}表示一个占位符号,通过#{}可以实现preparedStatement向占位符中设置值,自动进行java类型和jdbc类型转换。#{}可以有效防止sql注入。 #{}可以接收简单类型值或pojo属性值。 如果parameterType传输单个简单类型值,#{}括号中可以是value或其它名称。
${}表示拼接sql串,通过${}可以将parameterType 传入的内容拼接在sql中且不进行jdbc类型转换, ${}可以接收简单类型值或pojo属性值,如果parameterType传输单个简单类型值,${}括号中只能是value。
2. parameterType和resultType
parameterType:指定输入参数类型,mybatis通过ognl从输入对象中获取参数值拼接在sql中。
resultType:指定输出结果类型,mybatis将sql查询结果的一行记录数据映射为resultType指定类型的对象。如果有多条数据,则分别进行映射,并把对象放到容器List中
3. selectOne和selectList
selectOne查询一条记录,如果使用selectOne查询多条记录则抛出异常:
org.apache.ibatis.exceptions.TooManyResultsException: Expected one result (or null) to be returned by selectOne(), but found: 3 at org.apache.ibatis.session.defaults.DefaultSqlSession.selectOne(DefaultSqlSession.java:70)
selectList可以查询一条或多条记录。
Dao开发方法
1.SqlSession原理和使用范围
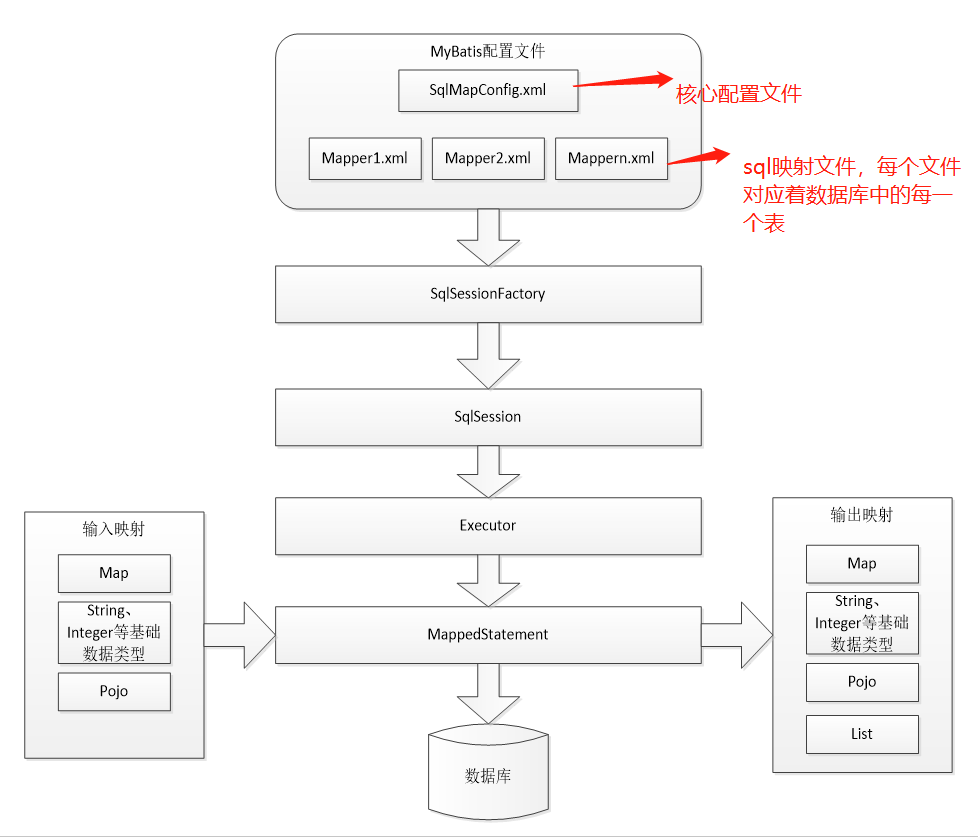
原理:SqlSession提供select/insert/update/delete方法,在旧版本中使用使用SqlSession接口的这些方法,但是新版的Mybatis中就会建议使用Mapper接口的方法。
映射器其实就是一个动态代理对象,进入到MapperMethod的execute方法就能简单找到SqlSession的删除、更新、查询、选择方法,从底层实现来说:通过动态代理技术,让接口跑起来,之后采用命令模式,最后还是采用了SqlSession的接口方法(getMapper()方法等到Mapper)执行SQL查询(也就是说Mapper接口方法的实现底层还是采用SqlSession接口方法实现的)。
使用范围:SqlSession中封装了对数据库的操作,如:查询、插入、更新、删除等。
SqlSession通过SqlSessionFactory创建。
SqlSessionFactory是通过SqlSessionFactoryBuilder进行创建。
1.1SqlSessionFactoryBuilder
SqlSessionFactoryBuilder用于创建SqlSessionFacoty,SqlSessionFacoty一旦创建完成就不需要SqlSessionFactoryBuilder了,因为SqlSession是通过SqlSessionFactory创建的。所以可以将SqlSessionFactoryBuilder当成一个工具类使用,最佳使用范围是方法范围即方法体内局部变量。
1.2SqlSessionFactory
SqlSessionFactory是一个接口,接口中定义了openSession的不同重载方法,SqlSessionFactory的最佳使用范围是整个应用运行期间,一旦创建后可以重复使用,通常以单例模式管理SqlSessionFactory。
1.3SqlSession
SqlSession是一个面向用户的接口,sqlSession中定义了数据库操作方法。
每个线程都应该有它自己的SqlSession实例。SqlSession的实例不能共享使用,它也是线程不安全的。因此最佳的范围是请求或方法范围。绝对不能将SqlSession实例的引用放在一个类的静态字段或实例字段中。
打开一个 SqlSession;使用完毕就要关闭它。通常把这个关闭操作放到 finally 块中以确保每次都能执行关闭。如下:
SqlSession session = sqlSessionFactory.openSession();
try {
     // do work
} finally {
    session.close();
}
2.原始Dao开发方式
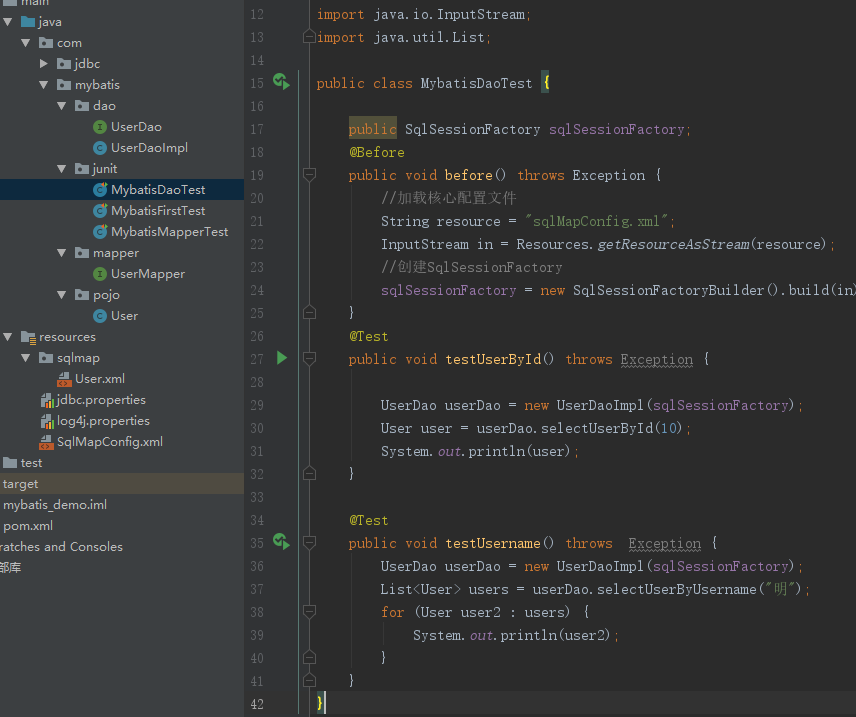
原始Dao开发方法需要程序员编写Dao接口和Dao实现类
2.1映射文件
编写映射文件如下:
<?xml version="1.0" encoding="UTF-8" ?>
<!DOCTYPE mapper
PUBLIC "-//mybatis.org//DTD Mapper 3.0//EN"
"http://mybatis.org/dtd/mybatis-3-mapper.dtd">
<!-- 写Sql语句  命名空间 -->
<mapper namespace="test">
 <!--通过ID查询一个用户,resultType返回类型为自动,值为实体类的全类路径,里面定义数据要与数据库中的字段一致-->
    <select id="findUserById" parameterType="Integer" resultType="com.mybatis.pojo.User">
        select * from user where id = #{v}   </select>
    <select id="findUserByUsername" parameterType="String" resultType="com.mybatis.pojo.User">                  select * from user where username like "%"#{haha}"%"
    </select>
    <!--     添加用户 -->
    <insert id="insertUser" parameterType="com.mybatis.pojo.User">
        <selectKey keyProperty="id" resultType="Integer" order="AFTER">
            <!--执行完保存数据并自动生成id-->
            select LAST_INSERT_ID()
        </selectKey>
        insert into user (username,birthday,address,sex)
        values (#{username},#{birthday},#{address},#{sex})
    </insert>
    <!--    更新 -->
    <update id="updateUserById" parameterType="com.mybatis.pojo.User">
        update user
        set username = #{username},sex = #{sex},birthday = #{birthday},address = #{address}
        where id = #{id}
    </update>
    <!--  删除 -->
    <delete id="deleteUserById" parameterType="Integer">
        delete from user
        where id = #{vvvvv}
    </delete>
</mapper>
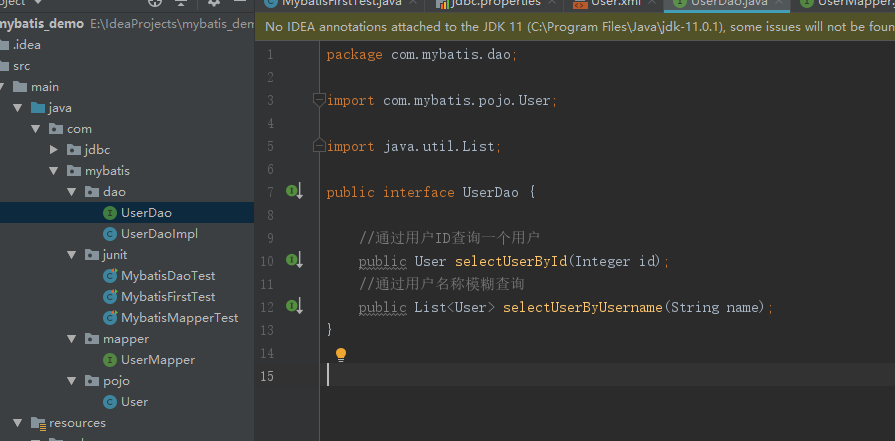
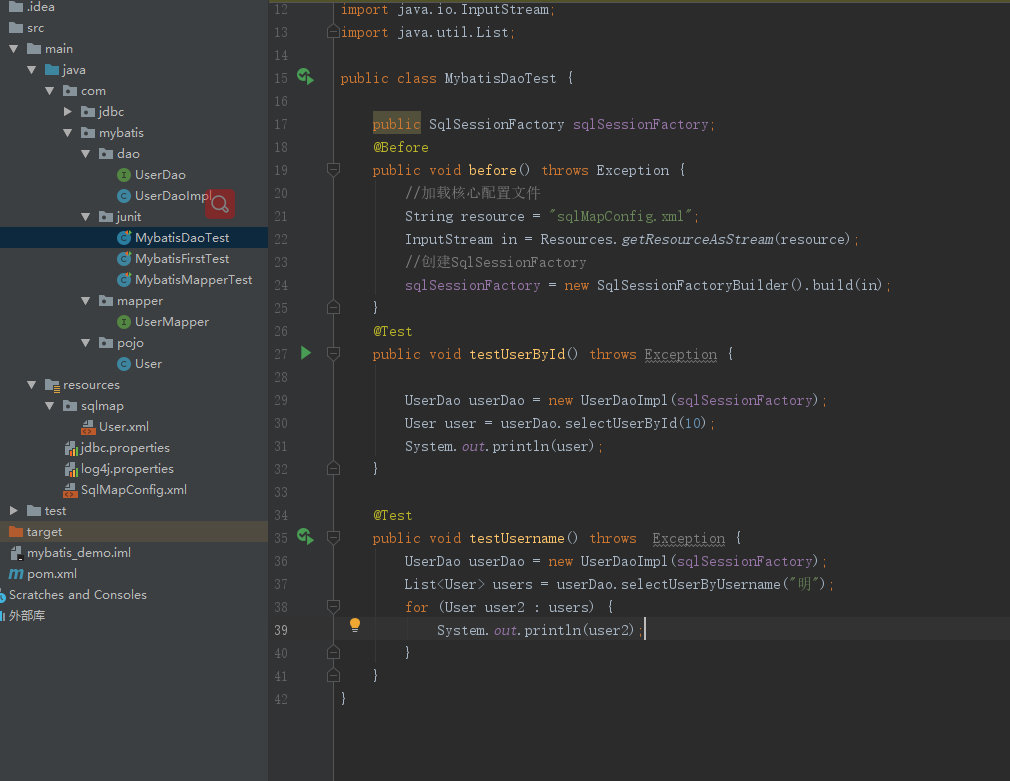
2.5问题
原始Dao开发中存在以下问题:
Dao方法体存在重复代码:通过SqlSessionFactory创建SqlSession,调用SqlSession的数据库操作方法
调用sqlSession的数据库操作方法需要指定statement的id,这里存在硬编码,不得于开发维护。
3.Mapperd动态代理方式
3.1开发规范
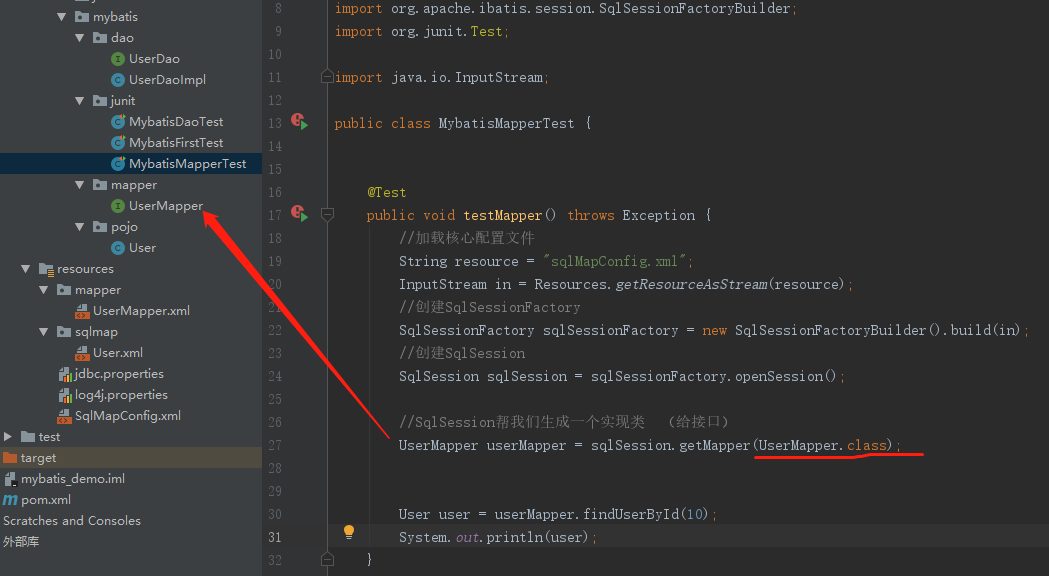
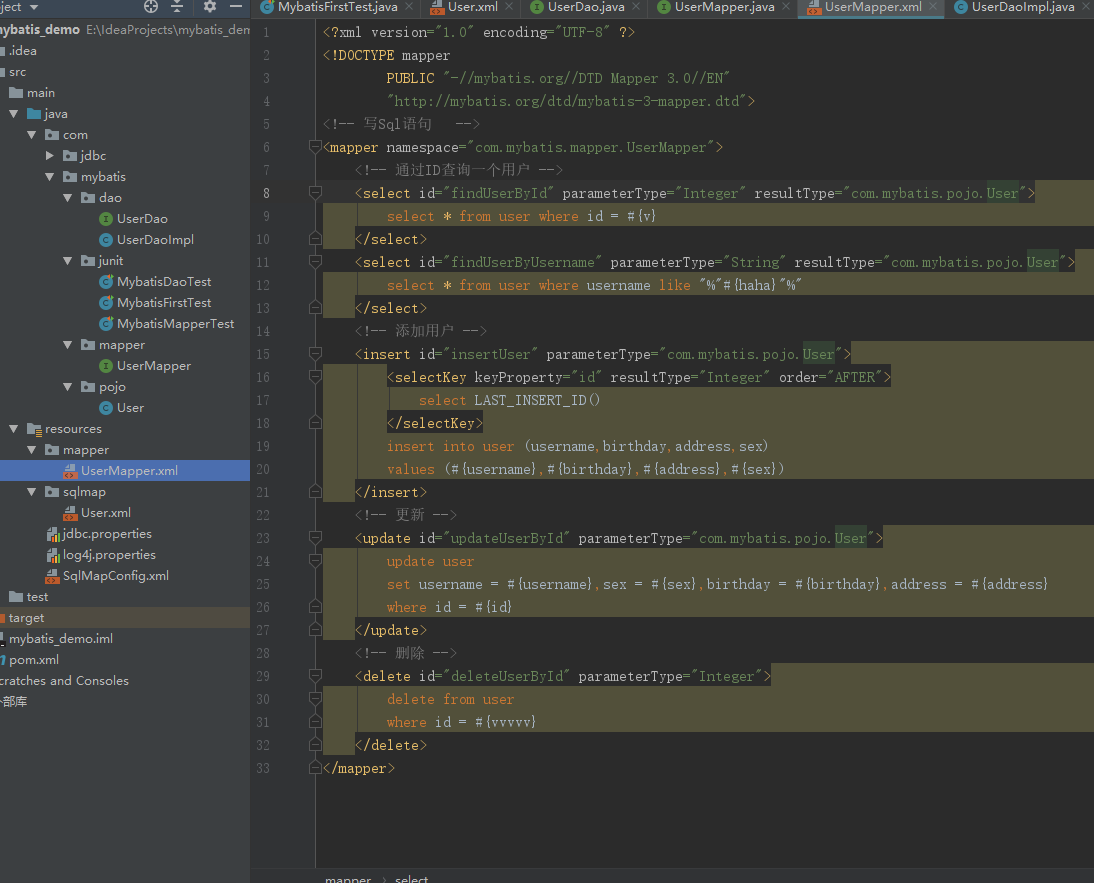
Mapper接口开发方法只需要程序员编写Mapper接口(相当于Dao接口),由Mybatis框架根据接口定义创建接口的动态代理对象,代理对象的方法体同上边Dao接口实现类方法。
Mapper接口开发需要遵循以下规范:
-
Mapper.xml文件中的namespace与mapper接口的类路径相同。
-
Mapper接口方法名和Mapper.xml中定义的每个statement的id相同
-
Mapper接口方法的输入参数类型和mapper.xml中定义的每个sql 的parameterType的类型相同
-
Mapper接口方法的输出参数类型和mapper.xml中定义的每个sql的resultType的类型相同
3.2Mapper.xml(映射文件)

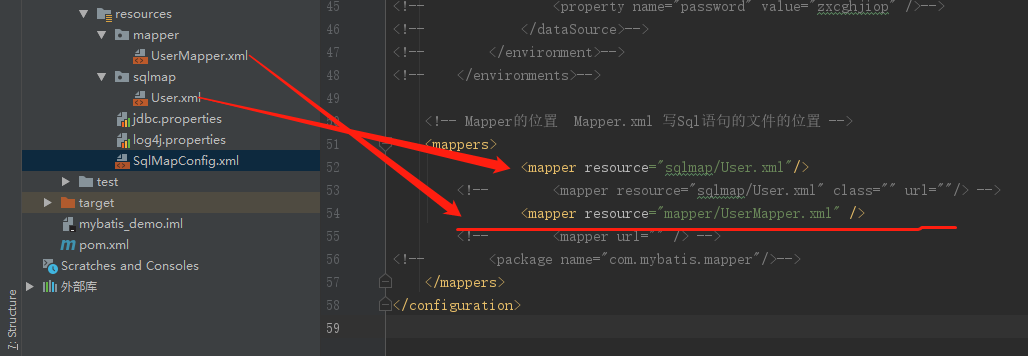
3.6小结
selectOne和selectList
动态代理对象调用sqlSession.selectOne()和sqlSession.selectList()是根据mapper接口方法的返回值决定,如果返回list则调用selectList方法,如果返回单个对象则调用selectOne方法。
namespace
mybatis官方推荐使用代理方法开发接口,程序员不用编写接口实现类,使用代理方法时,输入参数可以使用包装对象或对象,保证的通用性。
在连接数据库时出现的错误
-
Loading class
com.mysql.jdbc.Driver'. This is deprecated. The new driver class iscom.mysql.cj.jdb异常错误:Loading class
com.mysql.jdbc.Driver'. This is deprecated. The new driver class iscom.mysql.cj.jdbc.Driver'. The driver is automatically registered via the SPI and manual loading of the driver class is generally unnecessary.这个问题主要用了最新的mysql连接驱动
以前的连接驱动版本为:
<property name="driver" value="com.mysql.jdbc.Driver" />
则便解决
<property name="driver" value="com.mysql.cj.jdbc.Driver" />
连接MySQL数据库时报以下时区错误信息:Error querying database. Cause: java.sql.SQLException: The server time zone value '�й���ʱ��' is unrecognized or represents more than one time zone. You must configure either the server or JDBC driver (via the serverTimezone configuration property) to use a more specifc time zone value if you want to utilize time zone support.
原本为:
<property name="url" value="jdbc:mysql://localhost:3306/mybatischaracterEncoding=utf8" />
<property name="url" value="jdbc:mysql://localhost:3306/mybatis?characterEncoding=utf8&useUnicode=true&sessionVariables=storage_engine%3DInnoDB&useJDBCCompliantTimezoneShift=true&useLegacyDatetimeCode=false&serverTimezone=UTC" />
但这将会报出新错误:
org.apache.ibatis.exceptions.PersistenceException:
Error querying database.  Cause: java.sql.SQLException: Unknown system variable 'storage_engine'
原因:MySQL 5.7.x 默认使用 InnoDB,并删除了系统变量。具有此变量会导致 Confluence 无法启动。storage_engine
-
Stop Confluence
-
编辑
<confluence-home>/confluence.cfg.xml<confluence_home> 目录是以下文件中定义的路径:
<confluence_install>/confluence/WEB-INF/classes/confluence-init.properties -
查找类似于:
<property name="hibernate.connection.url">jdbc:mysql://localhost/confluence?sessionVariables=storage_engine%3DInnoDB&amp;useUnicode=true&amp;characterEncoding=utf8</property>
4.
<property name="hibernate.connection.url">jdbc:mysql://localhost/confluence?sessionVariables=useUnicode=true&amp;characterEncoding=utf8</property>
5.Start Confluence
即删除上面value中的: storage_engine%3DInnoDB&
<property name="url"
value="jdbc:mysql://localhost:3306/mybatis?characterEncoding=utf8&useUnicode=true&useJDBCCompliantTimezoneShift=true&useLegacyDatetimeCode=false&serverTimezone=UTC" />
JUnit4 中@AfterClass @BeforeClass @after @before的区别对比
JUnit4使用Java5中的注解(annotation),以下是JUnit4常用的几个annotation: @Before:初始化方法 对于每一个测试方法都要执行一次(注意与BeforeClass区别,后者是对于所有方法执行一次)
@After:释放资源 对于每一个测试方法都要执行一次(注意与AfterClass区别,后者是对于所有方法执行一次)@Test:测试方法,在这里可以测试期望异常和超时时间
@Test(expected=ArithmeticException.class)检查被测方法是否抛出ArithmeticException异常 @Ignore:忽略的测试方法
@BeforeClass:针对所有测试,只执行一次,且必须为static void
@AfterClass:针对所有测试,只执行一次,且必须为static void 一个JUnit4的单元测试用例执行
-
@BeforeClass – 表示在类中的任意public static void方法执行之前执行
-
@AfterClass – 表示在类中的任意public static void方法执行之后执行
-
@Before – 表示在任意使用@Test注解标注的public void方法执行之前执行
-
@After – 表示在任意使用@Test注解标注的public void方法执行之后执行
-
@Test – 使用该注解标注的public void方法会表示为一个测试方法
顺序为: @BeforeClass -> @Before -> @Test -> @After -> @AfterClass; 每一个测试方法的调用顺序为: @Before -> @Test -> @After;
public class JUnit4Test {
       @Before
       public void before() {
           System.out.println("@Before");
       }
       @Test
       /**
         *Mark your test cases with @Test annotations.
         *You don’t need to prefix your test cases with “test”.
         *tested class does not need to extend from “TestCase” class.
         */
   public void test() {
       System.out.println("@Test");
       assertEquals(5 + 5, 10);
   }

   @Ignore
   @Test
   public void testIgnore() {
       System.out.println("@Ignore");
   }

   @Test(timeout = 50)
   public void testTimeout() {
       System.out.println("@Test(timeout = 50)");
       assertEquals(5 + 5, 10);
   }

   @Test(expected = ArithmeticException.class)
   public void testExpected() {
       System.out.println("@Test(expected = Exception.class)");
       throw new ArithmeticException();
   }

   @After
   public void after() {
       System.out.println("@After");
   }

   @BeforeClass
   public static void beforeClass() {
       System.out.println("@BeforeClass");
   }

   @AfterClass
   public static void afterClass() {
       System.out.println("@AfterClass");
   }

   }
| @Before and @After | |
|---|---|
| 在一个类中只可以出现一次 | 在一个类中可以出现多次,即可以在多个方法的声明前加上这两个Annotaion标签,执行顺序不确定 |
| 方法名不做限制 | 方法名不做限制 |
| 在类中只运行一次 | 在每个测试方法之前或者之后都会运行一次 |
| @BeforeClass父类中标识了该Annotation的方法将会先于当前类中标识了该Annotation的方法执行。 @AfterClass 父类中标识了该Annotation的方法将会在当前类中标识了该Annotation的方法之后执行 | @Before父类中标识了该Annotation的方法将会先于当前类中标识了该Annotation的方法执行。 @After父类中标识了该Annotation的方法将会在当前类中标识了该Annotation的方法之后执行 |
| 必须声明为public static | 必须声明为public 并且非static |
| 所有标识为@AfterClass的方法都一定会被执行,即使在标识为@BeforeClass的方法抛出异常的的情况下也一样会。 | 所有标识为@After 的方法都一定会被执行,即使在标识为 @Before 或者 @Test 的方法抛出异常的的情况下也一样会。 |
@BeforeClass 和 @AfterClass 对于那些比较“昂贵”的资源的分配或者释放来说是很有效的,因为他们只会在类中被执行一次。相比之下对于那些需要在每次运行之前都要初始化或者在运行之后 都需要被清理的资源来说使用@Before和@After同样是一个比较明智的选择。
异常:使用@Before和@Test中,@Before没有执行初始化
代码:
public class MybatisDaoTest {    public SqlSessionFactory sqlSessionFactory;    @Before
 public void before() throws Exception {
    //加载核心配置文件
    String resource = "sqlMapConfig.xml";
    InputStream in = Resources.getResourceAsStream(resource);
    //创建SqlSessionFactory
    sqlSessionFactory = new SqlSessionFactoryBuilder().build(in);
}
  @Test
 public void testDao() throws Exception {
     UserDao userDao = new UserDaoImpl(sqlSessionFactory);
     User user = userDao.selectUserById(10);
     System.out.println(user);
 }
}
解决:换成这个包org.junit.Test;
因为idea默认不扫描src路径下的资源文件
在<build><build/>中加入下面的代码
  <!-- 如果不添加此节点mybatis的mapper.xml文件都会被漏掉。 -->
    <resources>
      <resource>
        <directory>src/main/java</directory>
        <includes>
          <include>**/*.yml</include>
          <include>**/*.properties</include>
          <include>**/*.xml</include>
        </includes>
        <filtering>false</filtering>
      </resource>
      <resource>
        <directory>src/main/resources</directory>
        <includes>
          <include>**/*.yml</include>
          <include>**/*.properties</include>
          <include>**/*.xml</include>
        </includes>
        <filtering>false</filtering>
      </resource>
