事务管理
一个数据库事务是一个单一的工作单元操作序列。这些操作应该要么完整地执行,要么完全不执行。事务管理是一个重要组成部分,事务管理可以确保数据完整性和一致性。事务具有以下四个关键特性分别是 ACID:
-
原子性:事务应该当作一个单独单元的操作,这意味着整个序列操作要么是成功,要么是失败的。
-
一致性:这表示数据库的引用完整性的一致性,表中唯一的主键等。
-
隔离性:可能同时处理很多有相同的数据集的事务,每个事务应该与其他事务隔离,以防止数据损坏。
- 持久性:一个事务一旦完成全部操作后,这个事务的结果必须是永久性的,不能因系统故障而从数据库中删除。
一个真正的关系型数据库管理系统应该为每个事务保证所有的四个特性。使用 SQL 发布到数据库中的事务的简单视图如下:
-
使用 begin transaction 命令开始事务。
-
使用 SQL 查询语句执行各种删除、更新或插入操作。
- 如果所有的操作都成功,则执行提交操作,否则回滚所有操作。
Spring 支持编程式和声明式事务管理。EJB 需要一个应用程序服务器,但 Spring 事务管理可以在不需要应用程序服务器的情况下实现。
编程式 vs. 声明式
Spring 支持两种类型的事务管理:
-
编程式事务管理 :这意味着你在编程的帮助下有管理事务。这给了你极大的灵活性,但却很难维护。
- 声明式事务管理 :这意味着你从业务代码中分离事务管理。你仅仅使用注解或 XML 配置来管理事务。
声明式事务管理比编程式事务管理更可取,尽管它不如编程式事务管理灵活,但它允许你通过代码控制事务。但作为一种横切关注点,声明式事务管理可以使用 AOP 方法进行模块化。Spring 支持使用 Spring AOP 框架的声明式事务管理。
Spring 事务抽象
Spring 事务抽象的关键是由 org.springframework.transaction.PlatformTransactionManager 接口定义,如下所示:
1 public interface PlatformTransactionManager {
2    TransactionStatus getTransaction(TransactionDefinition definition) throws TransactionException;
3    void commit(TransactionStatus status) throws TransactionException;
4    void rollback(TransactionStatus status) throws TransactionException;
5 }
TransactionStatus getTransaction(TransactionDefinition definition):根据指定的传播行为,该方法返回当前活动事务或创建一个新的事务。
void commit(TransactionStatus status):该方法提交给定的事务和关于它的状态。
void rollback(TransactionStatus status):该方法执行一个给定事务的回滚。
TransactionDefinition 是在 Spring 中事务支持的核心接口,它的定义如下:
1 public interface TransactionDefinition {
2    int getPropagationBehavior();
3    int getIsolationLevel();
4    String getName();
5    int getTimeout();
6    boolean isReadOnly();
7 }
int getPropagationBehavior():该方法返回传播行为。Spring 提供了与 EJB CMT 类似的所有的事务传播选项。
int getIsolationLevel():该方法返回该事务独立于其他事务的工作的程度。
String getName():该方法返回该事务的名称。
int getTimeout():该方法返回以秒为单位的时间间隔,事务必须在该时间间隔内完成。
boolean isReadOnly():该方法返回该事务是否是只读的。
下面是隔离级别的可能值:
TransactionDefinition.ISOLATION_DEFAULT:这是默认的隔离级别。
TransactionDefinition.ISOLATION_READ_COMMITTED:表明能够阻止误读;可以发生不可重复读和虚读。
TransactionDefinition.ISOLATION_READ_UNCOMMITTED:表明可以发生误读、不可重复读和虚读。
TransactionDefinition.ISOLATION_REPEATABLE_READ:表明能够阻止误读和不可重复读;可以发生虚读。
TransactionDefinition.ISOLATION_SERIALIZABLE:表明能够阻止误读、不可重复读和虚读。
下面是传播类型的可能值:
TransactionDefinition.PROPAGATION_MANDATORY:支持当前事务;如果不存在当前事务,则抛出一个异常。
TransactionDefinition.PROPAGATION_NESTED:如果存在当前事务,则在一个嵌套的事务中执行。
TransactionDefinition.PROPAGATION_NEVER:不支持当前事务;如果存在当前事务,则抛出一个异常。
TransactionDefinition.PROPAGATION_NOT_SUPPORTED:不支持当前事务;而总是执行非事务性。
TransactionDefinition.PROPAGATION_REQUIRED:支持当前事务;如果不存在事务,则创建一个新的事务。
TransactionDefinition.PROPAGATION_REQUIRES_NEW:创建一个新事务,如果存在一个事务,则把当前事务挂起。
TransactionDefinition.PROPAGATION_SUPPORTS:支持当前事务;如果不存在,则执行非事务性。
TransactionDefinition.TIMEOUT_DEFAULT:使用默认超时的底层事务系统,或者如果不支持超时则没有。
TransactionStatus 接口为事务代码提供了一个简单的方法来控制事务的执行和查询事务状态。
1 public interface TransactionStatus extends SavepointManager {
2    boolean isNewTransaction();
3    boolean hasSavepoint();
4    void setRollbackOnly();
5    boolean isRollbackOnly();
6    boolean isCompleted();
7 }
boolean hasSavepoint():该方法返回该事务内部是否有一个保存点,也就是说,基于一个保存点已经创建了嵌套事务。
boolean isCompleted():该方法返回该事务是否完成,也就是说,它是否已经提交或回滚。
boolean isNewTransaction():在当前事务是新的情况下,该方法返回 true。
boolean isRollbackOnly():该方法返回该事务是否已标记为 rollback-only。
void setRollbackOnly():该方法设置该事务为 rollback-only 标记。
Spring 编程式事务管理
编程式事务管理方法允许你在对你的源代码编程的帮助下管理事务。这给了你极大地灵活性,但是它很难维护。
在我们开始之前,至少要有两个数据库表,在事务的帮助下我们可以执行多种 CRUD 操作。以 Student 表为例,用下述 DDL 可以在 MySQL TEST 数据库中创建该表:
1 CREATE TABLE Student(
2    ID   INT NOT NULL AUTO_INCREMENT,
3    NAME VARCHAR(20) NOT NULL,
4    AGE  INT NOT NULL,
5    PRIMARY KEY (ID)
6 );
第二个表是 Marks,用来存储基于年份的学生的标记。这里 SID 是 Student 表的外键。
1 CREATE TABLE Marks(
2    SID INT NOT NULL,
3    MARKS  INT NOT NULL,
4    YEAR   INT NOT NULL
5 );
让我们直接使用 PlatformTransactionManager 来实现编程式方法从而实现事务。要开始一个新事务,你需要有一个带有适当的 transaction 属性的 TransactionDefinition 的实例。这个例子中,我们使用默认的 transaction 属性简单的创建了 DefaultTransactionDefinition 的一个实例。
当 TransactionDefinition 创建后,你可以通过调用 getTransaction() 方法来开始你的事务,该方法会返回 TransactionStatus 的一个实例。 TransactionStatus 对象帮助追踪当前的事务状态,并且最终,如果一切运行顺利,你可以使用 PlatformTransactionManager 的 commit() 方法来提交这个事务,否则的话,你可以使用 rollback() 方法来回滚整个操作。
现在让我们编写我们的 Spring JDBC 应用程序,它能够在 Student 和 Mark 表中实现简单的操作。让我们适当的使用 Eclipse IDE,并按照如下所示的步骤来创建一个 Spring 应用程序:
步骤一:创建一个名为 SpringExample 的项目,并在创建的项目中的 src 文件夹下创建包com.tutorialspoint。
步骤二:使用 Add JARs 选项添加必需的 Spring 库。
步骤三:在项目中添加 Spring JDBC 指定的最新的库 mysql-connector-java.jar,org.springframework.jdbc.jar 和 org.springframework.transaction.jar。如果没有这些库,你可以下载它们。
步骤四:创建 DAO 接口 StudentDAO 并列出所有需要的方法。尽管它不是必需的并且你可以直接编写 StudentJDBCTemplate 类,但是作为一个好的实践,我们还是做吧。
步骤五:在com.tutorialspoint包下创建其他必需的 Java 类 StudentMarks,StudentMarksMapper,StudentJDBCTemplate 和 MainApp。如果需要的话,你可以创建其他的 POJO 类。
步骤六:确保你已经在 TEST 数据库中创建了 Student 和 Marks 表。还要确保你的 MySQL 服务器运行正常并且你使用给出的用户名和密码可以读/写访问数据库。
步骤七:在 src 文件夹下创建 Beans 配置文件 Beans.xml 。
最后一步:最后一步是创建所有 Java 文件和 Bean 配置文件的内容并按照如下所示的方法运行应用程序。
下面是数据访问对象接口文件 StudentDAO.java 的内容:
 1 package com.tutorialspoint;
 2 import java.util.List;
 3 import javax.sql.DataSource;
 4 public interface StudentDAO {
 5    /**
 6     * This is the method to be used to initialize
 7     * database resources ie. connection.
 8     */
 9    public void setDataSource(DataSource ds);
10    /**
11     * This is the method to be used to create
12     * a record in the Student and Marks tables.
13     */
14    public void create(String name, Integer age, Integer marks, Integer year);
15    /**
16     * This is the method to be used to list down
17     * all the records from the Student and Marks tables.
18     */
19    public List<StudentMarks> listStudents();
20 }
下面是 StudentMarks.java 文件的内容:
 1 package com.tutorialspoint;
 2 public class StudentMarks {
 3    private Integer age;
 4    private String name;
 5    private Integer id;
 6    private Integer marks;
 7    private Integer year;
 8    private Integer sid;
 9    public void setAge(Integer age) {
10       this.age = age;
11    }
12    public Integer getAge() {
13       return age;
14    }
15    public void setName(String name) {
16       this.name = name;
17    }
18    public String getName() {
19       return name;
20    }
21    public void setId(Integer id) {
22       this.id = id;
23    }
24    public Integer getId() {
25       return id;
26    }
27    public void setMarks(Integer marks) {
28       this.marks = marks;
29    }
30    public Integer getMarks() {
31       return marks;
32    }
33    public void setYear(Integer year) {
34       this.year = year;
35    }
36    public Integer getYear() {
37       return year;
38    }
39    public void setSid(Integer sid) {
40       this.sid = sid;
41    }
42    public Integer getSid() {
43       return sid;
44    }
45 }
以下是 StudentMarksMapper.java 文件的内容:
 1 package com.tutorialspoint;
 2 import java.sql.ResultSet;
 3 import java.sql.SQLException;
 4 import org.springframework.jdbc.core.RowMapper;
 5 public class StudentMarksMapper implements RowMapper<StudentMarks> {
 6    public StudentMarks mapRow(ResultSet rs, int rowNum) throws SQLException {
 7       StudentMarks studentMarks = new StudentMarks();
 8       studentMarks.setId(rs.getInt("id"));
 9       studentMarks.setName(rs.getString("name"));
10       studentMarks.setAge(rs.getInt("age"));
11       studentMarks.setSid(rs.getInt("sid"));
12       studentMarks.setMarks(rs.getInt("marks"));
13       studentMarks.setYear(rs.getInt("year"));
14       return studentMarks;
15    }
16 }
下面是定义的 DAO 接口 StudentDAO 实现类文件 StudentJDBCTemplate.java:
 1 package com.tutorialspoint;
 2 import java.util.List;
 3 import javax.sql.DataSource;
 4 import org.springframework.dao.DataAccessException;
 5 import org.springframework.jdbc.core.JdbcTemplate;
 6 import org.springframework.transaction.PlatformTransactionManager;
 7 import org.springframework.transaction.TransactionDefinition;
 8 import org.springframework.transaction.TransactionStatus;
 9 import org.springframework.transaction.support.DefaultTransactionDefinition;
10 public class StudentJDBCTemplate implements StudentDAO {
11    private DataSource dataSource;
12    private JdbcTemplate jdbcTemplateObject;
13    private PlatformTransactionManager transactionManager;
14    public void setDataSource(DataSource dataSource) {
15       this.dataSource = dataSource;
16       this.jdbcTemplateObject = new JdbcTemplate(dataSource);
17    }
18    public void setTransactionManager(
19       PlatformTransactionManager transactionManager) {
20       this.transactionManager = transactionManager;
21    }
22    public void create(String name, Integer age, Integer marks, Integer year){
23       TransactionDefinition def = new DefaultTransactionDefinition();
24       TransactionStatus status = transactionManager.getTransaction(def);
25       try {
26          String SQL1 = "insert into Student (name, age) values (?, ?)";
27          jdbcTemplateObject.update( SQL1, name, age);
28          // Get the latest student id to be used in Marks table
29          String SQL2 = "select max(id) from Student";
30          int sid = jdbcTemplateObject.queryForInt( SQL2 );
31          String SQL3 = "insert into Marks(sid, marks, year) " +
32                        "values (?, ?, ?)";
33          jdbcTemplateObject.update( SQL3, sid, marks, year);
34          System.out.println("Created Name = " + name + ", Age = " + age);
35          transactionManager.commit(status);
36       } catch (DataAccessException e) {
37          System.out.println("Error in creating record, rolling back");
38          transactionManager.rollback(status);
39          throw e;
40       }
41       return;
42    }
43    public List<StudentMarks> listStudents() {
44       String SQL = "select * from Student, Marks where Student.id=Marks.sid";
45       List <StudentMarks> studentMarks = jdbcTemplateObject.query(SQL,
46                                          new StudentMarksMapper());
47       return studentMarks;
48    }
49 }
现在让我们改变主应用程序文件 MainApp.java,如下所示:
 1 package com.tutorialspoint;
 2 import java.util.List;
 3 import org.springframework.context.ApplicationContext;
 4 import org.springframework.context.support.ClassPathXmlApplicationContext;
 5 import com.tutorialspoint.StudentJDBCTemplate;
 6 public class MainApp {
 7    public static void main(String[] args) {
 8       ApplicationContext context =
 9              new ClassPathXmlApplicationContext("Beans.xml");
10       StudentJDBCTemplate studentJDBCTemplate =
11       (StudentJDBCTemplate)context.getBean("studentJDBCTemplate");
12       System.out.println("------Records creation--------" );
13       studentJDBCTemplate.create("Zara", 11, 99, 2010);
14       studentJDBCTemplate.create("Nuha", 20, 97, 2010);
15       studentJDBCTemplate.create("Ayan", 25, 100, 2011);
16       System.out.println("------Listing all the records--------" );
17       List<StudentMarks> studentMarks = studentJDBCTemplate.listStudents();
18       for (StudentMarks record : studentMarks) {
19          System.out.print("ID : " + record.getId() );
20          System.out.print(", Name : " + record.getName() );
21          System.out.print(", Marks : " + record.getMarks());
22          System.out.print(", Year : " + record.getYear());
23          System.out.println(", Age : " + record.getAge());
24       }
25    }
26 }
下面是配置文件 Beans.xml 的内容:
 1 <?xml version="1.0" encoding="UTF-8"?>
 2 <beans xmlns="http://www.springframework.org/schema/beans"
 3     xmlns:xsi="http://www.w3.org/2001/XMLSchema-instance"
 4     xsi:schemaLocation="http://www.springframework.org/schema/beans
 5     http://www.springframework.org/schema/beans/spring-beans-3.0.xsd ">
 6
 7    <!-- Initialization for data source -->
 8    <bean id="dataSource"
 9       class="org.springframework.jdbc.datasource.DriverManagerDataSource">
10       <property name="driverClassName" value="com.mysql.jdbc.Driver"/>
11       <property name="url" value="jdbc:mysql://localhost:3306/TEST"/>
12       <property name="username" value="root"/>
13       <property name="password" value="password"/>
14    </bean>
15
16    <!-- Initialization for TransactionManager -->
17    <bean id="transactionManager"
18       class="org.springframework.jdbc.datasource.DataSourceTransactionManager">
19       <property name="dataSource"  ref="dataSource" />
20    </bean>
21
22    <!-- Definition for studentJDBCTemplate bean -->
23    <bean id="studentJDBCTemplate"
24       class="com.tutorialspoint.StudentJDBCTemplate">
25       <property name="dataSource"  ref="dataSource" />
26       <property name="transactionManager"  ref="transactionManager" />
27    </bean>
28
29 </beans>
当你完成了创建源和 bean 配置文件后,让我们运行应用程序。如果你的应用程序运行顺利的话,那么将会输出如下所示的消息:
------Records creation--------
Created Name = Zara, Age = 11
Created Name = Nuha, Age = 20
Created Name = Ayan, Age = 25
------Listing all the records--------
ID : 1, Name : Zara, Marks : 99, Year : 2010, Age : 11
ID : 2, Name : Nuha, Marks : 97, Year : 2010, Age : 20
ID : 3, Name : Ayan, Marks : 100, Year : 2011, Age : 25
Spring 声明式事务管理
声明式事务管理方法允许你在配置的帮助下而不是源代码硬编程来管理事务。这意味着你可以将事务管理从事务代码中隔离出来。你可以只使用注释或基于配置的 XML 来管理事务。 bean 配置会指定事务型方法。这是与声明式事务相关的步骤:
-
我们使用 标签,它创建一个事务处理的建议,同时,我们定义一个匹配所有方法的切入点,我们希望这些方法是事务型的并且会引用事务型的建议。
-
如果在事务型配置中包含了一个方法的名称,那么创建的建议在调用方法之前就会在事务中开始进行。
-
目标方法会在 try / catch 块中执行。
- 如果方法正常结束,AOP 建议会成功的提交事务,否则它执行回滚操作。
让我们看看上述步骤是如何实现的。但是在我们开始之前,至少有两个数据库表是至关重要的,在事务的帮助下,我们可以实现各种 CRUD 操作。以 Student 表为例,该表是使用下述 DDL 在 MySQL TEST 数据库中创建的。
1 CREATE TABLE Student(
2    ID   INT NOT NULL AUTO_INCREMENT,
3    NAME VARCHAR(20) NOT NULL,
4    AGE  INT NOT NULL,
5    PRIMARY KEY (ID)
6 );
第二个表是 Marks,我们用来存储基于年份的学生标记。在这里,SID 是 Student 表的外键。
1 CREATE TABLE Marks(
2    SID INT NOT NULL,
3    MARKS  INT NOT NULL,
4    YEAR   INT NOT NULL
5 );
现在让我们编写 Spring JDBC 应用程序来在 Student 和 Marks 表中实现简单的操作。让我们适当的使用 Eclipse IDE,并按照如下所示的步骤来创建一个 Spring 应用程序:
步骤一:创建一个名为 SpringExample 的项目,并在创建的项目中的 src 文件夹下创建包 com.tutorialspoint。
步骤二:使用 Add JARs 选项添加必需的 Spring 库。
步骤三:在项目中添加其它必需的库 mysql-connector-java.jar,org.springframework.jdbc.jar 和 org.springframework.transaction.jar。如果你还没有这些库,你可以下载它们。
步骤四:创建 DAO 接口 StudentDAO 并列出所有需要的方法。尽管它不是必需的并且你可以直接编写 StudentJDBCTemplate 类,但是作为一个好的实践,我们还是做吧。
步骤五:在 com.tutorialspoint 包下创建其他必需的 Java 类 StudentMarks,StudentMarksMapper,StudentJDBCTemplate 和 MainApp。如果需要的话,你可以创建其他的 POJO 类。
步骤六:确保你已经在 TEST 数据库中创建了 Student 和 Marks 表。还要确保你的 MySQL 服务器运行正常并且你使用给出的用户名和密码可以读/写访问数据库。
步骤七:在 src 文件夹下创建 Beans 配置文件 Beans.xml 。
最后一步:最后一步是创建所有 Java 文件和 Bean 配置文件的内容并按照如下所示的方法运行应用程序。
下面是数据访问对象接口文件 StudentDAO.java 的内容:
 1 package com.tutorialspoint;
 2 import java.util.List;
 3 import javax.sql.DataSource;
 4 public interface StudentDAO {
 5    /**
 6     * This is the method to be used to initialize
 7     * database resources ie. connection.
 8     */
 9    public void setDataSource(DataSource ds);
10    /**
11     * This is the method to be used to create
12     * a record in the Student and Marks tables.
13     */
14    public void create(String name, Integer age, Integer marks, Integer year);
15    /**
16     * This is the method to be used to list down
17     * all the records from the Student and Marks tables.
18     */
19    public List<StudentMarks> listStudents();
20 }
以下是 StudentMarks.java 文件的内容:
 1 package com.tutorialspoint;
 2 public class StudentMarks {
 3    private Integer age;
 4    private String name;
 5    private Integer id;
 6    private Integer marks;
 7    private Integer year;
 8    private Integer sid;
 9    public void setAge(Integer age) {
10       this.age = age;
11    }
12    public Integer getAge() {
13       return age;
14    }
15    public void setName(String name) {
16       this.name = name;
17    }
18    public String getName() {
19       return name;
20    }
21    public void setId(Integer id) {
22       this.id = id;
23    }
24    public Integer getId() {
25       return id;
26    }
27    public void setMarks(Integer marks) {
28       this.marks = marks;
29    }
30    public Integer getMarks() {
31       return marks;
32    }
33    public void setYear(Integer year) {
34       this.year = year;
35    }
36    public Integer getYear() {
37       return year;
38    }
39    public void setSid(Integer sid) {
40       this.sid = sid;
41    }
42    public Integer getSid() {
43       return sid;
44    }
45 }
下面是 StudentMarksMapper.java 文件的内容:
 1 package com.tutorialspoint;
 2 import java.sql.ResultSet;
 3 import java.sql.SQLException;
 4 import org.springframework.jdbc.core.RowMapper;
 5 public class StudentMarksMapper implements RowMapper<StudentMarks> {
 6    public StudentMarks mapRow(ResultSet rs, int rowNum) throws SQLException {
 7       StudentMarks studentMarks = new StudentMarks();
 8       studentMarks.setId(rs.getInt("id"));
 9       studentMarks.setName(rs.getString("name"));
10       studentMarks.setAge(rs.getInt("age"));
11       studentMarks.setSid(rs.getInt("sid"));
12       studentMarks.setMarks(rs.getInt("marks"));
13       studentMarks.setYear(rs.getInt("year"));
14       return studentMarks;
15    }
16 }
下面是定义的 DAO 接口 StudentDAO 实现类文件 StudentJDBCTemplate.java:
 1 package com.tutorialspoint;
 2 import java.util.List;
 3 import javax.sql.DataSource;
 4 import org.springframework.dao.DataAccessException;
 5 import org.springframework.jdbc.core.JdbcTemplate;
 6 public class StudentJDBCTemplate implements StudentDAO{
 7    private JdbcTemplate jdbcTemplateObject;
 8    public void setDataSource(DataSource dataSource) {
 9       this.jdbcTemplateObject = new JdbcTemplate(dataSource);
10    }
11    public void create(String name, Integer age, Integer marks, Integer year){
12       try {
13          String SQL1 = "insert into Student (name, age) values (?, ?)";
14          jdbcTemplateObject.update( SQL1, name, age);
15          // Get the latest student id to be used in Marks table
16          String SQL2 = "select max(id) from Student";
17          int sid = jdbcTemplateObject.queryForInt( SQL2 );
18          String SQL3 = "insert into Marks(sid, marks, year) " +
19                        "values (?, ?, ?)";
20          jdbcTemplateObject.update( SQL3, sid, marks, year);
21          System.out.println("Created Name = " + name + ", Age = " + age);
22          // to simulate the exception.
23          throw new RuntimeException("simulate Error condition") ;
24       } catch (DataAccessException e) {
25          System.out.println("Error in creating record, rolling back");
26          throw e;
27       }
28    }
29    public List<StudentMarks> listStudents() {
30       String SQL = "select * from Student, Marks where Student.id=Marks.sid";
31       List <StudentMarks> studentMarks=jdbcTemplateObject.query(SQL,
32       new StudentMarksMapper());
33       return studentMarks;
34    }
35 }
现在让我们改变主应用程序文件 MainApp.java,如下所示:
 1 package com.tutorialspoint;
 2 import java.util.List;
 3 import org.springframework.context.ApplicationContext;
 4 import org.springframework.context.support.ClassPathXmlApplicationContext;
 5 public class MainApp {
 6    public static void main(String[] args) {
 7       ApplicationContext context =
 8              new ClassPathXmlApplicationContext("Beans.xml");
 9       StudentDAO studentJDBCTemplate =
10       (StudentDAO)context.getBean("studentJDBCTemplate");
11       System.out.println("------Records creation--------" );
12       studentJDBCTemplate.create("Zara", 11, 99, 2010);
13       studentJDBCTemplate.create("Nuha", 20, 97, 2010);
14       studentJDBCTemplate.create("Ayan", 25, 100, 2011);
15       System.out.println("------Listing all the records--------" );
16       List<StudentMarks> studentMarks = studentJDBCTemplate.listStudents();
17       for (StudentMarks record : studentMarks) {
18          System.out.print("ID : " + record.getId() );
19          System.out.print(", Name : " + record.getName() );
20          System.out.print(", Marks : " + record.getMarks());
21          System.out.print(", Year : " + record.getYear());
22          System.out.println(", Age : " + record.getAge());
23       }
24    }
25 }
以下是配置文件 Beans.xml 的内容:
 1 <?xml version="1.0" encoding="UTF-8"?>
 2 <beans xmlns="http://www.springframework.org/schema/beans"
 3    xmlns:xsi="http://www.w3.org/2001/XMLSchema-instance"
 4    xmlns:tx="http://www.springframework.org/schema/tx"
 5    xmlns:aop="http://www.springframework.org/schema/aop"
 6    xsi:schemaLocation="http://www.springframework.org/schema/beans
 7    http://www.springframework.org/schema/beans/spring-beans-3.0.xsd
 8    http://www.springframework.org/schema/tx
 9    http://www.springframework.org/schema/tx/spring-tx-3.0.xsd
10    http://www.springframework.org/schema/aop
11    http://www.springframework.org/schema/aop/spring-aop-3.0.xsd">
12
13    <!-- Initialization for data source -->
14    <bean id="dataSource"
15       class="org.springframework.jdbc.datasource.DriverManagerDataSource">
16       <property name="driverClassName" value="com.mysql.jdbc.Driver"/>
17       <property name="url" value="jdbc:mysql://localhost:3306/TEST"/>
18       <property name="username" value="root"/>
19       <property name="password" value="cohondob"/>
20    </bean>
21
22    <tx:advice id="txAdvice"  transaction-manager="transactionManager">
23       <tx:attributes>
24       <tx:method name="create"/>
25       </tx:attributes>
26    </tx:advice>
27
28    <aop:config>
29       <aop:pointcut id="createOperation"
30       expression="execution(* com.tutorialspoint.StudentJDBCTemplate.create(..))"/>
31       <aop:advisor advice-ref="txAdvice" pointcut-ref="createOperation"/>
32    </aop:config>
33
34    <!-- Initialization for TransactionManager -->
35    <bean id="transactionManager"
36    class="org.springframework.jdbc.datasource.DataSourceTransactionManager">
37       <property name="dataSource"  ref="dataSource" />
38    </bean>
39
40    <!-- Definition for studentJDBCTemplate bean -->
41    <bean id="studentJDBCTemplate"
42    class="com.tutorialspoint.StudentJDBCTemplate">
43       <property name="dataSource"  ref="dataSource" />
44    </bean>
45
46 </beans>
当你完成了创建源和 bean 配置文件后,让我们运行应用程序。如果你的应用程序运行顺利的话,那么会输出如下所示的异常。在这种情况下,事务会回滚并且在数据库表中不会创建任何记录。
------Records creation--------
Created Name = Zara, Age = 11
Exception in thread "main" java.lang.RuntimeException: simulate Error condition
在删除StudentJDBCTemplate类中create方法抛出异常的代码后,你可以尝试上述示例,在这种情况下,会提交事务并且你可以在数据库中看见记录。
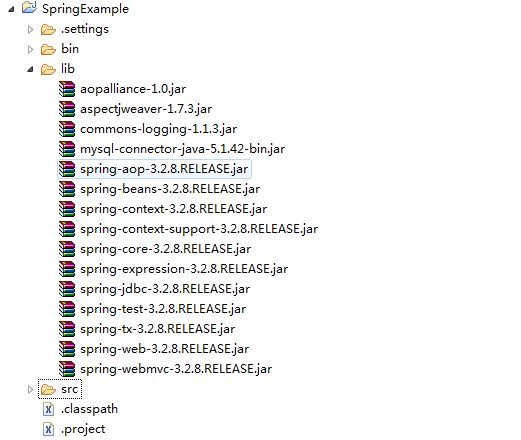
注意:项目jar包如图所示,其中也包含了Spring其它方面的一些jar包,小Alan偷一下懒就没去剔除了,这一块大家可以尝试只留下必要的jar包,以便熟悉Spring所包含的每个jar包在项目中所能够起到的作用,记得把jar包引入项目中才能够运行上述的示例。
结束语:除了无可奈何地走向衰老,没有人知道前面将会发生什么,没有人。
可爱博主:AlanLee
博客地址:http://www.cnblogs.com/AlanLee
本文出自博客园,欢迎大家加入博客园。