1、首先需要下载VSCode,打开浏览器输入https://code.visualstudio.com/(进入到官网),点击下载,可以根据自己的操作系统进行下载。

2、下载成功后的本地exe安装包:

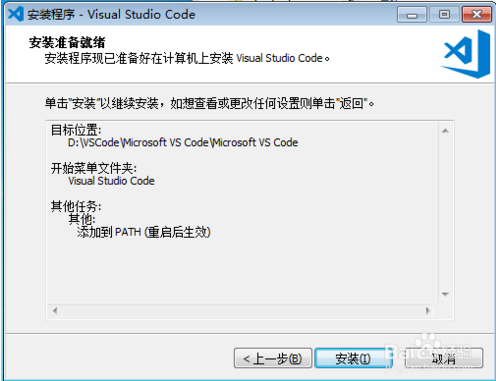
3、默认安装,下图为确认安装弹窗,点击安装即可,安装成功后启动VSCode:

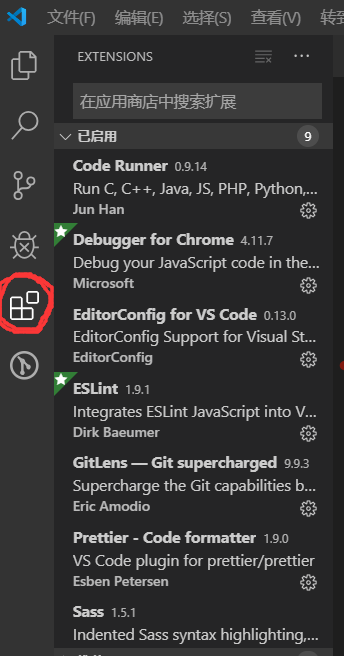
4、VSCode安装插件,安装成功后需重启VSCode:
Chinese (Simplified) Language Pack for Visual Studio Code(配置显示语言“zh-cn”)、
Vetur、stylelint、Sass、Prettier-Code formatter、GitLens--Git supercharged、ESLint、EditorConfig for VS Code、Debugger for Chrome、Code Runner、Auto Rename Tag(暂时这些)

5、打开文件->首选项->设置,就会进入到 settings.json 文件中,以下是自定义配置:
{
  "git.confirmSync": false,
  "git.autofetch": true,
  "git.checkoutType": "remote",
  "git.enableSmartCommit": true,
  "files.autoSave": "onFocusChange",
  "files.associations": {
    "*.vue": "vue",
    "*.wpy": "vue",
    "*.wxml": "wxml",
    "*.wxss": "css",
    "*.js": "javascript",
    "*.html": "html",
    "*.cjson": "jsonc",
    "*.wxs": "javascript"
  },
  "emmet.syntaxProfiles": {
    "vue-html": "html",
    "vue": "html"
  },
  "emmet.includeLanguages": {
    "wxml": "html"
  },
  "eslint.autoFixOnSave": true,
  "eslint.validate": [
    "javascript",
    "javascriptreact",
    {
      "language": "html",
      "autoFix": true
    },
    {
      "language": "vue",
      "autoFix": true
    },
    {
      "autoFix": true,
      "language": "javascript"
    },
    {
      "autoFix": true,
      "language": "javascriptreact"
    },
    {
      "autoFix": true,
      "language": "typescript"
    },
    {
      "autoFix": true,
      "language": "typescriptreact"
    }
  ],
  "terminal.integrated.shell.windows": "C:\\Windows\\System32\\cmd.exe",
  "window.zoomLevel": 1,
  "explorer.confirmDelete": false,
  "vetur.experimental.templateInterpolationService": false,
  "editor.tabSize": 4,
  "editor.tabCompletion": "on",
  "editor.codeActionsOnSave": {
    "source.fixAll": true
  }
}
6、设置>用户代码片段
{
    // Place your snippets for vue here. Each snippet is defined under a snippet name and has a prefix, body and
    // description. The prefix is what is used to trigger the snippet and the body will be expanded and inserted. Possible variables are:
    // $1, $2 for tab stops, $0 for the final cursor position, and ${1:label}, ${2:another} for placeholders. Placeholders with the
    // same ids are connected.
    // Example:
    "Print to console": {
        "prefix": "log",
        "body": [
            "console.log('$1')",
            "$2"
        ],
        "description": "Log output to console"
    },
    "Print to vue template": {
        "prefix": "vue",
        "body": [
            "<template>",
            "    <div class='page-view'>",
            "      1",
            "    </div>",
            "</template>",
            "      ",
            "<script lang='ts'>",
            "import Vue from 'vue'",
            "export default Vue.extend({",
            "    data() {",
            "      return{}",
            "    },",
            "    methods:{}",
            "});",
            "</script>",
            "      ",
            "<style lang='scss' scoped>",
            ".page-view {",
            "  min-height: 100%;",
            "}",
            "</style>"
        ],
        "description": "Log output to vue template"
    }
}