我的微信公众号感兴趣的话可以扫一下,
或者加微信号 whenDreams

第一部分:基础设置,跑起一个页面-首页
第一步:
composer create-project symfony/framework-standard-edition 你的项目名;
创建完这个原型,我执行php bin/console server:run,可以跑起来;
那么此刻你需要连接数据库了:我的数据库是PostgreSql
写一个数据库创建脚本例如我的


create user myblog with password 'myblog' ;
ALTER USER myblog WITH PASSWORD 'myblog';

create database myblog_dev with encoding='utf8' ;
create database myblog_prod with encoding='utf8' ;
create database myblog_test with encoding='utf8' ;

grant all privileges on database myblog_dev to myblog ;
grant all privileges on database myblog_test to myblog;
grant all privileges on database myblog_prod to myblog;

connect myblog_dev;
create schema extensions;
create extension hstore schema extensions;
ALTER DATABASE myblog_dev SET search_path to "$user",public,extensions;
alter database myblog_dev owner to myblog;
alter schema public owner to myblog;
alter schema extensions owner to myblog;
GRANT USAGE ON SCHEMA public to myblog;

connect myblog_prod;
create schema extensions;
create extension hstore schema extensions;
ALTER DATABASE myblog_dev SET search_path to "$user",public,extensions;
alter database myblog_dev owner to myblog;
alter schema public owner to myblog;
alter schema extensions owner to myblog;
GRANT USAGE ON SCHEMA public to myblog;


connect myblog_test;
create schema extensions;
create extension hstore schema extensions;
ALTER DATABASE myblog_dev SET search_path to "$user",public,extensions;
alter database myblog_dev owner to myblog;
alter schema public owner to myblog;
alter schema extensions owner to myblog;
GRANT USAGE ON SCHEMA public to myblog;
根据脚本创建数据库。
第二步,让你的程序这个原型程序连接数据库:
找到config.yml
复制代码:
# Doctrine Configuration
doctrine:
    dbal:
        driver:   %database_driver%
        host:     %database_host%
        port:     %database_port%
        dbname:   %database_name%
        user:     %database_user%
        password: %database_password%
        charset:  UTF8
找到parameters.yml和parameters.yml.dist
连接你的数据库名字(配置一样的):
# This file is auto-generated during the composer install
parameters:
    database_driver: pdo_pgsql
    database_host: 127.0.0.1
    database_port: null
    database_name: 数据库名字
    database_user: 数据库用户名
    database_password: 数据库密码
    mailer_transport: smtp
    mailer_host: 127.0.0.1
    mailer_user:
    mailer_password:
    secret: ThisTokenIsNotSoSecretChangeIt
这样就连上数据库了;
-----------------------------------------------
第三步,根据业务需求开始写Bundle:
注:bundle的真义在于,它是作为软件的一个“可被复用”的独立构成而存在。如果UserBundle不能“原封不动地”使用在别的Symfony程序中,它不应该成为bundle。另外,如果InvoiceBundle依赖于ProductBundle,那便没有任何必要将它们分成两个bundle。
以下是创建Bundle的命令:在这里我不打算创建新Bundle
php bin/console generate:bundle --namespace=AppBundle --dir=src --format=annotation --no-interaction
第三步,找到首页更改首页,写一个服务测试一下;
首页在我的AppBundle下面的Resources/views/Default/index.html.twig
如果没有自行新建这个目录;
写一个注册一个服务
先在src/AppBundle/Utils/创建一个新的Slugger类并添加下面的slugify()方法
// src/AppBundle/Utils/Slugger.php
namespace AppBundleUtils;

class Slugger
{
    public function slugify($string)
    {
        return preg_replace(
            '/[^a-z0-9]/', '-', strtolower(trim(strip_tags($string)))
        );
    }
}
然后,为这个类定义一个服务:
# app/config/services.yml
services:
    # keep your service names short
    app.slugger:
        class: AppBundleUtilsSlugger
那么我开始修改我的首页:
    /**
     * @Route("/", name="homepage")
     */
    public function indexAction(Request $request)
    {

        //得到服务
        $slug = $this->get('app.slugger')->slugify("DREAM START");

        return $this->render('AppBundle:Default:index.html.twig',
            array('slug' => $slug));
    }
那么我在页面上取slug,只需要加上{{slug}}这样就可以了。
好了首页部分结束;
注:刚才的服务注册写在了config目录下的service.yml里,
我需要更改一下,应该写在AppBundle/Resources/config/service.yml 下,这样更好一些
然后在在config.yml文件中import就可以了如下添加:
imports:
    - { resource: parameters.yml }
    - { resource: security.yml }
    - { resource: services.yml }
    - { resource: "@AppBundle/Resources/config/services.yml" }
第二部分:根据业务需求开始写实体;
首先我安装了DoctrineMigrationsBundle,用于数据库migration;
(数据库迁移功能是数据库抽象层的扩展,可让您以安全,简单和标准化的方式以编程方式部署新版本的数据库模式);
官方地址:http://symfony.com/doc/current/bundles/DoctrineMigrationsBundle/index.html
$ composer require doctrine/doctrine-migrations-bundle "^1.0"
./composer.json has been updated
Loading composer repositories with package information
Updating dependencies (including require-dev)
Package operations: 5 installs, 0 updates, 0 removals
  - Installing zendframework/zend-eventmanager (3.0.1) Downloading: 100%
  - Installing zendframework/zend-code (2.6.3) Downloading: 100%
  - Installing ocramius/proxy-manager (1.0.2) Downloading: 100%
  - Installing doctrine/migrations (v1.5.0) Downloading: 100%
  - Installing doctrine/doctrine-migrations-bundle (v1.2.1) Downloading: 100%
zendframework/zend-eventmanager suggests installing container-interop/container-interop (^1.1.0, to use the lazy listeners feature)
zendframework/zend-eventmanager suggests installing zendframework/zend-stdlib (^2.7.3 || ^3.0, to use the FilterChain feature)
zendframework/zend-code suggests installing zendframework/zend-stdlib (ZendStdlib component)
ocramius/proxy-manager suggests installing zendframework/zend-stdlib (To use the hydrator proxy)
ocramius/proxy-manager suggests installing ocramius/generated-hydrator (To have very fast object to array to object conversion for ghost objects)
ocramius/proxy-manager suggests installing zendframework/zend-xmlrpc (To have the XmlRpc adapter (Remote Object feature))
ocramius/proxy-manager suggests installing zendframework/zend-json (To have the JsonRpc adapter (Remote Object feature))
ocramius/proxy-manager suggests installing zendframework/zend-soap (To have the Soap adapter (Remote Object feature))
Writing lock file
Generating autoload files
> IncenteevParameterHandlerScriptHandler::buildParameters
Updating the "app/config/parameters.yml" file
> SensioBundleDistributionBundleComposerScriptHandler::buildBootstrap
> SensioBundleDistributionBundleComposerScriptHandler::clearCache

 // Clearing the cache for the dev environment with debug true

 [OK] Cache for the "dev" environment (debug=true) was successfully cleared.

> SensioBundleDistributionBundleComposerScriptHandler::installAssets

 Trying to install assets as relative symbolic links.

 -- -------- ----------------
     Bundle   Method / Error
 -- -------- ----------------

 [OK] All assets were successfully installed.

> SensioBundleDistributionBundleComposerScriptHandler::installRequirementsFile
> SensioBundleDistributionBundleComposerScriptHandler::prepareDeploymentTarget
引入新bundle,
1:composer 加载,
$ composer require doctrine/doctrine-migrations-bundle "^1.0"
2:在Appkernel.php中注册new,
new DoctrineBundleMigrationsBundleDoctrineMigrationsBundle(),
3:配置config.yml,添加
doctrine_migrations:
    dir_name: "%kernel.root_dir%/DoctrineMigrations"
    namespace: ApplicationMigrations
    table_name: migration_versions
    name: Application Migrations
运行以下命令查看一下:
$ php bin/console doctrine:migrations:status

 == Configuration

    >> Name:                                               Application Migrations
    >> Database Driver:                                    pdo_pgsql
    >> Database Name:                                      dreamstart_dev
    >> Configuration Source:                               manually configured
    >> Version Table Name:                                 migration_versions
    >> Version Column Name:                                version
    >> Migrations Namespace:                               ApplicationMigrations
    >> Migrations Directory:                               C:homeworkspacedreamstartapp/DoctrineMigrations
    >> Previous Version:                                   Already at first version
    >> Current Version:                                    0
    >> Next Version:                                       Already at latest version
    >> Latest Version:                                     0
    >> Executed Migrations:                                0
    >> Executed Unavailable Migrations:                    0
    >> Available Migrations:                               0
    >> New Migrations:                                     0
然后我引入fosuserbundle,用于安全认证;
https://symfony.com/doc/current/bundles/FOSUserBundle/index.html#main
需要7步安装:
- Download FOSUserBundle using composer //下载
- Enable the Bundle //启用
- Create your User class //创建User类
- Configure your application's security.yml //配置security
- Configure the FOSUserBundle //配置FOSUserBundle
- Import FOSUserBundle routing //导入routing
- Update your database schema //更新数据库
下载:
$ composer require friendsofsymfony/user-bundle "~1.3"
启用:
<?php
// app/AppKernel.php

public function registerBundles()
{
    $bundles = array(
        // ...
        new FOSUserBundleFOSUserBundle(),
        // ...
    );
}
创建User类:
<?php

namespace AppBundleEntity;
use FOSUserBundleModelUser as BaseUser;
use DoctrineORMMapping as ORM;

/**
 * @ORMEntity
 * @ORMTable(name="dream_user")
 */
class User extends BaseUser
{

    //构造函数
    public function __construct()
    {
        parent::__construct();
        // your own logic
    }

    /**
     * @ORMId
     * @ORMColumn(type="integer")
     * @ORMGeneratedValue(strategy="AUTO")
     */
    protected $id;


}
配置security
# app/config/security.yml
security:
    encoders:
        FOSUserBundleModelUserInterface: bcrypt

    role_hierarchy:
        ROLE_ADMIN:       ROLE_USER
        ROLE_SUPER_ADMIN: ROLE_ADMIN

    providers:
        fos_userbundle:
            id: fos_user.user_provider.username

    firewalls:
        main:
            pattern: ^/
            form_login:
                provider: fos_userbundle
                csrf_provider: security.csrf.token_manager # Use form.csrf_provider instead for Symfony <2.4
            logout:       true
            anonymous:    true

    access_control:
        - { path: ^/login$, role: IS_AUTHENTICATED_ANONYMOUSLY }
        - { path: ^/register, role: IS_AUTHENTICATED_ANONYMOUSLY }
        - { path: ^/resetting, role: IS_AUTHENTICATED_ANONYMOUSLY }
        - { path: ^/admin/, role: ROLE_ADMIN }
配置FOSUserBundle
# app/config/config.yml
fos_user:
    db_driver: orm # other valid values are 'mongodb', 'couchdb' and 'propel'
    firewall_name: main
    user_class: AppBundleEntityUser
导入routing
# app/config/routing.yml
fos_user_security:
    resource: "@FOSUserBundle/Resources/config/routing/all.xml"

更新数据库
$ php app/console doctrine:schema:update --force
将security.yml
csrf_provider: security.csrf.token_manager
改为:csrf_token_generator: security.csrf.token_manager

 现在我们用户bundle可以正常使用了;
-----------------------------------
接下来我打算还是新建一个Bundle,作为前台Bundle;
php bin/console generate:bundle;
此命令执行后会一连串的与终端互动如下,默认即可
peng@PENG-PC /C/home/workspace/dreamstart (master)
$ php bin/console generate:bundle


  Welcome to the Symfony bundle generator!


Are you planning on sharing this bundle across multiple applications? [no]:

Your application code must be written in bundles. This command helps
you generate them easily.

Give your bundle a descriptive name, like BlogBundle.
Bundle name: WebBundle

Bundles are usually generated into the src/ directory. Unless you're
doing something custom, hit enter to keep this default!

Target Directory [src/]:

What format do you want to use for your generated configuration?

Configuration format (annotation, yml, xml, php) [annotation]:


  Bundle generation


> Generating a sample bundle skeleton into C:homeworkspacedreamstartapp/../src/WebBundle
  created .app/../src/WebBundle/
  created .app/../src/WebBundle/WebBundle.php
  created .app/../src/WebBundle/Controller/
  created .app/../src/WebBundle/Controller/DefaultController.php
  created .app/../tests/WebBundle/Controller/
  created .app/../tests/WebBundle/Controller/DefaultControllerTest.php
  created .app/../src/WebBundle/Resources/views/Default/
  created .app/../src/WebBundle/Resources/views/Default/index.html.twig
  created .app/../src/WebBundle/Resources/config/
  created .app/../src/WebBundle/Resources/config/services.yml
> Checking that the bundle is autoloaded
> Enabling the bundle inside C:homeworkspacedreamstartappAppKernel.php
  updated .appAppKernel.php
> Importing the bundle's routes from the C:homeworkspacedreamstartappconfig
outing.yml file
  updated .app/config/routing.yml
> Importing the bundle's services.yml from the C:homeworkspacedreamstartappconfigconfig.yml file
  updated .app/config/config.yml


  Everything is OK! Now get to work :).
需要修改一下默认访问页面,现在只需要改一下routing文件
app:
    resource: '@AppBundle/Controller/'
    type: annotation
    prefix:   /admin

web:
    resource: "@WebBundle/Controller/"
    type:     annotation
    prefix:   /
现在默认页面是WebBundle里面的页面了;
接下来就开始创建实体了:
业务分析一下,我大概需要写两个实体,一个是文章,一个是类别,其余的暂时不需要;
实体创建过程:
$ php bin/console doctrine:generate:entity


  Welcome to the Doctrine2 entity generator


This command helps you generate Doctrine2 entities.

First, you need to give the entity name you want to generate.
You must use the shortcut notation like AcmeBlogBundle:Post.

The Entity shortcut name: AppBundle:Category

Determine the format to use for the mapping information.

Configuration format (yml, xml, php, or annotation) [annotation]:

Instead of starting with a blank entity, you can add some fields now.
Note that the primary key will be added automatically (named id).

Available types: array, simple_array, json_array, object,
boolean, integer, smallint, bigint, string, text, datetime, datetimetz,
date, time, decimal, float, binary, blob, guid.

New field name (press <return> to stop adding fields): name
Field type [string]:
Field length [255]:
Is nullable [false]:
Unique [false]:

New field name (press <return> to stop adding fields):


  Entity generation


  created .srcAppBundle/Entity/Category.php
> Generating entity class C:homeworkspacedreamstartsrcAppBundleEntityCategory.php: OK!
> Generating repository class C:homeworkspacedreamstartsrcAppBundleRepositoryCategoryRepository.php: OK!


  Everything is OK! Now get to work :).
$ php bin/console doctrine:generate:entity


  Welcome to the Doctrine2 entity generator


This command helps you generate Doctrine2 entities.

First, you need to give the entity name you want to generate.
You must use the shortcut notation like AcmeBlogBundle:Post.

The Entity shortcut name: AppBundle:Post

Determine the format to use for the mapping information.

Configuration format (yml, xml, php, or annotation) [annotation]:

Instead of starting with a blank entity, you can add some fields now.
Note that the primary key will be added automatically (named id).

Available types: array, simple_array, json_array, object,
boolean, integer, smallint, bigint, string, text, datetime, datetimetz,
date, time, decimal, float, binary, blob, guid.

New field name (press <return> to stop adding fields): name
Field type [string]:
Field length [255]:
Is nullable [false]:
Unique [false]:

New field name (press <return> to stop adding fields): content
Field type [string]: text
Is nullable [false]:
Unique [false]:

New field name (press <return> to stop adding fields): created
Field type [string]: datetime
Is nullable [false]:
Unique [false]:

New field name (press <return> to stop adding fields): modified
Field type [string]: datetime
Is nullable [false]:
Unique [false]:

New field name (press <return> to stop adding fields):


  Entity generation


  created .srcAppBundle/Entity/Post.php
> Generating entity class C:homeworkspacedreamstartsrcAppBundleEntityPost.php: OK!
> Generating repository class C:homeworkspacedreamstartsrcAppBundleRepositoryPostRepository.php: OK!


  Everything is OK! Now get to work :).
需要在Post实体中增加与category的多对一关系,我只建一端,在Post实体中加即可:
    /**
     * @var string
     * @ORMManyToOne(targetEntity="Category")
     * @ORMJoinColumn(name="category_id",referencedColumnName="id")
     */
    private $category;
然后验证关联关系是否正确:
$ php bin/console doctrine:schema:validate
[Mapping]  OK - The mapping files are correct.
[Database] FAIL - The database schema is not in sync with the current mapping file.
这里提示,数据库没有映射成功

我们执行更新数据库表命令
$ php bin/console doctrine:schema:update --force
Updating database schema...
Database schema updated successfully! "6" queries were executed
这时候你的数据库就多了两张表
我们重新生成getter和seter方法:
$ php bin/console doctrine:generate:entities AppBundle:Post
Generating entity "AppBundleEntityPost"
  > backing up Post.php to Post.php~
  > generating AppBundleEntityPost
好了已经自动生成了。
那么现在就开始写CRUD;
文章的CRUD,类型的CRUD;用户的CRUD;
如下过程:
$ php bin/console generate:doctrine:crud


  Welcome to the Doctrine2 CRUD generator


This command helps you generate CRUD controllers and templates.

First, give the name of the existing entity for which you want to generate a CRUD
(use the shortcut notation like AcmeBlogBundle:Post)

The Entity shortcut name: AppBundle:Category

By default, the generator creates two actions: list and show.
You can also ask it to generate "write" actions: new, update, and delete.

Do you want to generate the "write" actions [no]? yes

Determine the format to use for the generated CRUD.

Configuration format (yml, xml, php, or annotation) [annotation]:

Determine the routes prefix (all the routes will be "mounted" under this
prefix: /prefix/, /prefix/new, ...).

Routes prefix [/category]:


  Summary before generation


You are going to generate a CRUD controller for "AppBundle:Category"
using the "annotation" format.

Do you confirm generation [yes]?


  CRUD generation


  created .srcAppBundle/Controller//CategoryController.php
  created .app/Resources/views/category/
  created .app/Resources/views/category/index.html.twig
  created .app/Resources/views/category/show.html.twig
  created .app/Resources/views/category/new.html.twig
  created .app/Resources/views/category/edit.html.twig
  created .srcAppBundle/Tests/Controller/
  created .srcAppBundle/Tests/Controller//CategoryControllerTest.php
Generating the CRUD code: OK
  created .srcAppBundle/Form/
  created .srcAppBundle/Form/CategoryType.php
Generating the Form code: OK
Updating the routing: OK


  Everything is OK! Now get to work :).


$ php bin/console generate:doctrine:crud


  Welcome to the Doctrine2 CRUD generator


This command helps you generate CRUD controllers and templates.

First, give the name of the existing entity for which you want to generate a CRUD
(use the shortcut notation like AcmeBlogBundle:Post)

The Entity shortcut name: AppBundle:Post

By default, the generator creates two actions: list and show.
You can also ask it to generate "write" actions: new, update, and delete.

Do you want to generate the "write" actions [no]? yes

Determine the format to use for the generated CRUD.

Configuration format (yml, xml, php, or annotation) [annotation]:

Determine the routes prefix (all the routes will be "mounted" under this
prefix: /prefix/, /prefix/new, ...).

Routes prefix [/post]:


  Summary before generation


You are going to generate a CRUD controller for "AppBundle:Post"
using the "annotation" format.

Do you confirm generation [yes]?


  CRUD generation


  created .srcAppBundle/Controller//PostController.php
  created .app/Resources/views/post/
  created .app/Resources/views/post/index.html.twig
  created .app/Resources/views/post/show.html.twig
  created .app/Resources/views/post/new.html.twig
  created .app/Resources/views/post/edit.html.twig
  created .srcAppBundle/Tests/Controller//PostControllerTest.php
Generating the CRUD code: OK
  created .srcAppBundle/Form/PostType.php
Generating the Form code: OK
Updating the routing: OK


  Everything is OK! Now get to work :).
现在已经生成了Resources/views目录下生成了相应的增删改查页面;
现在需要把后台布局页面搭建起来:
步骤:
1:布局:新建一个在AppBundle/Resources/views/新建Layout目录;
2:在Layout新建admin.layout.html.twig;
<!DOCTYPE html>
<html lang="zh-cn">
<head>
    <meta charset="utf-8">
    <meta http-equiv="X-UA-Compatible" content="IE=edge">
    <meta name="viewport" content="width=device-width, initial-scale=1">
    <title>{% block title %}{% endblock  %} | {{ slug }}</title>

    <link rel="stylesheet" href="http://cdn.bootcss.com/bootstrap/3.3.0/css/bootstrap.min.css">
    <link rel="stylesheet" href="https://cdnjs.cloudflare.com/ajax/libs/ionicons/2.0.1/css/ionicons.min.css">
    <!--[if lt IE 9]>
    <script src="http://cdn.bootcss.com/html5shiv/3.7.2/html5shiv.min.js"></script>
    <script src="http://cdn.bootcss.com/respond.js/1.4.2/respond.min.js"></script>
    <![endif]-->
    {% block header  %}{% endblock %}
</head>
<body style="background-color:#EFEFEF">
<nav class="navbar navbar-default navbar-inverse" role="navigation">
    <div class="container-fluid">
        <!-- Brand and toggle get grouped for better mobile display -->
        <div class="navbar-header">
            <button type="button" class="navbar-toggle collapsed" data-toggle="collapse" data-target="#bs-example-navbar-collapse-1">
                <span class="sr-only">Toggle navigation</span>
                <span class="icon-bar"></span>
                <span class="icon-bar"></span>
                <span class="icon-bar"></span>
            </button>
            <a class="navbar-brand" href="">博客控制台</a>
        </div>

        <!-- Collect the nav links, forms, and other content for toggling -->
        <div class="collapse navbar-collapse" id="bs-example-navbar-collapse-1">
            <ul class="nav navbar-nav">
                <li class="dropdown">
                    <a href="#" class="dropdown-toggle" data-toggle="dropdown">用户管理 <span class="caret"></span></a>
                    <ul class="dropdown-menu" role="menu">
                        <li><a href="">用户管理</a></li>
                        <li><a href="">2</a></li>
                    </ul>
                </li>
                <li class="dropdown">
                    <a href="#" class="dropdown-toggle" data-toggle="dropdown">博客 <span class="caret"></span></a>
                    <ul class="dropdown-menu" role="menu">
                        <li><a href="">1</a></li>
                        <li><a href="">2</a></li>
                        <li><a href="">3</a></li>
                        <li><a href="">4</a></li>
                    </ul>
                </li>
                <li class="dropdown">
                    <a href="#" class="dropdown-toggle" data-toggle="dropdown">2<span class="caret"></span></a>
                    <ul class="dropdown-menu" role="menu">
                        <li><a href="">1</a></li>
                        <li><a href="">2</a></li>
                    </ul>
                </li>
                <li class="dropdown">
                    <a href="#" class="dropdown-toggle" data-toggle="dropdown">2<span class="caret"></span></a>
                    <ul class="dropdown-menu" role="menu">
                        <li><a href="">2</a></li>
                    </ul>
                </li>
            </ul>
            <ul class="nav navbar-nav navbar-right">
                <li class="dropdown">
                    <a href="#" class="dropdown-toggle" data-toggle="dropdown">{{app.user.username}} <span class="caret"></span></a>
                    <ul class="dropdown-menu" role="menu">
                        <li><a href="{{path('fos_user_change_password')}}">修改密码</a></li>
                        <li class="divider"></li>
                        <li><a href="{{path('fos_user_security_logout')}}">退出登录</a></li>
                    </ul>
                </li>
            </ul>
        </div><!-- /.navbar-collapse -->
    </div><!-- /.container-fluid -->
</nav>

<div class="xin-staff-body" style="min-height:500px">
    <div class="container">
        {% include "AppBundle:include:notice.html.twig" %}
        {% block main %}{% endblock %}
    </div>
</div>
<div class="xin-staff-footer">
    <hr />
    <div class="clearfix">
        <div class="pull-right">
            <a href="mailto:turinguntion@163.com">技术支持</a>,
        </div>
    </div>
</div>
<script src="http://cdn.bootcss.com/jquery/1.11.1/jquery.min.js"></script>
<script src="http://cdn.bootcss.com/bootstrap/3.3.0/js/bootstrap.min.js"></script>
{% block footer %}{% endblock %}
</body>
</html>
3:修改index.hmtl.twing如下:
{% extends "AppBundle:Layout:admin.layout.html.twig" %}

{% block title %}博客控制台{% endblock %}

{% block main %}


{% endblock %}
那么现在为止后台布局就写好了,其他页面都继承这个布局就好了,接下来,就开始修改一下CRUD以及页面;
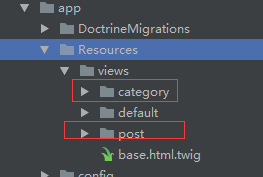
需要移动一下category和post到相应的Bundle的Resources下面;
此时也要改一下controller如下:index
    public function indexAction(Request $request)
    {
        $em = $this->getDoctrine()->getManager();
        $categories = $em->getRepository('AppBundle:Category')->findAll();
        return $this->render('AppBundle:Category:index.html.twig', array(
            'categories' => $categories
        ));
    }
对应的html如下:index.html.twig
{% extends "AppBundle:layout:admin.layout.html.twig" %}

{% block title %}管理控制台{% endblock %}

{% block main %}
    <ol class="breadcrumb clearfix">
        <li><a href="{{ path('category_index') }}">类别管理</a></li>
        <li class="pull-right">
            <a href="{{ path('category_new' ) }}">新建</a>
        </li>
    </ol>

    <table class="table">
        <thead>
            <tr>
                <th>ID</th>
                <th>名称</th>
                <th>操作</th>
            </tr>
        </thead>
        <tbody>
        {% for category in categories %}
            <tr>
                <td><a href="{{ path('category_show', { 'id': category.id }) }}">{{ category.id }}</a></td>
                <td>{{ category.name }}</td>
                <td>
                    <ul>
                        <li>
                            <a href="{{ path('category_show', { 'id': category.id }) }}">show</a>
                        </li>
                        <li>
                            <a href="{{ path('category_edit', { 'id': category.id }) }}">edit</a>
                        </li>
                    </ul>
                </td>
            </tr>
        {% endfor %}
        </tbody>
    </table>
{% endblock %}
其余页面也进行修改。
我们开始添加分页功能
https://packagist.org/packages/knplabs/knp-paginator-bundle
1:把分页Bundle加上
composer.phar require knplabs/knp-paginator-bundle;
$ composer.phar require knplabs/knp-paginator-bundle
Using version ^2.5 for knplabs/knp-paginator-bundle
./composer.json has been updated
Loading composer repositories with package information
Updating dependencies (including require-dev)
Package operations: 2 installs, 0 updates, 0 removals
  - Installing knplabs/knp-components (1.3.4) Loading from cache
  - Installing knplabs/knp-paginator-bundle (2.5.4) Downloading: 100%
knplabs/knp-components suggests installing doctrine/mongodb-odm (to allow usage pagination with Doctrine ODM MongoDB)
knplabs/knp-components suggests installing doctrine/phpcr-odm (to allow usage pagination with Doctrine ODM PHPCR)
knplabs/knp-components suggests installing propel/propel1 (to allow usage pagination with Propel ORM)
knplabs/knp-components suggests installing ruflin/Elastica (to allow usage pagination with ElasticSearch Client)
knplabs/knp-components suggests installing solarium/solarium (to allow usage pagination with Solarium Client)
Writing lock file
Generating autoload files
> IncenteevParameterHandlerScriptHandler::buildParameters
Updating the "app/config/parameters.yml" file
> SensioBundleDistributionBundleComposerScriptHandler::buildBootstrap
> SensioBundleDistributionBundleComposerScriptHandler::clearCache

 // Clearing the cache for the dev environment with debug true

 [OK] Cache for the "dev" environment (debug=true) was successfully cleared.

> SensioBundleDistributionBundleComposerScriptHandler::installAssets

 Trying to install assets as relative symbolic links.

 -- -------- ----------------
     Bundle   Method / Error
 -- -------- ----------------

 [OK] All assets were successfully installed.

> SensioBundleDistributionBundleComposerScriptHandler::installRequirementsFile
> SensioBundleDistributionBundleComposerScriptHandler::prepareDeploymentTarget
2:在AppKernel.php 注册Bundle:
new KnpBundlePaginatorBundleKnpPaginatorBundle()
3:在config.yml中添加
knp_paginator:
    page_range: 5                      # default page range used in pagination control
    default_options:
        page_name: page                # page query parameter name
        sort_field_name: sort          # sort field query parameter name
        sort_direction_name: direction # sort direction query parameter name
        distinct: true                 # ensure distinct results, useful when ORM queries are using GROUP BY statements
    template:
        pagination: 'KnpPaginatorBundle:Pagination:sliding.html.twig'     # sliding pagination controls template
        sortable: 'KnpPaginatorBundle:Pagination:sortable_link.html.twig' # sort link template
4:重新写indexAction列表:
    /**
     * Lists all Category entities.
     *
     * @Route("/", name="category_index")
     * @Method("GET")
     * @Template()
     */
    public function indexAction(Request $request)
    {
        $em = $this->getDoctrine()->getManager();
        $query = $em->getRepository('AppBundle:Category')
                    ->createQueryBuilder('c')
                    ->getQuery();
        $paginator  = $this->get('knp_paginator');
        $pagination = $paginator->paginate(
            $query,
            $request->query->getInt('page', 1), 1
        );
        return array(
            'pagination' => $pagination,
        );

    }
5:index.html
{% extends "AppBundle:layout:admin.layout.html.twig" %}

{% block title %}管理控制台{% endblock %}

{% block main %}
    <ol class="breadcrumb clearfix">
        <li><a href="{{ path('category_index') }}">类别管理</a></li>
        <li class="pull-right">
            <a href="{{ path('category_new' ) }}">新建</a>
        </li>
    </ol>

    <table class="table">
        <thead>
            <tr>
                <th>ID</th>
                <th>名称</th>
                <th>操作</th>
            </tr>
        </thead>
        <tbody>
        {% for category in pagination %}
            <tr>
                <td><a href="{{ path('category_show', { 'id': category.id }) }}">{{ category.id }}</a></td>
                <td>{{ category.name }}</td>
                <td>
                    <ul>
                        <li>
                            <a href="{{ path('category_show', { 'id': category.id }) }}">show</a>
                        </li>
                        <li>
                            <a href="{{ path('category_edit', { 'id': category.id }) }}">edit</a>
                        </li>
                    </ul>
                </td>
            </tr>
        {% endfor %}
        </tbody>
    </table>
    {{ knp_pagination_render(pagination, "KnpPaginatorBundle:Pagination:twitter_bootstrap_v3_pagination.html.twig") }}

{% endblock %}
这样我们就创建好了最基本的CRUD了;剩下的页面可以自己创建,如果有问题可以加我公众号直接发消息给我公众号:whenDreams,或者加Symfony的群联系我 群号:182983780;
----------------------------------------------------------------------------------------
接下来我需要写一个用户的CRUD将全过程记录,前提已经成功引入了FOSUserBundle;
1:命令创建CRUD如下:
app/console doctrine:generate:crud


  Welcome to the Doctrine2 CRUD generator


This command helps you generate CRUD controllers and templates.

First, you need to give the entity for which you want to generate a CRUD.
You can give an entity that does not exist yet and the wizard will help
you defining it.

You must use the shortcut notation like AcmeBlogBundle:Post.

The Entity shortcut name: AppBundle:User

By default, the generator creates two actions: list and show.
You can also ask it to generate "write" actions: new, update, and delete.

Do you want to generate the "write" actions [no]? yes

Determine the format to use for the generated CRUD.

Configuration format (yml, xml, php, or annotation) [annotation]:

Determine the routes prefix (all the routes will be "mounted" under this
prefix: /prefix/, /prefix/new, ...).

Routes prefix [/user]:


  Summary before generation


You are going to generate a CRUD controller for "WorkshopBackendBundle:User"
using the "annotation" format.

Do you confirm generation [yes]?


  CRUD generation


Generating the CRUD code: OK
Generating the Form code: OK


  You can now start using the generated code!
2:修改controller如下:
<?php

namespace AppBundleController;

use AppBundleEntityUser;
use SymfonyBundleFrameworkBundleControllerController;
use SensioBundleFrameworkExtraBundleConfigurationMethod;
use SensioBundleFrameworkExtraBundleConfigurationRoute;use SymfonyComponentHttpFoundationRequest;
use SensioBundleFrameworkExtraBundleConfigurationTemplate;
/**
 * User controller.
 *
 * @Route("user")
 */
class UserController extends Controller
{
    /**
     * Lists all user entities.
     *
     * @Route("/", name="user_index")
     * @Method("GET")
     * @Template()
     */
    public function indexAction(Request $request)
    {
        $em = $this->getDoctrine()->getManager();
        $query = $em->getRepository('AppBundle:User')
            ->createQueryBuilder('c')
            ->getQuery();
        $paginator  = $this->get('knp_paginator');
        $pagination = $paginator->paginate(
            $query,
            $request->query->getInt('page', 1), 1
        );
        return array(
            'pagination' => $pagination,
        );

    }

    /**
     * Creates a new user entity.
     *
     * @Route("/new", name="user_new")
     * @Method({"GET", "POST"})
     * @Template()
     */
    public function newAction(Request $request)
    {
        $user = new User();
        $user->addRole(User::ROLE_USER);
        $form = $this->createForm('AppBundleFormUserType', $user);
        $form->handleRequest($request);

        if ($form->isSubmitted() && $form->isValid()) {
            $userManager = $this->get('fos_user.user_manager');
            $userManager->updateUser($user);

            return $this->redirectToRoute('user_show', array('id' => $user->getId()));
        }

        return [
            'user' => $user,
            'form' => $form->createView()
        ];
    }

    /**
     * Finds and displays a user entity.
     *
     * @Route("/{id}", name="user_show")
     * @Method("GET")
     * @Template()
     */
    public function showAction(User $user)
    {
        $deleteForm = $this->createDeleteForm($user);

        return [
            'user' => $user,
            'delete_form' => $deleteForm->createView(),
        ];
    }

    /**
     * Displays a form to edit an existing user entity.
     *
     * @Route("/{id}/edit", name="user_edit")
     * @Method({"GET", "POST"})
     * @Template()
     */
    public function editAction(Request $request, User $user)
    {
        $deleteForm = $this->createDeleteForm($user);
        $editForm = $this->createForm('AppBundleFormUserType', $user);
        $editForm->handleRequest($request);

        if ($editForm->isSubmitted() && $editForm->isValid()) {
            $this->getDoctrine()->getManager()->flush();

            return $this->redirectToRoute('user_show', array('id' => $user->getId()));
        }

        return [
            'user' => $user,
            'edit_form' => $editForm->createView(),
            'delete_form' => $deleteForm->createView(),
        ];
    }

    /**
     * Deletes a user entity.
     *
     * @Route("/{id}", name="user_delete")
     * @Method("DELETE")
     */
    public function deleteAction(Request $request, User $user)
    {
        $form = $this->createDeleteForm($user);
        $form->handleRequest($request);

        if ($form->isSubmitted() && $form->isValid()) {
            $em = $this->getDoctrine()->getManager();
            $em->remove($user);
            $em->flush();
        }

        return $this->redirectToRoute('user_index');
    }

    /**
     * Creates a form to delete a user entity.
     *
     * @param User $user The user entity
     *
     * @return SymfonyComponentFormForm The form
     */
    private function createDeleteForm(User $user)
    {
        return $this->createFormBuilder()
            ->setAction($this->generateUrl('user_delete', array('id' => $user->getId())))
            ->setMethod('DELETE')
            ->getForm()
        ;
    }


    /**
     * enable
     * @Route("/{id}/enable", name="user_enable")
     * @Method("GET")
     */
    public function enableAction(Request $request,User $user)
    {
        $userManager = $this->get('fos_user.user_manager');
        $user->setEnabled(true);
        $userManager->updateUser($user);
        $this->addFlash('success', '已经启用');
        return $this->redirectToRoute('user_show', array('id' => $user->getId()));
    }

    /**
     * disable a Member entity.
     *
     * @Route("/{id}/disable", name="user_disable")
     * @Method("GET")
     */
    public function disableAction(Request $request, User $user)
    {
        $userManager = $this->get('fos_user.user_manager');
        $user->setEnabled(false);
        $userManager->updateUser($user);
        $this->addFlash('success', '已经禁用'
        );
        return $this->redirectToRoute('user_show', array('id' => $user->getId()));
    }


}
3:CRUD的html页面如下:
index
{% extends "AppBundle:layout:admin.layout.html.twig" %}

{% block title %}管理控制台{% endblock %}

{% block main %}
    <ol class="breadcrumb clearfix">
        <li><a href="{{ path('user_index') }}">用户管理</a></li>
        <li class="pull-right">
            <a href="{{ path('user_new' ) }}">新建</a>
        </li>
    </ol>

    <table class="table">
        <thead>
        <tr>
            <th>ID</th>
            <th>用户名</th>
            <th>邮箱</th>
            <th>角色</th>
            <th>状态</th>
            <th>最后登录</th>
            <th>操作</th>
        </tr>
        </thead>
        <tbody>
        {% for user in pagination %}
            <tr>
                <td><a href="{{ path('user_show', { 'id': user.id }) }}">{{ user.id }}</a></td>
                <td>{{ user.username }}</td>
                <td>{{ user.email }}</td>
                <td>
                    <ul class="list">
                        {%for role in user.roles %}
                            <li>{{role}}</li>
                        {%endfor%}
                    </ul>
                </td>
                <td>
                    {% if user.enabled %}
                        <span class="label label-success">启用</span>
                    {% else %}
                        <span class="label label-danger">禁用</span>
                    {% endif %}
                </td>
                <td>{{ user.lastLogin |date('Y-m-d H:i') }}</td>
                <td>
                    <a href="{{ path('user_show', { 'id': user.id }) }}">查看</a>
                    <a href="{{ path('user_edit', { 'id': user.id }) }}">编辑</a>
                </td>
            </tr>
        {% endfor %}
        </tbody>
    </table>
    {{ knp_pagination_render(pagination, "KnpPaginatorBundle:Pagination:twitter_bootstrap_v3_pagination.html.twig") }}

{% endblock %}
new
{% extends "AppBundle:layout:admin.layout.html.twig" %}

{% block title %}管理控制台{% endblock %}

{% block main %}
    <ol class="breadcrumb clearfix">
        <li><a href="{{ path('user_index') }}">用户管理</a></li>
        <li class="pull-right">
            <a href="{{ path('user_index') }}">列表</a>
        </li>
    </ol>
    {{ form_start(form) }}
    {{ form_widget(form) }}
    <input type="submit" value="保存" class="btn btn-primary" />
    {{ form_end(form) }}
{% endblock %}
edit
{% extends "AppBundle:layout:admin.layout.html.twig" %}

{% block title %}管理控制台{% endblock %}

{% block main %}
    <ol class="breadcrumb clearfix">
        <li><a href="{{ path('user_index') }}">用户管理</a></li>
        <li class="pull-right">
            <a href="{{ path('user_edit',{'id':user.id} ) }}">编辑</a>
        </li>
    </ol>
    {{ form_start(edit_form) }}
    {{ form_widget(edit_form) }}
    <input type="submit" value="保存" class="btn btn-primary" />
    {{ form_end(edit_form) }}
{% endblock %}
show
{% extends "AppBundle:layout:admin.layout.html.twig" %}

{% block title %}管理控制台{% endblock %}

{% block main %}
    <ol class="breadcrumb clearfix">
        <li><a href="{{ path('user_index') }}">用户管理</a></li>
        <li class="pull-right">
            <a href="{{ path('user_edit',{'id':user.id} ) }}">编辑</a>
        </li>
    </ol>
    <table class="table">
        <tbody>
        <tr>
            <th>Id</th>
            <td>{{ user.id }}</td>
        </tr>
        <tr>
            <th>用户名</th>
            <td>{{ user.username }}</td>
        </tr>
        <tr>
            <th>邮箱</th>
            <td>{{ user.email }}</td>
        </tr>
        <tr>
            <th>状态</th>
            <td>{{ user.enabled }}</td>
        </tr>
        <tr>
            <th>最后登陆时间</th>
            <td>{{ user.lastLogin|date('Y-m-d H:i:s') }}</td>
        </tr>


        <tr>
            <th>Roles</th>
            <td>
                <ul class="list">
                    {%for role in user.roles %}
                        <li>{{role}}</li>
                    {%endfor%}
                </ul>
            </td>
        </tr>

        </tbody>
    </table>
    <div class="clearfix">
        <div class="pull-right">
            {% if user.enabled %}
                <a class="btn btn-danger btn_delete" onclick="return confirm('确定禁用?')"
                   href="{{ path('user_disable', { 'id': user.id }) }}">禁用</a>
            {% else %}
                <a class="btn btn-success" onclick="return confirm('确定启用?')"
                   href="{{ path('user_enable', { 'id': user.id }) }}">启用
                </a>
            {% endif %}
        </div>
    </div>
{% endblock %}
4:建立权限—修改security.yml
# app/config/security.yml
security:
    encoders:
        FOSUserBundleModelUserInterface: bcrypt

    role_hierarchy:
        ROLE_BLOG:         ROLE_USER
        ROLE_ADMIN:        ROLE_BLOG
        ROLE_PENG:         [ROLE_ADMIN,ROLE_BLOG]
    providers:
        fos_userbundle:
            id: fos_user.user_provider.username

    firewalls:
        main:
            pattern: ^/
            form_login:
                provider: fos_userbundle
#                csrf_provider: security.csrf.token_manager
                csrf_token_generator: security.csrf.token_manager
                remember_me: true
                default_target_path: /admin
            remember_me:
                always_remember_me: true
                lifetime: 2592000 #month
                secret: "%secret%"
            logout:       true
            anonymous:    true


    access_control:
        - { path: ^/login$, role: IS_AUTHENTICATED_ANONYMOUSLY }
#        - { path: ^/register, role: IS_AUTHENTICATED_ANONYMOUSLY }
#        - { path: ^/resetting, role: IS_AUTHENTICATED_ANONYMOUSLY }
#        - { path: ^/admin/,         roles: ROLE_ADMIN }
        - { path: ^/admin/blog/,         roles: ROLE_USER }
        - { path: ^/admin/user/,         roles: ROLE_PENG }
        - { path: ^/, role: IS_AUTHENTICATED_ANONYMOUSLY }
5:给user实体添加验证,不要忘了use导入:
<?php

namespace AppBundleEntity;
use FOSUserBundleModelUser as BaseUser;
use DoctrineORMMapping as ORM;
use SymfonyBridgeDoctrineValidatorConstraintsUniqueEntity;


/**
 * @ORMEntity
 * @ORMTable(name="dream_user")
 * @UniqueEntity("username",message="用户名已经存在")
 * @UniqueEntity("email",message="邮箱已经存在")
 */
class User extends BaseUser
{
    const ROLE_USER      = 'ROLE_USER';//平台用户
    //构造函数
    public function __construct()
    {
        parent::__construct();
        $this->addRole(self::ROLE_USER);
        $this->setEnabled(true);
        // your own logic
    }

    /**
     * @ORMId
     * @ORMColumn(type="integer")
     * @ORMGeneratedValue(strategy="AUTO")
     */
    protected $id;


}
到此为止,用户管理,以及权限划分已经完成;
我现在需要重新写一个登陆页面:
1: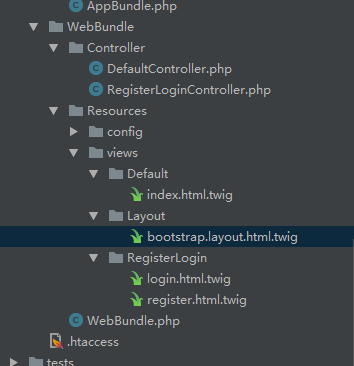
首先加入一个bootstrap.layout.html.twing布局样式, 登陆页 login.html.twing;
2:添加RegisterLoginController.php; 代码如下:
<?php

namespace WebBundleController;


use SensioLabsSecuritySecurityChecker;
use SymfonyBundleFrameworkBundleControllerController;
use SensioBundleFrameworkExtraBundleConfigurationRoute;
use SensioBundleFrameworkExtraBundleConfigurationMethod;
use SensioBundleFrameworkExtraBundleConfigurationTemplate;
use SymfonyComponentHttpFoundationRequest;
use SymfonyComponentHttpFoundationResponse;
use SymfonyComponentHttpFoundationRedirectResponse;
use SymfonyComponentSecurityCoreSecurity;


class RegisterLoginController extends Controller
{

    /**
     * @Route("/login", name="Blog_Login")
     * @Method({"GET","POST"})
     * @Template()
     */
    public function loginAction(Request $request)
    {
        $param =  array();
        $securityChecker = $this->get('security.authorization_checker');
        if($securityChecker->isGranted('IS_AUTHENTICATED_FULLY')){
            //已登录
//            return $this->redirectToRoute('homepage');
        }

        if($request->getMethod()==='POST'){
            $username = $request->request->get('username');
            $plainPassword = $request->request->get('password');
            $em = $this->getDoctrine()->getManager();
            $member = $em->getRepository('AppBundle:User')
                ->findOneBy(['username'=>$username]);
            $encoder = $this->get('security.password_encoder');

            if($member&&$encoder->isPasswordValid($member,$plainPassword)){
                //成功登录
                $loginManager = $this->get('fos_user.security.login_manager');
                $response = new RedirectResponse($this->generateUrl('homepage'),301);
                $member->setLastLogin(new DateTime());
                $em->persist($member);
                $em->flush();
                $loginManager->logInUser('main',$member,$response);
                return $response;
            }else{
                //failure
                $this->addFlash(
                    'danger',
                    '身份验证失败,请检查用户名与密码'
                );
            }
        }
        return $param;
    }


}
3:<a class="page-scroll" href="{{path('Blog_Login')}}">登录</a>
完成一个登陆页面,样式可以调整,我使用的是Bootstartp;
------------------------------------------------------------------------------------------------
到此为止,基本框架都可以,如需调整就是细节调整了,那么现在就开始写最重要的
文章发布;前台页面;
------------------=================-------------------------
后台文章发布
前台页面展示:
现在要写前台页面:
1)建立基本 bootstrapLayout.html.twig
<!DOCTYPE html>
<html lang="zh_CN">
<head>
    <meta charset="utf-8">
    <meta http-equiv="X-UA-Compatible" content="IE=edge">
    <meta name="viewport" content="width=device-width, initial-scale=1">
    <meta name="description" content="">
    <meta name="author" content="">

    <title>{% block title %}{% endblock %}</title>

    <link rel="stylesheet" href="http://cdn.bootcss.com/bootstrap/3.3.0/css/bootstrap.min.css">
    <link rel="stylesheet" href="https://cdnjs.cloudflare.com/ajax/libs/ionicons/2.0.1/css/ionicons.min.css">

    <!--[if lt IE 9]>
    <script src="https://oss.maxcdn.com/libs/html5shiv/3.7.0/html5shiv.js"></script>
    <script src="https://oss.maxcdn.com/libs/respond.js/1.4.2/respond.min.js"></script>
    <![endif]-->

</head>
<body>
{%block body%}
    {%block header%}{%include "WebBundle:Common:_header.html.twig"%}{%endblock%}
    <div class="container main-content">
        {%block main%}
        {%endblock%}
    </div>
    {%block footer%}{%include "WebBundle:Common:_footer.html.twig"%}{%endblock%}
{%endblock%}
</body>
</html>
2) 建立基本 Sidebar Layout
src/WebBundle/Resources/views/Layout/sidebarLayout.html.twig
{%extends "WebBundle:Layout:bootstrapLayout.html.twig"%}
{%block header%}{%include "WorkshopFrontendBundle:Common:_header.html.twig"%}{%endblock%}
{%block footer%}{%include "WorkshopFrontendBundle:Common:_footer.html.twig"%}{%endblock%}
{%block main%}
<div class="row">
<div class="col-md-3" style="border: 1px solid;height: 300px;">sidebar</div>
<div class="col-md-9" role="main">{%block content%}{%endblock%}</div>
</div>
{%endblock%}
接着设定好前台的 header 跟 footer
src/WebBundle/Resources/views/Common/_header.html.twig
<header role="header">
    <div class="page-header">
        <h1>Example page header <small>Subtext for header</small></h1>
    </div>
</header>
src/WebBundle/Resources/views/Common/_footer.html.twig
<footer role="footer" class="bs-footer">
    <div class="container text-center">
        This is footer.
    </div>
</footer>
3) 首页显示目前所有文章的列表
透过 Doctrine Entity Manager 读出所有文章。

src/WebBundle/Controller/DefaultController.php
<?php

namespace WebBundleController;

use SymfonyBundleFrameworkBundleControllerController;
use SensioBundleFrameworkExtraBundleConfigurationRoute;
use SensioBundleFrameworkExtraBundleConfigurationTemplate;

class DefaultController extends Controller
{
    /**
     * @Route("/",name="welcome")
     * @Template()
     */
    public function indexAction()
    {
        $em = $this->getDoctrine()->getManager();
        $posts = $em->getRepository('AppBundle:Post')
            ->findBy(array(), array('id' => 'desc'));
        return array('posts'=>$posts);
    }
}
为了方便共用文章列表,我们将文章列表抽出独立成一个 partial view。
src/WebBundle/Resources/views/Post/_list.html.twig
{%for post in posts%}
<div class="page-header">
    <h1>{{post.subject}} <small>{{post.createdAt|date('Y-m-d H:i:s')}}</small></h1>
</div>
<p>{{post.content}}</p>
{%endfor%}
4) 设定 Sidebar 內容,显示所有的分类目录
建立一个 Category Controller 修改sidebar 内容
<?php

namespace WebBundleController;
use SymfonyBundleFrameworkBundleControllerController;
use SensioBundleFrameworkExtraBundleConfigurationRoute;
use SensioBundleFrameworkExtraBundleConfigurationTemplate;
use AppBundleEntityCategory;
use AppBundleEntityPost;
use SymfonyComponentHttpFoundationRequest;

/**
 * @Route("/category")
 */
class CategoryController extends Controller
{
    /**
     * @Template()
     */
    public function _categoryAction(Request $request)
    {
        $currentCategory = $request->get('currentCategory');
        $em = $this->getDoctrine()->getManager();
        $categories = $em->getRepository('AppBundle:Category')
            ->createQueryBuilder('c')
            ->orderBy('c.id', 'asc')
            ->getQuery()
            ->getResult();
        return array('categories' => $categories, 'currentCategory' => $currentCategory);
    }


    /**
     * @Route("/{id}-{name}", name="@categoryIndex")
     * @Template()
     */
    public function indexAction(Category $category)
    {
        $em = $this->getDoctrine()->getManager();
        $posts = $em->getRepository('AppBundle:Post')
            ->findBy(array('category' => $category), array('id' => 'desc'));
        return array('category' => $category, 'posts' => $posts);
    }

}
{%if currentCategory is not defined%}
    {%set currentCategory = null%}
{%endif%}
{%extends "WebBundle:Layout:bootstrapLayout.html.twig"%}
{%block title %}我的博客 | dreamstart{% endblock %}
{%block header%}{%include "WebBundle:Common:_header.html.twig"%}{%endblock%}
{%block footer%}{%include "WebBundle:Common:_footer.html.twig"%}{%endblock%}

{%block main%}
    <div class="row">
        <div class="col-md-3">{{ render(controller("WebBundle:Category:_category",{currentCategory: currentCategory}))}}</div>
        <div class="col-md-9" role="main">{%block content%}{%endblock%}</div>
    </div>
{%endblock%}
修改src/WebBundle/Resources/views/Category/_category.html.twig
<ul style="max- 300px;" class="nav nav-pills nav-stacked">
{%for category in categories%}
<li{%if currentCategory and currentCategory.id == category.id%} class="active"{%endif%}><a href="{{path('@categoryIndex', {id: category.id, name: category.name})}}">{{category.name}}</a></li>
{%endfor%}
</ul>
修改src/WebBundle/Resources/views/Category/index.html.twig
{%extends "WebBundle:Layout:sidebarLayout.html.twig"%}
{%set currentCategory = category%}
{% block content %}
{%include "WebBundle:Post:_list.html.twig" with {posts: posts}%}
{% endblock %}
建立一个PostController
<?php
/**
 * Created by PhpStorm.
 * User: peng
 * Date: 2017/5/7
 * Time: 23:51
 */

namespace WebBundleController;

use SymfonyBundleFrameworkBundleControllerController;
use SensioBundleFrameworkExtraBundleConfigurationRoute;
use SensioBundleFrameworkExtraBundleConfigurationTemplate;
use AppBundleEntityPost;

/**
 * @Route("/post")
 */
class PostController extends Controller
{
    /**
     * @Route("/{id}-{name}.html", name="@postView")
     * @Template()
     */
    public function viewAction(Post $post)
    {
        return array('post' => $post);
    }

}
修改src/WebBundle/Resources/views/Post/_list.html.twig
{%for post in posts%}
    <div class="page-header">
        <a href="{{path('@postView', {id: post.id, name: post.name})}}"><h1>{{post.name}} <small>{{post.created|date('Y-m-d H:i:s')}}</small></h1></a>
    </div>
    <p>{{post.content}}</p>
{%endfor%}
src/WebBundle/Resources/views/Post/view.html.twig
{%extends "WebBundle:Layout:sidebarLayout.html.twig"%}

{% block content %}
    <div class="page-header">
        <a href="{{path('@postView', {id: post.id, name: post.name})}}"><h1>{{post.name}} <small>{{post.created|date('Y-m-d H:i:s')}}</small></h1></a>
    </div>
    <p>{{post.content|nl2br}}</p>
{% endblock %}
到此前台文章列表,分类类别,点击分类都已实现;
----------------------------------------------------------------------------------
现在我添加了一个评论功能,
需要全部代码的可以扫上面微信也
可以关注我另一个微信公众号Coding手艺人,微信号:coding_craftsman
---------------------------------------------------------
接下来我需要写一个图片上传功能,在文章里添加图片
1:修改 Post Entity
use SymfonyComponentHttpFoundationFileUploadedFile;
以下是文件上传部分代码:
  /**
     *
     * @var UploadedFile
     */
    protected $file;

    /**
     * @var string
     *
     * @ORMColumn(name="filename", type="string", length=255, nullable=true)
     */
    private $filename;

    protected function getUploadRootDir()
    {
        return realpath(__DIR__.'/../../../../../web').'/'.$this->getUploadDir();
    }
    protected function getUploadDir()
    {
        return 'uploads/images';
    }
    public function getWebPath()
    {
        if($this->filename === null){
            return null;
        }

        return $this->getUploadDir().'/'.$this->filename;
    }

    public function getAbsolutePath()
    {
        if($this->filename === null){
            return null;
        }
        return $this->getUploadRootDir().'/'.$this->filename;
    }

    public function setFile(UploadedFile $file = null)
    {
        $this->file = $file;
    }
    /**
     *
     * @return UploadedFile
     */
    public function getFile()
    {
        return $this->file;
    }

    public function upload()
    {
        if($this->file === null){
            return;
        }

        if(!file_exists($this->getUploadRootDir())){
            mkdir($this->getUploadRootDir(), 0777, true);
        }

        $this->filename = "{$this->getId()}.{$this->getFile()->guessExtension()}";

        $this->getFile()->move($this->getUploadRootDir(), $this->filename);

        $this->setFile(null);
    }

//文件上穿部分代码结束