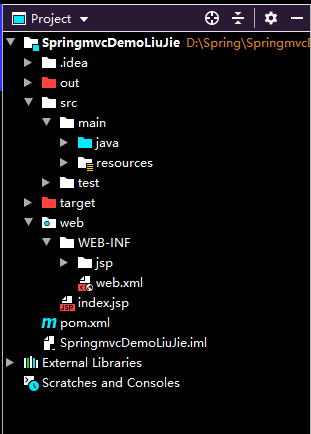
新建项目:SpringmvcDemoLiuJie
导包:MySQL驱动包、框架基础包、添加MyBatis核心配置文件
添加web
右键SpringmvcDemoLiuJie项目名——Add Framework Support——Versions4.0——Create web.xml(自动创建web.xml)——ok
配置SpringMVC
引入依赖
<dependencies>
    <dependency>
        <groupId>junit</groupId>
        <artifactId>junit</artifactId>
        <version>4.13.2</version>
        <scope>test</scope>
    </dependency>
    <dependency>
        <groupId>org.springframework</groupId>
        <artifactId>spring-webmvc</artifactId>
        <version>5.2.13.RELEASE</version>
    </dependency>
    <dependency>
        <groupId>javax.servlet</groupId>
        <artifactId>servlet-api</artifactId>
        <version>2.5</version>
    </dependency>
    <dependency>
        <groupId>javax.servlet</groupId>
        <artifactId>javax.servlet-api</artifactId>
        <version>4.0.1</version>
        <scope>provided</scope>
    </dependency>
</dependencies>
刷新Maven自动下载
配置静态资源导出
<build>
    <resources>
        <resource>
            <directory>src/main/java</directory>
            <includes>
                <include>**/*.properties</include>
                <include>**/*.xml</include>
            </includes>
            <filtering>false</filtering>
        </resource>
        <resource>
            <directory>src/main/resources</directory>
            <includes>
                <include>**/*.properties</include>
                <include>**/*.xml</include>
            </includes>
            <filtering>false</filtering>
        </resource>
    </resources>
</build>

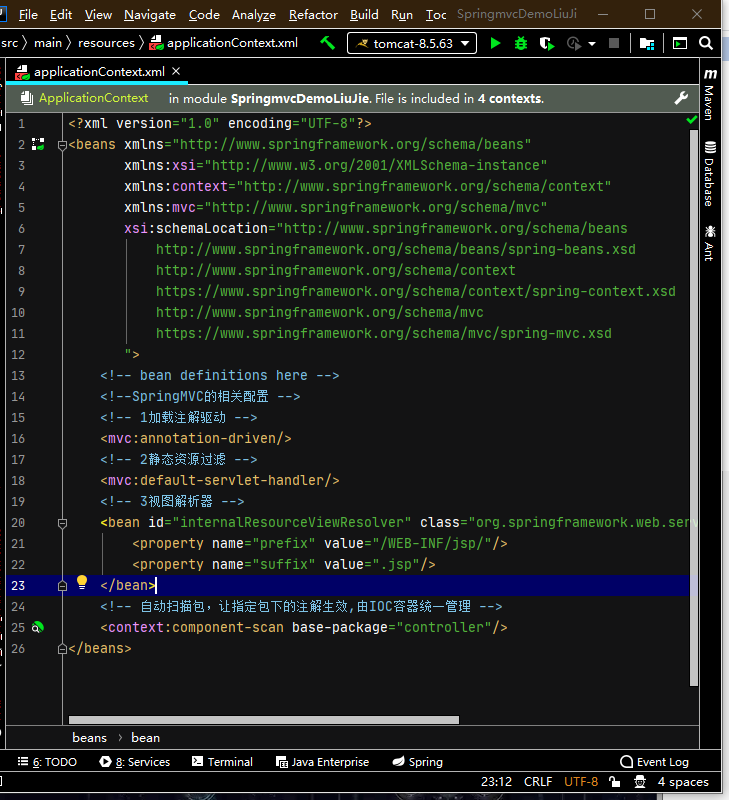
Spring核心配置文件
main——resources——applicationContext.xml
添加SpringMVC配置内容
1.加载注解驱动
注册DefaultAnnotationHandlerMapping和AnnotationMethodHandlerAdapter实例,
可以用annotation-driven配置自动完成注入
<!-- 1加载注解驱动 -->
<mvc:annotation-driven/>
2.静态资源过滤
<!-- 2静态资源过滤 -->
<mvc:default-servlet-handler/>
3.视图解析器——自动添加前后缀
<!-- 3视图解析器 -->
<bean id="internalResourceViewResolver" class="org.springframework.web.servlet.view.InternalResourceViewResolver">
    <property name="prefix" value="/WEB-INF/jsp/"/>
    <property name="suffix" value=".jsp"/>
</bean>
controller包:HelloController

配置Spring容器自动扫描包
applicationContext.xml
<!-- 自动扫描包,让指定包下的注解生效,由IOC容器统一管理 -->
<context:component-scan base-package="controller"/>
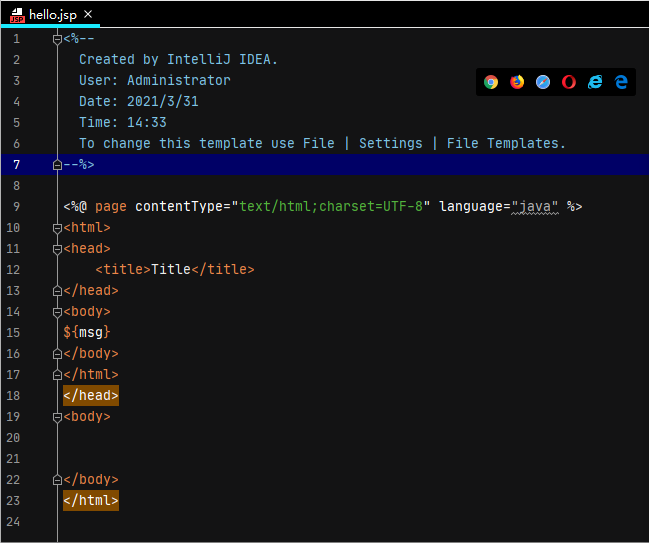
编写jsp
WEB—INF包:
新建jsp包—hello.jsp
<%@ page contentType="text/html;charset=UTF-8" language="java" %>
<html>
<head>
    <title>Title</title>
</head>
<body>
    ${msg}
</body>
</html>
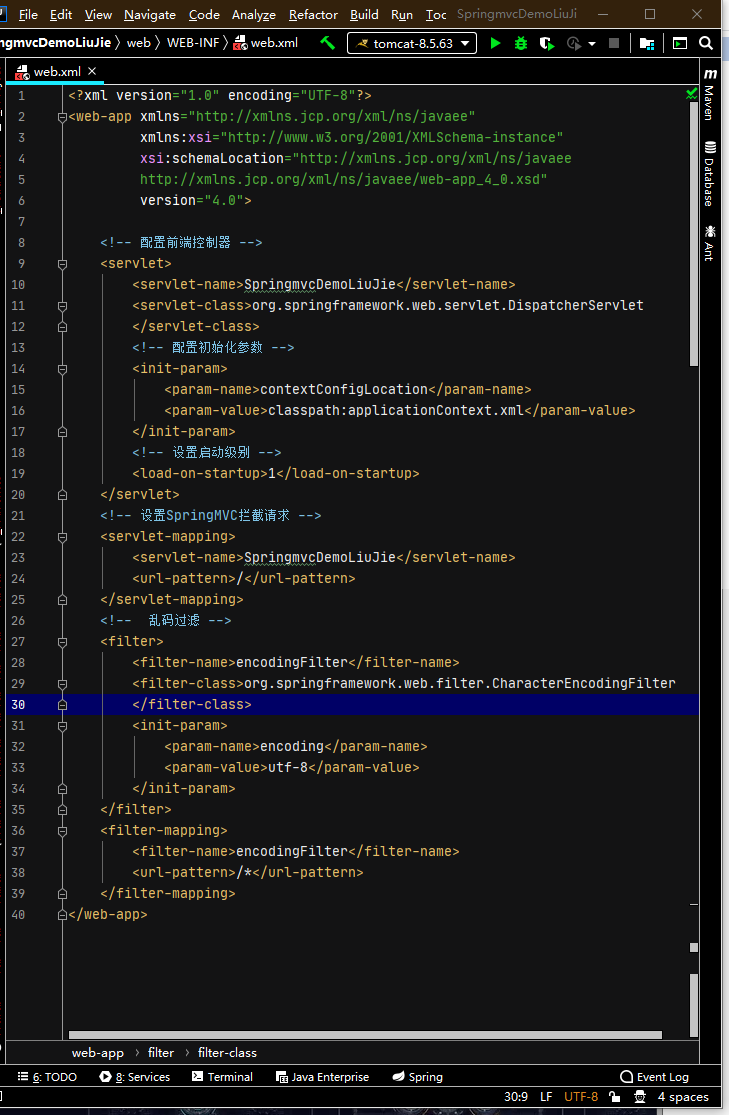
编写web.xml
1.配置前端控制器
<!-- 配置前端控制器 -->
<servlet>
    <servlet-name>springmvc</servlet-name>
    <servlet-class>org.springframework.web.servlet.DispatcherServlet</servlet-class>
</servlet>
2.配置初始化参数
<!-- 配置初始化参数 -->
<init-param>
    <param-name>contextConfigLocation</param-name>
    <param-value>classpath:applicationContext.xml</param-value>
</init-param>
3.设置启动级别
<!-- 设置启动级别 -->
<load-on-startup>1</load-on-startup>
4.设置SpringMVC拦截请求
<!-- 设置SpringMVC拦截请求 -->
<servlet-mapping>
    <servlet-name>springmvc</servlet-name>
    <url-pattern>/</url-pattern>
</servlet-mapping>
5.配置中文乱码过滤器
<!--  乱码过滤 -->
<filter>
    <filter-name>encodingFilter</filter-name>
    <filter-class>org.springframework.web.filter.CharacterEncodingFilter</filter-class>
    <init-param>
        <param-name>encoding</param-name>
        <param-value>utf-8</param-value>
    </init-param>
</filter>
<filter-mapping>
    <filter-name>encodingFilter</filter-name>
    <url-pattern>/*</url-pattern>
</filter-mapping>
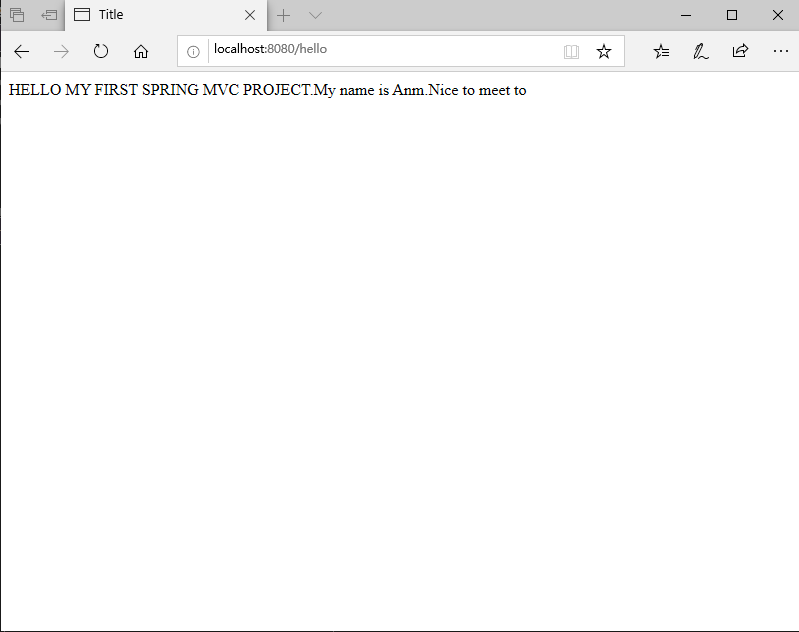
运行web项目
打包:file——Project Structure打开项目构建管理框
删除默认包

添加WAR包
点+号——Web Application:Exploded——From Modules——依次点击ok
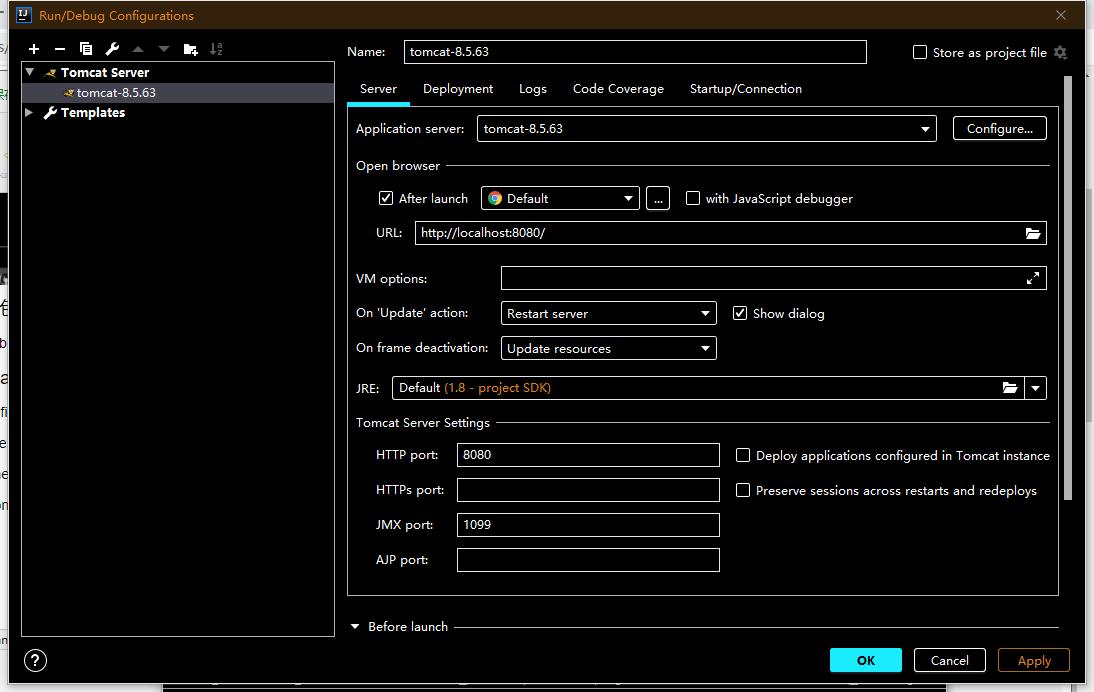
配置TomCat
点击 Add Configuration… 进入运行配置框
点击 Configure 选择我们自己的TomCat
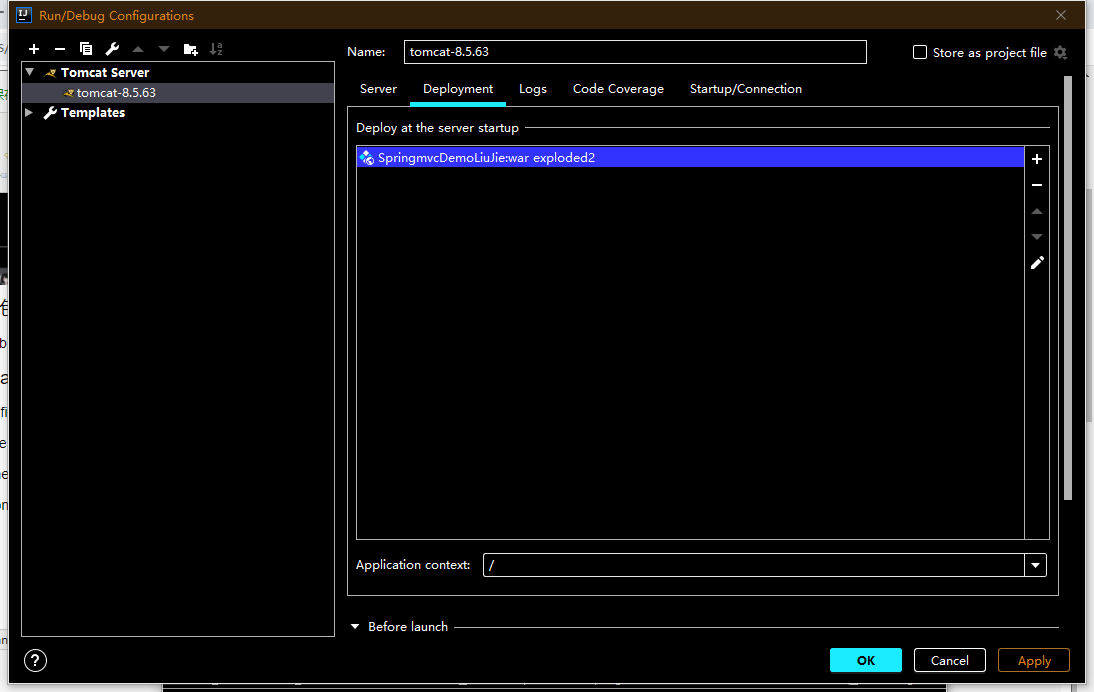
点击 Deployment -> + 号 -> Artifact——自动加入导好的包
Application context 改成/是为了方便在浏览器输入路径
运行Tomcat
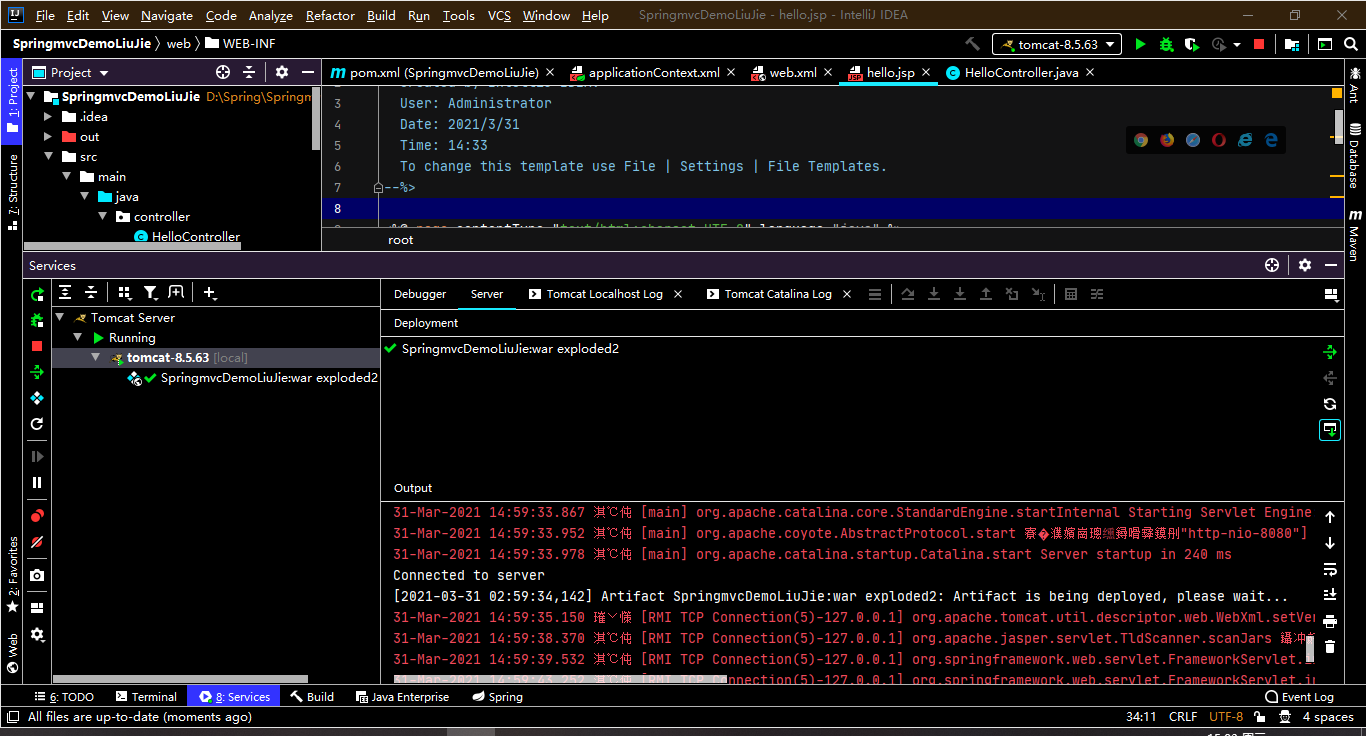
在浏览器输入 http://localhost:8080/hello