S3 & CloudFront
In this hands-on exercise, you will access private S3 bucket content via a Cloud Front distribution. You will also learn that CloudFront, after caching, speeds up the delivery of content to your website.
- Prerequisites: AWS Account
- By the end of this lab, you will be able to:
- Create and configure a bucket
- Upload an object to a bucket
- Create distribution
Follow the exercise instructions described below:
Step 1. Create S3 Bucket
- From the AWS Management Console page, select the S3 service.
- Use the Create bucket wizard to create a bucket with the following details:
| Field | Value |
|---|---|
| Bucket name | Your choice Bucket name must be globally unique |
| Region | Default |
| Block all public access | Turn on Block the public access. |
| Bucket Versioning | Disable |
| Server-side encryption | Disable |
- Once the bucket is created, you will be taken to the Buckets dashboard. Click on the bucket name to view the details, and upload files and folders.
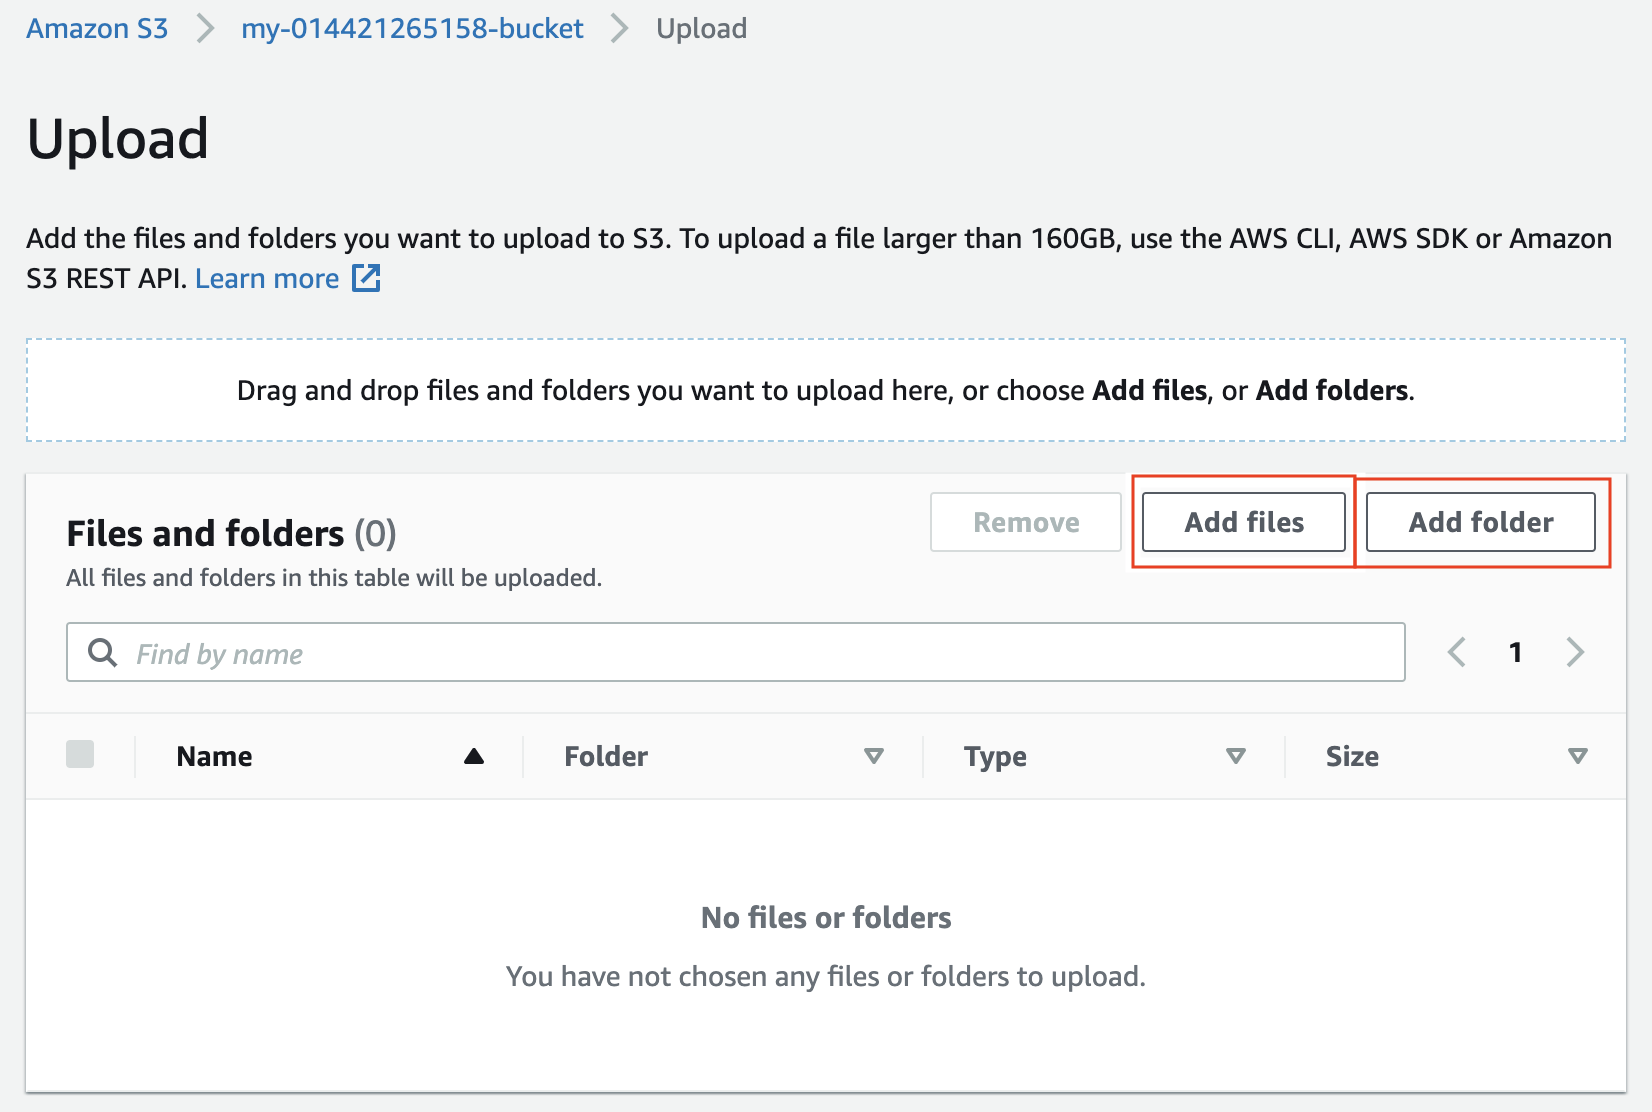
Click the "Add files" to upload a file
Step 2. Upload Object to Bucket
- Once the bucket is open to view its contents, click the Upload button to add files/folders.
- Click the Add Files button, and upload the Sample.html (or any file from your local computer) provided at the bottom of the current page.
- Note that the Bucket has not allowed public access, therefore, the
Sample.htmlfile cannot be accessed via its object URL, such ashttps://my-014421265158-bucket.s3.us-east-2.amazonaws.com/Sample.html.
Note - In the steps above, the object URL will be different in your case.
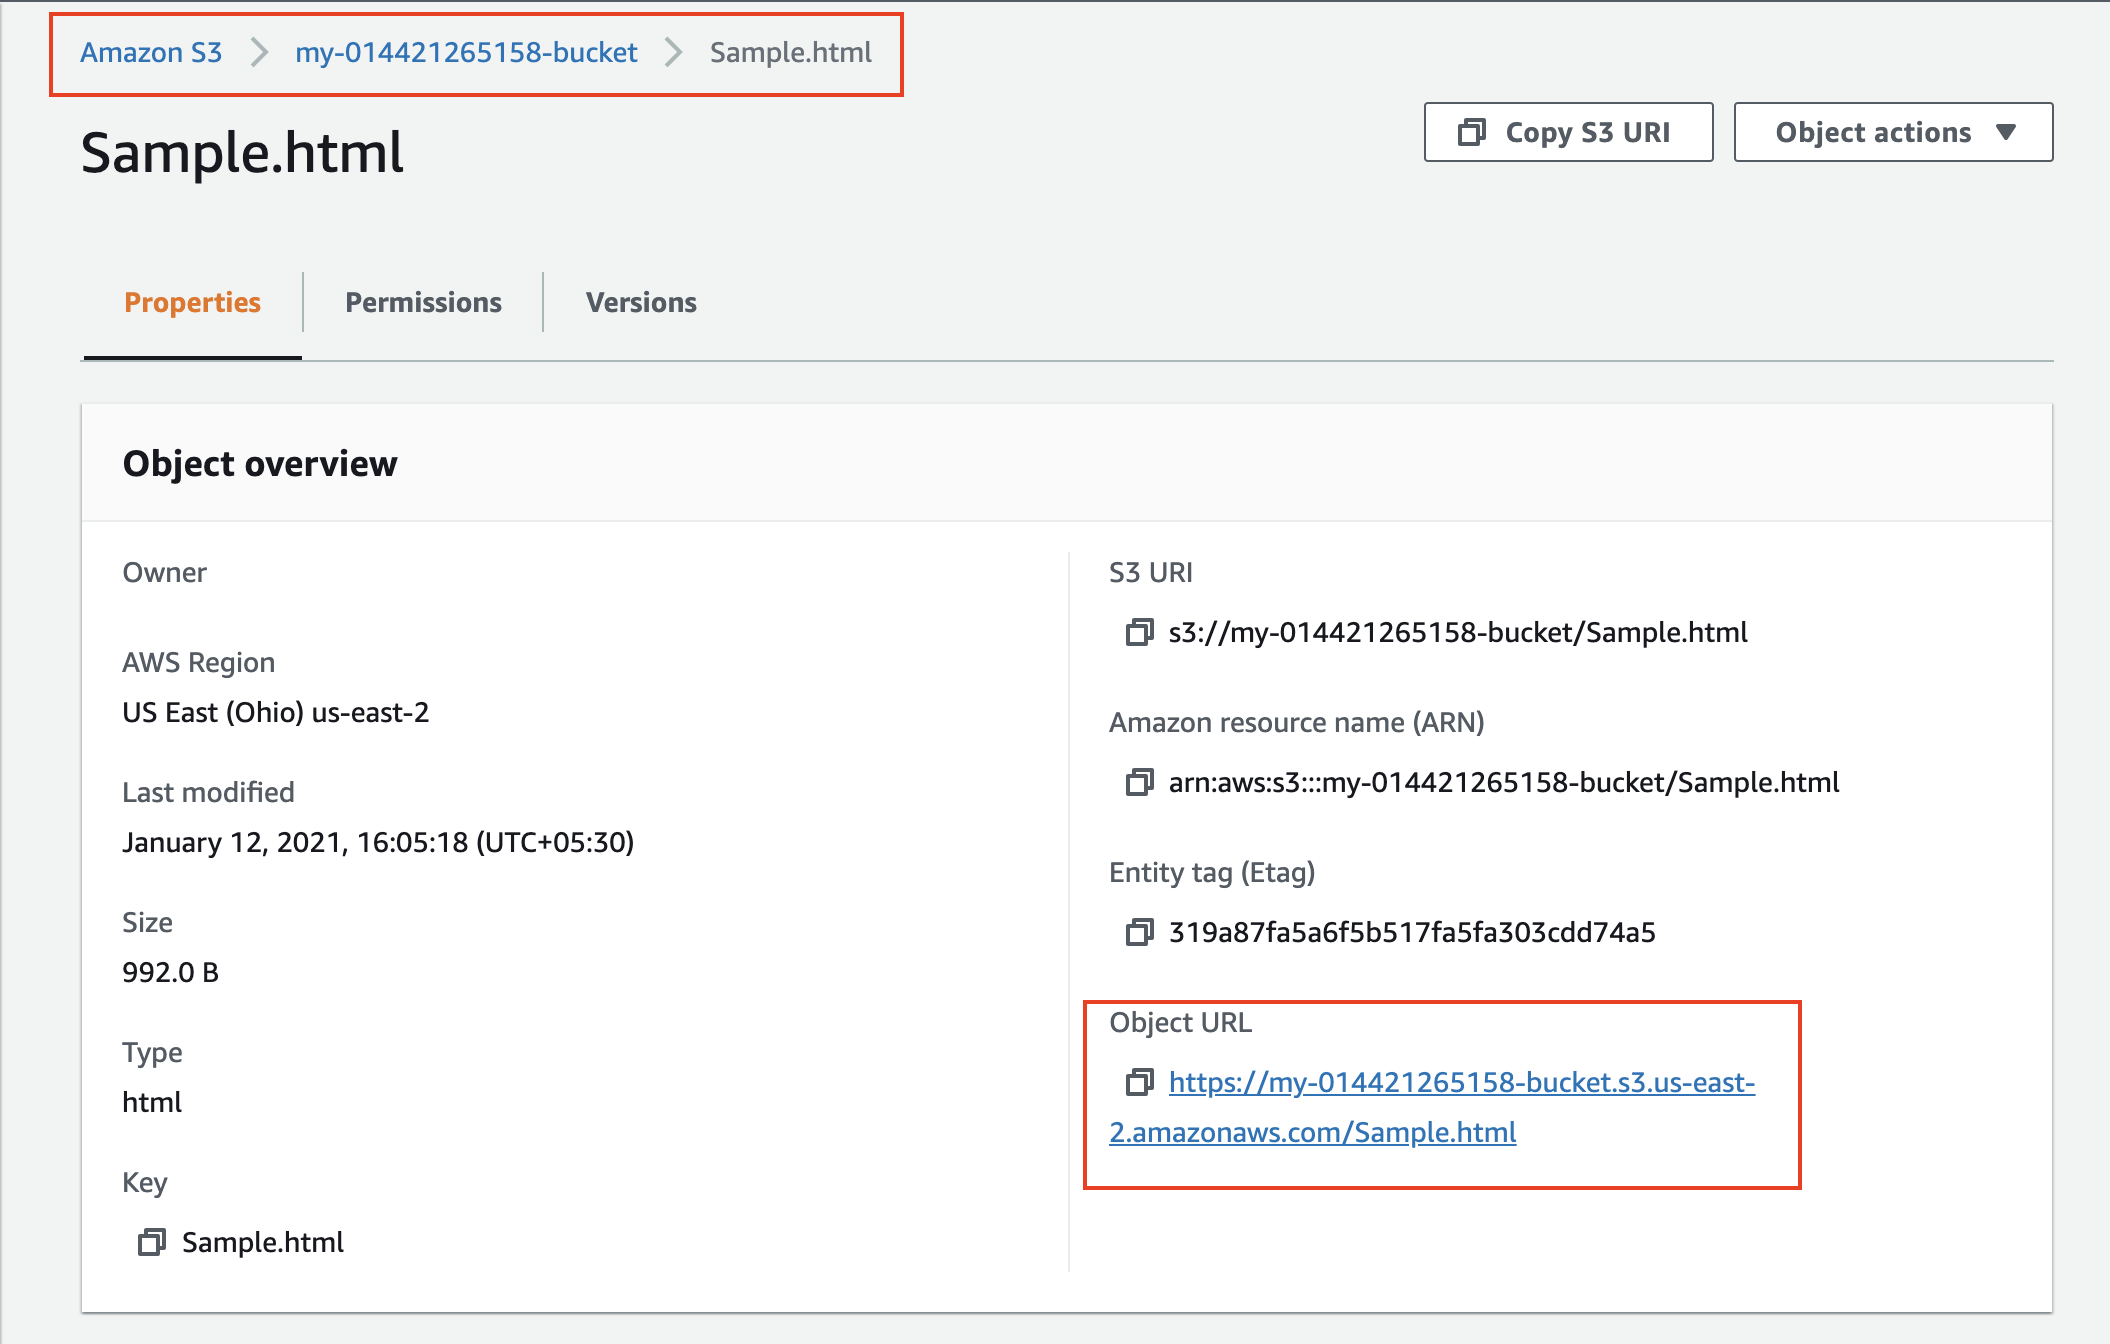
The figure above shows how to copy the S3 object URL.
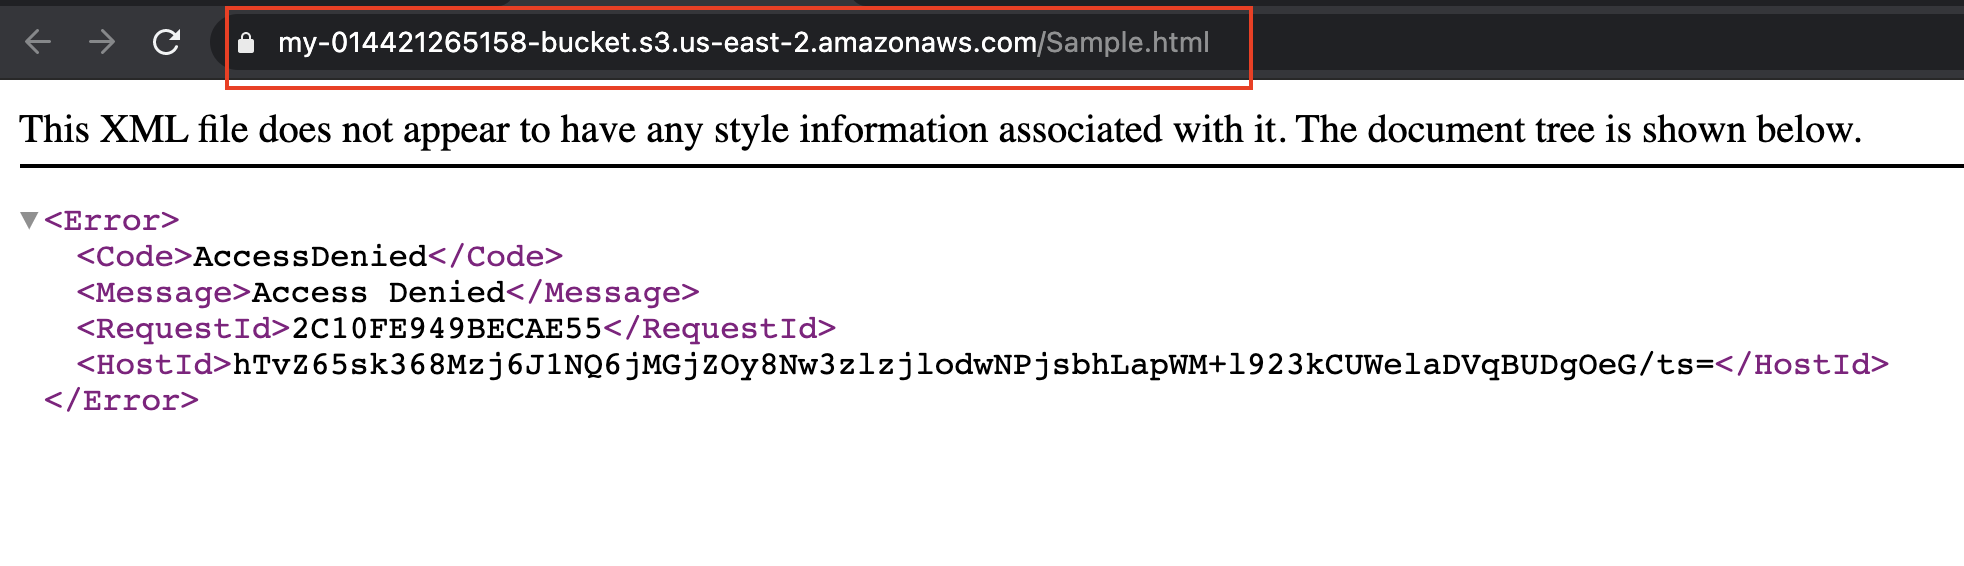
The figure above shows AccessDenied error while trying to access the file via its S3 object URL

The figure above shows that the individual object (Sample.html) has no public access.
Step 3. Create CloudFront Distribution
- Select the CloudFront service from the Services menu at the top left corner of your AWS console.
- Start the Create Distribution wizard.
- Under the Web delivery method, click the Get Started button, and use the following details to create a distribution:
| Section | Field | Value |
|---|---|---|
| Origin Settings | Origin Domain Name | Select the S3 bucket that you created in the step above |
| Origin Path | Enter / to indicate the root level |
|
| Restrict Bucket Access | Yes | |
| Origin Access Identity | Create a New Identity (Allow access to the S3 content using CloudFront URL) |
|
| Grant Read Permission on Bucket | Yes, Update Bucket Policy Automatically updates the bucket access policy in S3 to allow CloudFront to access the bucket content |
|
| Default Cache Behavior Settings | Viewer Protocol Policy | Redirect HTTP to HTTPS |
In the configuration table above, the Grant Read Permission on Bucket says that "Yes, update access bucket policy automatically to allows the Origin Access Identity user access to the bucket content." Origin Access Identity user represents the CloudFront service. The policy is a JSON file that defines the access permissions to the bucket object.
- Leave the defaults for the rest of the options. It may take up to 10 minutes for the CloudFront Distribution to get created. Upon successful creation of the CloudFront distribution, the S3 bucket access policy will also get updated automatically, as shown below.
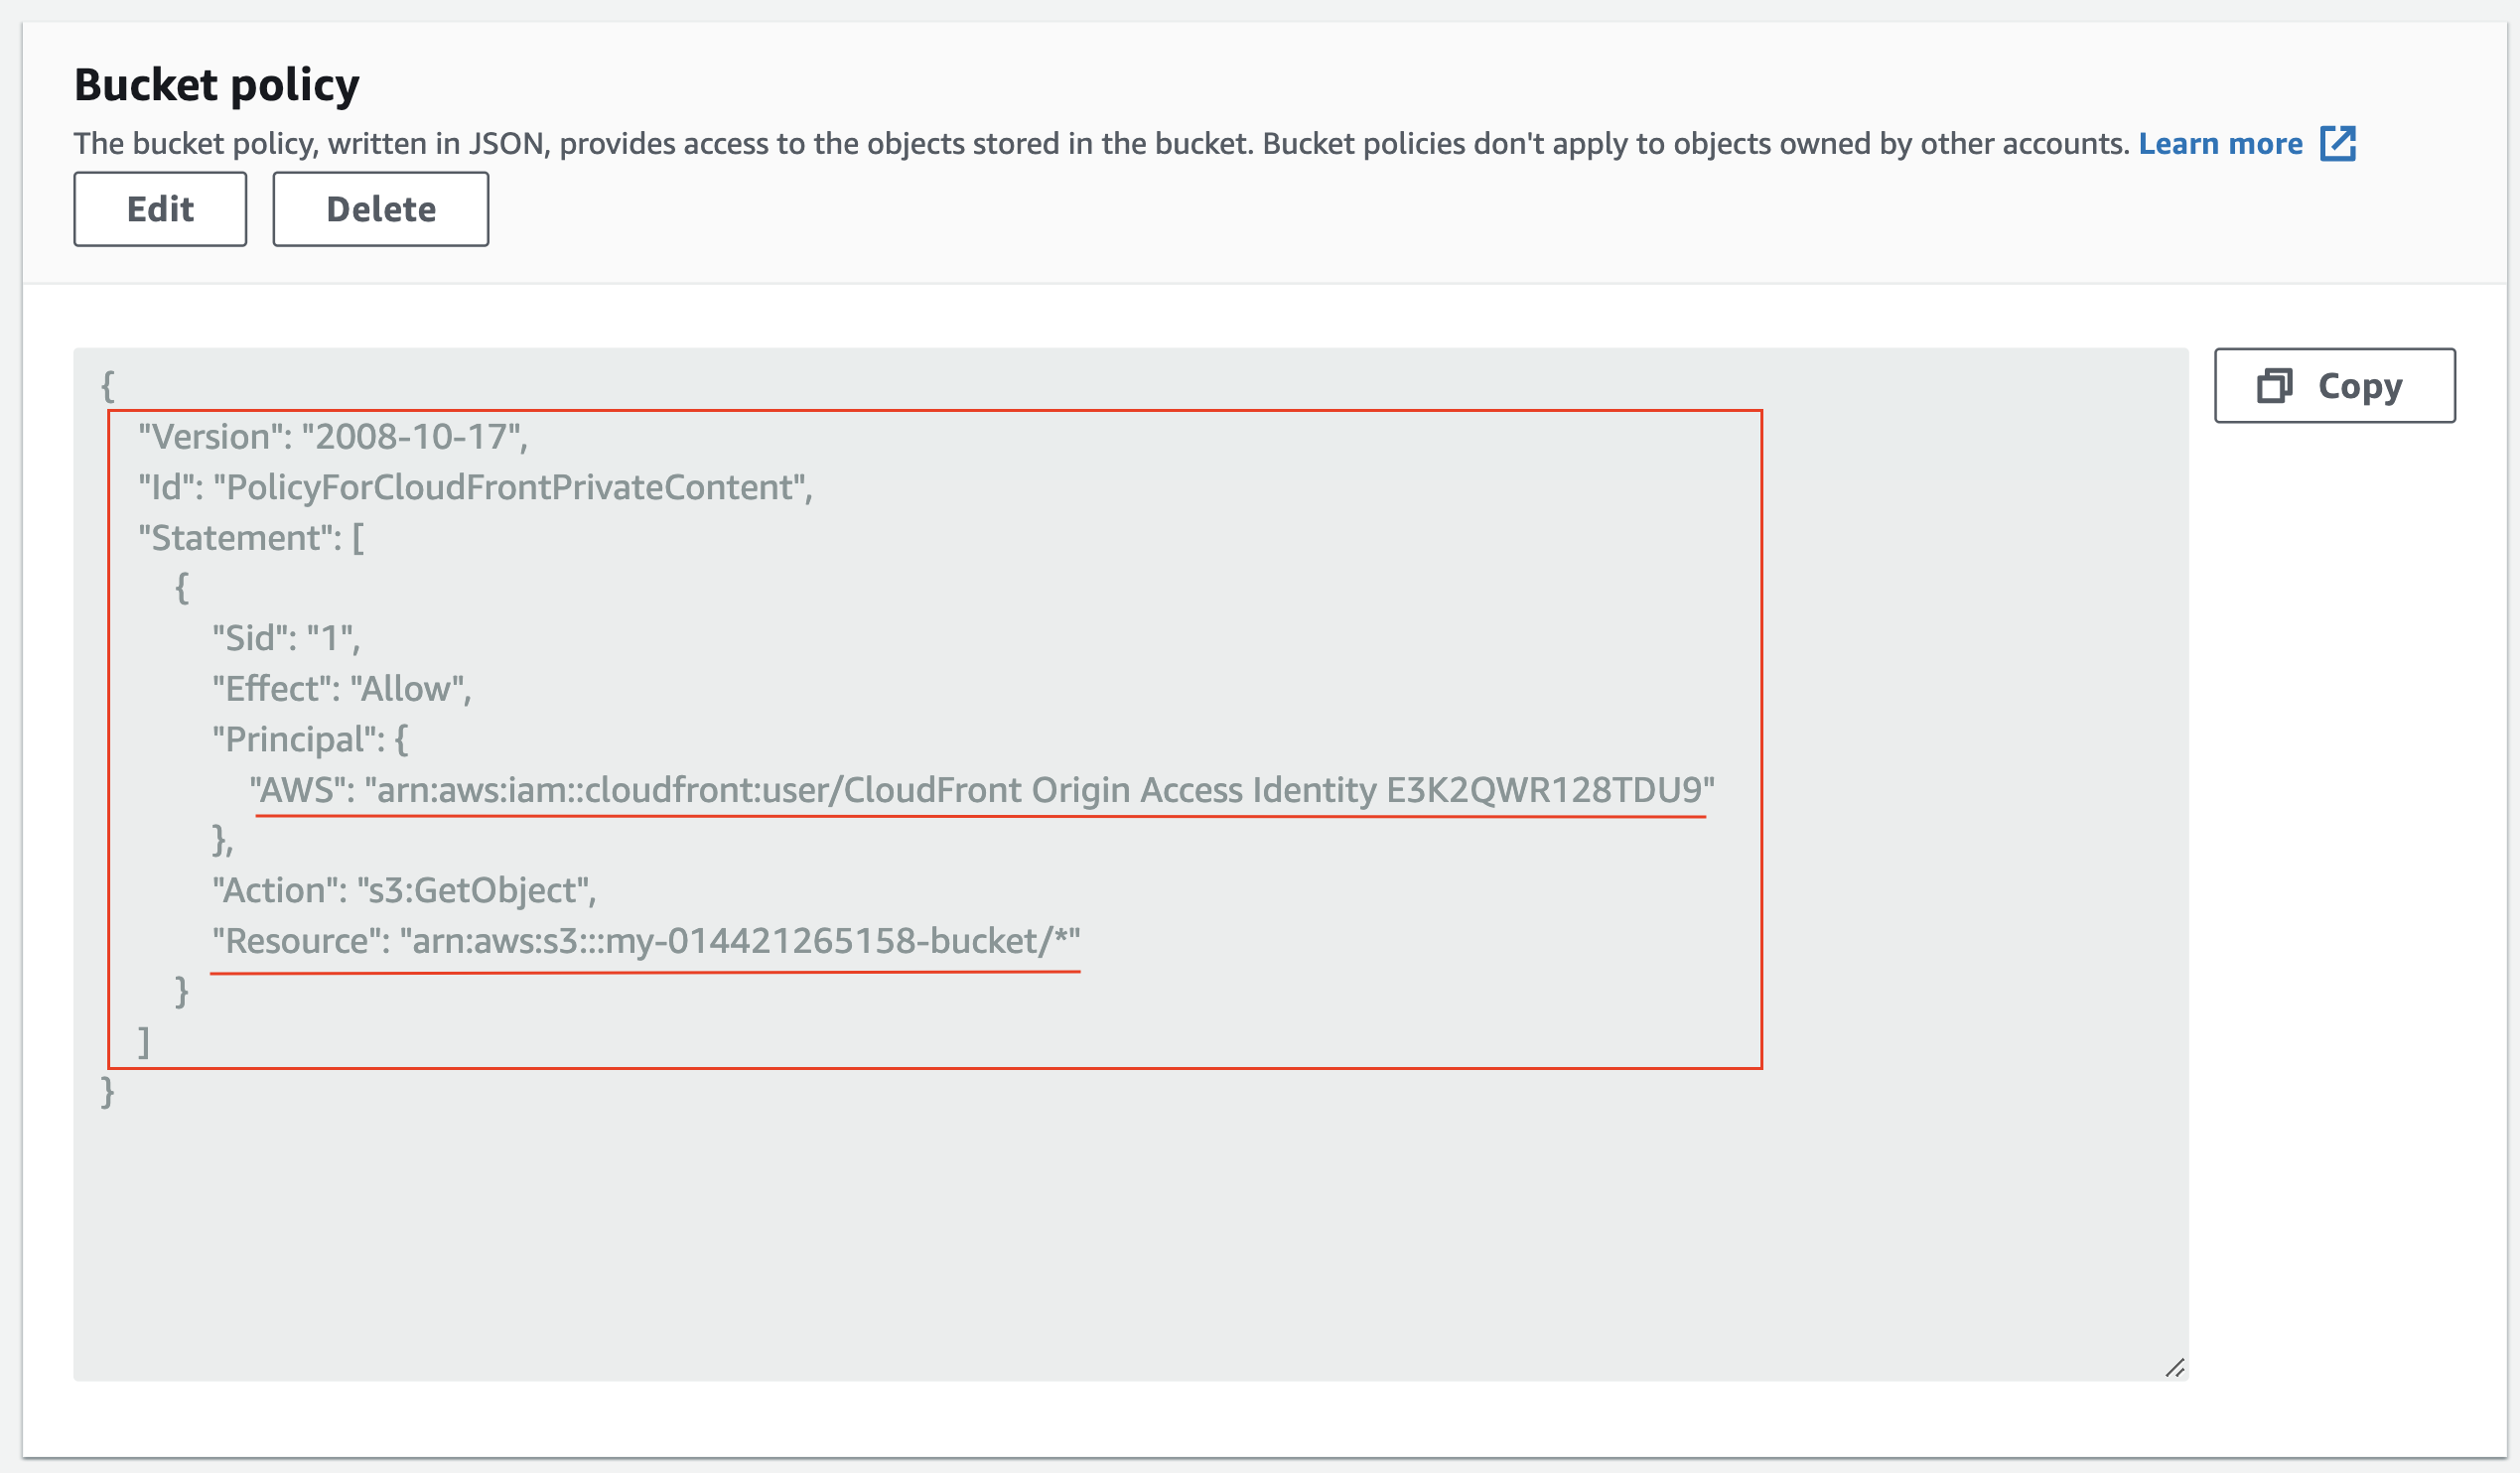
The figure above shows the updated S3 access policy. We will learn more about the access policies in the upcoming lessons.
- Once your CloudFront distribution is created, and the status shows as Deployed, copy its Domain Name (such as,
dgf7z6g067r6d.cloudfront.net) and append/Sample.htmlbefore pasting it in a new browser.
- For the initial few attempts, your
https://dgf7z6g067r6d.cloudfront.net/Sample.htmlmay redirect tohttps://my-014421265158-bucket.s3.us-east-2.amazonaws.com/Sample.html, which is why you may still see anAccessDeniederror.
Note - Remember, as soon as your CloudFront distribution is Deployed, it attaches to S3 and starts caching the S3 private pages. Once the caching is complete, the CloudFront domain name URL will stop redirecting to the S3 object URL. CloudFront may take 10-30 minutes (or more) to cache the S3 page, and you will be able to view the webpage, as shown below.
Note - In the steps above, the exact domain name and the object URL will be different in your case.
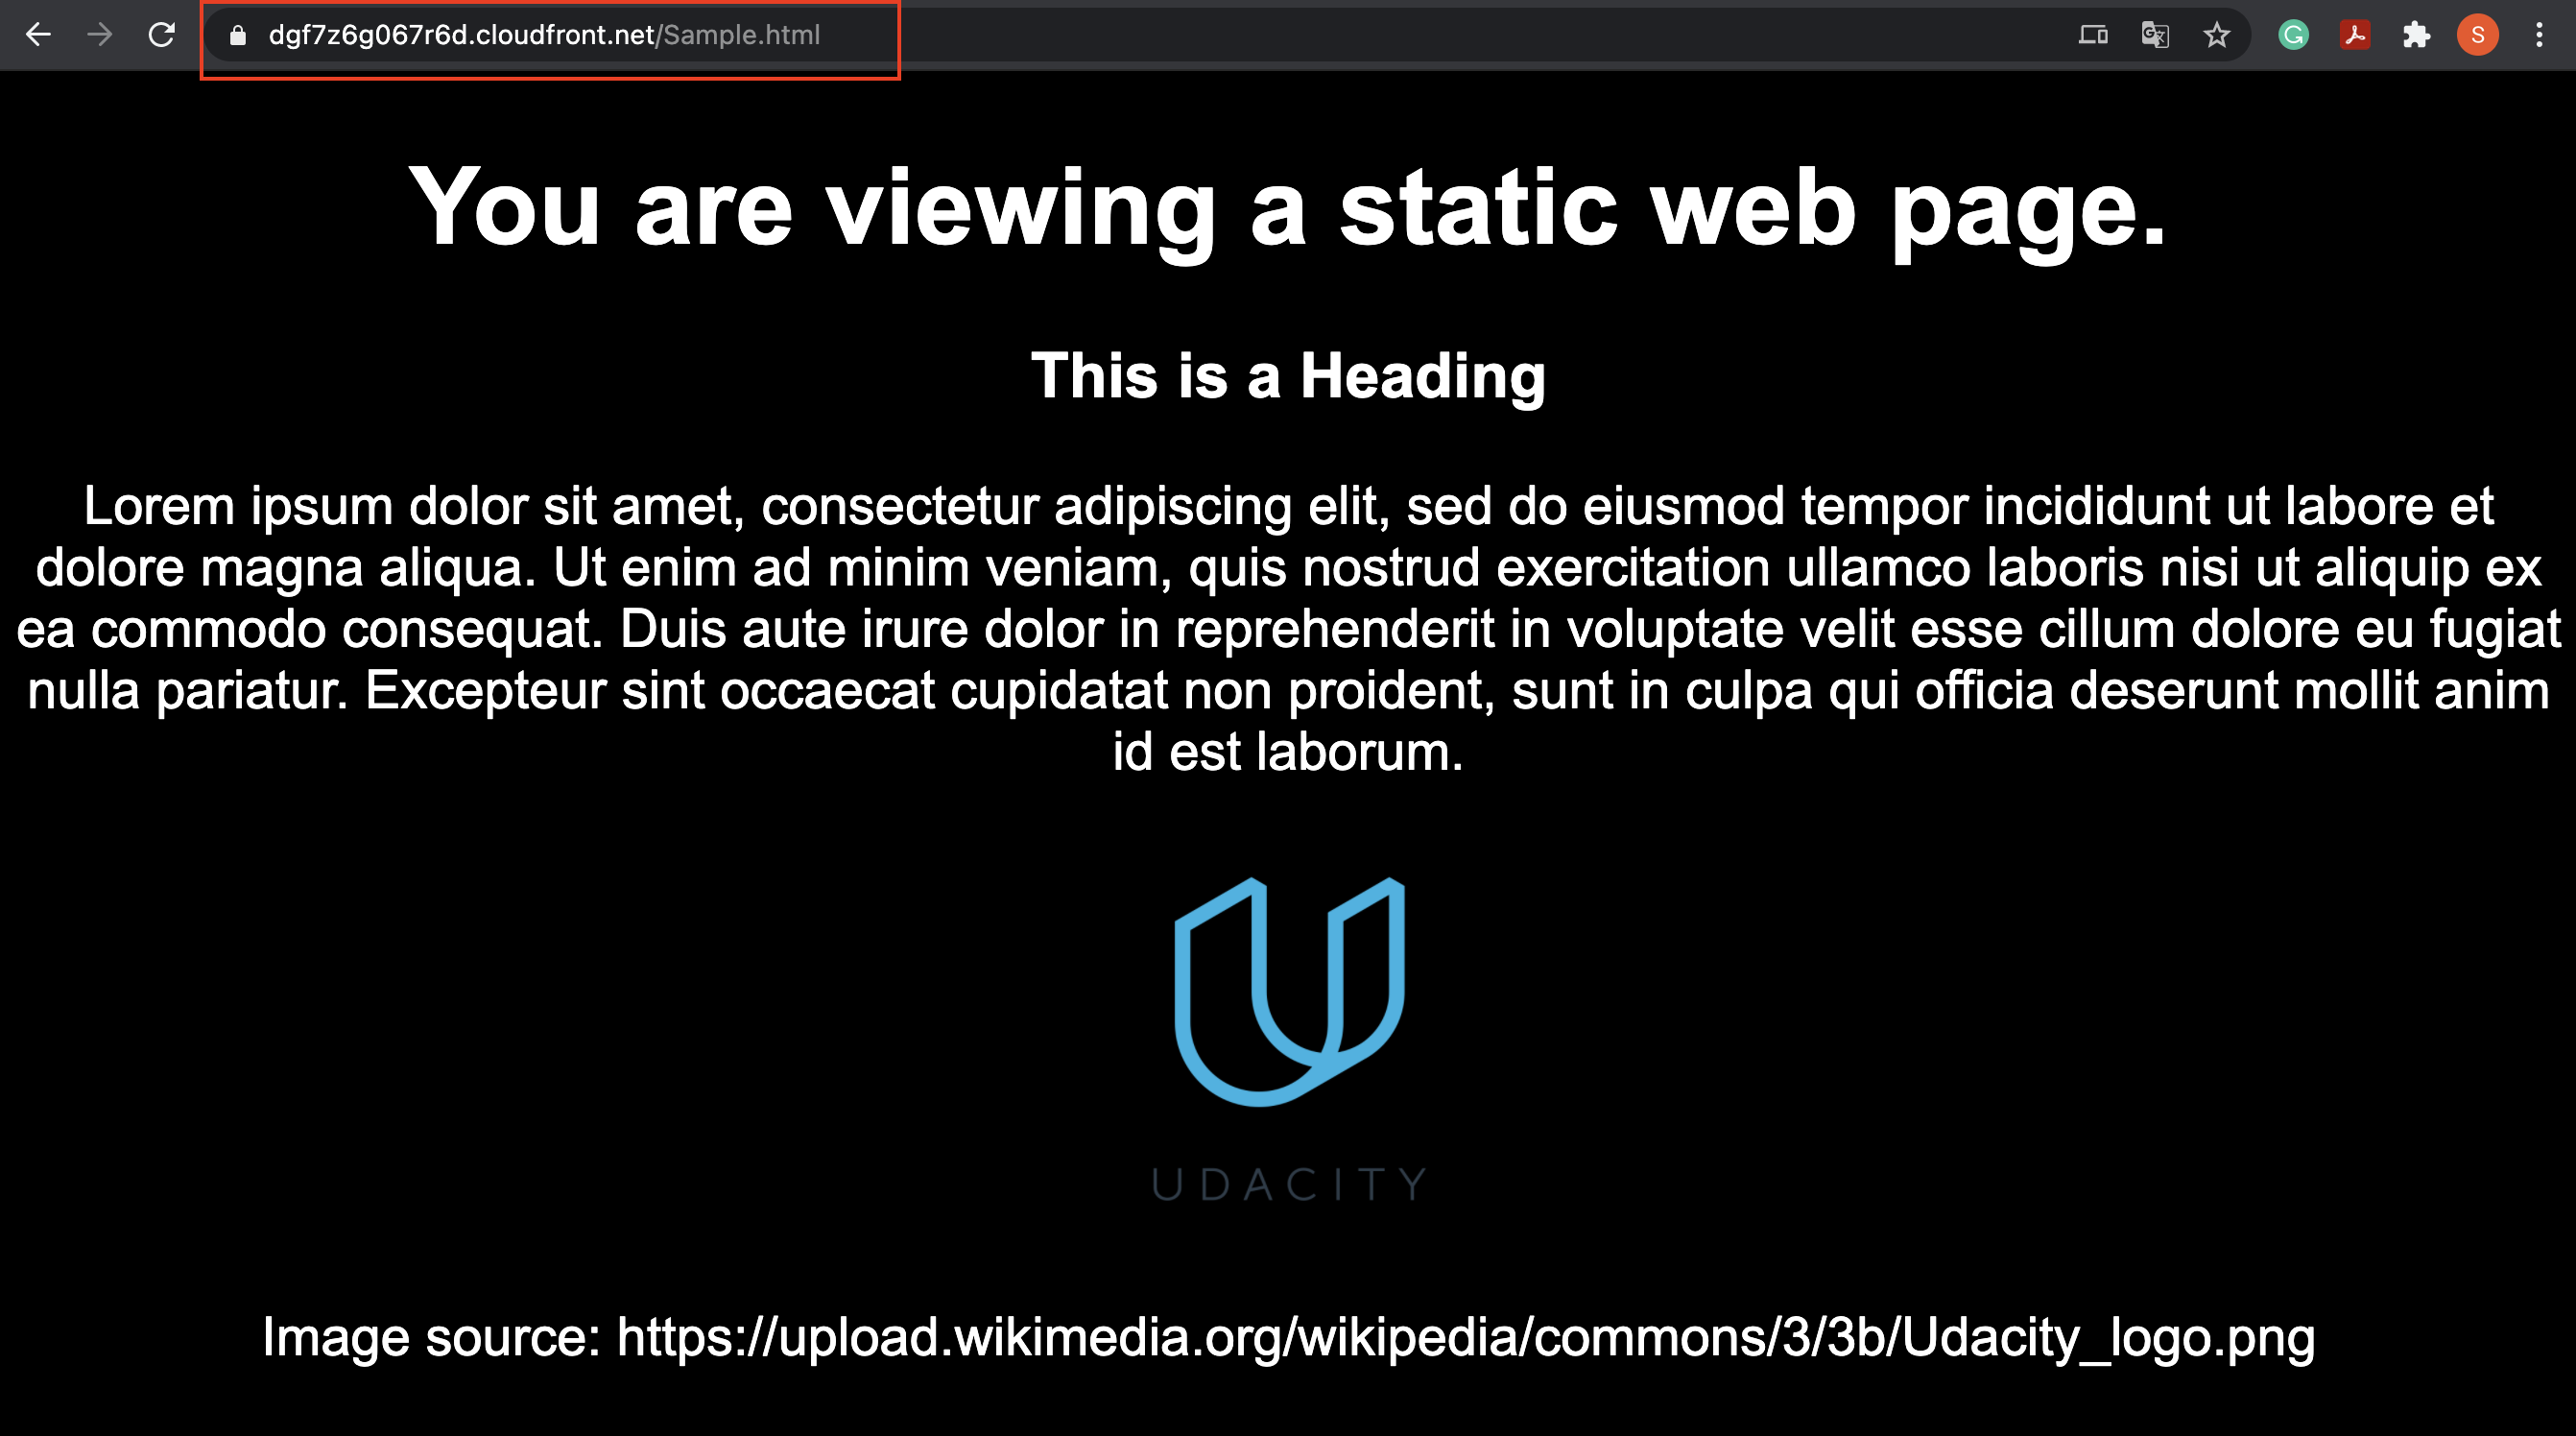
Final output at https://dgf7z6g067r6d.cloudfront.net/Sample.html. However, at the same time, the https://my-014421265158-bucket.s3.us-east-2.amazonaws.com/Sample.html will not work.
External Resources
Step 4. Delete Bucket and Distribution
-
Delete the CloudFront distribution
-
On the Distributions dashboard, click on the radio button next to the Delivery Method for the distribution. Click Disable, and confirm the prompt.
-
Once the distribution is disabled, you can delete it by selecting the radio button next to the Delivery Method and clicking the Delete button.
-
You may also need to delete the Origin Access Identity users. To do so, you can go to the Origin Access Identity service in the CloudFront dashboard.
-
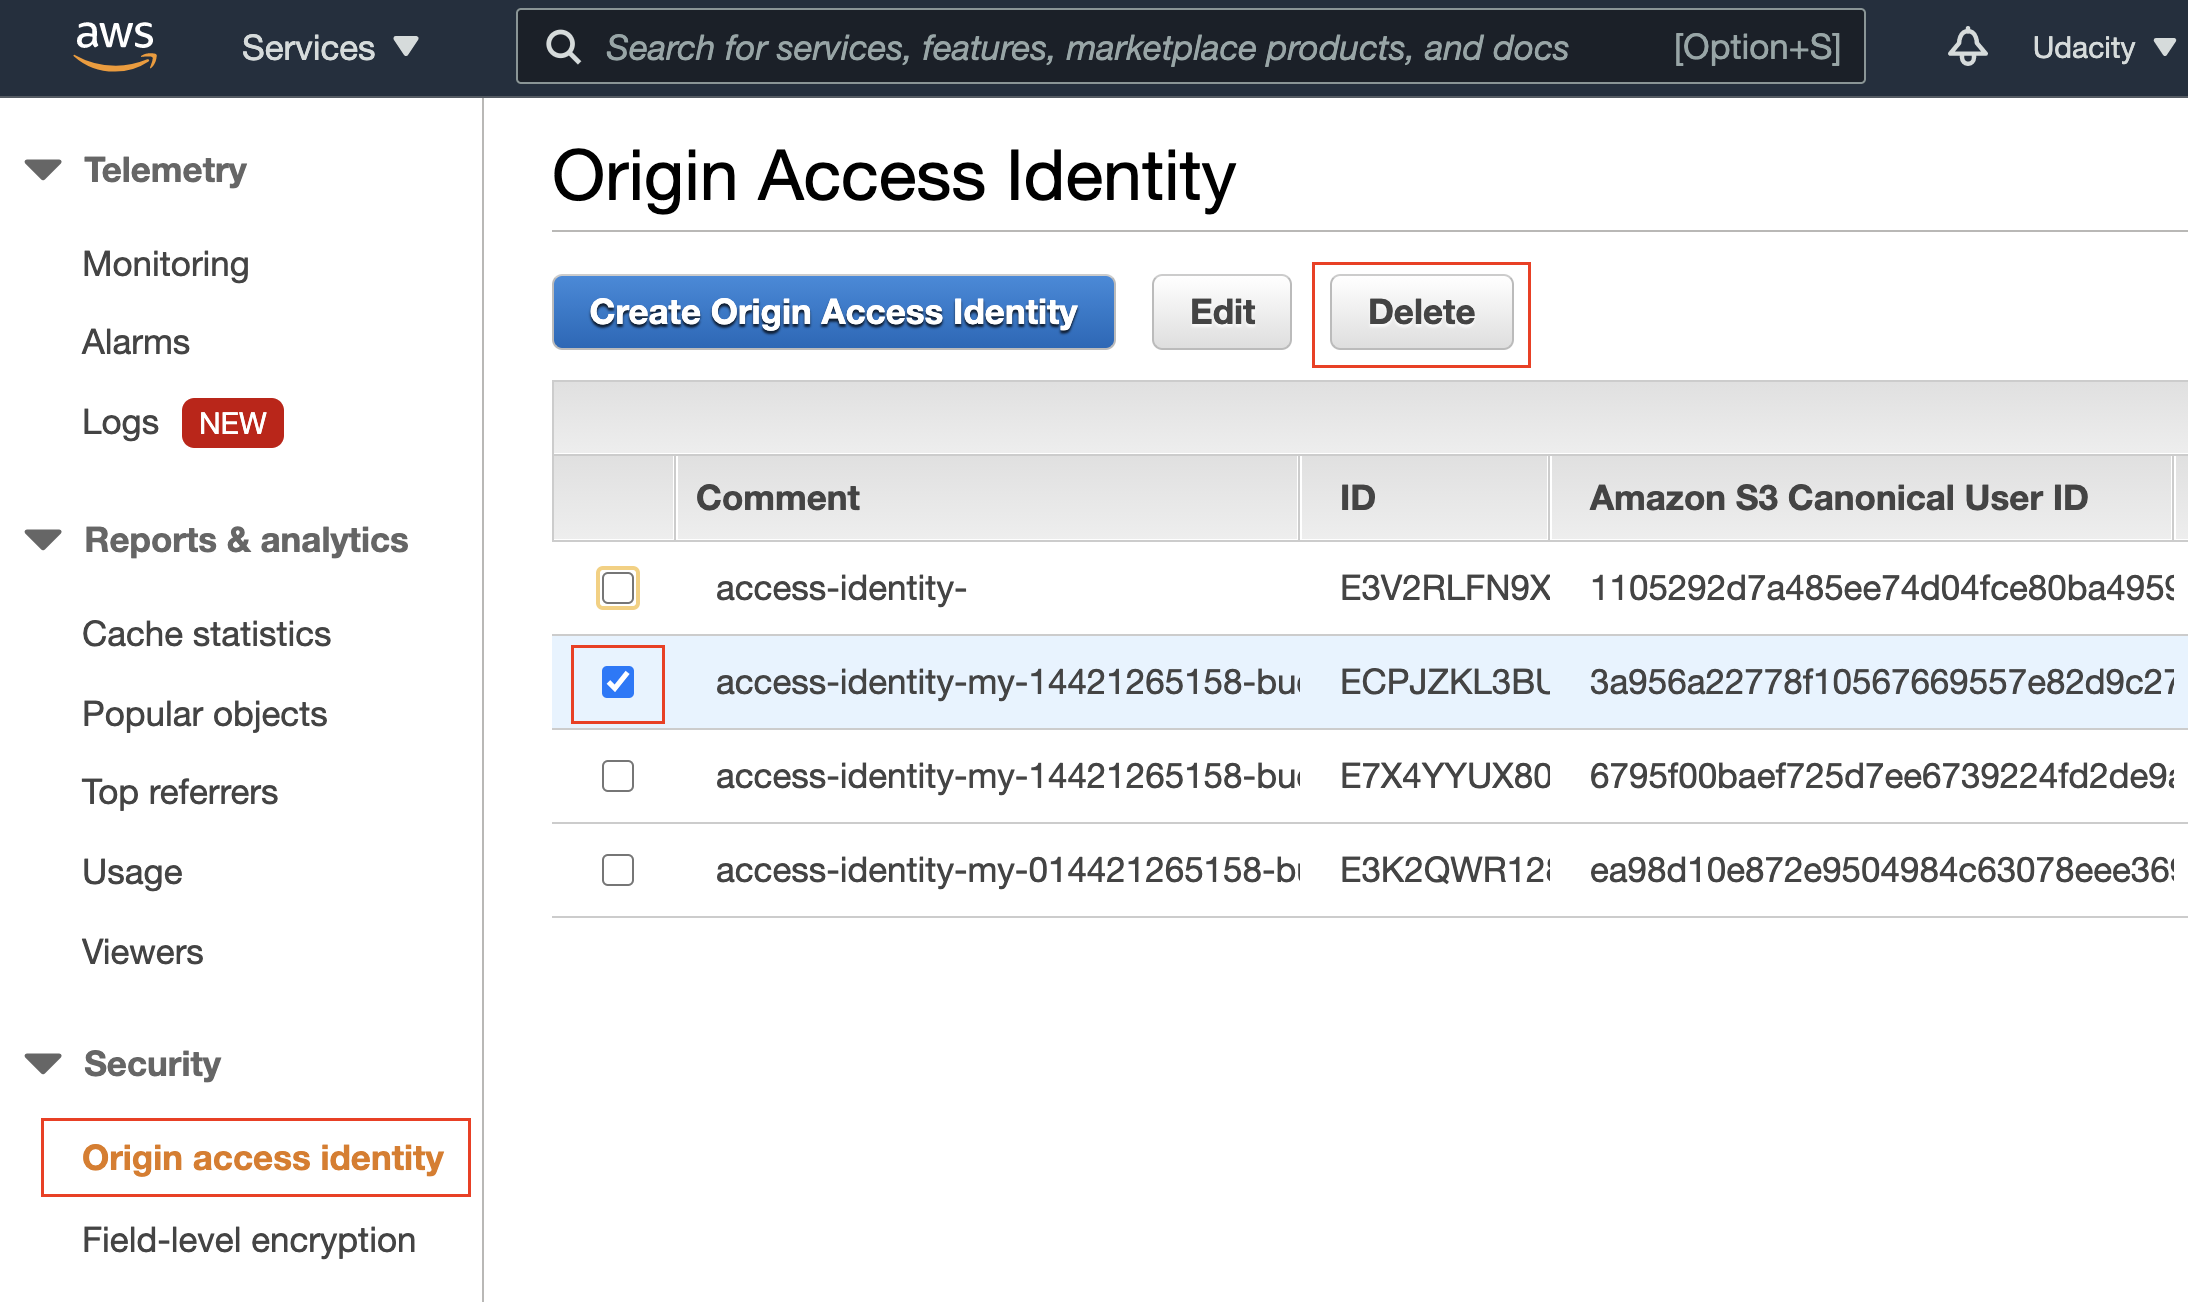
Delete OAI users
- Delete the S3 bucket
- To delete the S3 bucket, navigate to the S3 service.
- Select the radio button next to the name of the bucket you want to delete. Note that the bucket you want to delete should be empty before deletion.
- Click the Delete button on the top-right, and confirm the deletion.
- To delete the S3 bucket, navigate to the S3 service.