学习NetCore的配置管理;
目录
- 命令行配置
- Json文件配置
- 配置文件文本至C#对象实例的映射
- 配置文件热更新
- 总结
命令行配置:
打开VS2017,新建NetCore控制台项目;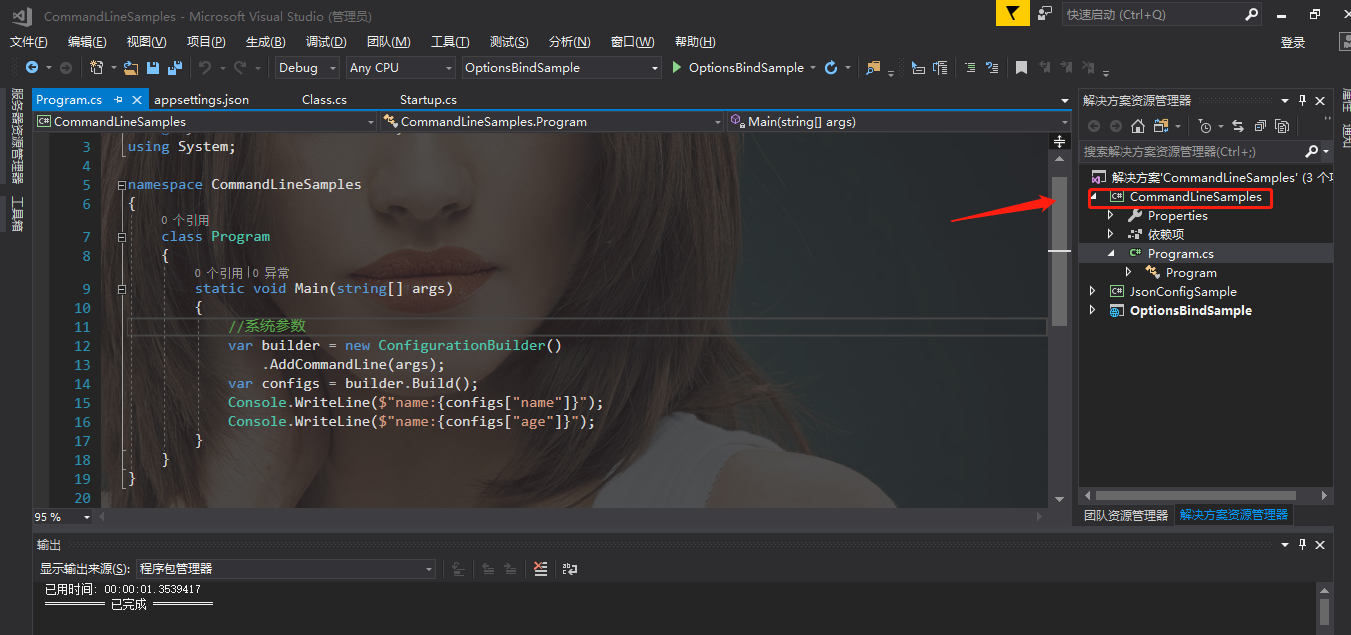
打开nuget包管理;添加Microsoft.Asp.NetCore.all,或者使用命令nstall-Package Microsoft.AspNetCore.All进行添加;接下来添加系统参数;右键项目属性,调试,如下图:

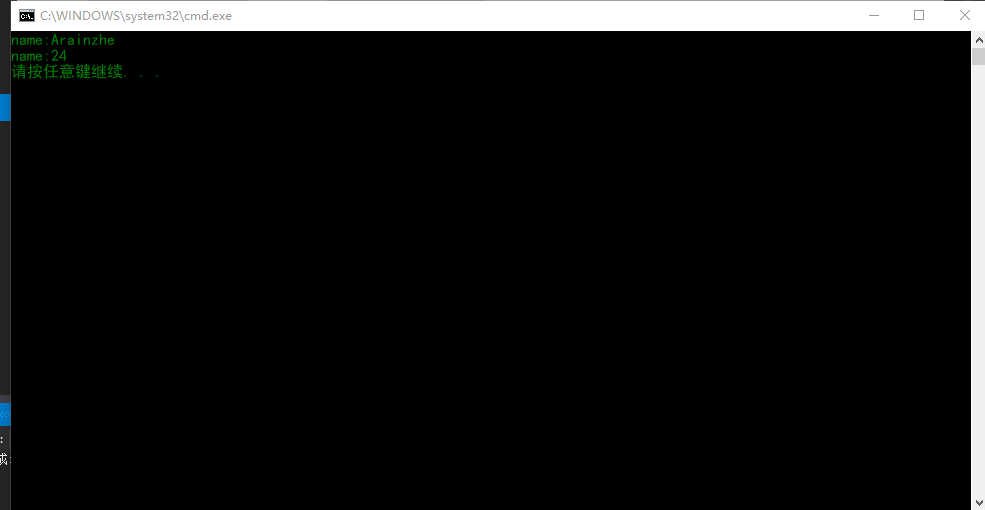
OK,跑一下就行;控制台显示:
Json文件配置:
接下来学习Json文件配置:新建一个core的控制台项目;同样的通过nuget添加Microsoft>Asp.NetCore.all;添加一个新的json文件,代码如下:
{
  "ClassNo": "1",
  "ClassDesc": "AspNetCore",
  "Students": [
    {
      "name": "Tom",
      "age": "8"
    },
    {
      "name": "jerry",
      "age": "7"
    },
    {
      "name": "rose",
      "age": "18"
    }
  ]
}

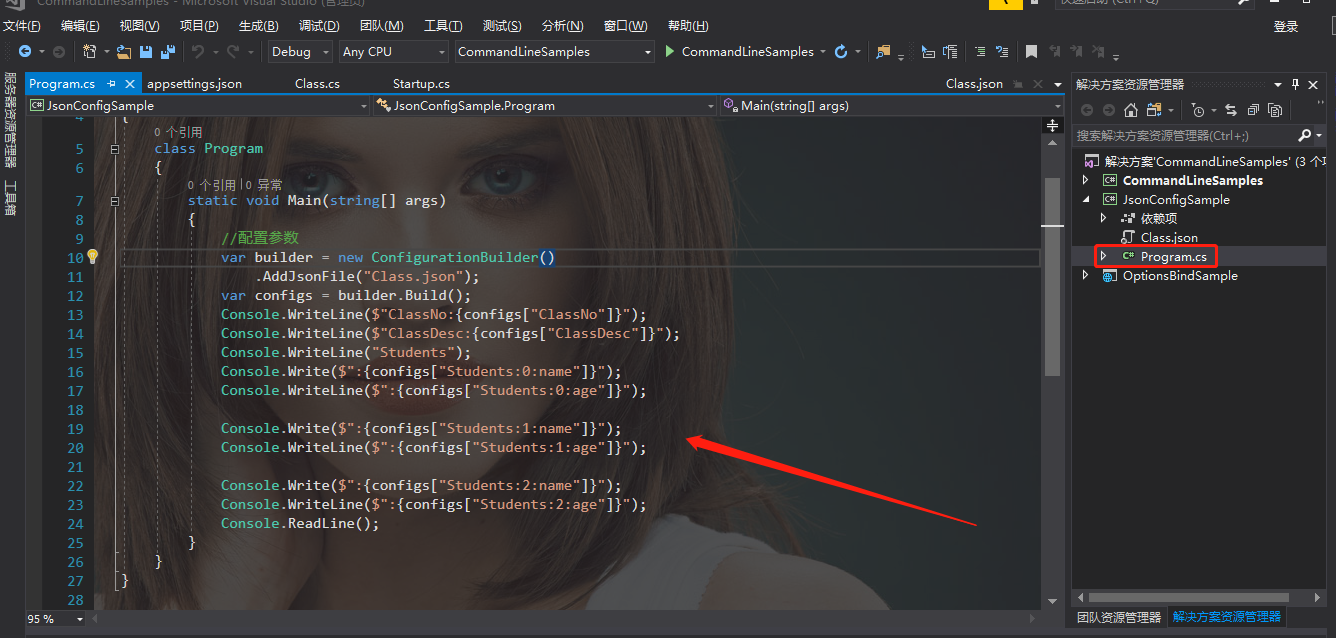
using System;
using Microsoft.Extensions.Configuration;
namespace JsonConfigSample
{
    class Program
    {
        static void Main(string[] args)
        {
            //配置参数
            var builder = new ConfigurationBuilder()
                .AddJsonFile("Class.json");
            var configs = builder.Build();
            Console.WriteLine($"ClassNo:{configs["ClassNo"]}");
            Console.WriteLine($"ClassDesc:{configs["ClassDesc"]}");
            Console.WriteLine("Students");
            Console.Write($":{configs["Students:0:name"]}");
            Console.WriteLine($":{configs["Students:0:age"]}");

            Console.Write($":{configs["Students:1:name"]}");
            Console.WriteLine($":{configs["Students:1:age"]}");

            Console.Write($":{configs["Students:2:name"]}");
            Console.WriteLine($":{configs["Students:2:age"]}");
            Console.ReadLine();
        }
    }
}
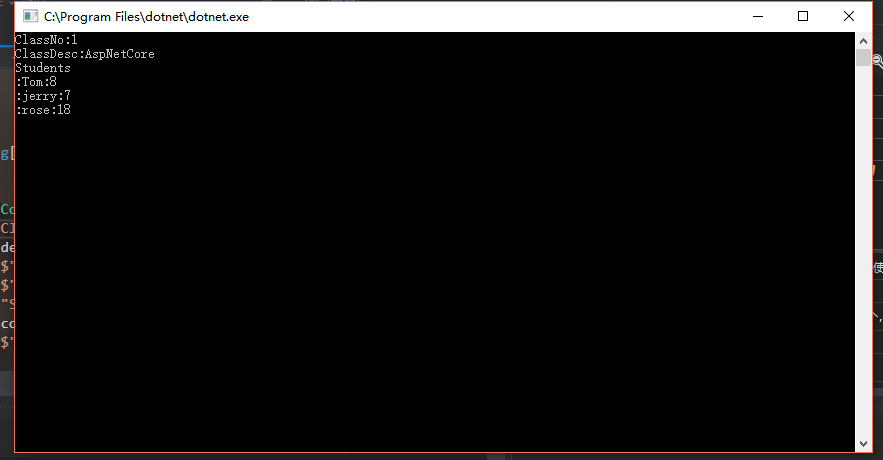
最终运行如下图所示:
配置文件文本至C#对象实例的映射:
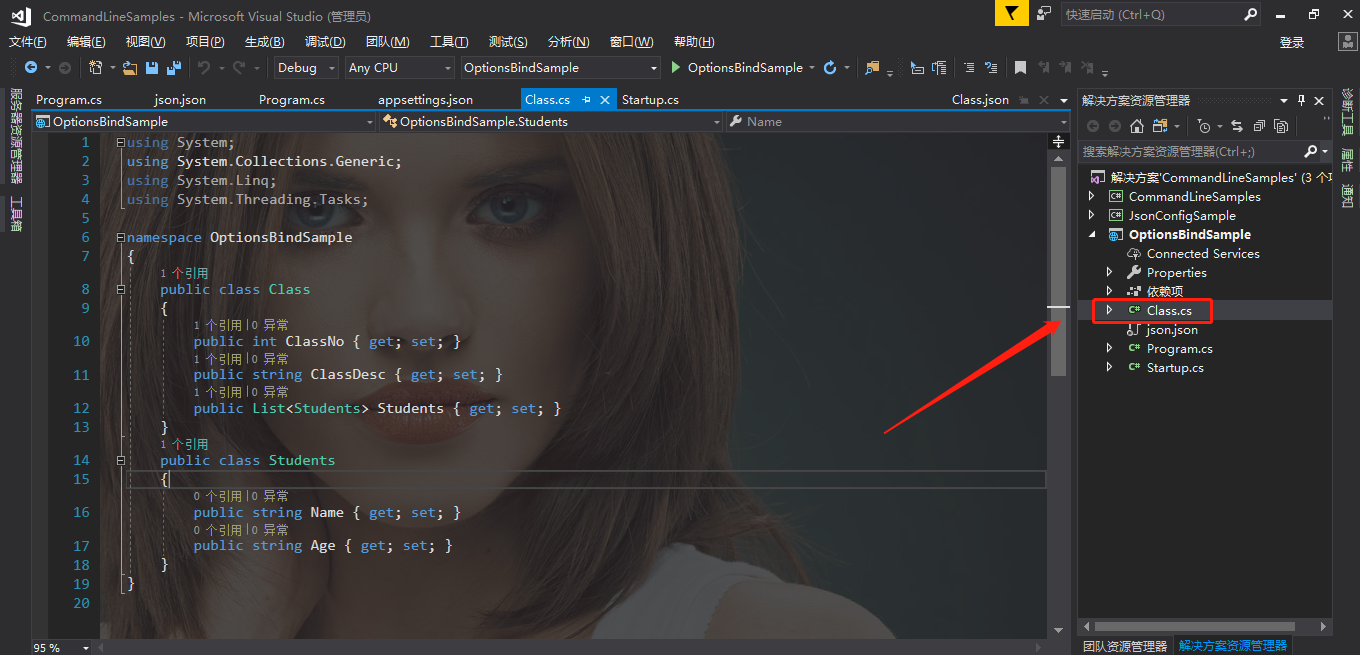
创建一个空的mvc项目,将上一步的json文件 复制到这个项目中,并且改名为appsettings.json(因为Program.cs 中 BuildWebHost方法中,默认将appsettings.json写入配置)。然后我们创建一个类,名字叫做MyClass;(现在的core2.2或者3.0里面应该是存在appsettings.json)
using System;
using System.Collections.Generic;
using System.Linq;
using System.Threading.Tasks;

namespace OptionsBindSample
{
    public class Class
    {
        public int ClassNo { get; set; }
        public string ClassDesc { get; set; }
        public List<Students> Students { get; set; }
    }
    public class Students
    {
        public string Name { get; set; }
        public string Age { get; set; }
    }
}

{
  "ClassNo": "1",
  "ClassDesc": "AspNetCore",
  "Students": [
    {
      "name": "Tom",
      "age": "8"
    },
    {
      "name": "jerry",
      "age": "7"
    },
    {
      "name": "rose",
      "age": "18"
    }
  ]
}
我们在Startup 中添加一个 IConfiguration,然后再构造函数中注入:

 public class Startup
    {
        public IConfiguration Configurations { get; set; }
        public Startup(IConfiguration configuration)
        {
            this.Configurations = configuration;
        }
接下来,我们读取配置文件中的内容;
 public void Configure(IApplicationBuilder app, IHostingEnvironment env)
        {
            if (env.IsDevelopment())
            {
                app.UseDeveloperExceptionPage();
            }

            app.Run(async (context) =>
            {
                var myClass = new Class();
                Configurations.Bind(myClass);
                await context.Response.WriteAsync($"ClassNo:{myClass.ClassNo}");
                await context.Response.WriteAsync($"ClassDesc:{myClass.ClassDesc}");
                await context.Response.WriteAsync($"{myClass.Students.Count}");
            });
        }

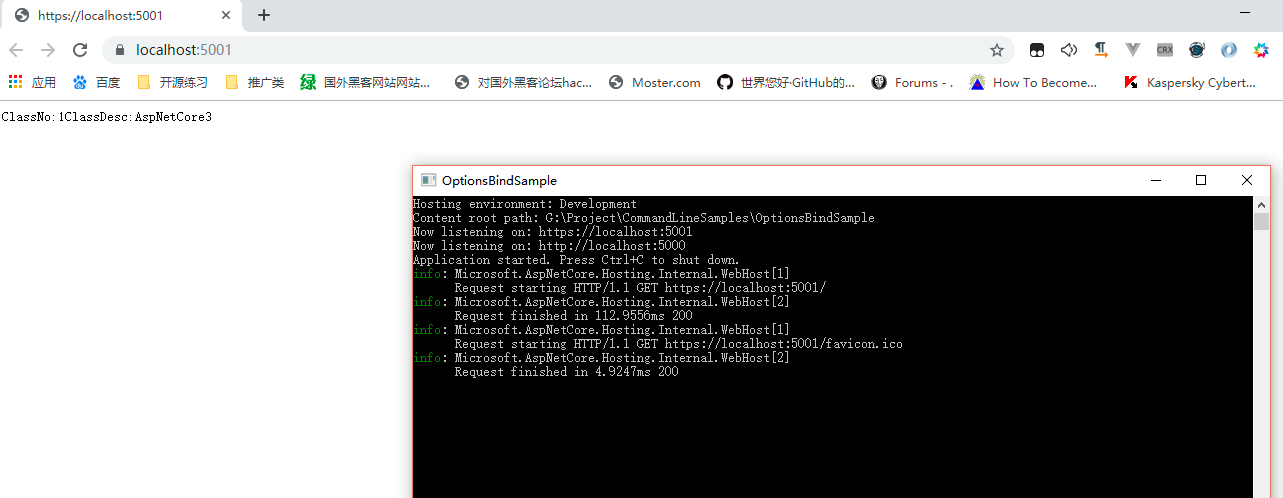
最后启动我们使用core的控制台应用启动即可;
好的,现在接下来将配置文件读取到MVC的视图中去。首先添加一个Home控制器,在控制器中注入Class,

修改代码如下:
    public class HomeController : Controller
    {
        private readonly Class _myClass;
        public HomeController(IOptions<Class> optionsClass)
        {
            this._myClass = optionsClass.Value;
        }
        public IActionResult Index()
        {
            return View(_myClass);
        }
    }
修改我们的startup.cs 和添加Index.cshtml,将视图的model设置为Class;
using System;
using System.Collections.Generic;
using System.Linq;
using System.Threading.Tasks;
using Microsoft.AspNetCore.Builder;
using Microsoft.AspNetCore.Hosting;
using Microsoft.AspNetCore.Http;
using Microsoft.Extensions.Configuration;
using Microsoft.Extensions.DependencyInjection;

namespace OptionsBindSample
{
    public class Startup
    {
        public IConfiguration Configurations { get; set; }
        public Startup(IConfiguration configuration)
        {
            this.Configurations = configuration;
        }
        // This method gets called by the runtime. Use this method to add services to the container.
        // For more information on how to configure your application, visit https://go.microsoft.com/fwlink/?LinkID=398940
        public void ConfigureServices(IServiceCollection services)
        {
            services.Configure<Class>(Configurations);
            //添加MVC,依赖注入配置加到里面;
            services.AddMvc();
        }

        // This method gets called by the runtime. Use this method to configure the HTTP request pipeline.
        public void Configure(IApplicationBuilder app, IHostingEnvironment env)
        {
            if (env.IsDevelopment())
            {
                app.UseDeveloperExceptionPage();
            }
            app.UseMvcWithDefaultRoute();//使用默认路由
        }
    }
}
@model MVCConfigApplication.Class

@{
    ViewData["Title"] = "Index";
}

<h2>Index</h2>

<h4>Class.No:@Model.ClassNo</h4>
    <h4>Class.Desc:@Model.ClassDesc</h4>
    <h3>
        Students:
    </h3>
    <div>
        @foreach (var itemStudent in Model.Students)
        {
            <span>@itemStudent.Name</span>
            <span>@itemStudent.Age</span>
        }
    </div>
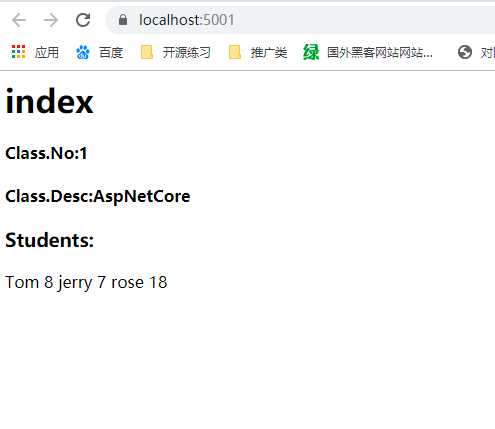
当然,我们也可以不使用控制器,在视图中直接注入MyClass。我们在HomeController中删除依赖注入的代码,修改Index.cshtml代码如下
public class HomeController : Controller
    {
        public IActionResult Index()
        {
            return View();
        }
    }
@using Microsoft.Extensions.Options
@inject IOptions<OptionsBindSample.Class> ClassAccesser;

@{
ViewData["Title"] = "Index";
}

<h1>index</h1>
<h4>Class.No:@ClassAccesser.Value.ClassNo</h4>
<h4>Class.Desc:@ClassAccesser.Value.ClassDesc</h4>
<h3>
    Students:
</h3>
<div>
    @foreach (var itemStudent in ClassAccesser.Value.Students)
    {
        <span> Name:@itemStudent.Name</span>
        <span>Age:@itemStudent.Age</span>
    }
</div>
配置文件热更新
将IOptions 改为IOptionsSnapshot:
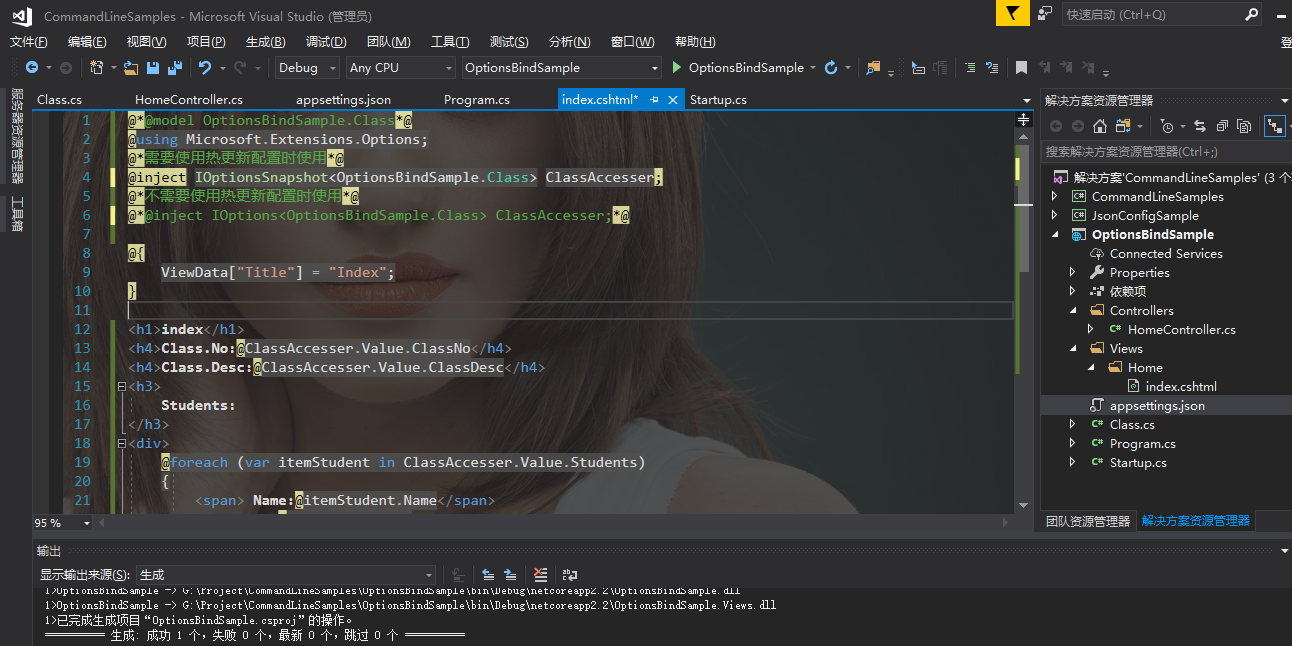
在asp.net core 中,WebHost.CreateDefaultBuilder(args) 方法中,默认加载appsettings.json文件,并且将是否更改重新加载设置为true;

F12进去阅读下源代码,可以看到这三个参数;或者去GitHub上面可查看Core的源代码;

这里是github webhost.cs源码:
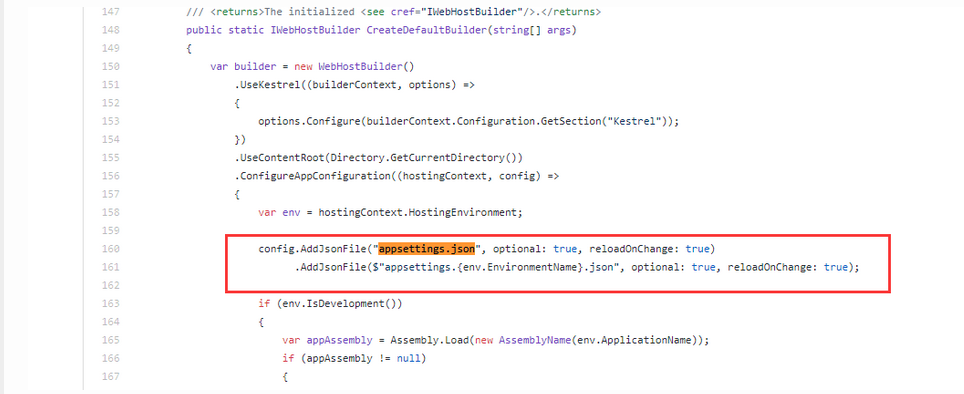
所以我们想关闭热更新只需要将WebHost的ConfigureAppConfiguration方法中 config.AddJsonFile第三个参数设置为false就可以了。 config.AddJsonFile("appsettings.json", false, false);
总结
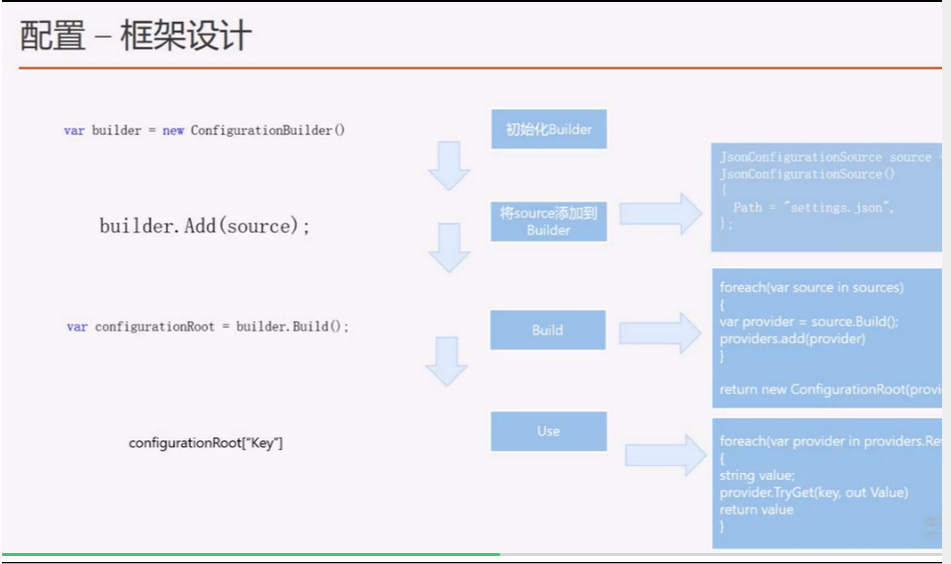
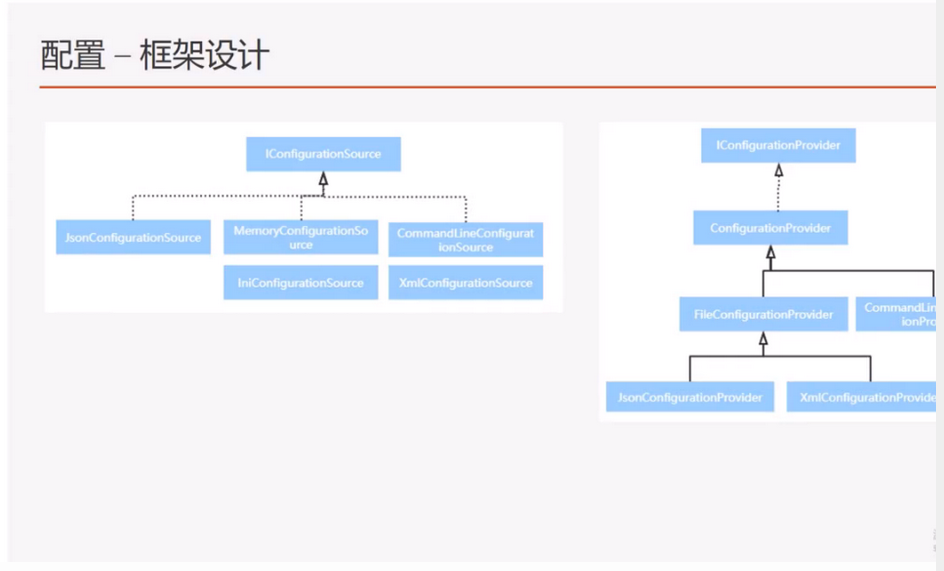
在框架配置中,有两个最重要的对象。第一个是IConfigurationSource,第二个是IConfigurationProvider。IConfigurationSource 在实例化 ConfigurationBuilder时候,可以把不同的Source添加至builder,例如Program中的BuildWebHost方法,最后使用生成器模式统一生成(Build),追加到IConfigurationProvider当中。读取时候,就根据IConfigurationProvider当中是否存在"Key",把对应的值读取出来;
