根据学习笔记一的知识点搭建的简易用户注册登录模块,用户数据暂用json保存。
HTML:
<!DOCTYPE html>
<html lang="en" dir="ltr">

<head>
  <link href="bootstrap-4.0.0-dist/css/bootstrap.min.css" rel="stylesheet" />
  <meta charset="utf-8">
  <style>
    body {
      margin: 0px;
      padding: 0px;
    }
    div{
      position:absolute;
      display: block;
      /* border: 3px solid #116; */
      border-left: 40px;
      border-top: 5px;
      border-bottom: 5px;
      border-right: 3px;
      border-style: solid;
      border-radius: 5px 20px 20px 5px;
      border-color: rgb(0, 123, 255);
      padding:5px 10px;
      left: 5px;
    }
  </style>
  <title></title>
  <script src="ajax.js" charset="utf-8"></script>
  <script type="text/javascript">
    window.onload=function (){
      var oTxtUser=document.getElementById('user');
      var oTxtPass=document.getElementById('pass');
      var oBtnReg=document.getElementById('reg_btn');
      var oBtnLogin=document.getElementById('login_btn');

      oBtnLogin.onclick=function (){
        ajax({
          url: '/user',
          data: {act: 'login', user: oTxtUser.value, pass: oTxtPass.value},
          type: 'get',
          success: function (str){
            var json=eval('('+str+')');

            if(json.ok){
              alert('登录成功');
            }else{
              alert('登录失败:'+json.msg);
            }
          },
          error: function (){
            alert('通信错误');
          }
        });
      };

      oBtnReg.onclick=function (){
        ajax({
          url: '/user',
          data: {act: 'reg', user: oTxtUser.value, pass: oTxtPass.value},
          type: 'get',
          success: function (str){
            var json=eval('('+str+')');

            if(json.ok){
              alert('注册成功');
            }else{
              alert('注册失败:'+json.msg);
            }
          },
          error: function (){
            alert('通信错误');
          }
        });
      };
    };
  </script>
</head>

<body>
  <index>
    <p>Hello Node.js</p>
  </index>
  <div>
    <input type="text" id="user" placeholder="输入用户名" class="form-control"><br />
    <input type="password" id="pass" placeholder="输入密码" class="form-control"><br />
    <input type="button" value="注册" class="btn btn-primary" id="reg_btn">
    <input type="button" value="登陆" class="btn btn-primary" id="login_btn">
  </div>
</body>

</html>
ajax.js:
function json2url(json){
    var arr=[];
    for(var name in json){
        arr.push(name+'='+json[name]);
    }
    return arr.join('&');
}

function ajax(json){
    json=json || {};
    if(!json.url)return;
    json.data=json.data || {};
    json.type=json.type || 'get';

    var timer=null;

    if(window.XMLHttpRequest){
        var oAjax=new XMLHttpRequest();
    }else{
        var oAjax=new ActiveXObject('Microsoft.XMLHTTP');
    }

    switch(json.type){
        case 'get':
            oAjax.open('GET',json.url+'?'+json2url(json.data),true);
            oAjax.send();
            break;
        case 'post':
            oAjax.open('POST',json.url,true);
            oAjax.setRequestHeader('Content-Type','application/x-www-form-urlencoded');
            oAjax.send(json2url(json.data));
            break;
    }

    oAjax.onreadystatechange=function(){
        if(oAjax.readyState==4){
            clearTimeout(timer);
            if(oAjax.status>=200 && oAjax.status<300 || oAjax.status==304){
                json.success && json.success(oAjax.responseText);
            }else{
                json.error && json.error(oAjax.status);
            }
        }
    };
}
Node:
const http=require('http');
const fs=require('fs');
const querystring=require('querystring');
const urlLib=require('url');

var users={};//用来简易地存储用户数据{"blue":"123456","zhangsan":"789456","lisi":"123789"}

var server=http.createServer(function(req,res){
  //解析数据
  var str='';
  req.on('data',function(data){
    str+=data;
  });
  req.on('end',function(){
    var obj=urlLib.parse(req.url,true);
    const url=obj.pathname;
    const GET=obj.query;
    const POST=querystring.parse(str);
    //区分用户访问的是接口还是文件
    if(url=='/user'){ //假设只有这一个接口,其他的都是文件
      switch(GET.act){
        case 'reg':
          //1.检查用户名是否已经有了
          if(users[GET.user]){
            res.write('{"ok":false,"msg":"此用户已存在"}');
          }else{           //2.插入users
            users[GET.user]=GET.pass;
            res.write('{"ok":true,"msg":"注册成功"}');
          }
          break;
        case 'login':
          //1.检查用户是否存在
          if(users[GET.user==null]){
            res.write('{"ok":false,"msg":"此用户不存在"}');
          }else if(users[GET.user]!=GET.pass){//2.检查用户密码
            res.write('{"ok":false,"msg":"用户名或密码有误"}');
          }else{
            res.write('{"ok":true,"msg":"登陆成功"}');
          }
          break;
        default:
          res.write({"ok":false,"msg":"未知的act"});
      }
      res.end();
    }else{ //文件
      //读取文件
      var file_name='./www'+url;
      fs.readFile(file_name,function(err,data){
        if(err){
          res.write('404');
        }else{
          res.write(data);
        }
        res.end();
      });
    }
  });
});
server.listen(8080);
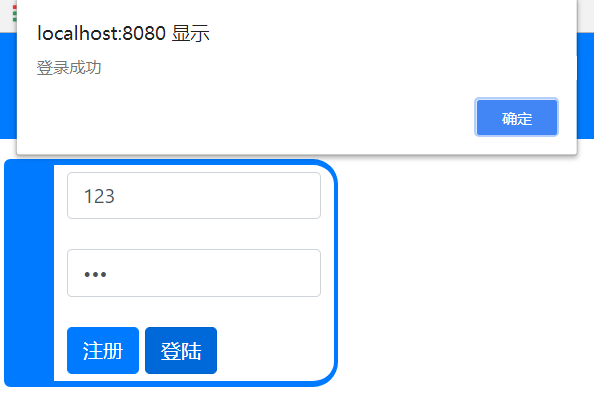
结果显示: