前一篇博文我们已经将基础知识和环境配置进行了介绍:https://www.cnblogs.com/Cl0ud/p/13192925.html
首先编写一个celerytask.py文件进行Celery的配置,同时耗时任务也写在该文件中
from celery import Celery
from init import app
from SZheConsole import SZheScan

app.config['CELERY_BROKER_URL'] = 'redis://localhost:6379/0'
app.config['CELERY_RESULT_BACKEND'] = 'redis://localhost:6379/0'

celery = Celery(app.name, broker=app.config['CELERY_BROKER_URL'])
celery.conf.update(app.config)


@celery.task
def SZheConsole(urls):
    try:
        for url in urls:
            print("="*20)
            print(url)
            SZheScan(url)
    except Exception as e:
        print("错误")
        print(e)
        pass
    print("allend!")
使用@celery.task装饰器修饰耗时函数SZheConsole,让Celery能够正确调用。
SZheScan函数是另外一个文件里面的函数,即对每一个URL进行单独的扫描,这部分过几天为了提高扫描速度会进行优化,这里将Celery用到项目里,暂时不改。
调用耗时任务SZheConsole的地方在index.py视图函数中,只选调用部分代码
@app.route('/console', methods=['GET', 'POST'])
@login_required
def console():
    bugbit, bugtype = core.GetBit()
    counts = core.GetCounts()
    ports = core.GetPort()
    services = core.GetServices()
    target = core.GetTargetCount()
    try:
        lastscantime = BaseInfo.query.order_by(BaseInfo.id.desc()).first().date
    except:
        lastscantime = "暂无扫描"
        pass
    if request.method == 'GET':
        return render_template('console.html', bugbit=bugbit, bugtype=bugtype, counts=counts, lastscantime=lastscantime,
                               ports=ports, services=services, target=target)
    else:
        urls = request.form.get('urls')
        urls = urls.split()
        print(urls)
        for url in urls:
            redispool.hincrby('targetscan', 'waitcount', 1)
        # executor.submit(SZheConsole, urls)
        SZheConsole.delay(urls)
        target = core.GetTargetCount()
        return render_template('console.html', bugbit=bugbit, bugtype=bugtype, counts=counts, lastscantime=lastscantime,
                               ports=ports, services=services, target=target)
可以看到原来的处理方式是多进程处理
executor.submit(SZheConsole, urls)
将原来的处理方式代码注释掉后,关键代码修改为
SZheConsole.delay(urls)
这样就可以将耗时任务丢给Celery进行处理,页面立即返回
return render_template('console.html', bugbit=bugbit, bugtype=bugtype, counts=counts, lastscantime=lastscantime,ports=ports, services=services, target=target)
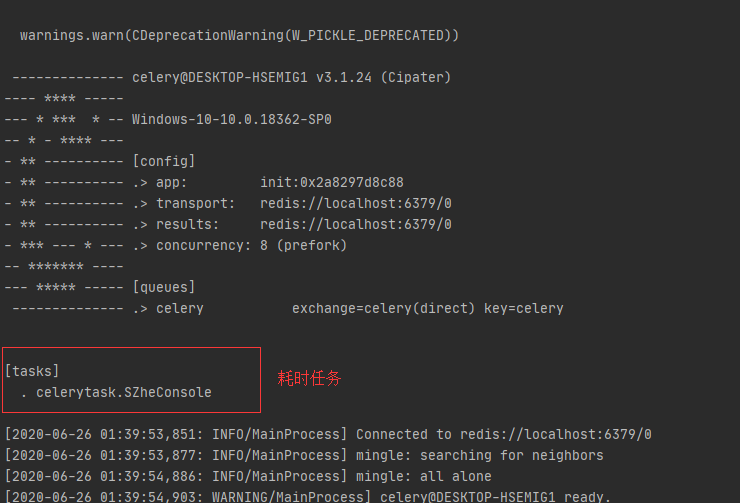
接着启动redis和Celery服务,启动redis自不用说,Celery启动命令为:
celery worker -A celerytask.celery -l INFO
(可以看出-A参数celery与文件名的关系
运行后的部分截图为:
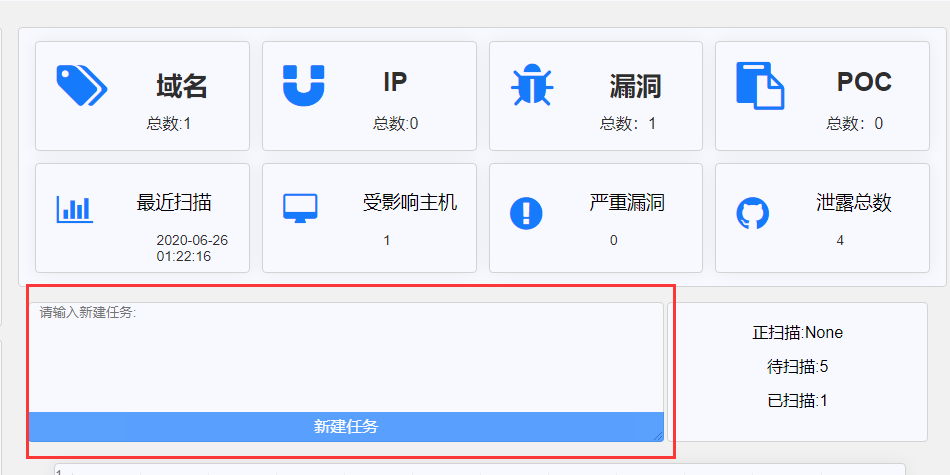
接着启动Flask服务,在任务控制台输入需要扫描的网址:
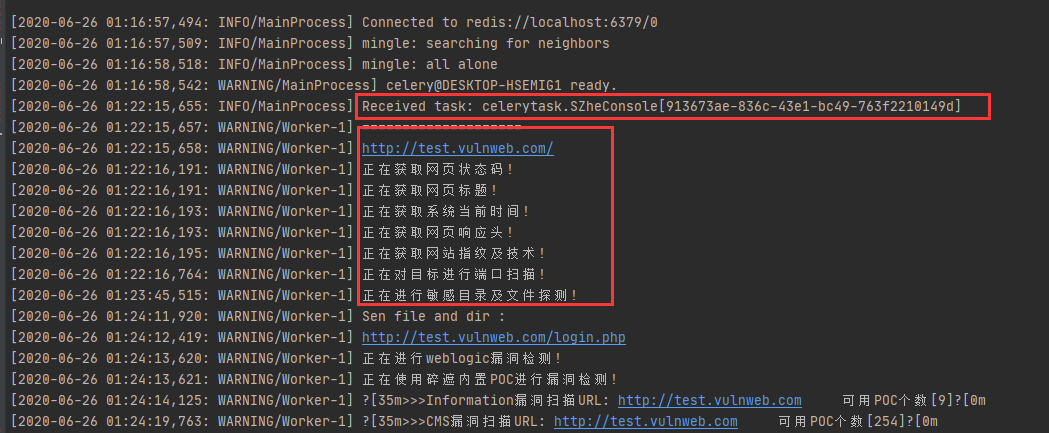
新建任务后查看Celery的日志信息,可以看到运行成功,同时与使用原生线程/进程一样,浏览器立即返回,异步处理成功。
后面的博客将学习使用Celery中更流行的用法,也是原生线程/进程很难做到的部分,如显示进度条,暂停删除任务,显示后台任务状态等。
既然使用了Celery就应当把它的威力发挥到最大,以上
且听下回 咕咕咕
参考链接: