一、路由系统介绍
在django程序中,可以通过urls.py文件对所有的url进行任务的分配,根据路由规则的定义选择不同的业务处理函数进行处理
二、路由规则定义
1、路由规则代码如下,mysite/mysite/urls.py
from django.conf.urls import url, include
from django.contrib import admin
from cmdb import views


urlpatterns = [

    #####静态路由#####
    # ① 匹配规则  http://127.0.0.1:8000/index/*
    url(r'^index/', views.index),

    #####动态路由--利用正则表达式可以达到分页url的效果#####
    # ② 匹配规则  http://127.0.0.1:8000/detail/432432  将最后面的数字当做参数传递给views.detail函数的nid参数
    url(r'^detail/(d+)', views.detail),

    # ③ 匹配规则  http://127.0.0.1:8000/detail2/432432/2  将最后面的两个数字当做参数分别传递给views.detail函数的nid和nnid参数
    url(r'^detail2/(d+)/(d+)', views.detail2),

    # ④ 匹配规则  http://127.0.0.1:8000/detail3/432432/2  将最后面的两个数字根据自定义的名字当做参数分别传递给views.detail函数的p1和p2参数
    url(r'^detail3/(?P<p1>d+)/(?P<p2>d+)', views.detail3),

    #####路由分发#####
    # 当一个网站变得庞大之后,在一个project中就会存在很多的路由规则,可以使用路由分发将每个APP的路由规则分发至APP自己的路由规则进行处理
    # 通过include可以将以web开头所有的url都分发给web.urls中的路由去进行处理
    url(r'^web/', include("web.urls")),
]
2、业务处理函数的代码如下, mysite/cmdb/views.py
from django.shortcuts import render
from django.shortcuts import HttpResponse

# Create your views here.


def index(request):
    return render(request, "index.html")


def detail(request, nid):
    print(nid)
    return HttpResponse("OK")


def detail2(request, nid, nnid):
    print(nid, nnid)
    return HttpResponse("OK")


def detail3(request, p1, p2):
    print(p1, p2)
    return HttpResponse("OK")
3、程序目录结构
mysite/
├── cmdb
│   ├── admin.py
│   ├── apps.py
│   ├── __init__.py
│   ├── migrations
│   │   └── __init__.py
│   ├── models.py
│   ├── tests.py
│   └── views.py
├── db.sqlite3
├── manage.py
├── mysite
│   ├── __init__.py
│   ├── settings.py
│   ├── urls.py
│   └── wsgi.py
├── static
│   └── s1.css
└── templates
    └── index.html
三、动态路由的应用 -- 实现分页和详细信息的功能
1、路由规则代码 mysite/mysite/urls.py
from django.conf.urls import url
from cmdb import views


urlpatterns = [
    url(r'^index/(d+)/', views.index),     # 分页
    url(r'^detail/(d+)/', views.detail),   # 详细信息
]
2、业务处理函数代码 mysite/cmdb/views.py
from django.shortcuts import render
from django.shortcuts import HttpResponse

# Create your views here.

# 临时存放一些数据,生产环境中,这些数据都是保存在数据库中
USER_LIST = []
for item in range(108):
    temp = {"id": item, "username": "name"+str(item), "email": "email"+str(item)}
    USER_LIST.append(temp)


def index(request, page):
    # 将用户信息分页展示

    print(page)
    # 第一页  0-9
    # 第二页  10-19
    # 第三页  20-29
    page = int(page)
    start_id = (page - 1) * 10
    end_id = page * 10 -1

    user_list = USER_LIST[start_id:end_id]

    return render(request, "index.html", {"user_list": user_list})


def detail(request, nid):
    # 用户ID的详细信息
    nid = int(nid)
    current_detail_dict = USER_LIST[nid]
    return render(request, "detail.html", {"current_detail_dict": current_detail_dict})
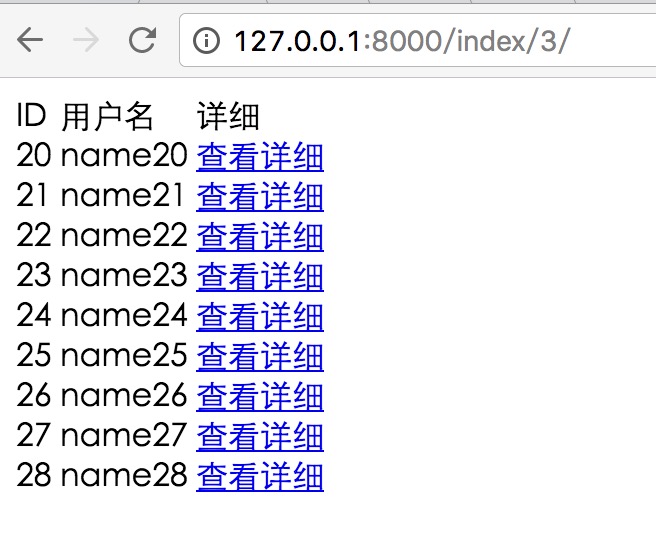
3、分页html代码 mysite/templates/index.html
<!DOCTYPE html>
<html lang="en">
<head>
    <meta charset="UTF-8">
    <title>Title</title>
    <link rel="stylesheet" href="/static/s1.css">
</head>
<body>

    <table>
        <thead>
            <tr>
                <td>ID</td>
                <td>用户名</td>
                <td>详细</td>
            </tr>
        </thead>
        <tbody>
            {% for item in user_list %}

                <tr>
                    <td>{{ item.id }}</td>
                    <td>{{ item.username }}</td>
                    <td><a href="/detail/{{ item.id }}/" target="_blank">查看详细</a></td>
                </tr>
            {% endfor %}

        </tbody>

    </table>


</body>
</html>
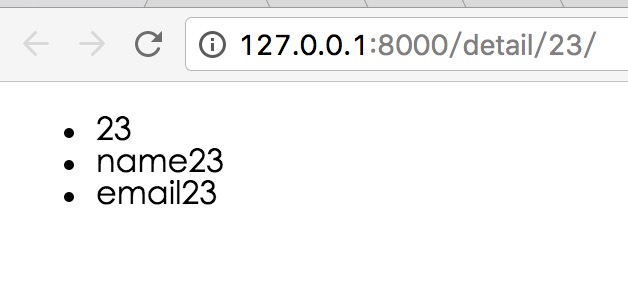
4、用户详细信息html代码 mysite/templates/detail.html
<!DOCTYPE html>
<html lang="en">
<head>
    <meta charset="UTF-8">
    <title>Title</title>
    <link rel="stylesheet" href="/static/s1.css">
</head>
<body>

    <ul>
        <li>{{ current_detail_dict.id }}</li>
        <li>{{ current_detail_dict.username }}</li>
        <li>{{ current_detail_dict.email }}</li>

    </ul>


</body>
</html>
5、目录结构
mysite/
├── cmdb
│   ├── admin.py
│   ├── apps.py
│   ├── __init__.py
│   ├── migrations
│   │   └── __init__.py
│   ├── models.py
│   ├── tests.py
│   └── views.py
├── db.sqlite3
├── manage.py
├── mysite
│   ├── __init__.py
│   ├── settings.py
│   ├── urls.py
│   └── wsgi.py
├── static
│   └── s1.css
└── templates
    ├── detail.html
    └── index.html
6、访问用户信息分页url,点击页面查看详细
-
通过访问url http://127.0.0.1:8000/index/3/ 最后的数字可以换成其他的
-
点击用户信息分页中的对应用户信息中的查看详细