1.项目maven结构:
项目地址:
https://github.com/KouReal/Rpc-Netty-Registry

2.之前没有在pom.xml中添加spring-boot-maven-build插件,只有在父工程的pom.xml中写了maven-compiler-plugin这个插件,所以项目只能在eclipse中选中主类run as java application,后来添加了(父工程和子模块都添加了):
<build>
        <plugins>
            <plugin>
                <groupId>org.apache.maven.plugins</groupId>
                <artifactId>maven-compiler-plugin</artifactId>
                <configuration>
                    <source>1.8</source>
                    <target>1.8</target>
                    <encoding>UTF-8</encoding>
                </configuration>
            </plugin>
            <plugin>
                <groupId>org.springframework.boot</groupId>
                <artifactId>spring-boot-maven-plugin</artifactId>
                <version>2.1.8.RELEASE</version>
                <executions>
                    <execution>
                        <goals>
                            <goal>repackage</goal>
                        </goals>
                    </execution>
                </executions>
            </plugin>
        </plugins>
    </build>
3.之后可以在cmd切到项目某个模块的根目录,比如RegistryCenter(启动优先级最高),运行mvn clean package -Dmaven.test.skip=true打包,运行mvn spring-boot:run -Dmaven.test.skip=true运行(界面显示初次运行会下载很多springboot-core文件还有其他的slfj等等插件,在eclipse中运行不会显示)


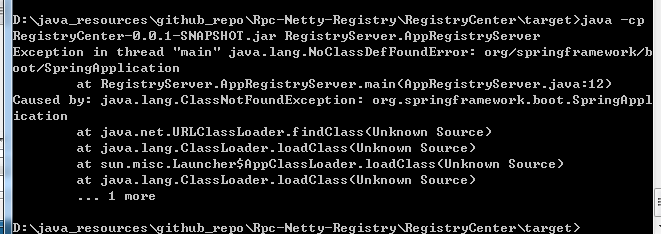
注意:错误命令演示:使用java命令没有用到spring-boot的maven插件,所以会报错:“NoClassDefFoundError”


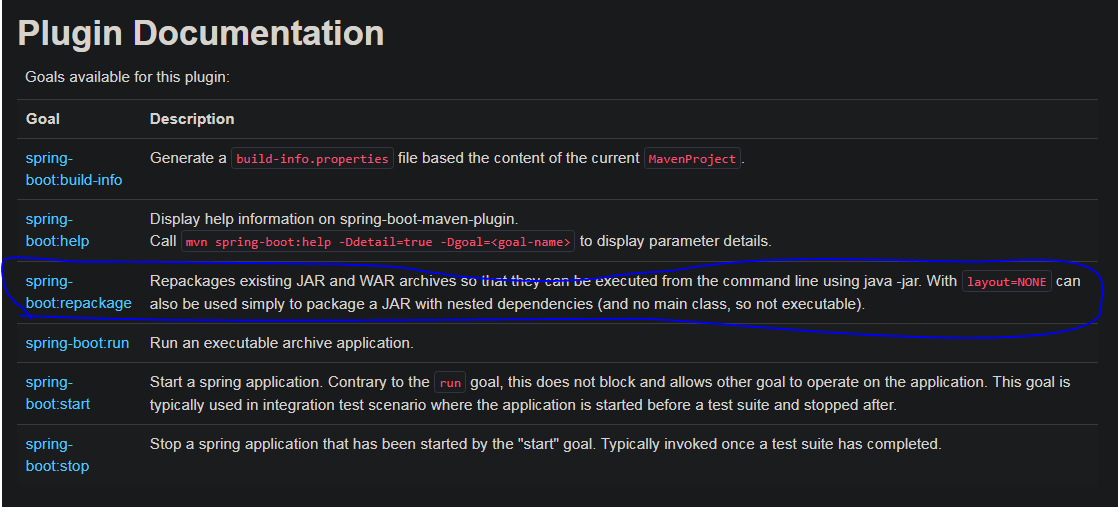
后来参考官方文档,学习到了mvn spring-boot:repackage命令,通过这个命令打包,可以使用java -jar运行,

于是对这个模块使用:mvn spring-boot:repackage -Dmaven.test.skip=true
结果:

查stackoverflow,应该用:mvn clean install spring-boot:repackage -Dmaven.test.skip=true

然后可以在target目录用java -jar运行jar包了:


使用repackage命令的作用是对原始的maven打包好的jar文件或war文件进一步打包,添加一些运行时的依赖资源,生成一个更大的jar 包,这个jar包就可以用java -jar运行了。

在linux中运行jar包的命令: java -jar xx.jar
后台nohup运行,同时将标准输出和错误重定向: nohup java -jar xx.jar >xx.log 2>1& &
停止jar包的运行:
(1)pid=`ps -ef | grep xx | grep -v grev | awk '{print $2}'`
(2)kill -9 pid
编写shell脚本实现:启动,停止,重启,状态
#!/bin/bash
export JAVA_HOME=/root/tools/jdk1.8.0_181
export JRE_HOME=/$JAVA_HOME/jre
export CLASSPATH=.:$JAVA_HOME/jre/lib/rt.jar:$JAVA_HOME/lib/dt.jar:$JAVA_HOME/lib/tools.jar
export PATH=$PATH:$JAVA_HOME/bin:$JRE_HOME/bin
#这里可替换为你自己的执行程序,其他代码无需更改
APP_NAME=/root/app/springBoot/robotcenter.jar
#使用说明,用来提示输入参数
usage() {
    echo "Usage: sh robotcenter.sh [start|stop|restart|status]"
    exit 1
}
#检查程序是否在运行
is_exist(){
  pid=`ps -ef|grep $APP_NAME|grep -v grep|awk '{print $2}'`
  #如果不存在返回1,存在返回0
  if [ -z "${pid}" ]; then
  return 1
  else
    return 0
  fi
''
}
#启动方法
start(){
  is_exist
  if [ $? -eq 0 ]; then
    echo "${APP_NAME} is already running. pid=${pid}"
  else
    nohup java -jar ${APP_NAME}  >robotcenter.out 2>&1 &
  fi
}
#停止方法
stop(){
  is_exist
  if [ $? -eq "0" ]; then
    kill -9 $pid
  else
    echo "${APP_NAME} is not running"
  fi
}
#输出运行状态
status(){
  is_exist
  if [ $? -eq "0" ]; then
    echo "${APP_NAME} is running. Pid is ${pid}"
  else
    echo "${APP_NAME} is NOT running."
  fi
}
#重启
restart(){
  stop
  sleep 5
  start
}
#根据输入参数,选择执行对应方法,不输入则执行使用说明
case "$1" in
  "start")
    start
    ;;
  "stop")
    stop
    ;;
  "status")
    status
    ;;
  "restart")
    restart
    ;;
  *)
    usage
    ;;
esac
查看日志:
cat xx.log, less, more都不能动态看到日志的变化,
tail -f xx.log可以动态看到日志变化