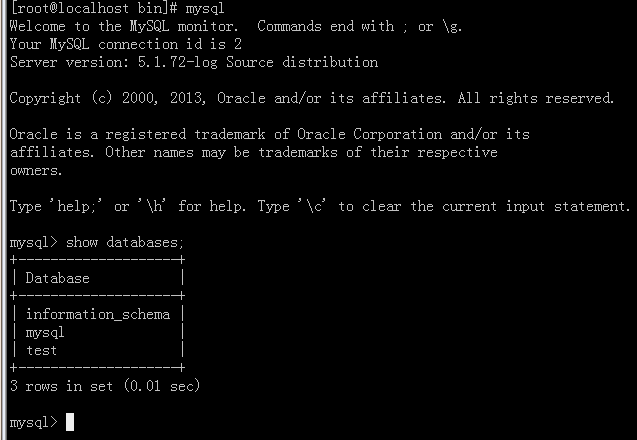
采取编译安装的方法,其好处为:编译安装与平台无关,安装的MySQL目录独立,维护起来方便,而且拥有更好的性能。
环境:CentOS release 6.9 (Final) x86_64
1)下载mysql 链接:http://mirrors.sohu.com/mysql/MySQL-5.1/mysql-5.1.72.tar.gz
安装基础环境:
yum -y install gcc gcc-c++ zlib-devel libtool ncurses-devel libxml2-devel wget
首先添加mysql用户及组
groupadd mysql
useradd -g mysql mysql
编译安装:
cd /usr/local/src
wget http://mirrors.sohu.com/mysql/MySQL-5.1/mysql-5.1.72.tar.gz
tar xf mysql-5.1.72.tar.gz
cd mysql-5.1.72
./configure --prefix=/usr/local/mysql --with-charset=utf8 --with-extra-charsets=all --enable-thread-safe-client --enable-assembler --with-readline --with-big-tables --with-plugins=all --with-mysqld-ldflags=-all-static --with-client-ldflags=-all-static
make && make install
2)配置权限,数据安装路径为/data/mysql并设置开机自启动:
cd /usr/local/mysql/
cp /usr/local/mysql/share/mysql/my-huge.cnf /etc/my.cnf
cp /usr/local/mysql/share/mysql/mysql.server /etc/init.d/mysqld
chmod +x /etc/init.d/mysqld
chown -R mysql:mysql /usr/local/mysql/
mkdir -p /data/mysql                           //数据存放路径
sed -i '39a datadir=/data/mysql' /etc/my.cnf   //加入配置文件
/usr/local/mysql/bin/mysql_install_db --user=mysql --datadir=/data/mysql  //初始化文件和数据库
启动时遇到错误:
[root@localhost mysql]# service mysqld start
Starting MySQL. ERROR! Manager of pid-file quit without updating file.
解决方法:http://www.jb51.net/article/48625.htm
问题解决后:
service mysqld start
chkconfig mysqld on
配置环境:
echo 'export PATH=/usr/local/mysql/bin:$PATH'>>/etc/profile
source /etc/profile
对数据库简单优化:
mysql> select user,host from mysql.user;
mysql> delete from mysql.user where host='::1'
mysql> delete from mysql.user where host='localhost.localdomain';
mysql> drop database test;
设置数据库密码:
mysqladmin -u root password '123'
登录方式:
mysql -uroot -p123
修改密码:
mysqladmin -uroot -p123 password '111'

2)mysql配置文件优化
配置文件如下:
[client]
port            = 3306
socket          = /tmp/mysql.sock
[mysqld]                                          //mysqld服务启动时的参数
port            = 3306                           //端口号
socket          = /tmp/mysql.sock              //用户在linux环境下客户端连接可以不通过TCP/IP网络
skip-locking
key_buffer_size = 384M                   //索引的缓冲区大小可设置为256M或384M,不建议设置过大
max_allowed_packet = 4M      //消息传输量的最大值,默认1M最大1G,必须为1024的倍数
table_open_cache = 512                           //高速缓存大小
sort_buffer_size = 2M                //查询排序时使用的缓冲区大小
read_buffer_size = 2M                //读查询操作使用的缓冲区大小
read_rnd_buffer_size = 8M
myisam_sort_buffer_size = 64M
thread_cache_size = 8                   //连接线程最大数值 0~16384、1GB内存可以配置为8,2GB内存可以配置为16,3GB内存可以配置为32,4GB及以上64
query_cache_size = 32M                          //mysql查询缓冲区大小
thread_concurrency = 8
datadir=/data/mysql
log-bin=mysql-bin
server-id       = 1
max_connections = 456                //允许的最大连接进程数
[mysqldump]
quick
max_allowed_packet = 16M
[mysql]
no-auto-rehash
[myisamchk]
key_buffer_size = 256M
sort_buffer_size = 256M
read_buffer = 2M
write_buffer = 2M
[mysqlhotcopy]
interactive-timeout
做别名方便启动mysql:
alias mysql='/usr/local/mysql/bin/mysql'

2)优化
查看运行各种状态值:
mysql> show global status;
1、慢查询
慢查询是指超过指定时间的SQL语句查询,分析MySQL语句查询性能的方法除了使用EXPLAIN输出执行计划,还可以让MySQL记录下查询超过指定时间的语句。
mysql> show variables like '%slow%';
开启慢查询:
mysql>set global slow_query_log=ON;
如果是主从结构,可以打开一台从服务器的慢查询来监控,或者用自带的命令查询
[root@localhost bin]# ./mysqldumpslow -s -c -t 20 /data/mysql/localhost-slow.log
2、连接数
遇见“MySQL:ERROR 1040:Too manyconnections”的情况配置文件中max_connections的值过小。
mysql> show variables like 'max_connections';
查看过去最大连接数如果达到上限需要增大:
mysql> show global status like 'Max_used_connections';
3、key_buffer_size
key_buffer_size是设置MyISAM表索引引擎缓存空间的大小
mysql> show variables like 'key_buffer_size';
4、临时表
mysql>show global status like 'created_tmp%';
5、open table的情况
open_tables表示打开表的数量,opened_tables表示打开过的表数量
mysql>show global status like 'open%tables%';
+---------------+-------+
| Variable_name | Value |
+---------------+-------+
| Open_tables   | 9     |
| Opened_tables | 15    |
+---------------+-------+
6、进程使用情况
threads_created表示创建过的线程数
mysql>show global status like 'Thread%';
threads_created的值过大,表明MySQL服务器一直在创建线程,这也是比较耗资源的,可以适当增大配置文件中thread_cache_size的值。
mysql>show variables like 'thread_cache_size';
7、查询缓存
query_cache_size用于设置MySQL的查询缓存(query cache)大小,query_cache_type用于设置使用查询缓存的类型
8、排序使用情况
mysql>show global status like 'sort%';
9、文件打开数
文件打开数(open_files)大于open_files_limit值时,MySQL数据库就会产生卡住的现象。
mysql>show global status like 'open_files';
mysql>show variables like 'open_files_limit';
10、Innodb_buffer_pool_size的合理设置
平台配置:
[client]
default-character-set=utf8
port      =3306
socket     =/tmp/mysql.sock
[mysqld]
user      =mysql
port      =3306
socket     =/tmp/mysql.sock
basedir    =/usr/local/mysql
datadir    =/data/mysql/data
log-error   =/data/mysql/mysql-error.log
pid-file    =/data/mysql/mysql.pid
old-passwords =1
log_slave_updates=1
log-bin       =/data/mysql/binlog/mysql-bin
binlog_format    =mixed
binlog_cache_size  =4M
max_binlog_cache_size=8M
max_binlog_size   =1G
expire_logs_days   =90
binlog-ignore-db  =mysql
binlog-ignore-db  =test
binlog-ignore-db  =information_schema
key_buffer_size     =384M
sort_buffer_size    =2M
read_buffer_size    =2M
read_rnd_buffer_size  =16M
join_buffer_size    =2M
thread_cache_size    =8
query_cache_size    =32M
query_cache_limit    =2M
query_cache_min_res_unit=2k
thread_concurrency   =32
table_cache    =614
table_open_cache =512
open_files_limit =10240
back_log     =600
max_connections  =5000
max_connect_errors=6000
external-locking =FALSE
max_allowed_packet   =16M
default-storage-engine =MyISAM
thread_stack      =192K
transaction_isolation  =READ-COMMITTED
tmp_table_size     =256M
max_heap_table_size   =512M
bulk_insert_buffer_size =64M
myisam_sort_buffer_size =64M
myisam_max_sort_file_size=10G
myisam_repair_threads  =1
myisam_recover
long_query_time   =2
slow_query_log
slow_query_log_file =/data/mysql/slow.log
skip-name-resolve
skip-locking
skip-networking
innodb_additional_mem_pool_size = 16M
innodb_buffer_pool_size = 512M
innodb_data_file_path = ibdata1:256M:autoextend
innodb_file_io_threads = 4
innodb_thread_concurrency = 8
innodb_flush_log_at_trx_commit = 2
innodb_log_buffer_size = 16M
innodb_log_file_size = 128M
innodb_log_files_in_group = 3
innodb_max_dirty_pages_pct = 90
innodb_lock_wait_timeout = 120
innodb_file_per_table = 0
[mysqldump]
quick
max_allowed_packet = 64M
[mysql]
no-auto-rehash
Remove the next comment character if you are not familiar with SQL
safe-updates
[myisamchk]
key_buffer_size = 256M
sort_buffer_size = 256M
read_buffer   = 2M
write_buffer  = 2M
[mysqlhotcopy]
interactive-timeout