NIO:即非阻塞式IO
视频教程: https://chuanke.baidu.com/v1982732-211322-1316084.html
使用步骤:
1、创建 ServerSocketChannel 和业务处理线程池。
2、绑定监听端口,并配置为非阻塞模式。
3、创建 多路复用器Selector,将之前创建的 ServerSocketChannel 注册到 Selector 上,监听 SelectionKey.OP_ACCEPT。
4、循环执行 Selector.select() 方法,轮询就绪的 Channel。
5、Selector轮询就绪的 Channel 时,如果是处于 OP_ACCEPT 状态,说明是新的客户端接入,调用 ServerSocketChannel.accept 接收新的客户端。
6、设置新接入的 SocketChannel 为非阻塞模式,并注册到 Selector 上,监听 OP_READ。
7、如果Selector轮询的 Channel 状态是 OP_READ,说明有新的就绪数据包需要读取,则构造 ByteBuffer 对象,读取数据。
先启动服务端,不停监听客户端连接
服务端代码
import java.io.IOException;
import java.net.InetSocketAddress;
import java.nio.ByteBuffer;
import java.nio.channels.SelectionKey;
import java.nio.channels.Selector;
import java.nio.channels.ServerSocketChannel;
import java.nio.channels.SocketChannel;
import java.util.Iterator;

public class NIOServer {


    /*标识数字*/
    private  int flag = 0;
    /*缓冲区大小*/
    private  int BLOCK = 4096;
    /*接受数据缓冲区*/
    private  ByteBuffer sendbuffer = ByteBuffer.allocate(BLOCK);
    /*发送数据缓冲区*/
    private  ByteBuffer receivebuffer = ByteBuffer.allocate(BLOCK);
    //选择器
    private Selector selector;

    public NIOServer(int port) throws IOException {
        //1. 获取通道, 打开服务器套接字通道
        ServerSocketChannel serverSocketChannel = ServerSocketChannel.open();
        //2. 切换到非阻塞模式
        serverSocketChannel.configureBlocking(false);
        //3. 绑定连接的端口
        serverSocketChannel.socket().bind(new InetSocketAddress(port));
        //4. 获取选择器
        selector = Selector.open();
        //5. 通道注册到选择器上,指定监听事件:接收。……等待连接
        serverSocketChannel.register(selector, SelectionKey.OP_ACCEPT);

        System.out.println("Server Start----8888:");
    }

    //监听
    public void listen() throws IOException {
        while(true) {
            //6. 循环获取选择器上已经“准备就绪”的事件,返回的int值表示有多少个通道在上一次select后发生了注册事件
            int nKeys = selector.select();
            if(nKeys>0){
                //7. 获取当前选择器中所有注册的选择键(已就绪的监听事件)
                Iterator<SelectionKey> iterator = selector.selectedKeys().iterator();
                while(iterator.hasNext()){
                    //8. 获取“准备就绪”的事件
                    SelectionKey selectionKey = iterator.next();
                    //9. 判断具体是什么事件准备就绪,开始处理请求
                    handleKey(selectionKey);
                    iterator.remove();
                }
            } else {
                try {
                    Thread.sleep(1000);
                } catch (InterruptedException e) {
                    e.printStackTrace();
                }
            }
        }
    }

    // 处理请求
    private void handleKey(SelectionKey selectionKey) throws IOException {
        // 接受请求
        ServerSocketChannel server = null;
        SocketChannel client = null;
        String receiveText;
        String sendText;
        int count=0;
        // 此选择键的通道是否已准备好接受新的套接字连接。
        if (selectionKey.isAcceptable()) {
            // 返回为之创建此选择键的通道。
            server = (ServerSocketChannel) selectionKey.channel();
            //10. 若“接收就绪”,获取客户端连接
            client = server.accept();
            //11. 切换到非阻塞模式
            client.configureBlocking(false);
            //12. 通道注册到选择器上,指定监听事件:读 就绪
            client.register(selector, SelectionKey.OP_READ);
        } else if (selectionKey.isReadable()) {
            // 返回为之创建此键的通道。
            client = (SocketChannel) selectionKey.channel();
            //将缓冲区清空以备下次读取
            receivebuffer.clear();
            //读取服务器发送来的数据到缓冲区中
            count = client.read(receivebuffer);
            if (count > 0) {
                receiveText = new String(receivebuffer.array(),0,count);
                System.out.println("服务器端接受客户端数据--:"+receiveText);
                client.register(selector, SelectionKey.OP_WRITE);
            }
        } else if (selectionKey.isWritable()) {
            //将缓冲区清空以备下次写入
            sendbuffer.clear();
            // 返回为之创建此键的通道。
            client = (SocketChannel) selectionKey.channel();
            sendText="message from server--" + flag++;
            //向缓冲区中输入数据
            sendbuffer.put(sendText.getBytes());
             //将缓冲区各标志复位,因为向里面put了数据标志被改变要想从中读取数据发向服务器,就要复位
            sendbuffer.flip();
            //输出到通道
            client.write(sendbuffer);
            System.out.println("服务器端向客户端发送数据--:"+sendText);
            client.register(selector, SelectionKey.OP_READ);
        }
    }


    public static void main(String[] args) throws IOException {
         int port = 8888;
         NIOServer server = new NIOServer(port);
         server.listen();
    }

}
心得:
1、第5步中,先把服务端通道注册到选择器上,该选择器等待accept接收客户端消息
2、转到第9步,处理请求,如果isAcceptable()=true,准备好接收客户端了,获取客户端连接
3、第12步,客户端通道注册到选择器上,并指定监听读。然后,继续走到listen()方法的循环体中,
4、 这次循环中,上面已获取客户端连接,nKeys >0了,selectionKey 是监听读
5、又到第9步,isReadable()=true,说明是读事件,开始操作数据,通道读取缓冲区
客户端代码
import java.io.IOException;
import java.net.InetSocketAddress;
import java.nio.ByteBuffer;
import java.nio.channels.SelectionKey;
import java.nio.channels.Selector;
import java.nio.channels.SocketChannel;
import java.util.Iterator;
import java.util.Set;

public class NIOClient {

     /*标识数字*/
    private static int flag = 0;
    /*缓冲区大小*/
    private static int BLOCK = 4096;
    /*接受数据缓冲区*/
    private static ByteBuffer sendbuffer = ByteBuffer.allocate(BLOCK);
    /*发送数据缓冲区*/
    private static ByteBuffer receivebuffer = ByteBuffer.allocate(BLOCK);
    /*服务器端地址*/
    private final static InetSocketAddress SERVER_ADDRESS = new InetSocketAddress("127.0.0.1", 8888);

    public static void main(String[] args) throws IOException {
        // TODO Auto-generated method stub
        // 打开socket通道
        SocketChannel socketChannel = SocketChannel.open();
        // 设置为非阻塞方式
        socketChannel.configureBlocking(false);
        // 打开选择器
        Selector selector = Selector.open();
        // 注册连接服务端socket动作
        socketChannel.register(selector, SelectionKey.OP_CONNECT);
        // 连接
        socketChannel.connect(SERVER_ADDRESS);
        // 分配缓冲区大小内存

        Set<SelectionKey> selectionKeys;
        Iterator<SelectionKey> iterator;
        SelectionKey selectionKey;
        SocketChannel client;
        String receiveText;
        String sendText;
        int count=0;

        while (true) {
            //选择一组键,其相应的通道已为 I/O 操作准备就绪。
            //此方法执行处于阻塞模式的选择操作。
            selector.select();
            //返回此选择器的已选择键集。
            selectionKeys = selector.selectedKeys();
            //System.out.println(selectionKeys.size());
            iterator = selectionKeys.iterator();
            while (iterator.hasNext()) {
                selectionKey = iterator.next();
                if (selectionKey.isConnectable()) {
                    System.out.println("client connect");
                    client = (SocketChannel) selectionKey.channel();
                    // 判断此通道上是否正在进行连接操作。
                    // 完成套接字通道的连接过程。
                    if (client.isConnectionPending()) {
                        client.finishConnect();
                        System.out.println("完成连接!");
                        sendbuffer.clear();
                        sendbuffer.put("Hello,Server".getBytes());
                        sendbuffer.flip();
                        client.write(sendbuffer);
                    }
                    client.register(selector, SelectionKey.OP_READ);
                } else if (selectionKey.isReadable()) {
                    client = (SocketChannel) selectionKey.channel();
                    //将缓冲区清空以备下次读取
                    receivebuffer.clear();
                    //读取服务器发送来的数据到缓冲区中
                    count=client.read(receivebuffer);
                    if(count>0){
                        receiveText = new String( receivebuffer.array(),0,count);
                        System.out.println("客户端接受服务器端数据--:"+receiveText);
                        client.register(selector, SelectionKey.OP_WRITE);
                    }

                } else if (selectionKey.isWritable()) {
                    sendbuffer.clear();
                    client = (SocketChannel) selectionKey.channel();
                    sendText = "message from client--" + (flag++);
                    sendbuffer.put(sendText.getBytes());
                     //将缓冲区各标志复位,因为向里面put了数据标志被改变要想从中读取数据发向服务器,就要复位
                    sendbuffer.flip();
                    client.write(sendbuffer);
                    System.out.println("客户端向服务器端发送数据--:"+sendText);
                    client.register(selector, SelectionKey.OP_READ);
                }
            }
            selectionKeys.clear();
        }
    }


}
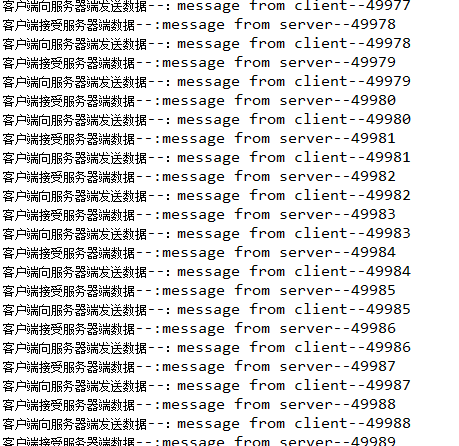
运行效果: