fragment 是android3.0中就开始引入的一个碎片功能,这个主要是针对android平板电脑这种大屏幕来使用的,到了android4.0之后也就开始在手机上引入fragment,在之前没有fragment时,就是将UI元素和具体的Activity界面结合在一起,而我们一般是通过不同的Activity之间的跳转来实现不同界面的改变,这样一来不仅UI代码得不到重用而且不停的跳转也会导致一些混乱。fragment的引入正好将一个应用变为一个模块化和可重用的组件。因为每一个fragment有它自己的布局文件,而且不同的Activity可以使用相同的fragment。
fragment生命周期
先来看下面的图片

上面的图片我是别的网站截取过来的,从上图中我们可以很清楚的看到fragment生命周期和Activity是差不多相同的,记住Fragment是不能独立存在的,Fragment必须嵌入的Activty中,所以Fragment的生命周期是会受到Activity的生命周期的影响,当Activity暂停时那么所在的Fragment也会暂停,当Activity销毁时那么所在的Fragment也相应的销毁。但是当Activity运行之后即跑了onResume之后onPause之前,我们就可以单独对Fragment进行添加,删除,替换等一系列的操作。而一个Fragment可以添加在多个Activity中也可以是一个Activity中添加多个Fragment。
如何创建一个简单的Fragment
要想创建一个Fragment就必须创建一个类继承Fragment或Fragment子类,这个Fragment代码写起来很像Activity,因为它们的生命周期都是差不多相同的,先来看一下继承Fragment类的代码:

package com.cheng.fragmentactivty;

import android.annotation.SuppressLint;
import android.annotation.TargetApi;
import android.app.Activity;
import android.app.Fragment;
import android.os.Build;
import android.os.Bundle;
import android.view.LayoutInflater;
import android.view.View;
import android.view.ViewGroup;

@SuppressLint("NewApi")
public class FragmentA extends Fragment{

    @Override
    public void onAttach(Activity activity) {
        // TODO Auto-generated method stub
        super.onAttach(activity);
    }

    @Override
    public void onCreate(Bundle savedInstanceState) {
        // TODO Auto-generated method stub
        super.onCreate(savedInstanceState);
    }

    @Override
    public View onCreateView(LayoutInflater inflater, ViewGroup container,
            Bundle savedInstanceState) {
        // TODO Auto-generated method stub
        return inflater.inflate(R.layout.fragment_a, container,false);
    }

    @Override
    public void onActivityCreated(Bundle savedInstanceState) {
        // TODO Auto-generated method stub
        super.onActivityCreated(savedInstanceState);
    }

    @Override
    public void onStart() {
        // TODO Auto-generated method stub
        super.onStart();
    }

    @Override
    public void onResume() {
        // TODO Auto-generated method stub
        super.onResume();
    }

    @Override
    public void onPause() {
        // TODO Auto-generated method stub
        super.onPause();
    }

    @Override
    public void onStop() {
        // TODO Auto-generated method stub
        super.onStop();
    }

    @Override
    public void onDestroyView() {
        // TODO Auto-generated method stub
        super.onDestroyView();
    }

    @Override
    public void onDestroy() {
        // TODO Auto-generated method stub
        super.onDestroy();
    }
}
上面的FragmentA就是继承自Fragment,实现了许多类似Activity的方法,比如onCreate,onPause,onDestory等,这些方法和Activity都是差不多的,我这里就不再说明了,我们平时在开发的过程中经常使用比较多的方法是:
onAttach()
这个是在刚刚开始添加Fragment与Activity关联的时候系统就会调用这个方法,具体当Activity里面调用setContentView()的方法的时候就调用这个onAttach()方法,主要是可以从这里获取到Activity的实例(注意看它的参数),当然在这里也可以使用getActivity()方法获取到它的activity的实例,这个我们后面会有说明的。
onCreate()
当创建Fragment时调用的方法在实现代码中, 应当初始化想要在fragment中保持的必要组件, 当fragment被暂停或者停止后可以恢复
onCreateView()
Fragment第一次绘制界面的时候系统就会调用这个方法,这个方法返回是一个view布局界面,看我上面贴的代码,onCreateView()方法中返回了
inflater.inflate(R.layout.fragment_a, container,false);这个界面,在onCreateView()方法中参数container指的是存放fragment布局layout中的viewgroup对象,简单点说就是当前fragment界面的父界面。我们来看看R.layout.fragment_a这个布局定义
<?xml version="1.0" encoding="utf-8"?>
<RelativeLayout xmlns:android="http://schemas.android.com/apk/res/android"
    android:layout_width="match_parent"
    android:layout_height="match_parent" >

    <Button
        android:id="@+id/btn"
        android:layout_width="wrap_content"
        android:layout_height="wrap_content"
        android:text="set_text"
        android:layout_centerInParent="true"
        />

</RelativeLayout>
这个布局我就添加了一个按钮,说明这个fragment界面就是显示一个按钮
onCreate()和onCreayeView()都是activity上调用setContentView()的时候调用的,也就是说我们的Activity中的onCreate()有可能还没有跑完,所以最好不要在两个方法中取操作Activity相关的view,不然可能会出现错误。
onActivityCreated()
这个方法也就是在activity中onCreate()方法完成之后被调用的,我们就可以在这个方法activity的UI操作
onPause()
这个和Activity中的onPause()意思是一样的,这里就不多介绍了
将Fragment添加到指定的Activity中
通过上面的方法一个fragment就简单创建好了,这个fragment只有一个button按钮,但是我们要记住一个fragment是不能单独存在的,它必须嵌入到某一个Activity中,那么如何把已经写好的fragment嵌入到指定的Activity中呢?这里有两种方法可以做到:
(1)在指定的Activity的layout文件中声明fragment
直接来看layout文件:
<RelativeLayout xmlns:android="http://schemas.android.com/apk/res/android"
    xmlns:tools="http://schemas.android.com/tools"
    android:layout_width="match_parent"
    android:layout_height="match_parent"
    android:paddingBottom="@dimen/activity_vertical_margin"
    android:paddingLeft="@dimen/activity_horizontal_margin"
    android:paddingRight="@dimen/activity_horizontal_margin"
    android:paddingTop="@dimen/activity_vertical_margin"
    tools:context=".FragmentActivity" >

    <fragment
        android:name="com.cheng.fragmentactivty.FragmentA"
        android:id="@+id/frag_a"
        android:layout_width="wrap_content"
        android:layout_height="wrap_content"
        android:layout_centerHorizontal="true"
        />
    <TextView
        android:id="@+id/txt"
        android:layout_below="@id/frag_a"
        android:layout_width="wrap_content"
        android:layout_height="wrap_content"
        android:text="@string/hello_world"
        android:layout_centerHorizontal="true"
        android:layout_marginTop="20dp"
         />

</RelativeLayout>
在上面我们已经看到<fragment>标签,android:name属性指定在layout中实例化的Fragment类,当系统创建上述中的layout的时候就会实例化fragment标签中android:name指定的fragment,然后就调用onCreateView方法来获取到当前fragment所返回的layout,系统把fragment返回的layout插入<fragment>标签的位置直接替换掉了<fragment>标签。
注意:每一个fragment都需要指定唯一的标识,系统可以通过这个标识来进行一系列的事物操作,比如:添加,删除,替换等等
添加一个指定的标识很简单:
使用android:id属性提供唯一的ID,上面中已经使用
使用android:tag属性提供一个唯一的ID
如果以上的两个方法都没有提供,那么系统默认使用容器的ID,(好像在以后没有提供上面两个跑起来直接就崩溃的)
(2)在代码中手动将fragment添加到已经存在的viewGroup中
先来看看我们Activity中layout布局做的改动:
<RelativeLayout xmlns:android="http://schemas.android.com/apk/res/android"
    xmlns:tools="http://schemas.android.com/tools"
    android:layout_width="match_parent"
    android:layout_height="match_parent"
    android:paddingBottom="@dimen/activity_vertical_margin"
    android:paddingLeft="@dimen/activity_horizontal_margin"
    android:paddingRight="@dimen/activity_horizontal_margin"
    android:paddingTop="@dimen/activity_vertical_margin"
    tools:context=".FragmentActivity" >

    <FrameLayout
        android:id="@+id/content"
        android:layout_width="wrap_content"
        android:layout_height="wrap_content"
        android:layout_centerHorizontal="true" />

    <TextView
        android:id="@+id/txt"
        android:layout_below="@id/content"
        android:layout_width="wrap_content"
        android:layout_height="wrap_content"
        android:text="@string/hello_world"
        android:layout_centerHorizontal="true"
        android:layout_marginTop="20dp"
         />

</RelativeLayout>
看上面的layout,和之前那个不同的是我把<fragment>标签给去掉了,新添加了一个<FrameLayout>标签,这个标签的id为content,这个有作用的,我们来看下面的代码:
        FragmentA fragmentA=new FragmentA();
        FragmentManager fragmentManager=getFragmentManager();
        FragmentTransaction transaction=fragmentManager.beginTransaction();
        transaction.add(R.id.content, fragmentA);
        transaction.commit();
FragmentManager类是实现在Activity中管理fragment的,我们可以在Activity中通过getFragmentManager()方法得到一个实例,那么我们可以使用FragmentManager做以下事情:
使用findFragmentById()或者findFragmentByTag()方法来获取已经在布局中定义的fragment,这个看字面的意思就知道它们和Activity中的findViewById()是一个道理的。
使用addOnBackStack()方法从Activity后退栈中弹出fragment,就类似于我们的返回建,这个作用应该不是很大。在后面介绍有关于fragment退回栈的时候在说一下。
使用addOnBackStackChangedListerner来注册一个监听器来监听上面所说的后退栈的变化,用处很少
使用FragmentManager来打开一个FragmentTransaction事务,这个是经常使用的,很重用,如果学过数据库的同学应该知道什么是事务,我们可以通过FragmentTransaction事务对fragment进行添加,删除,替换等操作命令,如何获取一个FragmentTransaction对象,从上面的代码中可以看到使用fragmentManager.beginTransaction()可以获取一个FragmentTransaction事务,那么transaction.add(R.id.content, fragmentA);这句话就是将已经创建好的fragment添加到Activity中,那么这个添加到哪里呢?这个add第一个参数是R.id.content,这个就是我们上面的定义的<FrameLayout>标签,这句话表示的是将fragmentA添加到FrameLayout布局中,我们利用多次调用add()方法来添加fragment,这样fragment显示的顺序和添加的顺序是一样的,
这里要注意当我们使用FragmentTransaction事务进行想要的操作之后,我们要在最后对事务进行提交,不然你所作的操作就无法看到,如上代码中最后一句话transaction.commit();就是提交所有的操作。

添加一个无UI的fragment
之前在onCreateView()方法中返回一个view:
    @Override
    public View onCreateView(LayoutInflater inflater, ViewGroup container,
            Bundle savedInstanceState) {
        // TODO Auto-generated method stub
        return inflater.inflate(R.layout.fragment_a, container,false);
    }
这个返回值也可以直接返回一个null,这个就表示添加了一个无UI的fragment,要把一个无UI的fragment添加到Activity中就不能在layout里面直接添加了,这个必须在Activity代码中使用add添加(为fragment提供一个唯一的字符串"tag", 而不是一个view ID).这么做添加了fragment, 但因为它没有关联到一个activity layout中的一个view, 所以不会接收到onCreateView()调用. 因此不必实现此方法。
Fragment交互
先来看一下如何在fragment代码里面获取到自己的view
    @Override
    public void onActivityCreated(Bundle savedInstanceState) {
        // TODO Auto-generated method stub
        super.onActivityCreated(savedInstanceState);
        Button btn=(Button) getView().findViewById(R.id.btn);


        btn.setOnClickListener(new OnClickListener() {

            @Override
            public void onClick(View v) {
                // TODO Auto-generated method stub
                Toast.makeText(getActivity(), "OKOKOK", Toast.LENGTH_LONG).show();
            }
        });
    }
看上面通过getView()方法来得到fragment的layout的(我们一般是在onActivityCreated()方法中取操作UI,这个是一个好习惯),这个代码看起来很容易吧,再来看看在fragment中操作activity中的view :
    @Override
    public void onActivityCreated(Bundle savedInstanceState) {
        // TODO Auto-generated method stub
        super.onActivityCreated(savedInstanceState);
        Button btn=(Button) getView().findViewById(R.id.btn);


        btn.setOnClickListener(new OnClickListener() {

            @Override
            public void onClick(View v) {
                // TODO Auto-generated method stub
                Toast.makeText(getActivity(), "OKOKOK", Toast.LENGTH_LONG).show();
                setText("OKOK");
            }
        });
    }

    private void setText(String text){
        TextView textview=(TextView) getActivity().findViewById(R.id.txt);
        textview.setText("OKOK");
    }
我这里就是用了TextView textview=(TextView) getActivity().findViewById(R.id.txt);这个就可以获取到Activity中的view,现在我们也苦于反过来来,在Activity中获取fragment中的view
    private FragmentA fragmentA;
    private FragmentManager fragmentManager;
    private Button btn;
    @Override
    protected void onCreate(Bundle savedInstanceState) {
        super.onCreate(savedInstanceState);
        setContentView(R.layout.activity_fragment);
        fragmentManager=getFragmentManager();
        fragmentA=(FragmentA) fragmentManager.findFragmentById(R.id.fragment);
        btn=(Button) fragmentA.getView().findViewById(R.id.btn);
        btn.setOnClickListener(new OnClickListener() {

            @Override
            public void onClick(View v) {
                // TODO Auto-generated method stub
                Toast.makeText(FragmentActivity.this, "koko", Toast.LENGTH_LONG).show();
            }
        });
我们先使用findFragmentById()找到指定的fragment,然后再通过fragment.getView()返回fragment的layout,这个代码很容易吧,不过要注意如果在fragment中设置了按钮的监听事件在Activity中又重新设置了,那么这个时候是以fragment中的为准。
其实在使用的过程中Fragment和Activity中是分开的,各自处理自己的view,那么比如在Fragment中button点击事件是如何响应到Activity中呢?一个必须好的方法就是在Fragment中定义一个接口,在Acticity中需要实现这个接口,
    public interface textListener{
        public void textchanger(String text);
    }
这个接口就是在Fragment类中定义的,
    private textListener listener;
    @Override
    public void onAttach(Activity activity) {
        // TODO Auto-generated method stub
        super.onAttach(activity);
        try{
            listener=(textListener) activity;
        }catch(ClassCastException e){
            throw new ClassCastException(activity.toString() + " must implement textlistener");
        }

    }
fragmentA的 onAttach() 回调方法(当添加fragment到activity时由系统调用) 通过将作为参数传入onAttach()的Activity做类型转换来实例化一个textListener实例.如果activity没有实现接口, fragment会抛出 ClassCastException 异常. 正常情形下, listener成员会保持一个到activity的textListener实现的引用, 因此fragment A可以通过调用在OnArticleSelectedListener接口中定义的方法分享事件给activity
public class FragmentActivity extends Activity implements textListener{

    private FragmentA fragmentA;
    private FragmentManager fragmentManager;
    private Button btn;
    private TextView textView;
    @Override
    protected void onCreate(Bundle savedInstanceState) {
        super.onCreate(savedInstanceState);
        setContentView(R.layout.activity_fragment);

        textView=(TextView) findViewById(R.id.txt);

    }
    @Override
    public void textchanger(String text) {
        // TODO Auto-generated method stub
        textView.setText(text);
    }
这个就是Activity,我们可以看到这个Activity实现了textListner的接口,在回调textChanger()方法中我们设置text文本显示,这里应该很容易理解
addToBackStack()和replace()方法
之前有简单的介绍过addToBackStack(),这个方法就把移除的Fragment放到Activity的stack栈中,当我们按返回建的时候就会依次的返回到位于在stack栈顶中的fragment,如果没有调用 addToBackStack(), 那么当事务提交后, 那个fragment会被销毁,并且用户不能导航回到它. 有鉴于此, 当移除一个fragment时,如果调用了 addToBackStack(), 那么fragment会被停止, 如果用户导航回来,它将会被恢复。replace()就是一个替换当前的fragment,先来看一下代码:
public class FragmentActivity extends Activity implements textListener{

    private FragmentA fragmentA;
    private FragmentB fragmentB;
    private FragmentManager fragmentManager;
    private Button btn;
    private TextView textView;
    @Override
    protected void onCreate(Bundle savedInstanceState) {
        super.onCreate(savedInstanceState);
        setContentView(R.layout.activity_fragment);

        textView = (TextView) findViewById(R.id.txt);
        btn=(Button) findViewById(R.id.setfragment);

        fragmentA = new FragmentA();
        fragmentB = new FragmentB();

        fragmentManager = getFragmentManager();

        FragmentTransaction transaction = fragmentManager.beginTransaction();
        transaction.add(R.id.content, fragmentA);
        transaction.commit();

        btn.setOnClickListener(new OnClickListener() {

            @Override
            public void onClick(View v) {
                // TODO Auto-generated method stub
                FragmentTransaction transaction = fragmentManager.beginTransaction();
                transaction.replace(R.id.content, fragmentB);
                transaction.addToBackStack(null);
                transaction.commit();
            }
        });

    }
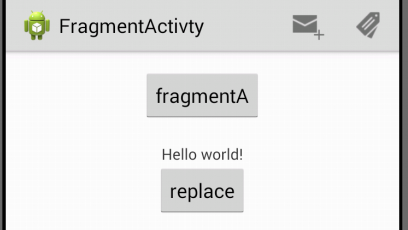
从代码中我们看到在刚刚开始的时候显示的FragmentA,在点击按钮之后我们使用了replace()把FragmentA换成了FragmentB,这个时候我们还可以看到代码里面在commit之前使用了 transaction.addToBackStack(null);如果我们点击按钮切换到FragmentB的时候再按返回建这个时候又回到FragmentA中而不是直接退出Activity,transaction.replace(R.id.content, fragmentB);大家还记得R.id.content是哪个id么?我这里在贴一次代码吧:
<RelativeLayout xmlns:android="http://schemas.android.com/apk/res/android"
    xmlns:tools="http://schemas.android.com/tools"
    android:layout_width="match_parent"
    android:layout_height="match_parent"
    android:paddingBottom="@dimen/activity_vertical_margin"
    android:paddingLeft="@dimen/activity_horizontal_margin"
    android:paddingRight="@dimen/activity_horizontal_margin"
    android:paddingTop="@dimen/activity_vertical_margin"
    tools:context=".FragmentActivity" >


    <FrameLayout
        android:id="@+id/content"
        android:layout_width="wrap_content"
        android:layout_height="wrap_content"
        android:layout_centerHorizontal="true" />


    <TextView
        android:id="@+id/txt"
        android:layout_below="@id/content"
        android:layout_width="wrap_content"
        android:layout_height="wrap_content"
        android:text="@string/hello_world"
        android:layout_centerHorizontal="true"
        android:layout_marginTop="20dp"
         />

    <Button
        android:id="@+id/setfragment"
        android:layout_width="wrap_content"
        android:layout_height="wrap_content"
        android:layout_centerHorizontal="true"
        android:layout_below="@id/txt"
        android:text="replace"
        />

</RelativeLayout>
这个是Activity的layout
在Fragment代码中添加ActionBar
ActionBar我之前有一边文章也介绍过了,那么我们利用在Fragment中添加的ActionBar显示效果和Activity一样显示效果一样,在Fragment中可以通过实现onCreateOptionMenu(),但是要使用这个方法来能调用,我们必须在Fragment中的onCreate()方法中调用setHasOptionsMenu()来指出fragment愿意添加item到选项菜单(否则, fragment将接收不到对 onCreateOptionsMenu()的调用),随后从fragment添加到Option菜单的任何项,都会被追加到现有菜单项的后面.当一个菜单项被选择, fragment也会接收到 对 onOptionsItemSelected() 的回调.也可以在你的fragment layout中通过调用 registerForContextMenu() 注册一个view来提供一个环境菜单.当用户打开环境菜单, fragment接收到一个对 onCreateContextMenu() 的调用.当用户选择一个项目, fragment接收到一个对onContextItemSelected() 的调用.还有一个是我们要注意在Fragment的onOptionsItemSelected()可以接受菜单选项的点击事件但是这个最开始还是在Activity中先接受到,只有Activity中没有做处理时才会调用到Fragment中的onOptionsItemSelected()方法,来看一下代码吧:
package com.cheng.fragmentactivty;


import android.annotation.SuppressLint;
import android.annotation.TargetApi;
import android.app.ActionBar;
import android.app.Activity;
import android.app.Fragment;
import android.os.Build;
import android.os.Bundle;
import android.view.LayoutInflater;
import android.view.Menu;
import android.view.MenuInflater;
import android.view.MenuItem;
import android.view.View;
import android.view.View.OnClickListener;
import android.view.ViewGroup;
import android.widget.Button;
import android.widget.TextView;
import android.widget.Toast;

@SuppressLint("NewApi")
public class FragmentA extends Fragment{

    private textListener listener;

    @Override
    public void onAttach(Activity activity) {
        // TODO Auto-generated method stub
        super.onAttach(activity);
        try{
            listener=(textListener) activity;
        }catch(ClassCastException e){
            throw new ClassCastException(activity.toString() + " must implement textlistener");
        }

    }

    @Override
    public void onCreate(Bundle savedInstanceState) {
        // TODO Auto-generated method stub
        super.onCreate(savedInstanceState);
         setHasOptionsMenu(true);
    }

    @Override
    public View onCreateView(LayoutInflater inflater, ViewGroup container,
            Bundle savedInstanceState) {
        // TODO Auto-generated method stub
        return inflater.inflate(R.layout.fragment_a, container,false);
    }

    @Override
    public void onActivityCreated(Bundle savedInstanceState) {
        // TODO Auto-generated method stub
        super.onActivityCreated(savedInstanceState);
        Button btn=(Button) getView().findViewById(R.id.btn);


        btn.setOnClickListener(new OnClickListener() {

            @Override
            public void onClick(View v) {
                // TODO Auto-generated method stub
                Toast.makeText(getActivity(), "OKOKOK", Toast.LENGTH_LONG).show();

                listener.textchanger("OKOKOK");
            }
        });
    }
    @Override
    public void onStart() {
        // TODO Auto-generated method stub
        super.onStart();
    }

    @Override
    public void onResume() {
        // TODO Auto-generated method stub
        super.onResume();
    }

    @Override
    public void onPause() {
        // TODO Auto-generated method stub
        super.onPause();
    }

    @Override
    public void onStop() {
        // TODO Auto-generated method stub
        super.onStop();
    }

    @Override
    public void onDestroyView() {
        // TODO Auto-generated method stub
        super.onDestroyView();
    }

    @Override
    public void onDestroy() {
        // TODO Auto-generated method stub
        super.onDestroy();
    }

    public interface textListener{
        public void textchanger(String text);
    }

    @Override
    public void onCreateOptionsMenu(Menu menu, MenuInflater inflater) {
        // TODO Auto-generated method stub
        super.onCreateOptionsMenu(menu, inflater);
//        menu.add("Menu 1a").setShowAsAction(MenuItem.SHOW_AS_ACTION_IF_ROOM);
//        menu.add("Menu 2a").setShowAsAction(MenuItem.SHOW_AS_ACTION_IF_ROOM);
        inflater.inflate(R.menu.gmail, menu);

    }

    @Override
    public boolean onOptionsItemSelected(MenuItem item) {
        // TODO Auto-generated method stub
        return super.onOptionsItemSelected(item);
    }


}
上面的代码中看先看onCreate()方法,调用了setHasOptionsMenu(true);如果不调用的话,Fragment中onCreateOptionsMenu()方法就没有调用,再来看看我们的onCreateOptionsMenu()里面使用了inflater.inflate(R.menu.gmail, menu);将布局写进去,同时也可以想注视那两次话这样写,剩下的onOptionsItemSelected()点击事件就很简单了,在这里也不必说了,先来看看图片