本机环境:
[root@Cobbler mnt]# cat /etc/redhat-release
CentOS Linux release 7.4.1708 (Core)
[root@Cobbler mnt]# uname -r
3.10.0-693.el7.x86_64
1.添加epel源
curl -o /etc/yum.repos.d/epel.repo http://mirrors.aliyun.com/repo/epel-7.repo
2.安装所属需软件
yum -y install cobbler cobbler-web dhcp tftp-server pykickstart httpd
3.启动http和cobbler服务
service cobblerd start
service httpd start
4.修改cobbler的配置文件
操作前备份:
cp /etc/cobbler/settings{,.ori}
配置文件中几个关键点:
a.这里是cobbler服务器的ip地址:
# this is the address of the cobbler server -- as it is used
# by systems during the install process, it must be the address
# or hostname of the system as those systems can see the server.
# if you have a server that appears differently to different subnets
# (dual homed, etc), you need to read the --server-override section
# of the manpage for how that works.
server: 172.16.1.202
b.如果想通过cobbler管理dhcp服务需修改以下:
# if using cobbler with manage_dhcp, put the IP address
# of the cobbler server here so that PXE booting guests can find it
# if you do not set this correctly, this will be manifested in TFTP open timeouts.
next_server: 172.16.1.202
如果想通过cobbler管理还需要修改如下配置为1
# set to 1 to enable Cobbler's DHCP management features.
# the choice of DHCP management engine is in /etc/cobbler/modules.conf
manage_dhcp: 1
c.为了防止循环装系统,让某台机器只能进行一次
# if this setting is set to 1, cobbler systems that pxe boot
# will request at the end of their installation to toggle the
# --netboot-enabled record in the cobbler system record.  This eliminates
# the potential for a PXE boot loop if the system is set to PXE
# first in it's BIOS order.  Enable this if PXE is first in your BIOS
# boot order, otherwise leave this disabled.   See the manpage
# for --netboot-enabled.
pxe_just_once: 1
d.新主机的root密码
default_password_crypted: "$1$hello$Npg9Pt9k98Mlg0ZeqHAuN1"
注:加密方法
openssl passwd -1 -salt 'random-phrase-here' 'your-password-here'
5.启动所有相关服务
systemctl start rsyncd
systemctl enable rsyncd
systemctl enable tftp.socket
systemctl start tftp.socket
systemctl restart cobblerd.service
6.下载get-loaders
[root@Cobbler mnt]#  cobbler get-loaders
[root@Cobbler mnt]# cd /var/lib/cobbler/loaders/
[root@Cobbler loaders]# ls
COPYING.elilo     COPYING.yaboot  grub-x86_64.efi  menu.c32    README
COPYING.syslinux  elilo-ia64.efi  grub-x86.efi     pxelinux.0  yaboot
注:由于服务器在国外下载会出问题
7.编辑dhcp模板:关键位置如下

8.检查并同步cobbler配置
cobbler check
cobbler sync
9.检查相关服务是否正常
systemctl status dhcpd.service
systemctl status tftp.service
systemctl status tftp.socket
10.使用浏览器打开https://10.0.0.202/cobbler_web
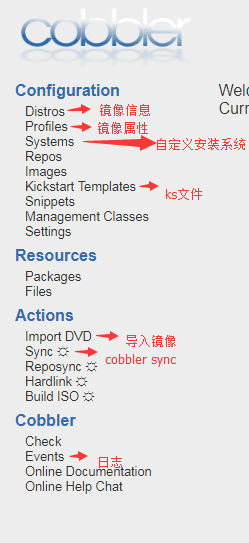
到此为止,就可以使用鼠标操作了