0 前后端分离下的用户信息认证
前端使用Vue+axios,后端使用SpringBoot+SpringSecurity。
为了解决http无状态的问题,我采用jwt(json web token)保存用户信息,前端每次发起请求时带上,交给后端做用户认证。此时需要解决的问题是后端如何将生成的jwt返回前端,以及前端在拿到jwt后如何在每次请求时携带jwt。
1 后端校验用户成功以后,将生成的token写到响应头里
response.addHeader("Authorization", "Bearer " + jwt);
jwt就是自己生成的token,是String类型。
<!-- jwt依赖 -->
<dependency>
    <groupId>io.jsonwebtoken</groupId>
    <artifactId>jjwt</artifactId>
    <version>0.9.0</version>
</dependency>
// 完整代码

/**
 * 登录验证
 * 登录成功就生成token并放入响应头
 */
public class JwtLoginFilter extends UsernamePasswordAuthenticationFilter {

    private AuthenticationManager authenticationManager;

    public JwtLoginFilter(AuthenticationManager authenticationManager) {
        this.authenticationManager = authenticationManager;
    }

    private static final Logger logger
            = LoggerFactory.getLogger(JwtLoginFilter.class);

    // 省略了重写的attemptAuthentication()

    @Override
    protected void successfulAuthentication(HttpServletRequest request,
                                            HttpServletResponse response,
                                            FilterChain chain,
                                            Authentication authResult)
            throws IOException, ServletException {
        // 获取用户角色
        Collection<? extends GrantedAuthority> authorities = authResult.getAuthorities();
        // 我的数据库设计了一个用户只会有一个角色
        Iterator<? extends GrantedAuthority> iterator = authorities.iterator();
        String role = "";
        if (iterator.hasNext()) {
            role = iterator.next().getAuthority();
        }

        // 生成token
        String jwt = Jwts.builder()
                //配置用户角色
                .claim("authorities", role)
                .setSubject(authResult.getName())
                //过期时间,一小时
                .setExpiration(new Date(System.currentTimeMillis() + 60 * 60 * 1000))
                .signWith(SignatureAlgorithm.HS512, "密钥")
                .compact();

        //将token写到响应头里
        response.addHeader("Authorization", "Bearer " + jwt);
        // 自定义方法,给响应设置状态码等
        ResponseDataUtil.setDataInResponse(response,
                null,
                HttpStatusEnum.SUCCESSFUL,
                true);
    }
}
2 后端开启配置,使前端可以获取到响应头里的token
/**
 * 配置cors,解决前端访问后端的跨域资源问题
 */
@Configuration
public class WebMvcConfig implements WebMvcConfigurer {
    @Override
    public void addCorsMappings(CorsRegistry registry) {
        registry.addMapping("/**")
                //设置了前端的地址
                .allowedOrigins("http://localhost:10011")
                .allowedMethods("GET", "POST", "DELETE", "PUT", "OPTIONS", "HEAD")
                .allowedHeaders("*")
                //将请求头里保存的token暴露出来给前端获取
                .exposedHeaders("Authorization");
    }
}
重点是调用了exposedHeaders(),否则前端无法获取到响应头中键为Authorization的值。
现在,登录请求的响应头中已经增加了保存着token的Authorization。

3 前端在登录方法的回调函数里面获取响应头里的token
login() {
      // 对表单数据的有效性进行验证
      this.$refs.loginFormRef.validate(async valid => {
        if (!valid) return
        // 表单数据有效,发送请求
        const data = await this.$request.postWithBody('login', this.loginForm)
        if (data.successful) {
          // 将token保存到本地
          window.sessionStorage.setItem('jwt', data.token)
          this.$router.push('/home')
        }
      })
    }
this.$request.postWithBody('login', this.loginForm)是我自己封装的axios方法,用于发送post请求。当然完全可以用原生额axios的post方法。
window.sessionStorage.setItem('jwt', data.token)将从后台返回的token保存在本地。其中jwt是这个键值对的键,可以根据自己的习惯命名。
4 前端axios配置请求拦截器,给每个请求加上token
// 请求拦截器
axios.interceptors.request.use(request => {
  // 显示进度条
  Nprogress.start()
  request.headers.Authorization = window.sessionStorage.getItem('jwt')
  return request
})
这一步可以将前端发送的每一个请求都拦截下来,并在请求头里添上第3步中获取到的jwt。
5 效果
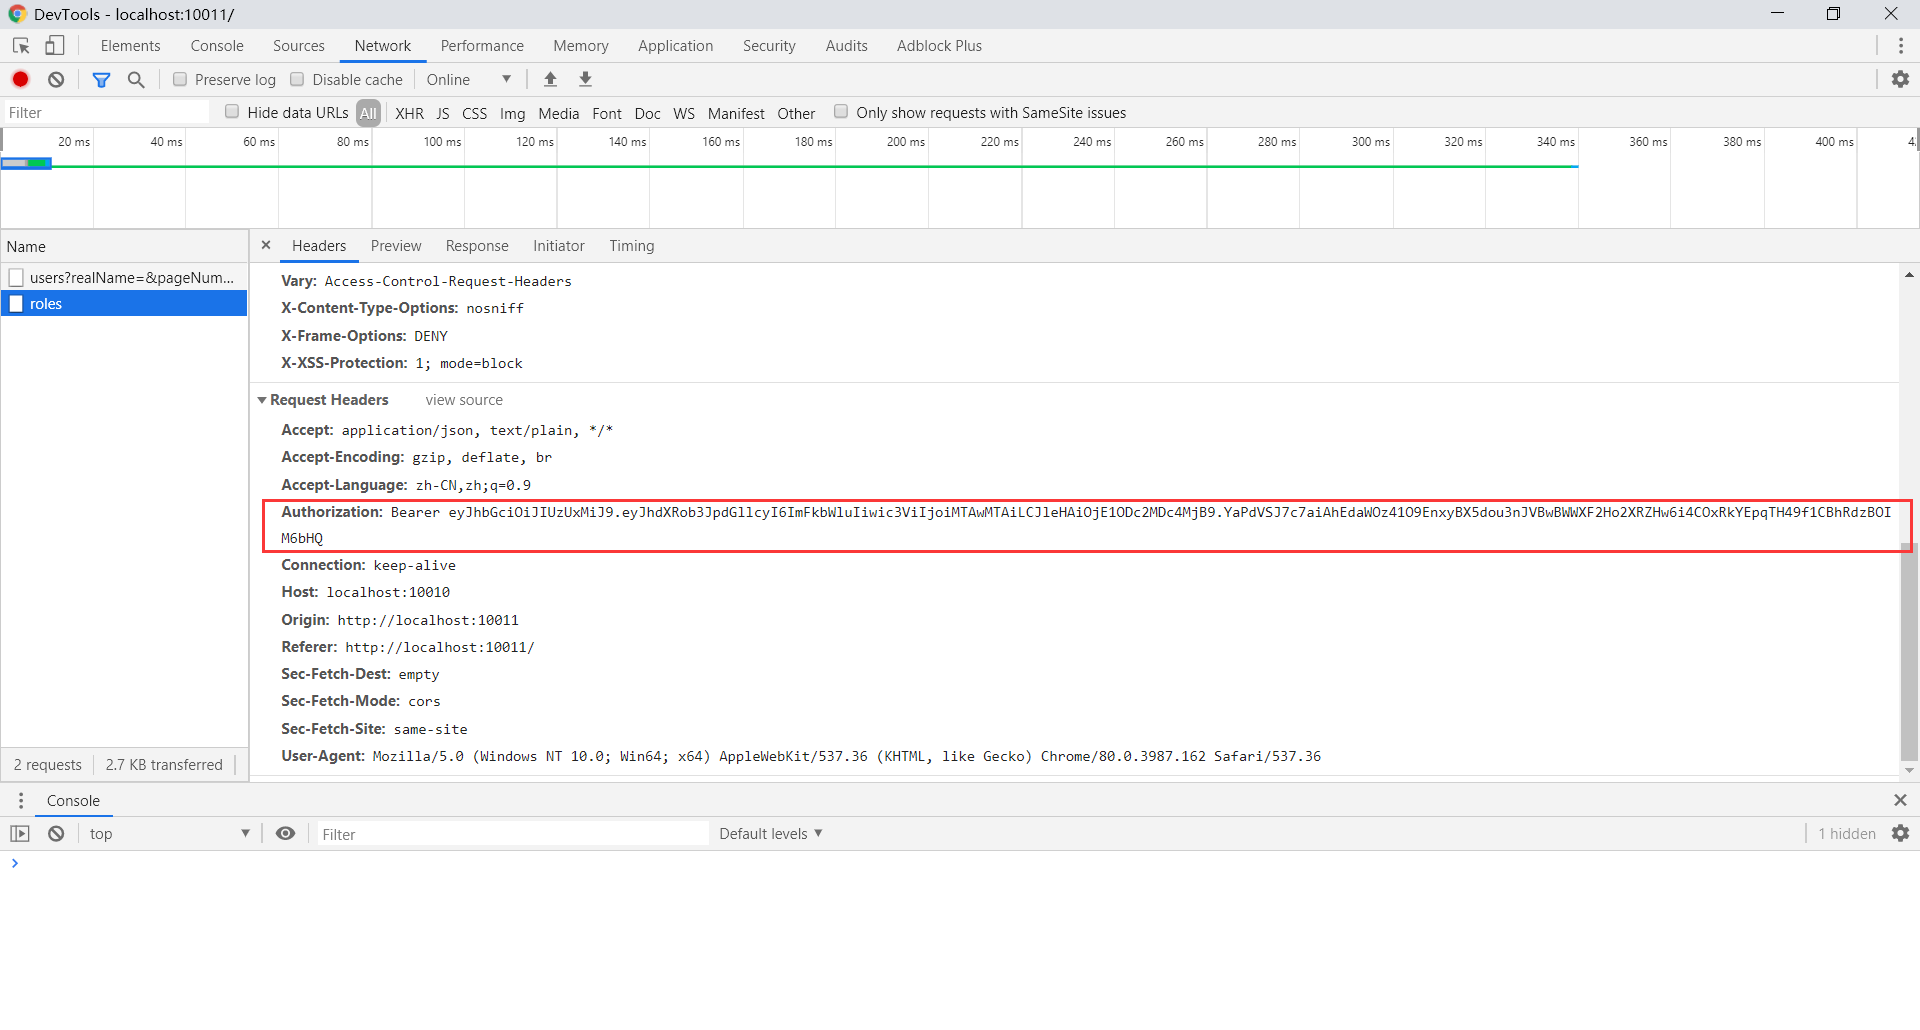
此时,前端发送的请求中,已经在请求头加入了jwt,后端收到请求后,将请求头里的token取出进行解析,完成用户认证。
本文由博客群发一文多发等运营工具平台 OpenWrite 发布