因为我之前已经做过PuTTY密钥认证,所以接下来Xshell密钥认证省去了一些步骤。
之前没有做过密钥认证的,需要执行以下命令,可参看这篇博客:PuTTY密钥认证
[root@localhost ~]# mkdir /root/.ssh
[root@localhost ~]# chmod 700 /root/.ssh
[root@localhost ~]# vi /root/.ssh/authorized_keys
[root@localhost ~]# setenforce 0
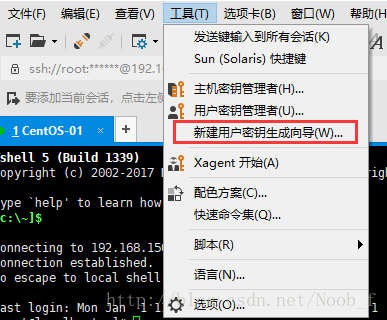
工具-新建用户密钥生成向导
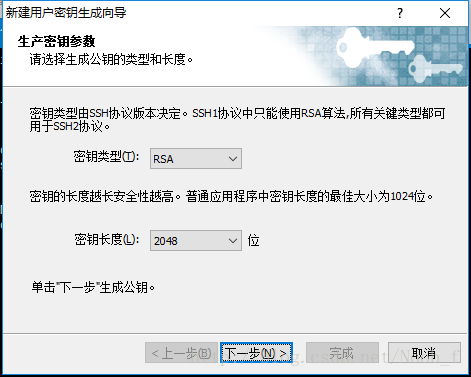
默认就行
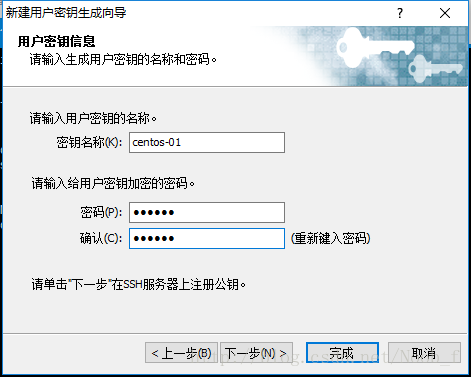
设置用户密钥信息
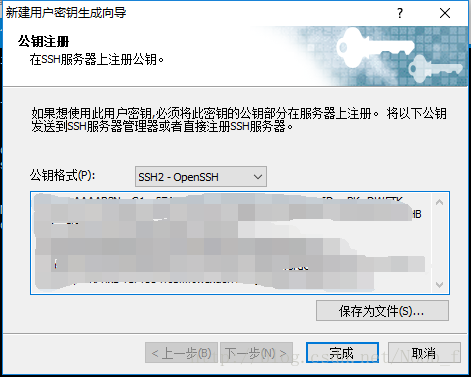
[root@localhost ~]# vi /root/.ssh/authorized_keys另起一行,把公钥粘贴进去(建议加注释),保存退出。(可点击上图中“保存为文件”,把公钥保存下来)
编辑完文件并保存退出后,点击“完成”
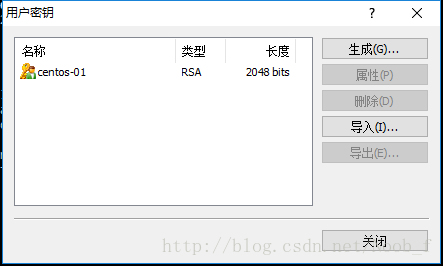
关闭当前界面。

修改用户身份验证方法,选择“Public Key”
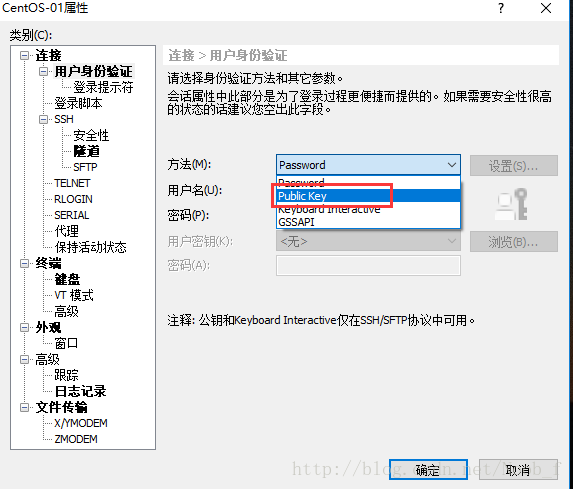

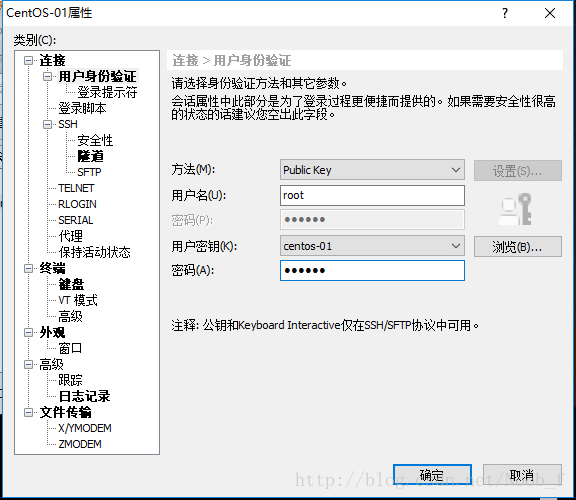
配置完,点击“确定”,重新连接即可。