本教程本意为笔者本人随笔笔记,需要的自行查看。
第一步:
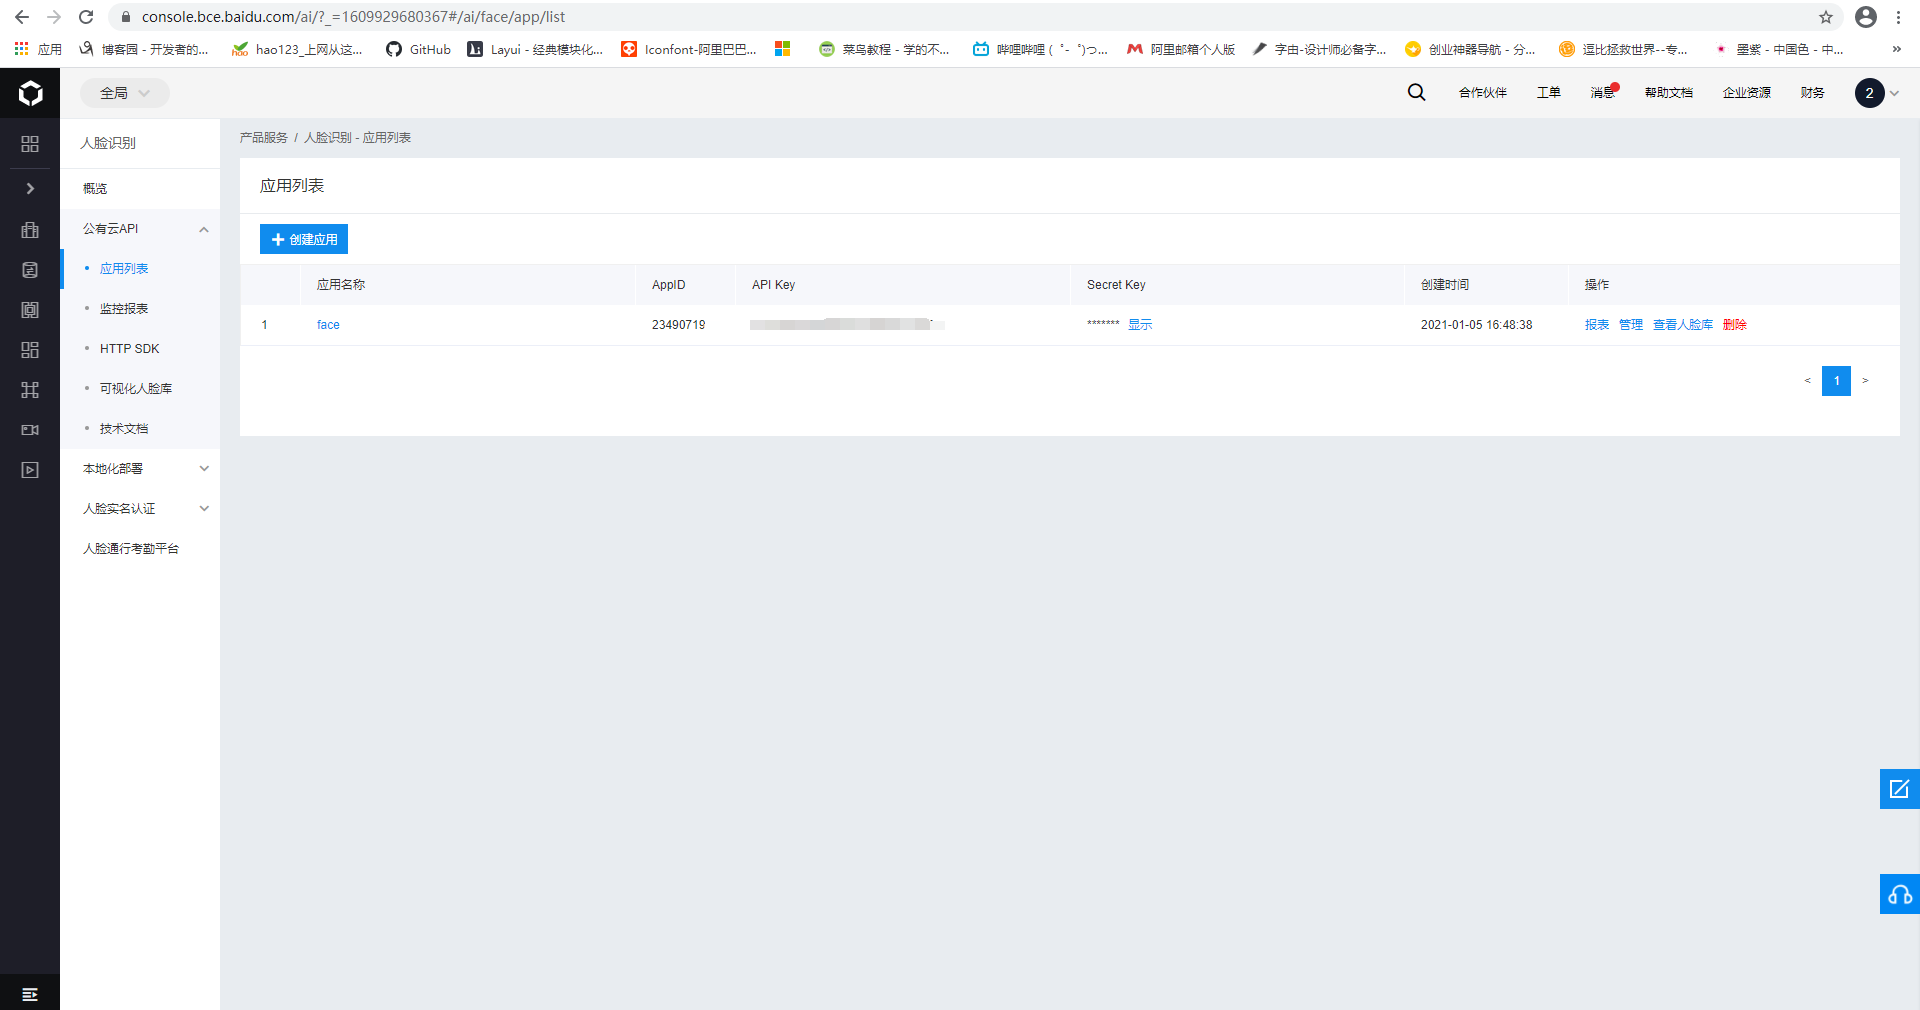
进入百度ai创建应用
第二步:
创建winform
这里不做演示,不会的自行查看Winform创建
之后添加包
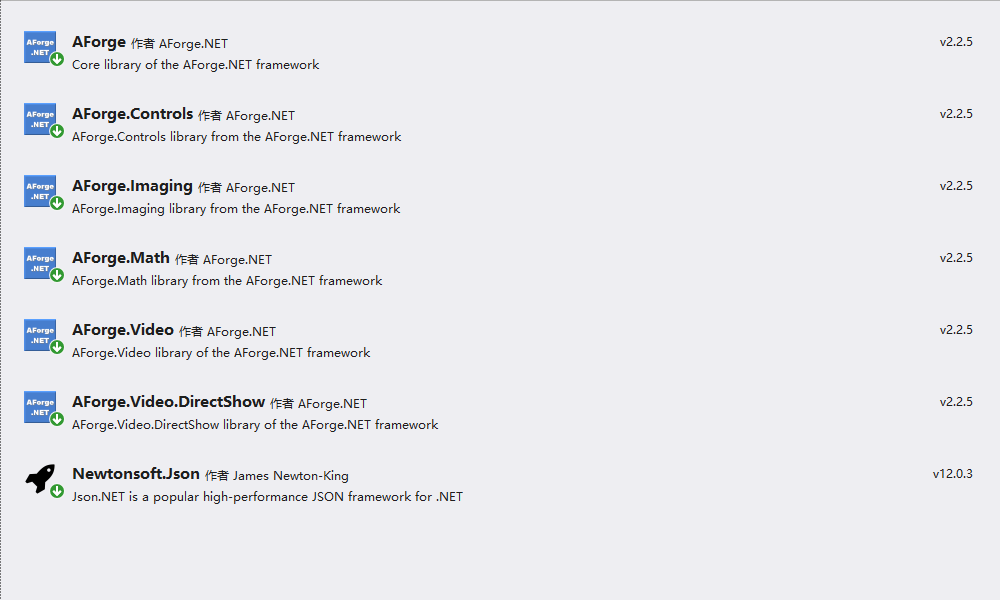
添加这些包:
AForge
AForge.Controls
AForge.Imaging
AForge.Math
AForge.Video
AForge.Video.DirectShow
Newtonsoft.Json
第三步:
创建一个文件夹用来存放我们这个案例需要得文件
创建一个 AccessToken 类来获取我们执行后续操作需要的tocken ,(主要用来给百度ai进行验证)
using System;
using System.Collections.Generic;
using System.Linq;
using System.Net.Http;
using System.Text;
using System.Threading.Tasks;

namespace WindowsFormsApp1.Ai
{
    //获取tocken指令
    public static class AccessToken
    {
        // 调用getAccessToken()获取的 access_token建议根据expires_in 时间 设置缓存
        // 返回token示例
        public static string TOKEN = "24.ddb44b9a5e904f9201ffc1999daa7670.2592000.1578837249.282335-18002137";

        // 百度云中开通对应服务应用的 API Key 建议开通应用的时候多选服务
        private static string clientId = "wHmbS8T5bdAHkswdPAkanYCM";
        // 百度云中开通对应服务应用的 Secret Key
        private static string clientSecret = "ddnALMG8YM1UsLedGl3Dm5zqM3VdswgD";

        public static string getAccessToken()
        {
            string authHost = "https://aip.baidubce.com/oauth/2.0/token";
            HttpClient client = new HttpClient();
            List<KeyValuePair<String, String>> paraList = new List<KeyValuePair<string, string>>();
            paraList.Add(new KeyValuePair<string, string>("grant_type", "client_credentials"));
            paraList.Add(new KeyValuePair<string, string>("client_id", clientId));
            paraList.Add(new KeyValuePair<string, string>("client_secret", clientSecret));

            HttpResponseMessage response = client.PostAsync(authHost, new FormUrlEncodedContent(paraList)).Result;
            string result = response.Content.ReadAsStringAsync().Result;
            return result;
        }
    }
}
第四步:
我们去百度ai请求tocken得类已经写好了,接下来我们将人脸注册得方法写一下
using Newtonsoft.Json;
using System;
using System.Collections.Generic;
using System.IO;
using System.Linq;
using System.Net;
using System.Text;
using System.Threading.Tasks;

namespace WindowsFormsApp1.Ai
{
    public class FaceCommon
    {
        public static string token { get; set; }
        // 人脸注册
        public static string add(FaceInfo info)
        {
            string host = "https://aip.baidubce.com/rest/2.0/face/v3/faceset/user/add?access_token=" + token;
            Encoding encoding = Encoding.Default;
            HttpWebRequest request = (HttpWebRequest)WebRequest.Create(host);
            request.Method = "post";
            request.KeepAlive = true;
            //String str = "{"image":"027d8308a2ec665acb1bdf63e513bcb9","image_type":"FACE_TOKEN","group_id":"group_repeat","user_id":"user1","user_info":"abc","quality_control":"LOW","liveness_control":"NORMAL"}";
            String str = "{"image":"" + info.image + "","image_type":"" + info.image_type + "","group_id":"" + info.group_id + "","user_id":"" + info.user_id + "","user_info":"" + info.user_info + "","quality_control":"" + info.quality_control + "","liveness_control":"" + info.liveness_control + ""}";
            byte[] buffer = encoding.GetBytes(str);
            request.ContentLength = buffer.Length;
            request.GetRequestStream().Write(buffer, 0, buffer.Length);
            HttpWebResponse response = (HttpWebResponse)request.GetResponse();
            StreamReader reader = new StreamReader(response.GetResponseStream(), Encoding.Default);
            string result = reader.ReadToEnd();
            Console.WriteLine("人脸注册:");
            Console.WriteLine(result);
            FaceMsg msg = JsonConvert.DeserializeObject<FaceMsg>(result);
            return result;
        }
  }
}
上面得方法是人脸注册得方法,参数是们请求百度ai接口用得tocken以及一个实体类,写完之后 创建注册窗体
添加了上边得包之后,我们得工具箱里会看到一下插件:
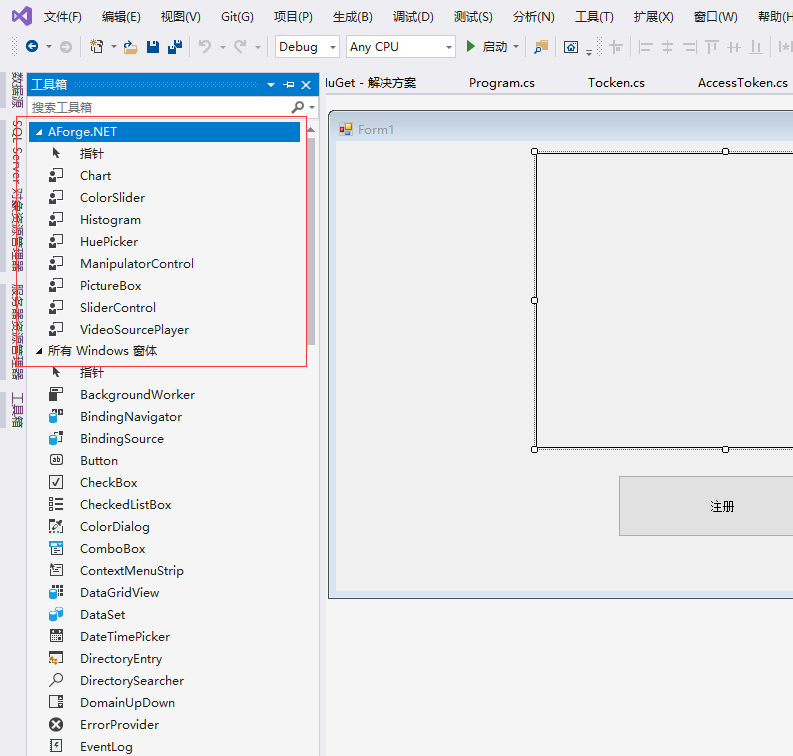
然后拖拽videoSourePlayer调整大小
下边先放上窗体后台代码
using AForge.Video.DirectShow;
using Newtonsoft.Json;
using System;
using System.Collections.Generic;
using System.ComponentModel;
using System.Data;
using System.Drawing;
using System.IO;
using System.Linq;
using System.Text;
using System.Threading.Tasks;
using System.Windows.Forms;
using WindowsFormsApp1.Ai;

namespace WindowsFormsApp1
{

    public partial class Form1 : Form
    {
        string tocken = "";
        public Form1()
        {
            //默认每次调用tocken取值
            InitializeComponent();
            string str = AccessToken.getAccessToken();
            Tocken tk = JsonConvert.DeserializeObject<Tocken>(str);
            this.tocken = tk.access_token;
        }

        private FilterInfoCollection videoDevices;
        private VideoCaptureDevice videoDevice;

        private void Form1_Load(object sender, EventArgs e)
        {
            //获取摄像头
            videoDevices = new FilterInfoCollection(FilterCategory.VideoInputDevice);
            //实例化摄像头
            videoDevice = new VideoCaptureDevice(videoDevices[0].MonikerString);
            //将摄像头视频播放在控件中
            videoSourcePlayer1.VideoSource = videoDevice;
            //开启摄像头
            videoSourcePlayer1.Start();
        }


        private void button1_Click_1(object sender, EventArgs e)
        {
            //拍照
            Bitmap img = videoSourcePlayer1.GetCurrentVideoFrame();
            //图片转Base64
            string imagStr = ImgHelper.ToBase64(img);
            //实例化FaceInfo对象
            FaceInfo faceInfo = new FaceInfo();
            faceInfo.image = imagStr;
            faceInfo.image_type = "BASE64";
            faceInfo.group_id = "admin";
            faceInfo.user_id = "1";
            faceInfo.user_info = "";
            faceInfo.quality_control = "NONE";
            faceInfo.liveness_control = "NONE";
            faceInfo.action_type = "APPEND";
            faceInfo.face_sort_type = 0;
            FaceCommon.token = tocken;
            //调用注册方法注册人脸
            var msg = FaceCommon.add(faceInfo);
            Console.WriteLine(msg);
        }
        //窗体关闭 关闭摄像头线程
        private void Form1_FormClosing_1(object sender, FormClosingEventArgs e)
        {
            videoSourcePlayer1.Stop();
        }
    }
}
比较简陋只是一个小demo
这是人脸注册传值用的实体类
using System;
using System.Collections.Generic;
using System.Linq;
using System.Text;
using System.Threading.Tasks;

namespace WindowsFormsApp1.Ai
{
    //人脸传值
    public class FaceInfo
    {
        public string image { get; set; }
        public string image_type { get; set; }
        public string group_id { get; set; }
        public string user_id { get; set; }
        public string user_info { get; set; }
        public string quality_control { get; set; }
        public string liveness_control { get; set; }
        public string action_type { get; set; }
        public int face_sort_type { get; set; }
        public string group_id_list { get; set; }
    }
}
这是接收人脸注册返回得实体
using System;
using System.Collections.Generic;
using System.Linq;
using System.Text;
using System.Threading.Tasks;

namespace WindowsFormsApp1.Ai
{
    //接收人脸注册返回值
    public class FaceMsg
    {
        public int error_code { get; set; }
        public string error_msg { get; set; }
        public string log_id { get; set; }
        public string timestamp { get; set; }
        public string cached { get; set; }
        public result result { get; set; }

    }
    public class result
    {
        public string face_token { get; set; }
        public location location { get; set; }
    }
    public class location
    {
        public double left { get; set; }
        public double top { get; set; }
        public double width { get; set; }
        public double height { get; set; }
        public int rotation { get; set; }
    }
}
上边窗体代码里的图片帮助类是不是没有啊,别急在这里呢
using System;
using System.Collections.Generic;
using System.Drawing;
using System.IO;
using System.Linq;
using System.Text;
using System.Threading.Tasks;
using System.Windows.Forms;

namespace WindowsFormsApp1.Ai
{
    public  class ImgHelper
    {
        /// <summary>
        /// 转换图片
        /// </summary>
        /// <param name="bmp"></param>
        /// <returns></returns>
        public static string ToBase64(Bitmap bmp)
        {
            try
            {
                MemoryStream ms = new MemoryStream();
                bmp.Save(ms, System.Drawing.Imaging.ImageFormat.Jpeg);
                byte[] arr = new byte[ms.Length];
                ms.Position = 0;
                ms.Read(arr, 0, (int)ms.Length);
                ms.Close();
                String strbaser64 = Convert.ToBase64String(arr);
                return strbaser64;
            }
            catch (Exception ex)
            {
                Console.WriteLine("ImgToBase64String 转换失败 Exception:" + ex.Message);
                return "";
            }
        }
    }
}
这是图片帮助类(用来转换图片格式成BASE64格式得)
这是取tocken值得类
上边注释有误
namespace WindowsFormsApp1
{
    //tocken接口
    internal class Tocken
    {
        public string access_token { get; set; }
    }
}
现在各位,不出意外得话我们得注册已经可以使用了
接下来我们写人脸搜索也就是比对相似值判断是否为本人
// 人脸搜索
        public static MatchMsg faceSearch(FaceInfo info)
         {
            string host = "https://aip.baidubce.com/rest/2.0/face/v3/search?access_token=" + token;
            Encoding encoding = Encoding.Default;
            HttpWebRequest request = (HttpWebRequest)WebRequest.Create(host);
            request.Method = "post";
            request.KeepAlive = true;
            String str = "{"image":"" + info.image + "","image_type":"" + info.image_type + "","group_id_list":"admin","quality_control":"NONE","liveness_control":"NONE"}";
            byte[] buffer = encoding.GetBytes(str);
            request.ContentLength = buffer.Length;
            request.GetRequestStream().Write(buffer, 0, buffer.Length);
            HttpWebResponse response = (HttpWebResponse)request.GetResponse();
            StreamReader reader = new StreamReader(response.GetResponseStream(), Encoding.Default);
            string result = reader.ReadToEnd();
            Console.WriteLine("人脸搜索:");
            Console.WriteLine(result);
            MatchMsg msg = JsonConvert.DeserializeObject<MatchMsg>(result);
            Console.WriteLine(msg);
            return msg;
        }
上边得代码加到我们上边得FaceCommon类add方法后边这个方法是用来进行人脸搜索得
请求用的参数还是之前的那个类
下边这个类是用来接收搜索返回值得
using System;
using System.Collections.Generic;
using System.Linq;
using System.Text;
using System.Threading.Tasks;

namespace WindowsFormsApp1.Ai
{
    //人脸搜索返回值
    public class MatchMsg
    {
        public int error_code { get; set; }
        public string error_msg { get; set; }
        public string log_id { get; set; }
        public int timestamp { get; set; }
        public int cached { get; set; }
        public Result result { get; set; }
    }
    public class Result
    {
        public string face_token { get; set; }
        public List<user_list> user_list { get; set; }
    }
    public class user_list
    {
        public string group_id { get; set; }
        public string user_id { get; set; }
        public string user_info { get; set; }
        public double score { get; set; }
    }


}
之后写登录窗体
using AForge.Video.DirectShow;
using Newtonsoft.Json;
using System;
using System.Collections.Generic;
using System.ComponentModel;
using System.Data;
using System.Drawing;
using System.Linq;
using System.Text;
using System.Threading.Tasks;
using System.Windows.Forms;
using WindowsFormsApp1.Ai;

namespace WindowsFormsApp1
{
    public partial class Form2 : Form
    {
        string tocken = "";
        public Form2()
        {
            //默认每次执行调用tocken取值
            InitializeComponent();
            string str = AccessToken.getAccessToken();
            Tocken tk = JsonConvert.DeserializeObject<Tocken>(str);
            this.tocken = tk.access_token;
        }

        private FilterInfoCollection videoDevices;
        private VideoCaptureDevice videoDevice;

        private void button1_Click(object sender, EventArgs e)
        {
            //获取摄像头
            videoDevices = new FilterInfoCollection(FilterCategory.VideoInputDevice);
            //实例化摄像头
            videoDevice = new VideoCaptureDevice(videoDevices[0].MonikerString);
            //将摄像头视频播放在控件中
            videoSourcePlayer1.VideoSource = videoDevice;
            //开启摄像头
            videoSourcePlayer1.Start();
        }

        private void button2_Click(object sender, EventArgs e)
        {
            videoSourcePlayer1.Stop();
        }

        private void button3_Click(object sender, EventArgs e)
        {
            NewMethod();
        }
        private void NewMethod()
        {
            //获取图片 拍照
            Bitmap img = videoSourcePlayer1.GetCurrentVideoFrame();
            //关闭相机
            videoSourcePlayer1.Stop();
            //图片转Base64
            string imagStr = ImgHelper.ToBase64(img);
            FaceInfo faceInfo = new FaceInfo();
            faceInfo.image = imagStr;
            faceInfo.image_type = "BASE64";
            faceInfo.group_id_list = "admin";
            try
            {
                FaceCommon.token = tocken;
                //调用查找方法
                MatchMsg msg = FaceCommon.faceSearch(faceInfo);
                if (msg.result.user_list[0].score > 90)
                {
                    MessageBox.Show("登陆成功");
                }
                else if(msg.result.user_list[0].score < 90)
                {
                    MessageBox.Show("人脸对不上");
                }
            }
            catch (Exception e)
            {
                DialogResult dialog = MessageBox.Show("人员不存在,错误提示" + e, "系统提示", MessageBoxButtons.OK, MessageBoxIcon.Information);
                if (dialog == DialogResult.OK)
                {
                    this.Close();
                }
            }

        }
        //注册人脸
        private void button4_Click(object sender, EventArgs e)
        {
            Form1 form = new Form1();
            form.ShowDialog();
        }
    }
}
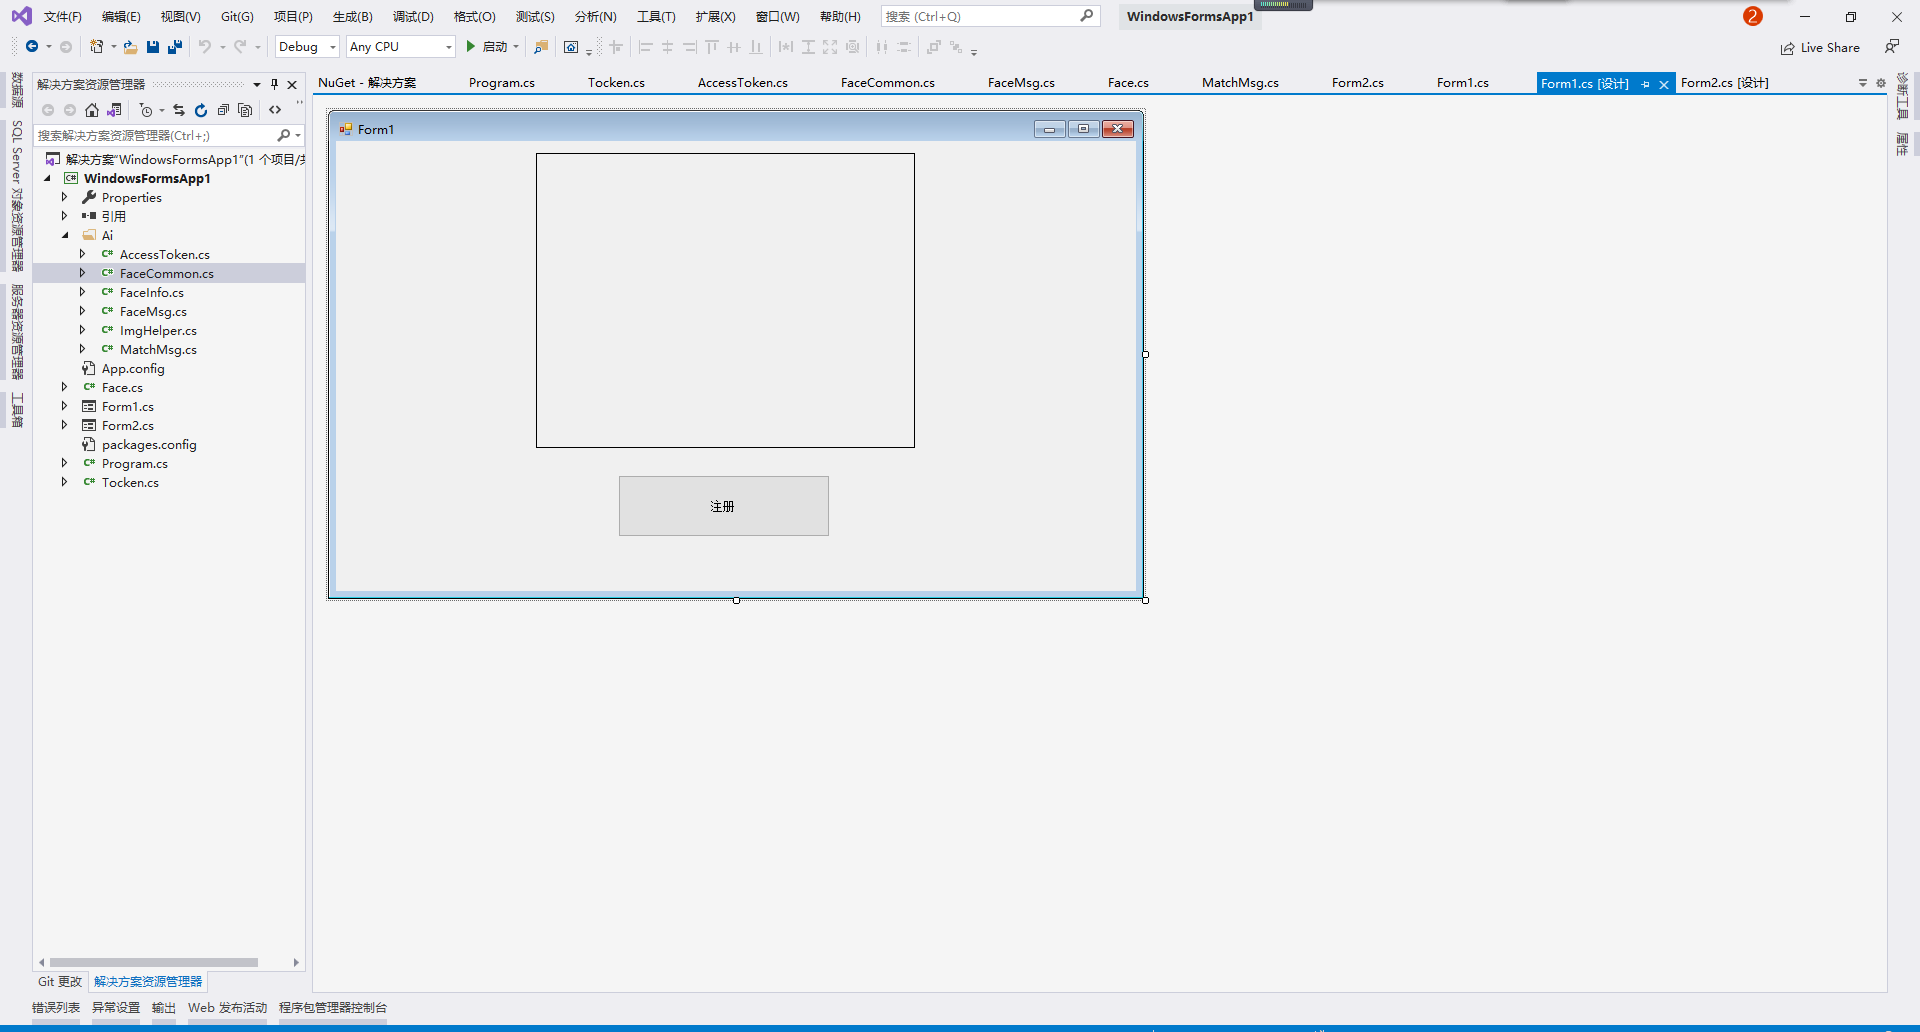
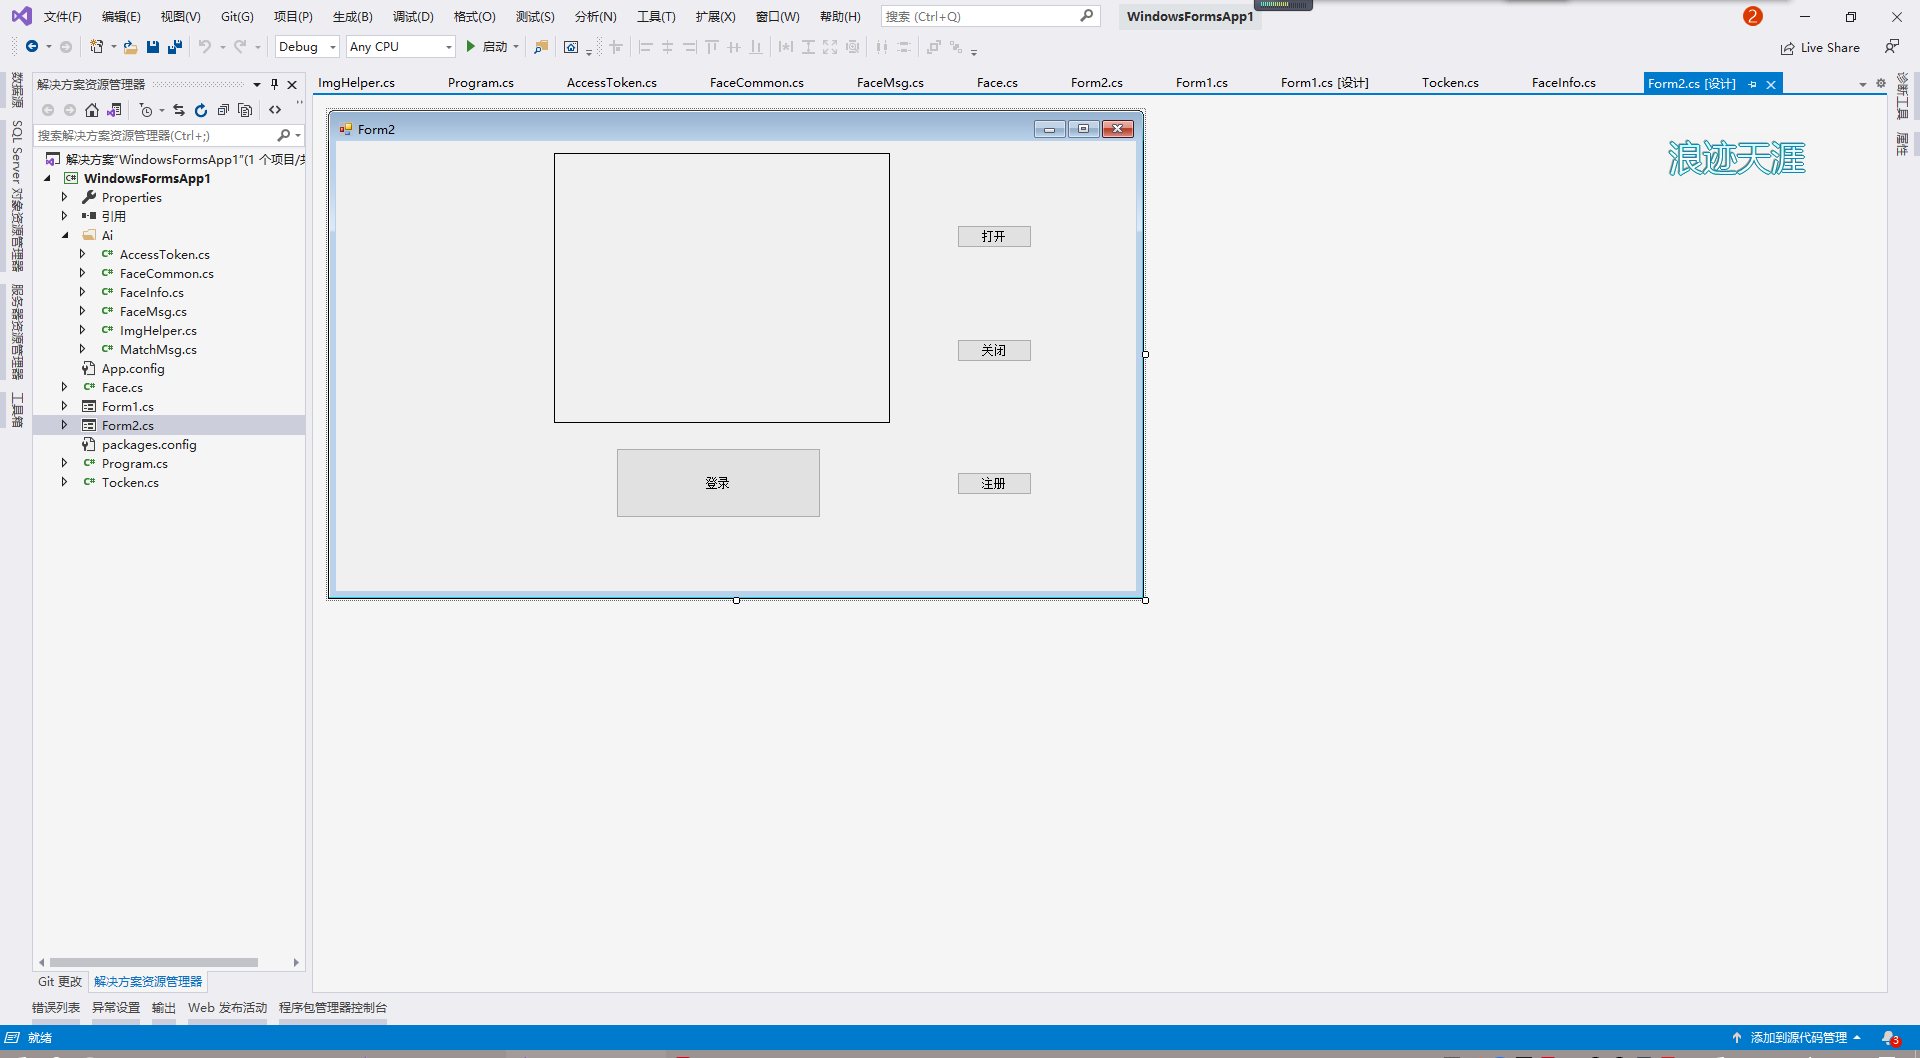
下边是窗体样式
到这里相信小伙伴们都多多少少有点问题吧!!!
没关系下方留言,我会耐心解答
这次得小案例结束了,下期再见。