前言
本文是继CentOS6 安装Sendmail + Dovecot + Squirrelmail 关于邮箱服务器配置的第二篇文章,因为关于使用Sendmail进行相关配置的文章、资料等太老,而且资料也不全,而使用Postfix的比较容易找到完备的资料,此处不讨论Sendmail和Postfix的优劣,仅仅是记录配置过程,希望对你有帮助。
此外,这里只是演示一个搭建本地邮箱环境,如果要投入真正使用,还需要搭建一个DNS,还得要有一个域名。这里会演示搭建本地环境的完整的一个过程,就不包括安装虚拟机了,这篇文章跟前一篇在安装Sendmail和Dovecot基本上是重复的,仅演示必要过程,不做过多解释。
准备阶段
1、基本命令使用
[lz@mail ~]$ sudo -i          【获取系统root权限】
[root@mail ~]# cat /etc/issue     【查看系统发行版本】
CentOS release 6.9 (Final)
Kernel
 on an m
[root@mail ~]# cat /etc/sysconfig/network
NETWORKING=yes
NETWORKING_IPV6=no
HOSTNAME=mail.roundcubemail.com    【修改下主机名,重启生效,不过不急于重启】
[root@mail ~]# hostname
mail.roundcubemail.com         【改成你的主机名】
[root@mail lz]# cat /etc/hosts
127.0.0.1	mail.roundcubemail.com	localhost          【将主机名和域名添加到hosts文件中】
127.0.0.1	roundcubemail.com	localhost
127.0.0.1	localhost.localdomain	localhost
::1	localhost6.localdomain6	localhost6
[root@mail lz]# ping -c 1 mail.roundcubemail.com           【这样就会自动解析成本地地址,这样就能使用这个名字啦】
PING mail.roundcubemail.com (127.0.0.1) 56(84) bytes of data.
64 bytes from mail.roundcubemail.com (127.0.0.1): icmp_seq=1 ttl=64 time=0.073 ms
[root@mail lz]# ping -c 1 roundcubemail.com
PING roundcubemail.com (127.0.0.1) 56(84) bytes of data.
64 bytes from mail.roundcubemail.com (127.0.0.1): icmp_seq=1 ttl=64 time=0.015 ms
2、系统更新
[root@mail lz]# yum update
Loaded plugins: fastestmirror, refresh-packagekit
Setting up Update Process
Loading mirror speeds from cached hostfile
 * base: mirrors.aliyun.com
 * extras: mirrors.nju.edu.cn
 * updates: mirrors.aliyun.com
No Packages marked for Update
关于系统更新就不演示过程,会比较耗时,只需一条命令即可更新。
3、关于root权限获取
如果你在使用sudo -i获取root权限失败,显示没有sudo权限,可以通过如下方式获取root权限
[lz@mail ~]$ su root
Password:                     【输入lz的用户密码】
[root@mail lz]# vim /etc/sudoers

将你的用户名添加到root后面,此处为lz, 保存文件之后就能正常使用sudo -i命令了。
安装LAMP环境
1、安装apache2
[root@mail lz]# yum install httpd
Loaded plugins: fastestmirror, refresh-packagekit
Setting up Install Process
Loading mirror speeds from cached hostfile
 * base: mirrors.aliyun.com
 * extras: mirrors.nju.edu.cn
 * updates: mirrors.aliyun.com
Package httpd-2.2.15-60.el6.centos.4.x86_64 already installed and latest version
Nothing to do
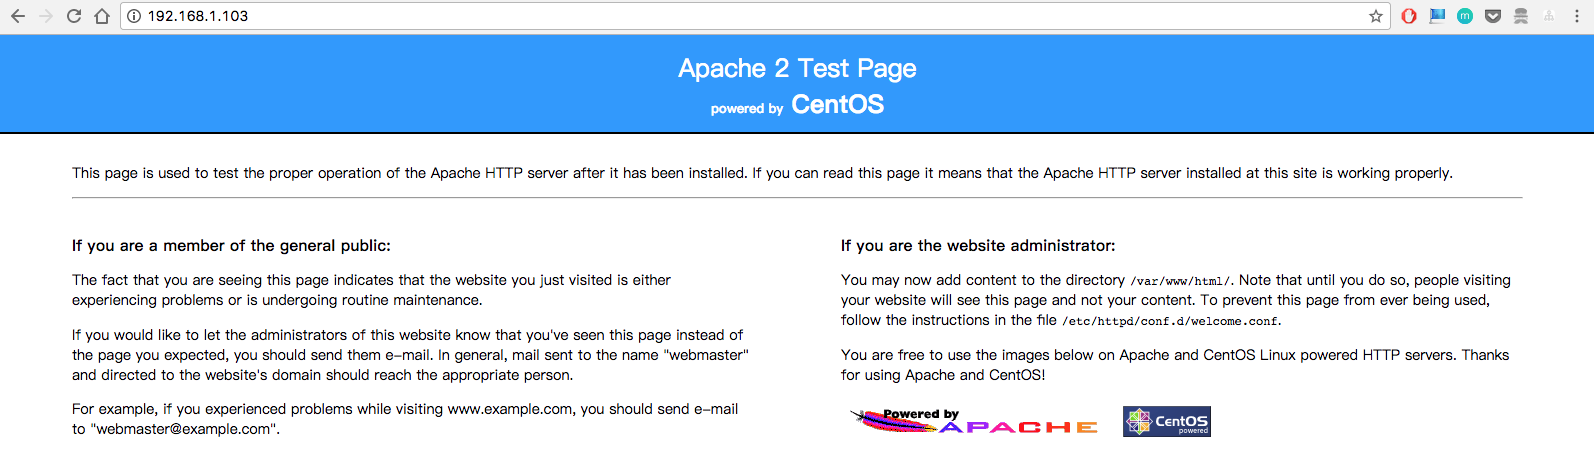
[root@mail lz]# service httpd status        【apache2默认应该是安装好了的,但并没有启动】
httpd is stopped
[root@mail lz]# service httpd start         【启动】
Starting httpd:                                            [  OK  ]
[root@mail lz]# chkconfig httpd on         【设置为开机自动启动】
这个时候访问虚拟机ip地址,应该就可以看到如下页面
2、安装PHP
因为Roundcubemail要求php > 5.3.7, 我们需要使用一个更新的源。原文参考:Centos 6.x/7.x yum安装php5.6.X(最新版)
a) 检查当前安装的php包
[root@mail lz]# yum list installed | grep php
如果之前安装过旧版本的php可以使用如下命令删除
yum remove php.x86_64 php-cli.x86_64 php-common.x86_64 php-gd.x86_64 php-ldap.x86_64 php-mbstring.x86_64 php-mcrypt.x86_64 php-mysql.x86_64 php-pdo.x86_64
b) 配置yum源
追加CentOS 6.5的epel及remi源:
rpm -Uvh http://ftp.iij.ad.jp/pub/linux/fedora/epel/6/x86_64/epel-release-6-8.noarch.rpm
rpm -Uvh http://rpms.famillecollet.com/enterprise/remi-release-6.rpm
CentOS 7.0的源:
yum install epel-release
rpm -ivh http://rpms.famillecollet.com/enterprise/remi-release-7.rpm
查看可安装的包:
yum list --enablerepo=remi --enablerepo=remi-php56 | grep php
c) 安装php5.6
yum install --enablerepo=remi --enablerepo=remi-php56 php php-opcache php-devel php-mbstring php-mcrypt php-mysqlnd php-phpunit-PHPUnit php-pecl-xdebug php-pecl-xhprof
d) 查看php版本
[root@mail lz]# php --version
PHP 5.6.31 (cli) (built: Jul  6 2017 08:16:47)
Copyright (c) 1997-2016 The PHP Group
Zend Engine v2.6.0, Copyright (c) 1998-2016 Zend Technologies
    with Zend OPcache v7.0.6-dev, Copyright (c) 1999-2016, by Zend Technologies
    with Xdebug v2.5.5, Copyright (c) 2002-2017, by Derick Rethans
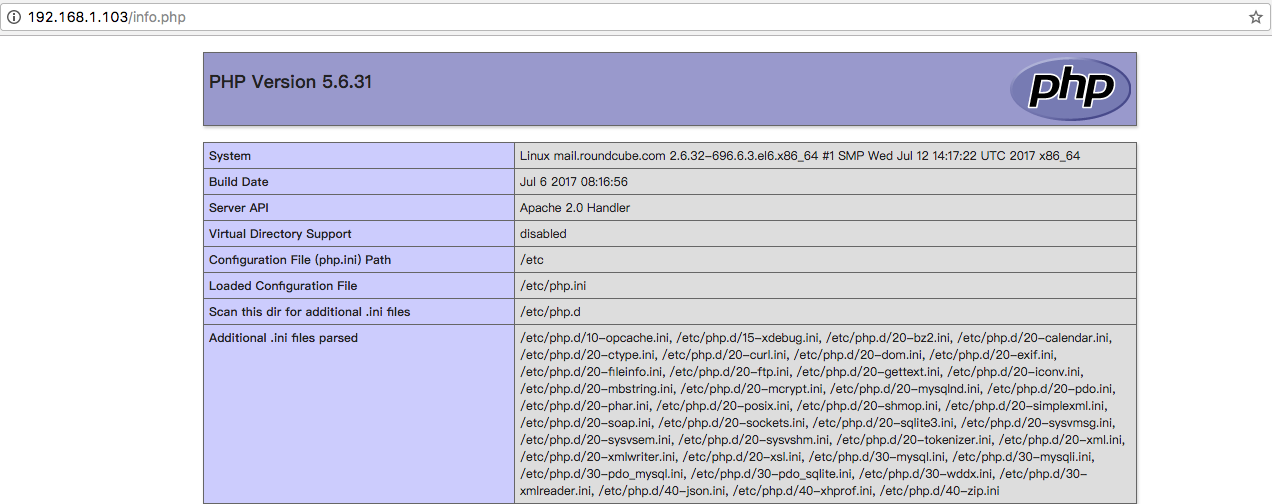
e) 测试
[root@mail lz]# cd /var/www/html/
[root@mail html]# ls
[root@mail html]# vim info.php
[root@mail html]# cat info.php
<?php
phpinfo();
?>
好像需要重启一下apache
[root@mail html]# service httpd restart
Stopping httpd:                                            [  OK  ]
Starting httpd:                                            [  OK  ]
3、安装Mysql
一坨安装,参考CentOS6.4+LAMP+Postfix+Dovecot+Postfixadmin+Roundcubemail 打造企业级邮件服务器 (1) 中第五步:五、安装并配置LAMP环境
会显示有一些错误,不过没有关系...
[root@mail html]# yum -y install httpd mysql mysql-devel mysql-server php php-pecl-Fileinfo php-mcrypt php-devel php-mysql php-common php-mbstring php-gd php-imap php-ldap php-odbc php-pear php-xml php-xmlrpc pcre pcre-devel
创建数据库:roundcubemail
[root@mail html]# service mysqld start          【启动mysql】
[root@mail html]# chkconfig mysqld on           【设置mysql开机启动】
[root@mail html]# mysql
Welcome to the MySQL monitor.  Commands end with ; or g.
Your MySQL connection id is 2
Server version: 5.1.73 Source distribution

Copyright (c) 2000, 2013, Oracle and/or its affiliates. All rights reserved.

Oracle is a registered trademark of Oracle Corporation and/or its
affiliates. Other names may be trademarks of their respective
owners.

Type 'help;' or 'h' for help. Type 'c' to clear the current input statement.

mysql> create database roundcubemail;            【创建数据库】
Query OK, 1 row affected (0.00 sec)

mysql> grant all on roundcubemail.* to roundcubemail@'localhost' identified by 'roundcubemail';      【赋予权限】
Query OK, 0 rows affected (0.00 sec)

mysql> flush privileges;
Query OK, 0 rows affected (0.00 sec)

mysql> quit
Bye
到这里LAMP安装完成。
Sendmail 安装和配置
1、安装mail相关工具包
[root@mail html]# yum install m4 telnet mailx
2、Sendmail安装
[root@mail html]# yum install sendmail sendmail-cf
3、Sendmail配置
a) 下面将使用m4这个工具来创建sendmail.cf这个文件
[root@mail html]# netstat -an | grep :25 | grep tcp
tcp        0      0 0.0.0.0:25                  0.0.0.0:*                   LISTEN
[root@mail html]# cd /etc/mail
[root@mail mail]# pwd
/etc/mail
[root@mail mail]# ls
access     aliasesdb-stamp  domaintable.db  local-host-names  mailertable.db  Makefile     sendmail.cf.bak  submit.cf  trusted-users  virtusertable.db
access.db  domaintable      helpfile        mailertable       make            sendmail.cf  sendmail.mc      submit.mc  virtusertable
[root@mail mail]# m4 /etc/mail/sendmail.mc > /etc/mail/sendmail.cf
b) 配置相关域名
在local-host-names增加域名项,表示的是可以用来发送/接收邮件的域名。
[root@mail mail]# vim /etc/mail/local-host-names
[root@mail mail]# cat /etc/mail/local-host-names
# local-host-names - include all aliases for your machine here.
roundcubemail.com
mail.roundcubemail.com
[root@mail mail]# service sendmail restart
Shutting down sm-client:                                   [  OK  ]
Shutting down sendmail:                                    [  OK  ]
Starting sendmail:                                         [  OK  ]
Starting sm-client:                                        [  OK  ]
[root@mail mail]# chkconfig sendmail on            [设置开机启动]
4、Sendmail 发信测试:mail命令测试
先新建两个用户
[root@mail mail]# useradd user1
[root@mail mail]# useradd user2
[root@mail mail]# passwd user1
Changing password for user user1.
New password:                   【输入密码】
BAD PASSWORD: it does not contain enough DIFFERENT characters
BAD PASSWORD: is too simple
Retype new password:
passwd: all authentication tokens updated successfully.
[root@mail mail]# passwd user2           【输入密码】
Changing password for user user2.
New password:
BAD PASSWORD: it does not contain enough DIFFERENT characters
BAD PASSWORD: is too simple
Retype new password:
passwd: all authentication tokens updated successfully.
[root@mail mail]# gpasswd -a user1 mail     【加入mail用户组】
Adding user user1 to group mail
[root@mail mail]# gpasswd -a user2 mail
Adding user user2 to group mail
用其中一个账户登陆,给另一个用户发送邮件:
[root@mail mail]# su user1              【切换到user1】
[user1@mail mail]$ mail -s "hello user2" user2
This is test a mail from user1.
.                             【.表示结束】
EOT
[user1@mail mail]$ cat /var/mail/user2
From user1@mail.roundcube.com  Mon Aug 14 22:28:15 2017
Return-Path: <user1@mail.roundcube.com>
Received: from mail.roundcube.com (mail.roundcubemail.com [127.0.0.1])
	by mail.roundcube.com (8.14.4/8.14.4) with ESMTP id v7EESF9P033866
	for <user2@mail.roundcube.com>; Mon, 14 Aug 2017 22:28:15 +0800
Received: (from user1@localhost)
	by mail.roundcube.com (8.14.4/8.14.4/Submit) id v7EESFmC033865
	for user2; Mon, 14 Aug 2017 22:28:15 +0800
From: user1@mail.roundcube.com
Message-Id: <201708141428.v7EESFmC033865@mail.roundcube.com>
Date: Mon, 14 Aug 2017 22:28:15 +0800
To: user2@mail.roundcube.com
Subject: hello user2
User-Agent: Heirloom mailx 12.4 7/29/08
MIME-Version: 1.0
Content-Type: text/plain; charset=us-ascii
Content-Transfer-Encoding: 7bit

This is test a mail from user1.
5、Sendmail 发信测试: telnet方式测试
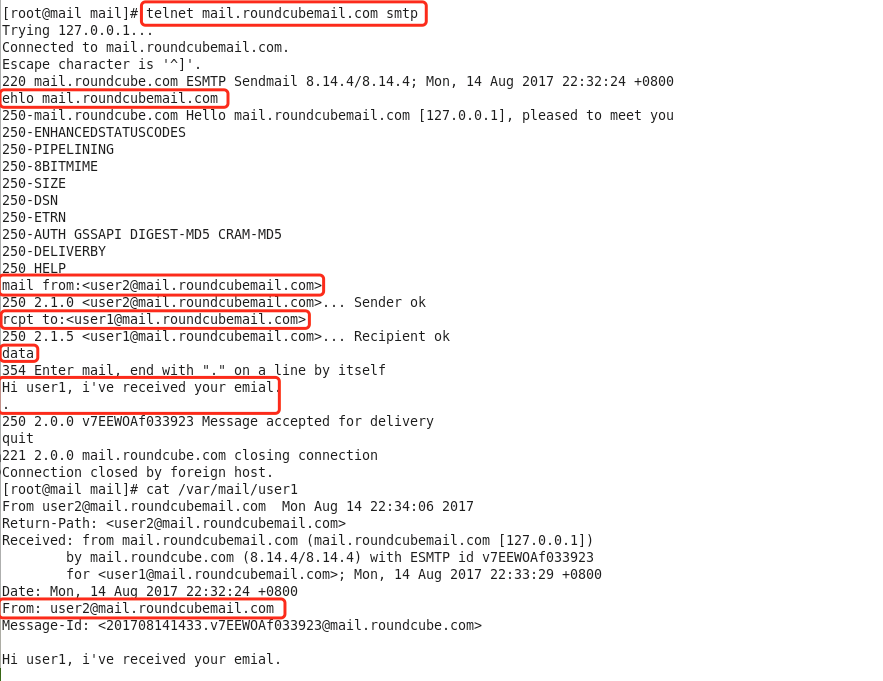
Sendmail安装测试成功。
Dovecot安装和配置
1、安装相关工具包
[root@mail mail]# yum install telnet mailx mutt
2、Dovecot安装
[root@mail mail]# yum install dovecot
3、Dovecot配置
[root@mail mail]# ls /etc/dovecot/
conf.d  dovecot.conf
[root@mail mail]# vim /etc/dovecot/dovecot.conf

[root@mail mail]# ls /etc/dovecot/conf.d/
10-auth.conf      10-master.conf  20-lmtp.conf    90-quota.conf                auth-master.conf.ext      auth-system.conf.ext
10-director.conf  10-ssl.conf     20-pop3.conf    auth-checkpassword.conf.ext  auth-passwdfile.conf.ext  auth-vpopmail.conf.ext
10-logging.conf   15-lda.conf     90-acl.conf     auth-deny.conf.ext           auth-sql.conf.ext
10-mail.conf      20-imap.conf    90-plugin.conf  auth-ldap.conf.ext           auth-static.conf.ext
[root@mail mail]# vim /etc/dovecot/conf.d/10-mail.conf
设置:mail_location = mbox:~/mail:INBOX=/var/mail/%u

[root@mail mail]# service dovecot start          【启动】
Starting Dovecot Imap:                                     [  OK  ]
[root@mail mail]# chkconfig dovecot on           【设置开机dovecot启动】
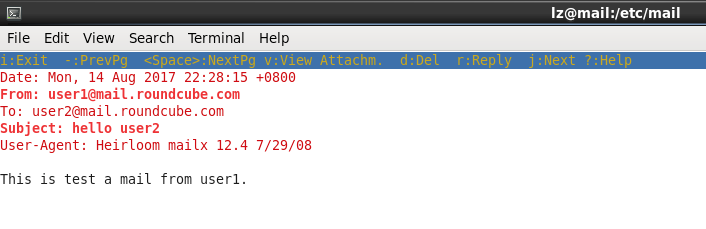
4、Dovecot 接收邮件测试: mutt命令
之前在测试Sendmail的时候,用user1这个账户向user2发送了一封邮件,通过查看本地文件进行验证。
[root@mail ~]# mutt -f imap://user2:123456@localhost 【用户user2 密码:123456】
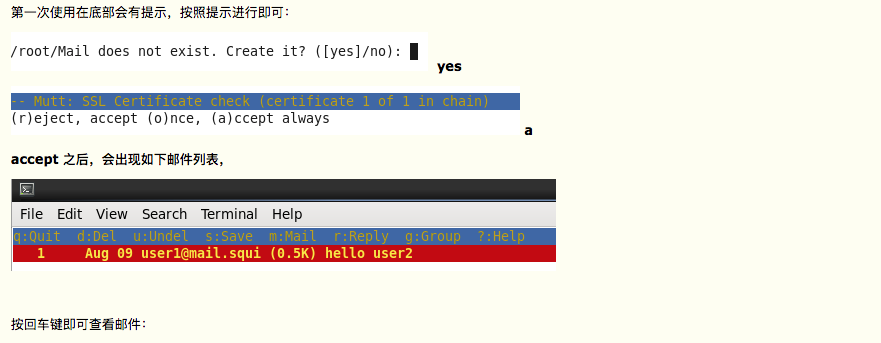
5、Dovecot接收邮件测试:telnet方式
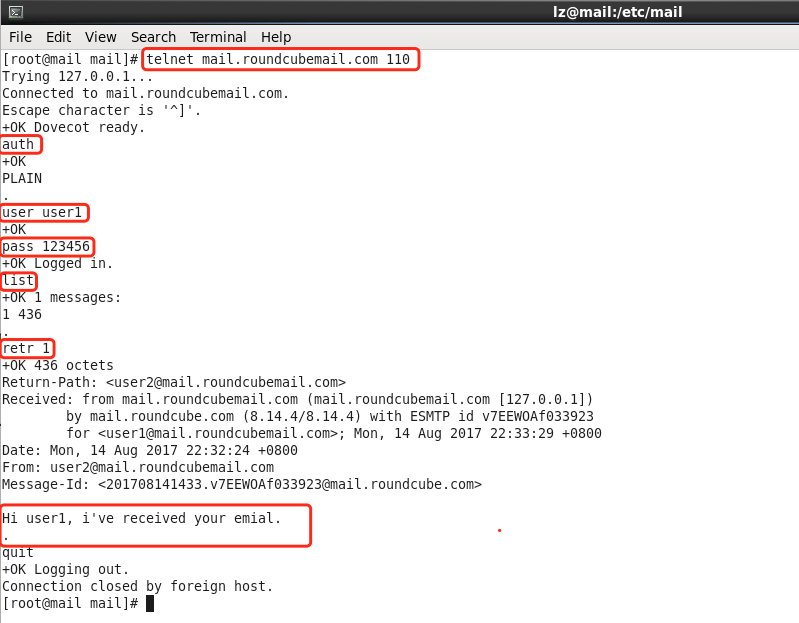
Dovecot 安装测试成功。
Roundcubemail安装和配置
1、下载roundcubemail
roundcubemail 官网下载: https://roundcube.net/
下载完整版complete解压到web根目录:/var/www/html
[root@mail html]# pwd
/var/www/html
[root@mail html]# ls
info.php  roundcubemail-1.3.0
[root@mail html]# mv roundcubemail-1.3.0/ roundcubemail      【改下名字】
2、配置installer
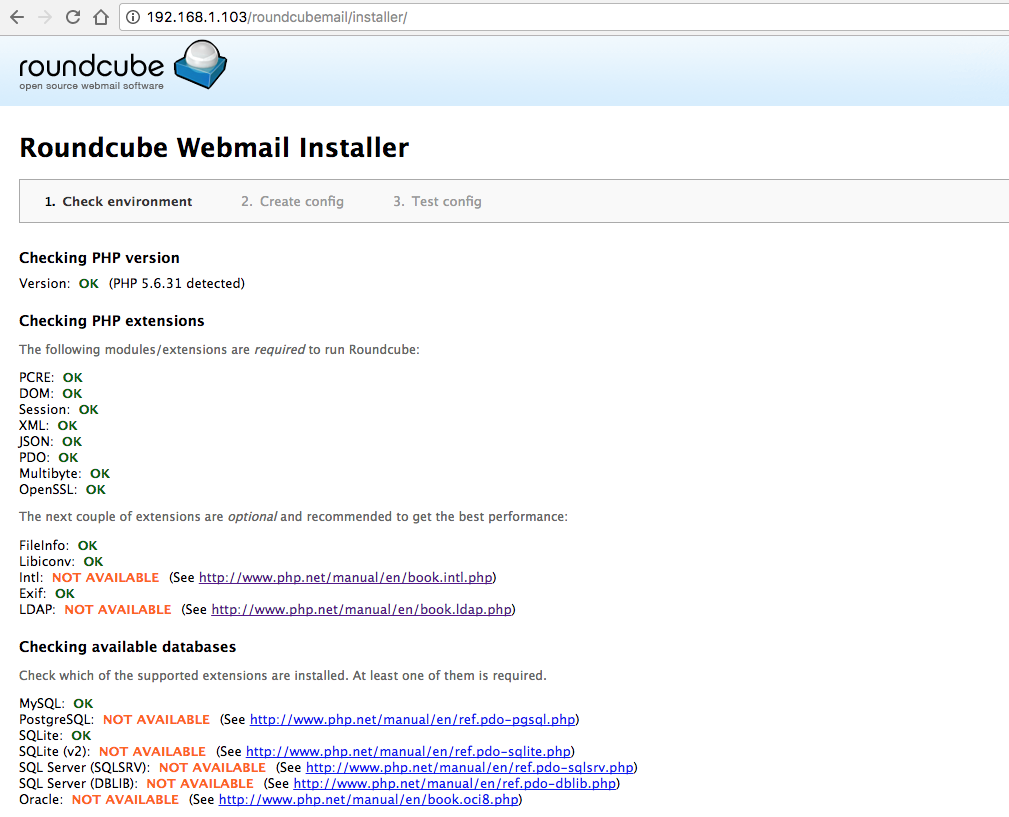
Step 1:
访问地址: http://192.168.1.103/roundcubemail/installer/ 【修改成你的ip】
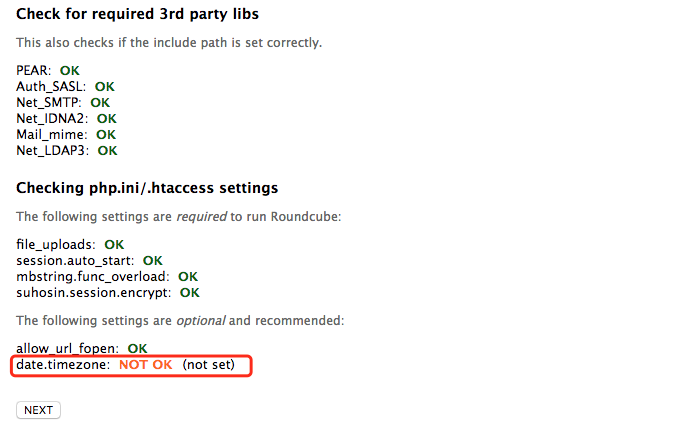
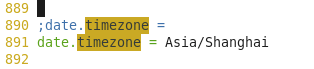
有个小问题: 时区没有设置,我们设置一下看看:
[root@mail html]# vim /etc/php.ini
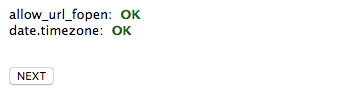
apache服务器需要重启一下,再次访问正常:
但是在重启apache的时候又会出现这样一个问题:

可以根据提示,进行如下修改:
[root@mail html]# vim /etc/httpd/conf/httpd.conf

再次重启正常:

Step2 :
点击下一步,我们进入创建配置文件Create config这一步,内容项有很多,下面仅贴出重要的相关项
基本配置:

数据库配置:roundcubemail (这个跟之前创建的数据库相关,为了简便,全部设置为roundcubemail)

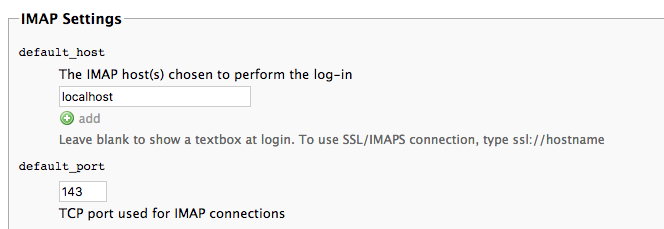
IMAP设置: 默认即可
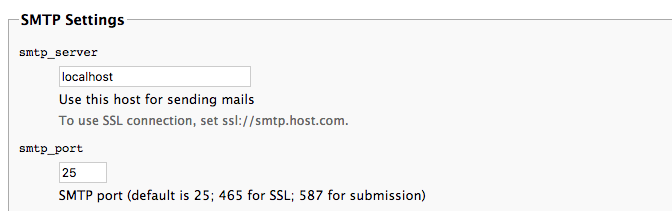
SMTP设置: 默认即可
拉到页面底部,点击创建配置文件Create config

将创建好的配置文件config.inc.php放置在:/var/www/html/roundcubemail/config 【根据自己的实际情况进行相应的修改】
[root@mail html]# pwd
/var/www/html
[root@mail html]# ls
info.php  roundcubemail
[root@mail html]# cd roundcubemail/config/
[root@mail config]# ls
config.inc.php.sample  defaults.inc.php  mimetypes.php
[root@mail config]# cp /home/lz/temp/config.inc.php ./
[root@mail config]# ls
config.inc.php  config.inc.php.sample  defaults.inc.php  mimetypes.php
[root@mail config]# pwd
/var/www/html/roundcubemail/config
确定已经将配置文件放到config目录下之后,点击下一步:
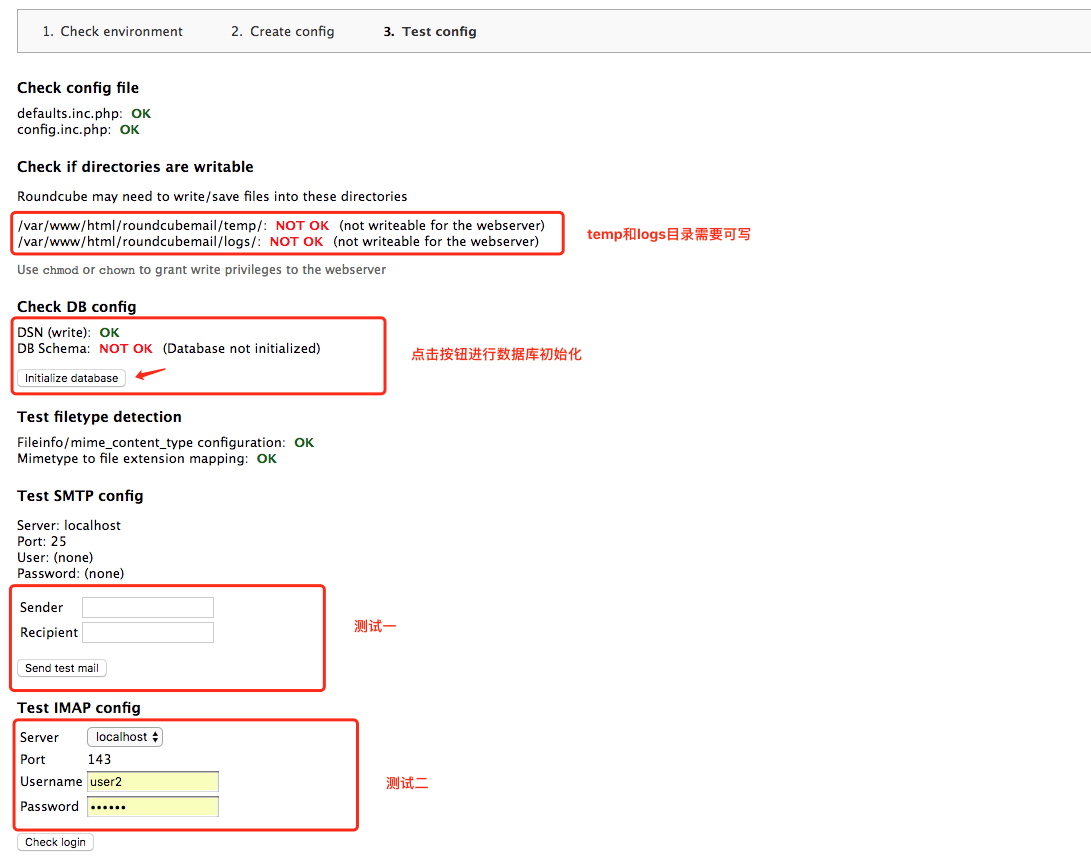
下面一步步进行展示:
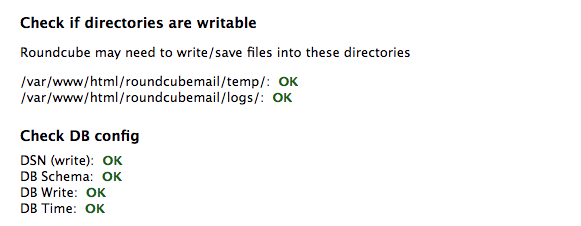
[root@mail html]# pwd
/var/www/html
[root@mail html]# ls
info.php  roundcubemail
[root@mail html]# cd roundcubemail/
[root@mail roundcubemail]# ls
bin        composer.json-dist  index.php  installer  logs     program      README.md  SQL   UPGRADING
CHANGELOG  config              INSTALL    LICENSE    plugins  public_html  skins      temp  vendor
[root@mail roundcubemail]# chmod a+w temp/       【赋予写权限】
[root@mail roundcubemail]# chmod a+w logs/
点击初始化按钮之后,页面会自动条状成如下,要求已经ok了:
细心的同学可能会注意到在General configuration中temp_dir
temp_dir: /var/www/html/roundcubemail/temp/
和Logging & Debugging中log_dir
log_dir: /var/www/html/roundcubemail/logs/
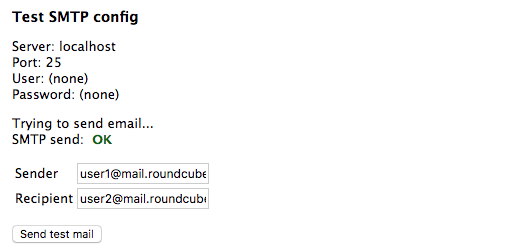
测试一:
Sender: user1@mail.roundcubemail.com
Recipient: user2@mail.roundcubemail.com
主要是@后面的部分需要修改成你的配置...可以看到,这里测试ok了
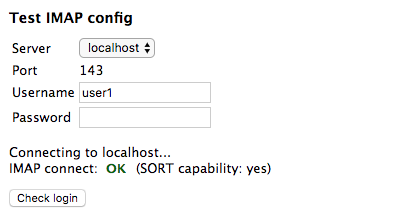
测试二:
我们用user1:123456登陆测试, 验证成功。
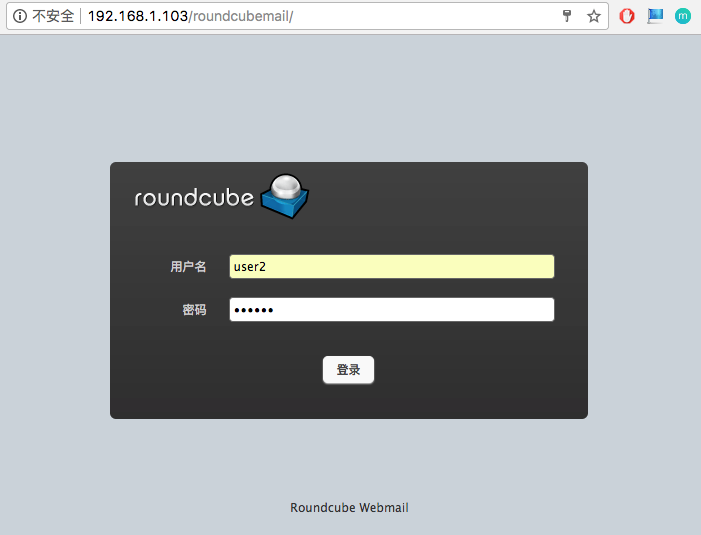
3、Roundcubemail 登陆测试
Webmail 登陆:
用户名:密码: user1/user2: 123456

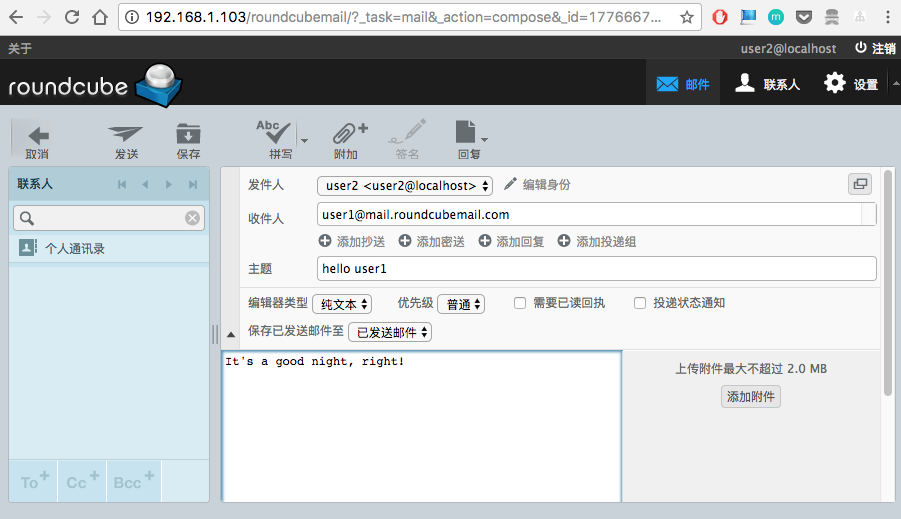
发信测试:
user2给user1发送邮件:
切换成user1登陆查看邮件:
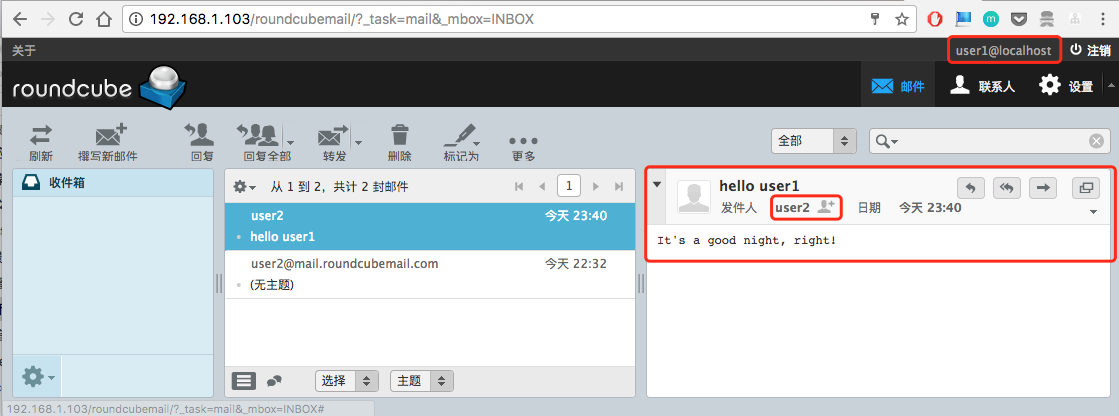
可以看到user1已经成功接收了user2发送的邮件。
至此,Sendmail + Dovecot + Roundcubemail 的环境搭建成功。
References:
CentOS6 安装Sendmail + Dovecot + Squirrelmail
Centos 6.x/7.x yum安装php5.6.X(最新版)
CentOS6.4+LAMP+Postfix+Dovecot+Postfixadmin+Roundcubemail 打造企业级邮件服务器 (1)