webpack系列博客中代码均在github上:https://github.com/JEmbrace/webpack-practice
《webpack实践(三)- html-webpack-plugin》
《webpack实践(四)- html-webpack-plugin》

一.前言
前面两篇文章中,我们实践了webpack cli和配置文件这两种打包方式,然而在验证的时候,均是手动将打包后的结果文件index.bundle.js添加到index.html中。
这显然脱离了我们实际的开发流程:实际开发中,通常引入的外部文件名都是已知的,而我们需要引入的文件名还需要在打包完成后才能确定。
那么今天我们要学习的这个html-wepback-plugin就解决这个问题。
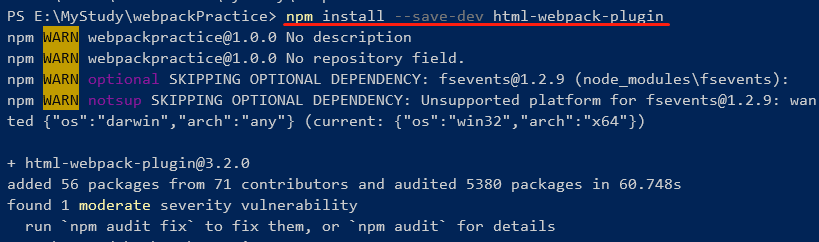
二.安装
三.使用
参考官方文档的示例,我们来使用一下这个插件
1.基本用法
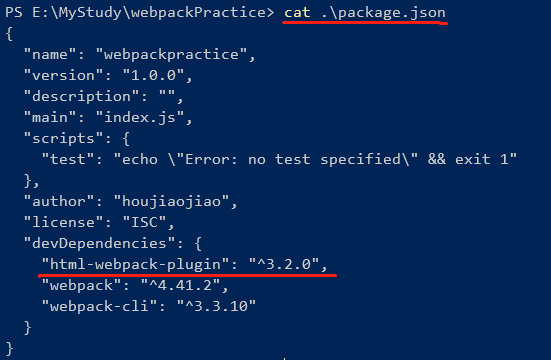
先将webpack.config.js的代码贴上来
// 第一步:引入
var htmlWepackPlugin = require('html-webpack-plugin')

var path = require('path');
module.exports = {
  mode: 'development',
  entry: {
    main: './index.js'
  },
  output: {
    path: path.resolve(__dirname,'dist'),
    filename: 'index.bundle.js'
  },
  // 第二步:创建html-webpack-plugin的实例,配置到plugins选项中
  plugins:[
    new htmlWepackPlugin()
  ]
};
可以看到添加html-webpack-plugin的基本使用方法就是两个步骤:
使用require引入
创建实例对象并配置到plugins选项中
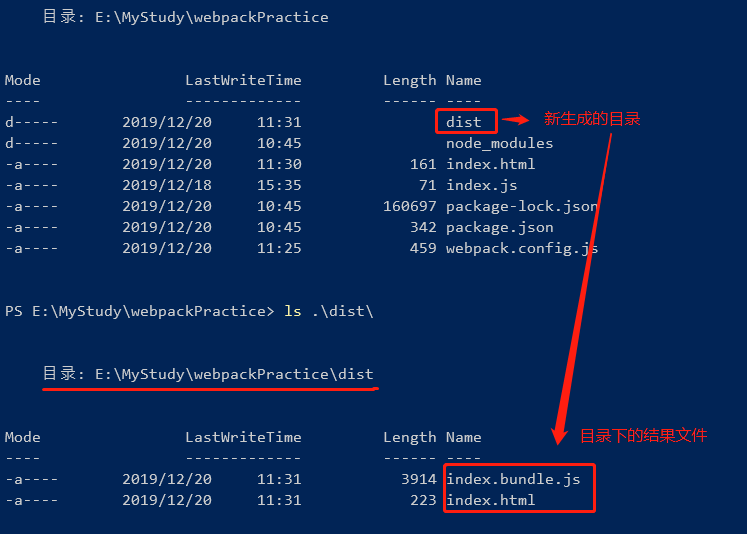
为了看清楚添加这个插件的效果,我们将前两篇文章中根目录下的index.html和dist删除
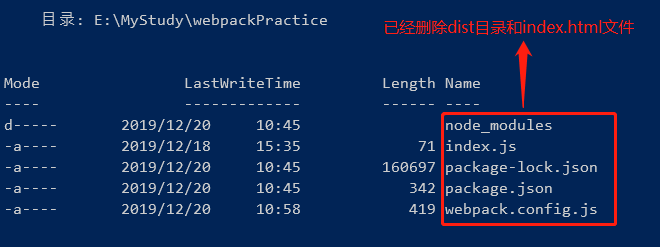
现在,我们在使用webpack命令进行打包
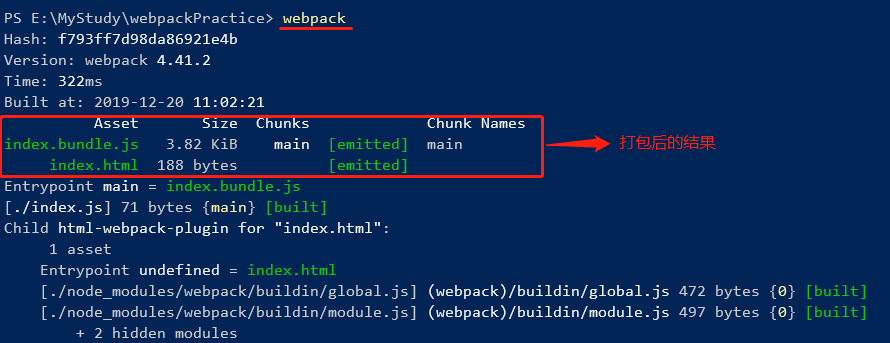
查看打包后的生成的文件和目录

可以看到打包完成后,在项目根目录下生成了一个dist目录,在该目录下生成了一个indx.bundle.js脚本文件和一个index.html模板文件。
index.bundle.js文件和前两节打包的结果文件内容一致。
index.html内容如下
dist/index.html
<!DOCTYPE html>
<html>
  <head>
    <meta charset="UTF-8">
    <title>Webpack App</title>
  </head>
  <body>
  <script type="text/javascript" src="index.bundle.js"></script></body>
</html>
这个indx.html就是html-webpack-plugin这个插件帮我们生成的,而且它还将打包后的结果文件index.bundle.js引入到了界面中。这样是不是有点有贴近我们平时的开发了。
实际上,日常项目开发中,通常我们会有自己html模板,因此我们还需要对这个插件做一些配置,让它使用我们的模板并且将打包后的结果文件自动引入到我们编写的模板中。
2.配置模板
配置模板需要在创建html-webpack-plugin示例是传入template参数。
template: 模板路径和模板名称
现在我们将template的配置添加到webpack.config.js配置文件中
// 第一步:引入
var htmlWepackPlugin = require('html-webpack-plugin')

var path = require('path');
module.exports = {
  mode: 'development',
  entry: {
    main: './index.js'
  },
  output: {
    path: path.resolve(__dirname,'dist'),
    filename: 'index.bundle.js'
  },
  // 第二步:创建html-webpack-plugin的实例,配置到plugins选项中
  plugins:[
    new htmlWepackPlugin({
      template: './index.html'
    })
  ]
};
在此我们还需要做两件事:
删除基本用法中生成的dist目录
在根目录下新建我们的模板文件index.html

index.html的内容如下:
<html>
    <head>
        <meta charset="utf-8" />
    </head>
    <body>
        <h1>webpack实践(三)- html-webpack-plugin</h1>
    </body>
</html>
最后,我们在进行一次打包

dist目录下的index.bundle.js文件还是和之前一样,我们看一下index.html文件的内容
<html>
    <head>
        <meta charset="utf-8" />
    </head>
    <body>
        <h1>webpack实践(三)- html-webpack-plugin</h1>
    <script type="text/javascript" src="index.bundle.js"></script></body>
</html>
可以看到dist/index.html已经将打包后的结果文件index.bundle.js引入。
浏览器打开dist/index.html验证结果:
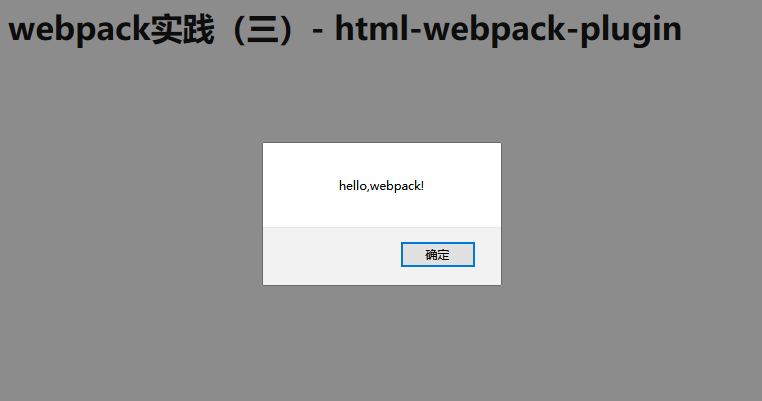
和之前的结果一致。
到此,本节内容结束,下一篇将深入学习总结一下html-webpack-plugin除template之外更多的配置项。
