
作者:小土豆biubiubiu
掘金:https://juejin.im/user/58c61b4361ff4b005d9e894d
简书:https://www.jianshu.com/u/cb1c3884e6d5
微信公众号:土豆妈的碎碎念(扫码关注,一起吸猫,一起听故事,一起学习前端技术)
码字不易,点赞鼓励哟~
一.前言
vuex被称为是专为vue应用程序开发的的状态管理模式。它的作用使用一句话描述就是:让组件之间可以共享数据
话不多少,先抛开概念,我们写一个简单的示例感受一波。
二.项目开发环境
项目开发环境搭建请移步作者的另外一篇文章《使用vue-cli搭建项目开发环境》
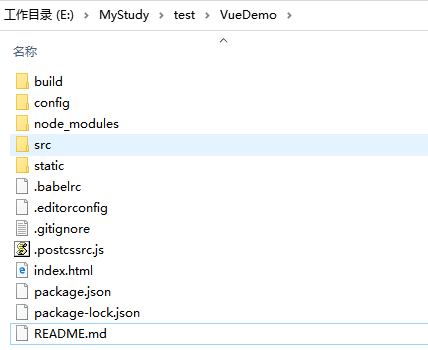
本次的项目目录如下:
三.安装vuex
使用vuex前需要先进行安装,安装命令:npm install vuex --save--dev

四.创建和访问共享数据
1.使用vuex创建全局共享数据
我们先需要在E:MyStudy estVueDemosrc目录下新建一个目录vuex和文件store.js

现在在store中使用vuex创建一个全局的共享数据
E:MyStudy estVueDemosrcvuexstore.js
import Vue from 'vue'
import Vuex from 'vuex'

Vue.use(Vuex)

export default new Vuex.Store({
    // 在state中创建一个全局共享的数据 counter
    state: {
        counter: 0
    }
})
可以看到使用vuex创建一个共享数据的语法也比较简单,即在new Vuex.Store中定义state对象,在state对象中就可以创建全局的共享对象,本次我们创建了一个counter数据。
2.入口文件中配置vuex
共享数据前面我们已经创建好了,接着需要在入口文件main.js中配置vuex
1.引入我们编写的关于vuex的代码模块store.js
2.在根实例上配置vuex
E:MyStudy estVueDemosrcmain.js
// The Vue build version to load with the `import` command
// (runtime-only or standalone) has been set in webpack.base.conf with an alias.
import Vue from 'vue'
import App from './App'
import router from './router/router'
//1.引入vuex
import store from './vuex/store'
Vue.config.productionTip = false

/* eslint-disable no-new */
new Vue({
  el: '#app',
  components: { App },
  template: '<App/>',
  router: router,
  // 2.根实例上配置vuex
  store: store
})
3.组件中获取共享数据
前面我们已经完成了两件事:使用vuex创建了共享数据counter和配置了vuex。
接着我们就需要在组件中访问这个共享数据counter
我们先新建一个Index.vue组件,在该组件中编写访问counter的代码
E:MyStudy estVueDemosrccomponentsIndex.vue
 1 <template>
 2     <div>
 3         <h1>这里是Index.vue组件</h1>
 4         <h1>Index组件获取共享数据:{{ $store.state.counter }}</h1>
 5     </div>
 6 </template>
 7 <script>
 8 export default {
 9     name: 'Index'
10 }
11 </script>
访问共享数据counter的代码为:
<h1>Index组件获取共享数据:{{ $store.state.counter }}</h1>
接着在App.vue中编写同样的代码访问这个counter,并且在App.vue组件中将Index.vue组件引入并展示。
E:MyStudy estVueDemosrcApp.vue
 1 <template>
 2   <div id="app">
 3     <img src="./assets/logo.png">
 4     <!-- 获取共享数据 -->
 5     <h1>这里是App组件</h1>
 6     <h1> App组件获取共享数据 : {{ $store.state.counter }} </h1>
 7     <hr/>
 8     <Index></Index>
 9   </div>
10 </template>
11
12 <script>
13 import Index  from './components/Index'
14 export default {
15   name: 'App',
16   components: { Index }
17 }
18 </script>
19
20 <style>
21 #app {
22   font-family: 'Avenir', Helvetica, Arial, sans-serif;
23   -webkit-font-smoothing: antialiased;
24   -moz-osx-font-smoothing: grayscale;
25   text-align: center;
26   color: #2c3e50;
27   margin-top: 60px;
28 }
29 </style>
4.浏览器查看结果
我们分别在App.vue组件和Index.vue组件中访问了共享数据counter,现在我们启动项目在浏览器中看下结果。
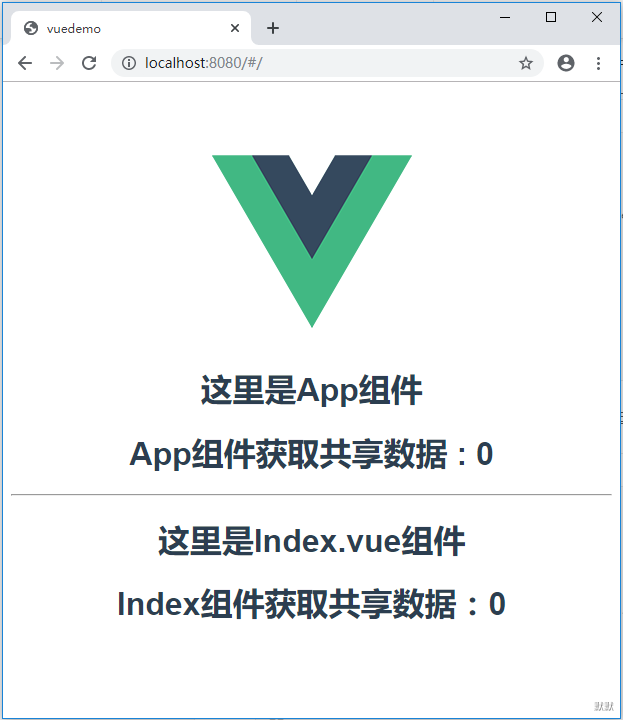
可以看到,App组件和Index组件均可以访问到counter的值。
到此,我们简单的创建一个共享数据并且在组件中成功的访问到了这个共享数据,这里我们做一个小总结
1.安装vuex:npm install vuex
2.全局配置vuex:创建vuex实例,调用store方法配置在state中创建共享数据。
3.组件中使用$store.state.counter可以访问到共享数据
五.修改共享数据
1.在store定义共享数据的修改状态
vuex中,假如需要改变共享数据,必须在vuex实例对象的Store方法中约定这个变化。
我们在store.js中对counter做两个约束:递增和递减。
E:MyStudy estVueDemosrcvuexstore.js
 1 import Vue from 'vue'
 2 import Vuex from 'vuex'
 3
 4 Vue.use(Vuex)
 5
 6 export default new Vuex.Store({
 7     // 在state中创建一个全局共享的数据 counter
 8     state: {
 9         counter: 0
10     },
11     mutations: {
12         // 递增
13         increase(state) {
14             state.counter++
15         },
16         // 递减
17         decrement(state) {
18             state.counter--
19         }
20     }
21 })
其中13行的increase方法就是约定共享数据counter每次递增1;
17行的decrement方法约定共享数据counter每次递减1。
2.组件中触发counter递增和递减
我们在App.vue组件中触发counter递减,在Index.vue中触发counter递增
E:MyStudy estVueDemosrcApp.vue
 1 <template>
 2   <div id="app">
 3     <img src="./assets/logo.png">
 4     <!-- 获取共享数据 -->
 5     <h1>这里是App组件</h1>
 6     <h1> App组件获取共享数据 : {{ $store.state.counter }} </h1>
 7     <button v-on:click="$store.commit('decrement')">点击触发共享数据counter递减1</button>
 8     <hr/>
 9     <Index></Index>
10   </div>
11 </template>
12
13 <script>
14 import Index  from './components/Index'
15 export default {
16   name: 'App',
17   components: { Index }
18 }
19 </script>
20
21 <style>
22 #app {
23   font-family: 'Avenir', Helvetica, Arial, sans-serif;
24   -webkit-font-smoothing: antialiased;
25   -moz-osx-font-smoothing: grayscale;
26   text-align: center;
27   color: #2c3e50;
28   margin-top: 60px;
29 }
30 </style>
E:MyStudy estVueDemosrccomponentsIndex.vue
<template>
    <div>
        <h1>这里是Index.vue组件</h1>
        <h1>Index组件获取共享数据:{{ $store.state.counter }}</h1>
        <button v-on:click="$store.commit('increase')">点击该组件触发共享数据counter递增1</button>
    </div>
</template>
<script>
export default {
    name: 'Index'
}
</script>
可以看到在组件中触发共享数据counter递增和递减的逻辑分别为:$store.commit('increase') 和 $store.commit('decrement'),即使用$store.commit方法并传递对应的函数名称。
3.浏览器查看结果
可以看到,点击App组件中的按钮,成功的将counter加1,且Index组件中的数据也自动更新;
点击Index组件中的按钮,成功的将counter加1,App组件中的数据也自动更新
六.异步修改共享数据
假设我们上面的递增递减的需求变成:点击按钮后,过3秒再去修改counter的值。那么这个时候应该怎么实现呢?我们直接上代码。
E:MyStudy estVueDemosrcvuexstore.js
import Vue from 'vue'
import Vuex from 'vuex'

Vue.use(Vuex)

export default new Vuex.Store({
    // 在state中创建一个全局共享的数据 counter
    state: {
        counter: 0
    },
    mutations: {
        // 递增
        increase(state) {
           state.counter++
        },
        // 递减
        decrement(state) {
           state.counter--
        }
    },
    actions: {
        increaseAction(context){
            setTimeout(function(){
                context.commit('increase')
            }, 3000);
        },
        decrementAction(context){
            setTimeout(function(){
                context.commit('decrement')
            }, 3000);
        }
    }
})
这里我们有几点需要总结:
1.异步修改数据定义在actions中,并且通过提交mutations改变共享数据的状态
2.在组件中需要使用$store.dispatch去触发共享数据的改变
E:MyStudy estVueDemosrcApp.vue
 1 <template>
 2   <div id="app">
 3     <img src="./assets/logo.png">
 4     <!-- 获取共享数据 -->
 5     <h1>这里是App组件</h1>
 6     <h1> App组件获取共享数据 : {{ $store.state.counter }} </h1>
 7     <button v-on:click="$store.dispatch('decrement')">点击等待3秒触发共享数据counter递减1</button>
 8     <hr/>
 9     <Index></Index>
10   </div>
11 </template>
12
13 <script>
14 import Index  from './components/Index'
15 export default {
16   name: 'App',
17   components: { Index }
18 }
19 </script>
20
21 <style>
22 #app {
23   font-family: 'Avenir', Helvetica, Arial, sans-serif;
24   -webkit-font-smoothing: antialiased;
25   -moz-osx-font-smoothing: grayscale;
26   text-align: center;
27   color: #2c3e50;
28   margin-top: 60px;
29 }
30 </style>
E:MyStudy estVueDemosrccomponentsIndex.vue
<template>
    <div>
        <h1>这里是Index.vue组件</h1>
        <h1>Index组件获取共享数据:{{ $store.state.counter }}</h1>
              <button v-on:click="$store.dispatch('increase')">点击等待3秒触发共享数据counter递增1</button>
    </div>
</template>
<script>
export default {
    name: 'Index'
}
</script>
浏览器查看结果:

可以看到,setTimeout这个异步逻辑成功执行。
看这里!!! 
关于上面想要实现的异步递增和递减,我们的第一反应可能就是在mutations中的递增递减函数添setTimeout延迟执行函数,我们来实践一下。
App.vue和Index.vue不做任何修改,还是前面的内容,只修改store.js。
E:MyStudy estVueDemosrcvuexstore.js
import Vue from 'vue'
import Vuex from 'vuex'

Vue.use(Vuex)

export default new Vuex.Store({
    // 在state中创建一个全局共享的数据 counter
    state: {
        counter: 0
    },
    mutations: {
        // 递增
        increase(state) {
            // 添加定时器执行
            setTimeout(function(){
                state.counter++
            },3000);

        },
        // 递减
        decrement(state) {
            //添加定时器
            setTimeout(function(){
                state.counter--
            },3000);

        }
    }
})
浏览器看下结果:

可以看到效果和actions一样!!!
没办法,我这人就是想多造作造作,对于mutations官网确实有明确的说明,mutations必须是同步函数。

emmmmm,先抛开官方文档的说法,我们的示例跑出来的结果确实是说明了mutations可以是异步函数。
那么如何解释官方文档的说法呢?我还是一遍一遍的看了下文档,找到了一些重要的信息:

当我仔细读了红色框里面的内容后,我大概理解了官方文档的为什么说mutation必须是同步函数了。
原因一:如果是异步函数,在触发mutation的时候,浏览器的调试功能看不到数据的变化;
原因二:mutation中异步函数中的数据变化无法追踪。
到这里呢,我们就不继续往下探究了,因为基础的还没有总结完,基础总结完后在探究这个问题。
七.共享数据的计算属性
vue组件中的计算属性想必大家都知道,那么vuex中共享数据的计算属性的用途和原理也是同vue组件中的计算属性。
我们假设vue组件中需要对共享数据做一些其他的转换:将某个字符串进行翻转,并且转为大写。(这个场景项目中几乎不会用到,仅仅为了演示而编造的。)
$store.state.split("").reverse().join("").toUpperCase();
当多个组件都需要这样的转化时,想必写起来也会比较繁琐,因此vuex共享数据的计算属性就帮了我们解决这个问题。下面我们使用vuex的共享数据的计算属性来实现这个需求
E:MyStudy estVueDemosrcvuexstore.js 在该文件中已经将前面定义的counter删除,重新定义了一个共享数据str
import Vue from 'vue'
import Vuex from 'vuex'

Vue.use(Vuex)

export default new Vuex.Store({
    // 在state中创建一个全局共享的数据 str
    state: {
        str: 'hello'
    },
    getters: {
        reverseAndToUpper(state){
            return state.str.split("").reverse().join("");
        }
    }
})
关于共享数据的计算属性的访问,我们只在App组件中添加访问代码
E:MyStudy estVueDemosrcApp.vue 在App组件中,将Index组件的引入代码已经删除
 1 <template>
 2   <div id="app">
 3     <img src="./assets/logo.png">
 4     <!-- 获取共享数据 -->
 5     <h1>这里是App组件</h1>
 6     <h1> App组件获取共享数据 : {{ $store.getters.reverseAndToUpper }} </h1>
 7   </div>
 8 </template>
 9
10 <script>
11 import Index  from './components/Index'
12 export default {
13   name: 'App',
14   components: { Index }
15 }
16 </script>
17
18 <style>
19 #app {
20   font-family: 'Avenir', Helvetica, Arial, sans-serif;
21   -webkit-font-smoothing: antialiased;
22   -moz-osx-font-smoothing: grayscale;
23   text-align: center;
24   color: #2c3e50;
25   margin-top: 60px;
26 }
27 </style>
浏览器查看一下结果:

可以看到,已经成功的访问到了str的计算属性。
八.总结
前面我们一共实践了vuex的这些内容:
1.在state中定义共享属性,在组件中可使用[$store.state.属性名]访问共享属性
2.在mutations可中定义修改共享数据的方法,在组件中可使用[$store.commit('方法名')]同步修改共享属性
3.在actions中可定义异步修改共享数据的方法,在组件中可使用[$store.dispatch('方法名')]异步修改共享属性
4.在getters中可定义共享数据的计算属性,在组件中可使用[$store.getters.计算属性名]访问共享数据的计算属性
后面会继续更新vuex中常用的内容

声明:转载请说明出处