1. ThreadLocal
ThreadLocal让线程有自己的局部变量,其中重要的方法有:set(),get(),remove()
ThreadLocal的使用
public static void main(String[] args) {

	ThreadLocal<String> local = new ThreadLocal();

	Thread thread1 = new Thread( () -> {
		local.set("我是线程1的消息");
		System.out.println("线程1的输出:" + local.get());
	});

	Thread thread2 = new Thread( () -> {
		System.out.println("线程2的输出:" + local.get());
	}) ;

	thread1.start();
	thread2.start();
}
线程1的输出:我是线程1的消息
线程2的输出:null
线程1存的内容,只有线程1能使用,其他线程拿不到
2. 原理
- 来看看set方法
public void set(T value) {
    Thread t = Thread.currentThread();		//获取当前线程
    ThreadLocalMap map = getMap(t);			//获取ThreadLocalMap,下面会说明
    if (map != null)						//map非空就设值
        map.set(this, value);				//键为threadloacl
    else									//空了就创建,map的键为当前线程,值为存入的值
        createMap(t, value);
}
- ThreadLocal内部维护了一个静态内部类--ThreadLocalMap,其内部又维护了Map
static class ThreadLocalMap {

/**
 * The entries in this hash map extend WeakReference, using
 * its main ref field as the key (which is always a
 * ThreadLocal object).  Note that null keys (i.e. entry.get()
 * == null) mean that the key is no longer referenced, so the
 * entry can be expunged from table.  Such entries are referred to
 * as "stale entries" in the code that follows.
 */
static class Entry extends WeakReference<ThreadLocal<?>> {
    /** The value associated with this ThreadLocal. */
    Object value;
    Entry(ThreadLocal<?> k, Object v) {
        super(k);
        value = v;
    }
}
- 在Thread中维护了一个变量ThreadLocalMap,真实复杂
- 即Thread维护了一个特殊的map集合,键值分别为线程和要存的值,这样就实现了ThreadLocal了
/* ThreadLocal values pertaining to this thread. This map is maintained
 * by the ThreadLocal class. */
ThreadLocal.ThreadLocalMap threadLocals = null;
3. 内存泄漏
ThreadLocalMap的生命周期跟Thread一样长,如果没有手动删除对应key就会导致内存泄漏,而不是因为弱引用,想要避免内存泄露就要手动remove(),key是弱引用,值不是
4. 线程死锁
- 互斥条件:线程使用的资源不共享
- 请求与保持条件:一个线程有一个资源且等待获取一个被其他线程拥有的资源
- 非剥夺条件:分配的资源不能从相应的线程中被强制剥夺
- 循环等待条件:一个线程等待其他线程,其他线程又等待该线程
避免死锁:
- 固定加锁的顺序(针对锁顺序死锁)
- 开放调用(针对对象之间协作造成的死锁)
- 使用定时锁tryLock(),如果等待获取锁时间超时,则抛出异常而不是一直等待!
5. Atomic
public class Synchronizedtest implements Runnable {

	int i = 0;

	@Override
	public void run() {
			i++;
			System.out.println("i :" + i);
	}

	public static void main(String[] args) throws InterruptedException {

		Synchronizedtest st = new Synchronizedtest();

		for (int i = 1; i <= 1000; i++) {
            new Thread(st).start();
        }
	}
}
多试几次会发现最后结果不是1000,为什么会这样呢?上面操作是线程不安全的,因为 i++ 不是原子操作,要分为三步:
- 读取 i 值
- 把读取的值 + 1
- 再把新值赋到 i 中
但如果用synchronized方法未免太浪费了,一个加法就用上了锁
public synchronized void run() {
    i++;
    System.out.println("i :" + i);
}
那么还有一种方法:java.util.concurrent.atomic,原子类,通过自旋CAS操作volatile变量实现
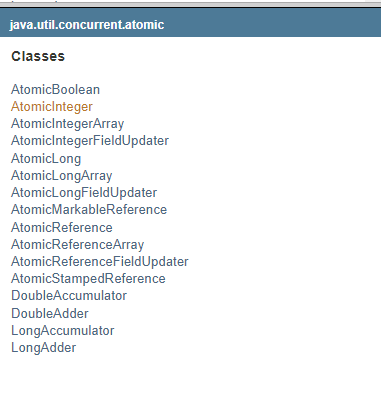
下面以AtomicInteger为例
public class Synchronizedtest implements Runnable {

	AtomicInteger i = new AtomicInteger(0);

	@Override
	public void run() {
			i.addAndGet(1);
			System.out.println("i :" + i);
	}

	public static void main(String[] args) throws InterruptedException {

		Synchronizedtest st = new Synchronizedtest();

		for (int i = 1; i <= 1000; i++) {
            new Thread(st).start();
        }
	}
}
创建原子类后,要使用该类特有方法来实现加减乘除,而不是直接 i++;
之后的结果一直为1000,实现了原子性
下面列出几个常见方法:
-
set(int newValue) 设置新值
-
get() 获得当前值
-
getAndDecrement() :-=
-
getAndIncrement() :+=
-
addAndGet(int delta):+/-= delta可以为负数
-
compareAndSet(int expect, int update): CAS操作
ABA问题
- 假设 num = 0
- 线程1修改其为10:compareAndSet(0, 10)
- 线程2修改其为 0 :compareAndSet(10, 0)
- 线程3修改为100,重点在于线程3不知道 num 已经多次修改,只是最后才将值改回来::compareAndSet(0, 100)
下面也举了个例子
public class ABADemo {

    private static AtomicReference atomicReference = new AtomicReference(0);

    public static void main(String[] args) {

        new Thread( () -> {
            atomicReference.compareAndSet(0, 10);
            atomicReference.compareAndSet(10, 0);
        },"t1").start();

        new Thread( () -> {
            try {
                TimeUnit.SECONDS.sleep(1);
            } catch (InterruptedException e) {
                e.printStackTrace();
            }
            atomicReference.compareAndSet(100, 2019);
        },"t2").start();
    }
}
可以发现t2可以修改t1改变之后的值
解决方法:增加一个版本号
这件事如果发生在链表中就是不安全的,所以JDK提供了类来解决
-
AtomicStampedReference
-
AtomicMarkableReference
public class ABADemo {

    private static AtomicStampedReference atomicStampedReference = new AtomicStampedReference(100,1);

    public static void main(String[] args) {

        new Thread(() -> {

            //t1的初始版本号
            System.out.println(atomicStampedReference.getStamp());
            try {
                TimeUnit.SECONDS.sleep(1);
            } catch (InterruptedException e) {
                e.printStackTrace();
            }
            atomicStampedReference.compareAndSet(0, 10,atomicStampedReference.getStamp(),atomicStampedReference.getStamp()+1);
            atomicStampedReference.compareAndSet(10, 0,atomicStampedReference.getStamp(),atomicStampedReference.getStamp()+1);
        },"t1").start();

        new Thread(() -> {
            //t2初始版本号
            System.out.println(atomicStampedReference.getStamp());

            try {
                TimeUnit.SECONDS.sleep(2);
            } catch (InterruptedException e) {
                e.printStackTrace();
            }
            //最新版本号
            System.out.println(atomicStampedReference.getStamp());
            atomicStampedReference.compareAndSet(0, 100,atomicStampedReference.getStamp(),atomicStampedReference.getStamp()+1);
        },"t2").start();
    }
}
可以看到t2因为版本号对不上而不能操作成功