二、封装此工具类分为三步:
将驱动类全路径、数据库连接地址、数据库用户名、数据库密码写到一个配置文件中,properties或xml都行,这里我们以properties为例。写到配置文件里面的好处是后期我们修改数据库连接相关信息的时候直接修改这个配置文本文件即可。
新建一个JDBCUtils类,在静态代码块中将数据库连接信息加载
三、代码示例(自己写的,亲测可以跑起来)
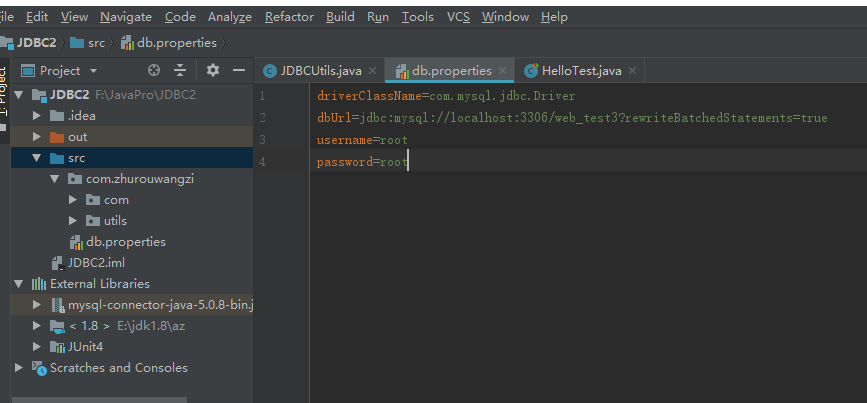
1.db.properties配置文件


driverClassName=com.mysql.jdbc.Driver
dbUrl=jdbc:mysql://localhost:3306/web_test3
username=root
password=root

2.JDBCUtils代码
package com.zhurouwangzi.utils; import java.io.FileInputStream; import java.sql.Connection; import java.sql.DriverManager; import java.sql.ResultSet; import java.sql.Statement; import java.util.Properties; public class JDBCUtils { public static String driverClassName; public static String dbUrl; public static String username; public static String password; //静态代码块用于加载配置文件中的数据库信息 static { Properties properties = new Properties(); try { properties.load(new FileInputStream("src/db.properties")); }catch (Exception ex){ ex.printStackTrace(); } driverClassName = properties.getProperty("driverClassName"); dbUrl = properties.getProperty("dbUrl"); username = properties.getProperty("username"); password = properties.getProperty("password"); } //加载驱动方法 public static void loadDriver(){ try { Class.forName(driverClassName); }catch (Exception ex){ ex.printStackTrace(); } } //获取连接 public static Connection getConnection(){ Connection conn = null; try { conn = DriverManager.getConnection(dbUrl,username ,password ); }catch (Exception ex){ ex.printStackTrace(); } return conn; } public static void release(Connection conn, Statement statement, ResultSet rs){ if(conn!=null){ try{ conn.close(); }catch (Exception e){ e.printStackTrace(); } conn = null; } if(statement!=null){ try { statement.close(); }catch (Exception e){ e.printStackTrace(); } statement = null; } if(rs!=null){ try { rs.close(); }catch (Exception e){ e.printStackTrace(); } rs = null; } } }
3.使用JDBC工具类,重新编写之前的方法(这里以添加方法为例)
@Test
    public void addData(){
        Connection conn = null;
        Statement statement = null;
        try {
            //加载驱动
            JDBCUtils.loadDriver();
            //获取连接
            conn = JDBCUtils.getConnection();
            //获取执行sql的对象
            statement = conn.createStatement();
            //编写sql
            String strSql = "insert into user_baseinfo values(null,'2','学生','正常','aa')";
            //执行sql并获得返回结果
            int num = statement.executeUpdate(strSql);
            if(num>0){
                System.out.println("添加成功");
            }else{
                System.out.println("添加失败");
            }
        }catch (Exception ex){
            ex.printStackTrace();
        }finally {
            //释放资源
            JDBCUtils.release(conn, statement,null);
        }
    }
四、参数化执行sql
@Test
    public void deleteData(){
        Connection conn = null;
        PreparedStatement prestatement = null;
        try {
            //加载驱动
            JDBCUtils.loadDriver();
            //获取连接
            conn = JDBCUtils.getConnection();
            //编写sql
            String strSql = "delete from user_baseinfo where id = ?";
            //获取连接对象
            prestatement = conn.prepareStatement(strSql);
            //设置参数
            prestatement.setString(1, "11");
            //执行sql
            int num = prestatement.executeUpdate();
            if(num>0){
                System.out.println("删除成功");
            }else{
                System.out.println("删除失败");
            }
        }catch (Exception ex){
            ex.printStackTrace();
        }finally {
            JDBCUtils.release(conn, prestatement, null);
        }
    }
五、JDBC的批处理
在默认情况下,Mysql的批处理是没有开启的,需要在数据库的url后边加一个参数才能开启(?rewriteBatchedStatements=true)
如:url=jdbc:mysql://localhost:3306/web_test3?rewriteBatchedStatements=true
1.实例代码
@Test public void addData(){ Connection conn = null; Statement statement = null; try { //加载驱动 JDBCUtils.loadDriver(); //获取连接 conn = JDBCUtils.getConnection(); //获取执行sql的对象 statement = conn.createStatement(); //编写sql String strSql = "insert into user_baseinfo values(null,'2','学生','正常','aa')"; String strSql2 = "insert into user_baseinfo values(null,'3','工人','正常','bb')"; String strSql3 = "insert into user_baseinfo values(null,'4','农民','正常','cc')"; //将要执行的sql添加到批处理里面 statement.addBatch(strSql); statement.addBatch(strSql2); statement.addBatch(strSql3); //执行批处理 statement.executeBatch(); }catch (Exception ex){ ex.printStackTrace(); }finally { //释放资源 JDBCUtils.release(conn, statement,null); } }
2.批处理参数版
@Test
    public void addDataPre(){
        Connection conn = null;
        PreparedStatement preStatement = null;
        try {
            //加载驱动
            JDBCUtils.loadDriver();
            //获取连接
            conn = JDBCUtils.getConnection();
            //编写sql
            String strSql = "insert into user_baseinfo values(null,?,?,?,?)";
            //预编译sql
            preStatement = conn.prepareStatement(strSql);
            for(int i =1;i<=10;i++){
                preStatement.setString(1, "tel"+i);
                preStatement.setString(2, "type"+i);
                preStatement.setString(3, "statu"+i);
                preStatement.setString(4, "name"+i);
                //添加到批处理
                preStatement.addBatch();
                //执行批处理(每5个执行一次)
                if(i%5==0){
                    preStatement.executeBatch();
                    preStatement.clearBatch();
                }
            }
        }catch (Exception ex){
            ex.printStackTrace();
        }finally {
            JDBCUtils.release(conn,preStatement, null);
        }
    }
转载请注明出处:cnblogs.com/Infancy/p/12502329.html