【转】 SpringCloud系列——Config 配置中心
前言
Spring Cloud Config为分布式系统中的外部化配置提供了服务器端和客户端支持。有了配置服务器,您就有了一个中心位置来管理跨所有环境的应用程序的外部属性。本文记录实现一个配置中心、客户端获取配置参数、refresh手动刷新
官方文档:https://cloud.spring.io/spring-cloud-config/single/spring-cloud-config.html
帮助文档:https://spring.io/guides/gs/centralized-configuration/
Config Server
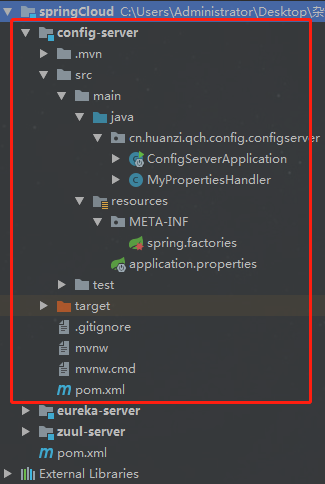
首先我们基于之前的代码,在springCloud工程下面新建一个Config Server,是一个springboot项目,并且在Eureka上面注册服务(还不会服务注册与发现的,请戳:SpringCloud系列——Eureka 服务注册与发现),本例使用的是GitHub
maven引jar
        <!-- config-server -->
        <dependency>
            <groupId>org.springframework.cloud</groupId>
            <artifactId>spring-cloud-config-server</artifactId>
        </dependency>
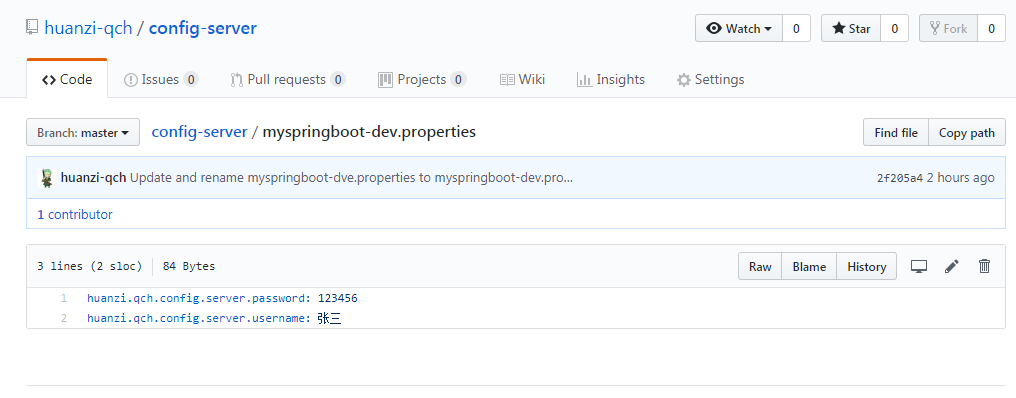
登录GitHub,新建一个public仓库:config-server,并且添加测试项目对应的配置文件:myspringboot-dev.properties,并设置几个值
配置文件
server.port=1112
spring.application.name=config-server

eureka.client.serviceUrl.defaultZone=http://localhost:1111/eureka/
#健康检查(需要spring-boot-starter-actuator依赖)
eureka.client.healthcheck.enabled=true
# 续约更新时间间隔(默认30秒)
eureka.instance.lease-renewal-interval-in-seconds=10
# 续约到期时间(默认90秒)
eureka.instance.lease-expiration-duration-in-seconds=10

#连接GitHub
spring.cloud.config.server.git.uri=https://github.com/huanzi-qch/config-server.git
spring.cloud.config.server.git.search-paths=config-server
spring.cloud.config.label=master
spring.cloud.config.server.git.username=******
spring.cloud.config.server.git.password=******
启动类加入注解@EnableConfigServer
@EnableConfigServer
@EnableEurekaClient
@SpringBootApplication
public class ConfigServerApplication {

    public static void main(String[] args) {
        SpringApplication.run(ConfigServerApplication.class, args);
    }
}
启动项目,访问http://localhost:1112/myspringboot-dev.properties/,发现有中文乱码
注:仓库中的配置文件会被转换成web接口,访问规则:
- /{application}/{profile}[/{label}]
- /{application}-{profile}.yml
- /{label}/{application}-{profile}.yml
- /{application}-{profile}.properties
- /{label}/{application}-{profile}.properties

解决中文乱码,参考:https://blog.csdn.net/sinat_38843093/article/details/79960777
新建自定义解析器MyPropertiesHandler,继承PropertiesPropertySourceLoader,重写方法
/**
 * 解决中文乱码问题
 * 参考:https://blog.csdn.net/sinat_38843093/article/details/79960777
 */
public class MyPropertiesHandler extends PropertiesPropertySourceLoader {

    @Override
    public String[] getFileExtensions() {
        return new String[]{"properties", "xml"};
    }

    @Override
    public List<PropertySource<?>> load(String name, Resource resource) throws IOException {
        ArrayList<PropertySource<?>> list = new ArrayList<>();
        Properties properties = getProperties(resource);
        if (!properties.isEmpty()) {
            list.add(new PropertiesPropertySource(name, properties));
        }
        return list;
    }

    private Properties getProperties(Resource resource) throws IOException {
        Properties properties = new Properties();
        InputStream inputStream = resource.getInputStream();
        properties.load(new InputStreamReader(inputStream, StandardCharsets.UTF_8));
        inputStream.close();
        return properties;
    }
}
resources文件夹下面新建META-INF文件夹,在里面创建spring.factories文件,指定使用我们自定义的解析器
org.springframework.boot.env.PropertySourceLoader=cn.huanzi.qch.config.configserver.MyPropertiesHandler
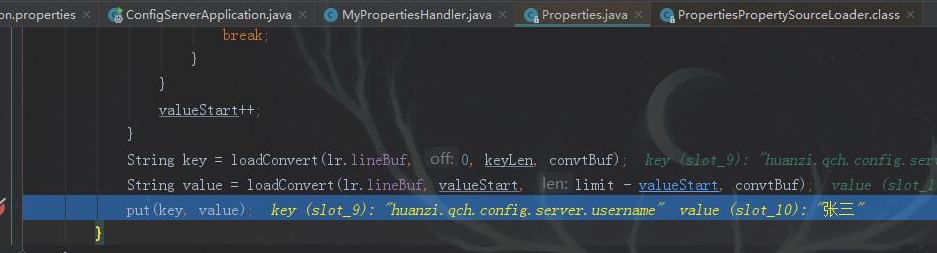
重新启动项目,在自定义解析器后进行断点调试,发现解析的时候中文乱码问题得以解决,但响应回去还是乱码

解决http响应中文乱码问题
配置文件添加
#解决http响应数据中文乱码问题
spring.http.encoding.force=true
spring.http.encoding.charset=UTF-8
spring.http.encoding.enabled=true
server.tomcat.uri-encoding=UTF-8
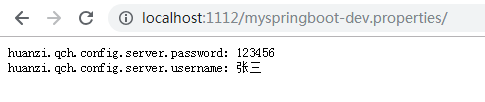
最终效果
我们去GitHub修改配置中心的值,看下config server能不能实时获取最新数据

改完后刷新http://localhost:1112/myspringboot-dev.properties/,配置中心可以实时获取最新数据

Config Client
客户端我们直接用之前的项目:myspringboot,这里就当做一个在Eureka上注册了的普通springboot项目
maven引入jar
        <!-- config-client -->
        <dependency>
            <groupId>org.springframework.cloud</groupId>
            <artifactId>spring-cloud-starter-config</artifactId>
        </dependency>
application.properties
#设置服务端口
server.port=10087
spring.application.name=myspringboot

#eureka
eureka.client.serviceUrl.defaultZone=http://localhost:1111/eureka/
#健康检查(需要spring-boot-starter-actuator依赖)
eureka.client.healthcheck.enabled=true
# 续约更新时间间隔(默认30秒)
eureka.instance.lease-renewal-interval-in-seconds=10
# 续约到期时间(默认90秒)
eureka.instance.lease-expiration-duration-in-seconds=10
#超时时间
feign.httpclient.connection-timeout=30000
使用优先级更高的bootstrap.properties进行config的配置,因为
#关闭spring cloud config,spring cloud默认要从config中读取配置,通过该配置,只从本地application.properties中读取配置
#spring.cloud.config.enabled=false

#配置文件名(当应用名跟配置文件相同时可以不用配置)
spring.cloud.config.name=myspringboot
# dev 开发环境配置文件 |  test 测试环境  |  pro 正式环境
spring.cloud.config.profile=dev
# 远程仓库的分支
spring.cloud.config.label=master

#指定配置中心名称(如果使用eureka可以这样配置)
#spring.cloud.config.discovery.service-id=config-server
#启用发现服务功能
#spring.cloud.config.discovery.enabled=true

#配置服务中心地址(如果不使用eureka可以直接配置url路径)
spring.cloud.config.uri=http://localhost:1112/
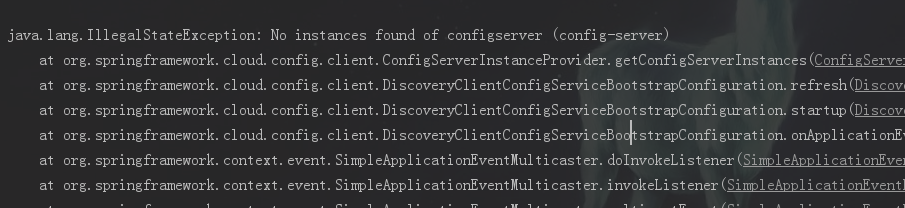
如果使用从eureka获取配置中心实例,则要在指定服务之前进行注册配置,否则会报错,因为你还没在Eureka注册就去Eureka查找配置中心,如:
#设置服务端口
server.port=10087
spring.application.name=myspringboot

#eureka
eureka.client.serviceUrl.defaultZone=http://localhost:1111/eureka/
#健康检查(需要spring-boot-starter-actuator依赖)
eureka.client.healthcheck.enabled=true
# 续约更新时间间隔(默认30秒)
eureka.instance.lease-renewal-interval-in-seconds=10
# 续约到期时间(默认90秒)
eureka.instance.lease-expiration-duration-in-seconds=10
#超时时间
feign.httpclient.connection-timeout=30000

#关闭spring cloud config,spring cloud默认要从config中读取配置,通过该配置,只从本地application.properties中读取配置
#spring.cloud.config.enabled=false

#配置文件名(当应用名跟配置文件相同时可以不用配置)
spring.cloud.config.name=myspringboot
# dev 开发环境配置文件 |  test 测试环境  |  pro 正式环境
spring.cloud.config.profile=dev
# 远程仓库的分支
spring.cloud.config.label=master

#指定配置中心名称(如果使用eureka可以这样配置)
spring.cloud.config.discovery.service-id=config-server
#启用发现服务功能
spring.cloud.config.discovery.enabled=true

#配置服务中心地址(如果不使用eureka可以直接配置url路径)
#spring.cloud.config.uri=http://localhost:1112/
测试
我们直接在启动类进行测试
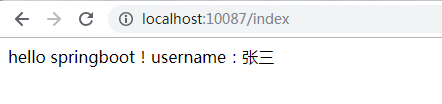
@EnableEurekaClient
@SpringBootApplication
@RestController
public class MyspringbootApplication{

    public static void main(String[] args) {
        SpringApplication.run(MyspringbootApplication.class, args);
    }

    @Value("${huanzi.qch.config.server.username}")
    private String username;

    /**
     * 访问首页
     */
    @GetMapping("/index")
    public String index(){
        return "hello springboot!username:" + username;
    }

}
查看启动日志,客户端已经发现了配置中心,并且从配置中心发现了myspringboot配置文件

访问http://localhost:10087/index,值已经取到了
其实客户端(Config Client)也是可以读取服务端(Config Server)配置文件里面的值,例如:

客户端(Config Client)是可以读取到这个值的,由此可见,是客户端是读取了服务端的数据,而服务端负责实时获取GitHub上面的数据
refresh手动刷新
我们已经在客户端取到了配置中心的值,但当我们修改GitHub上面的值时,服务端(Config Server)能实时获取最新的值,但客户端(Config Client)读的是缓存,无法实时获取最新值
spring已经为我们解决了这个问题,那就是客户端使用post去触发refresh,获取最新数据,需要依赖spring-boot-starter-actuator
        <!-- actuator -->
        <dependency>
            <groupId>org.springframework.boot</groupId>
            <artifactId>spring-boot-starter-actuator</artifactId>
        </dependency>
对应的controller类加上@RefreshScope
@RefreshScope
@EnableEurekaClient
@SpringBootApplication
@RestController
public class MyspringbootApplication{

    public static void main(String[] args) {
        SpringApplication.run(MyspringbootApplication.class, args);
    }

    @Value("${huanzi.qch.config.server.username}")
    private String username;

    /**
     * 访问首页
     */
    @GetMapping("/index")
    public String index(){
        return "hello springboot!username:" + username;
    }

}
启动后查看日志发现,actuator有个基础路径/actuator,同时还暴露了两个终端(不知道是哪两个端点...)

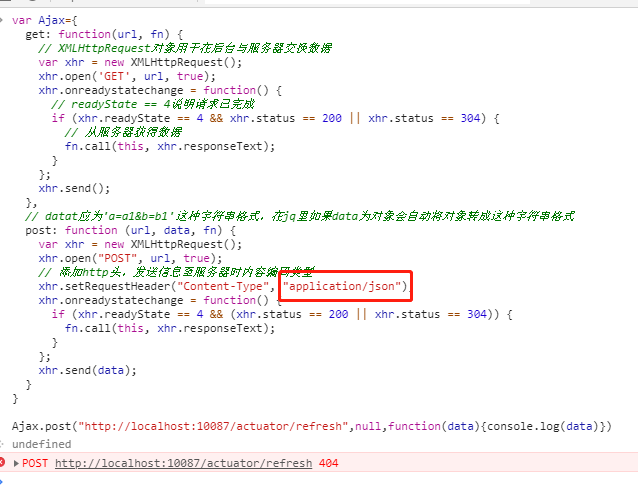
但是当我们post访问http://localhost:10087/actuator/refresh时,报404,这是什么回事?
注:这里插一句话:从网上找了个js的ajax(要注意content-type的类型)
var Ajax={
  get: function(url, fn) {
    // XMLHttpRequest对象用于在后台与服务器交换数据
    var xhr = new XMLHttpRequest();
    xhr.open('GET', url, true);
    xhr.onreadystatechange = function() {
      // readyState == 4说明请求已完成
      if (xhr.readyState == 4 && xhr.status == 200 || xhr.status == 304) {
        // 从服务器获得数据
        fn.call(this, xhr.responseText);
      }
    };
    xhr.send();
  },
  // datat应为'a=a1&b=b1'这种字符串格式,在jq里如果data为对象会自动将对象转成这种字符串格式
  post: function (url, data, fn) {
    var xhr = new XMLHttpRequest();
    xhr.open("POST", url, true);
    // 添加http头,发送信息至服务器时内容编码类型
    xhr.setRequestHeader("Content-Type", "application/json");
    xhr.onreadystatechange = function() {
      if (xhr.readyState == 4 && (xhr.status == 200 || xhr.status == 304)) {
        fn.call(this, xhr.responseText);
      }
    };
    xhr.send(data);
  }
}
Ajax.post("http://localhost:10087/actuator/refresh",null,function(data){console.log(data)})
经过层层查找,最后在帮助文档发现:默认情况下,自Spring Boot 2.0以来,默认情况下不会公开Actuator端点,需要手动暴露端点
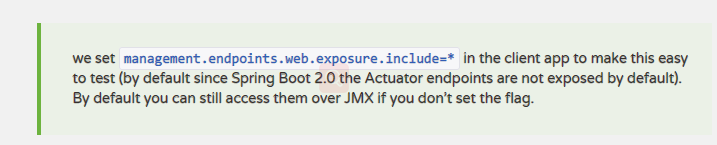
配置文件暴露端点
#只暴露refresh,当然也可以暴露所有:=*
management.endpoints.web.exposure.include=refresh
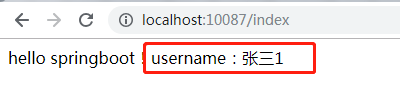
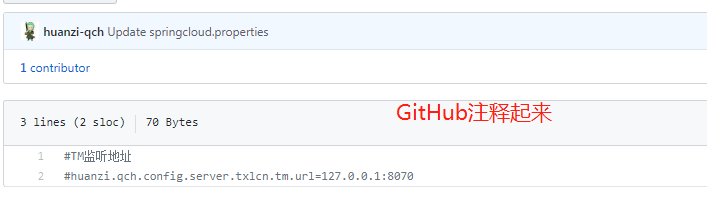
重启客户端,我们将GitHub配置文件改回:huanzi.qch.config.server.username: 张三
访问测试接口,还是张三1

post调用refresh

刷新,数据更新
总结
这里总结一下遇到的坑:
调用refresh报404的时候,百度查找都是说默认安全拦截,配置关闭:management.security.enabled=false,配置上去的时候发现报错,波浪线,被弃用了,

最后还是靠Google,在知乎(https://zhuanlan.zhihu.com/p/34784934)上面找到了答案
并且吐槽吐槽百度:
同样的关键字,Google搜出来的第一个就能解决问题

而垃圾百度,没一个可以...

代码开源
代码已经开源、托管到我的GitHub、码云: