Problem
I would like to learn how to fire events, execute T-SQL commands and run SMO with the SQL Server Integration Services (SSIS) Script Task. Can you help me?
Solution
This is the second part of the SSIS Script Task tutorial. If you did not read the first part and don't have much experience using the SSIS Script Task, we strongly recommend you read that tip.
Requirements
- SSIS installed
- SQL Server Data Tools Installed (SSDT) or BIDS (Business Intelligence Development Studio)
- A SQL Server database backup
- You can use SQL Server 2005 or later versions. In this example, we are using SQL Server 2014.
Example 1 - Firing events in SSIS
In the Script Task it is possible to fire errors, warnings and informational messages. In this first example, we will show how to fire an error message.
Drag and drop the Script Task and rename the task to "Fire event".
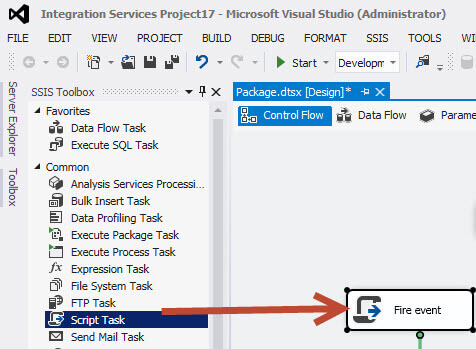
Open the task and edit the script with the following code:

public void Main()
{
   // TODO: Add your code here
   Dts.Events.FireError(18, "The process failed", "The task failed", "", 0);
   Dts.TaskResult = (int)ScriptResults.Success;
}
The dts.Events allow firing errors, progress messages, warnings and informational messages. You can specify the error code (18 in this example), detail about the event, the text message and the identifier of the topic in the help (0).
Once you have the code in place, Execute the task.
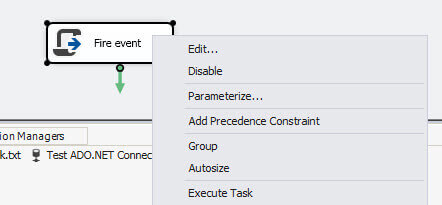
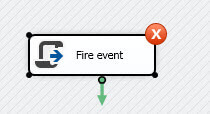
When this runs, you will see a red X in the event.
If you go to the output (View > Output), you will be able to see the error message raised: The process failed: The task failed. This is the error message that we coded in the step above. Usually you will raise an event in the catch section of the code.

Example 2 - Connect to ADO.net and run a T-SQL command in SSIS
The next example will show how to connect to SQL Server using an ADO.net connection and then we will create a new database.
For this example, drag and drop the Script Task and rename it to "Connection sample".

Double click on the task, press the edit script and edit the code. In the region Namespaces, add the System.Data.SqlClient to work with the sql connection as shown below.
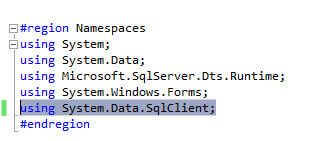
using System.Data.SqlClient;
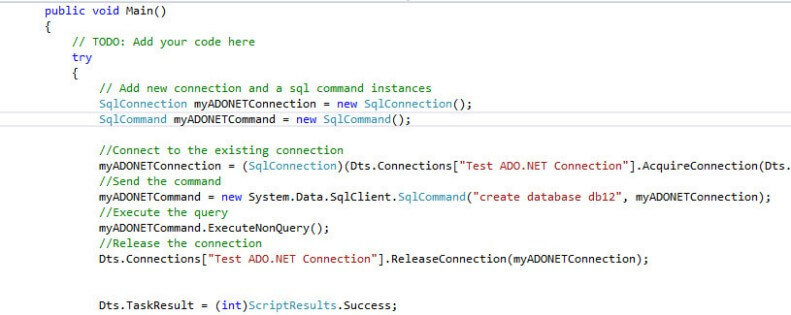
In the Script Task, add the following code:
try
{
   // Add new connection and a sql command instances
   SqlConnection myADONETConnection = new SqlConnection();
   SqlCommand myADONETCommand = new SqlCommand();

   //Connect to the existing connection
   myADONETConnection = (SqlConnection)(Dts.Connections["Test ADO.NET Connection"].AcquireConnection(Dts.Transaction) as SqlConnection);

   //Send the command
   myADONETCommand = new System.Data.SqlClient.SqlCommand("create database db12", myADONETConnection);

   //Execute the query
   myADONETCommand.ExecuteNonQuery();

   //Release the connection
   Dts.Connections["Test ADO.NET Connection"].ReleaseConnection(myADONETConnection);

   Dts.TaskResult = (int)ScriptResults.Success;
}
catch (Exception ex)
{
   MessageBox.Show(ex.ToString());
   Dts.TaskResult = (int)ScriptResults.Failure;
}
The code creates an instance of sqlconnections and commands. The connection will be obtained from an ADO connection named test ADO.NET. After that, we are creating a database named db12 using the command. You can send any T-SQL code with the SqlCommand. The execute nonquery is to run commands that are not queries (don't return data). Finally, the ReleaseConnection releases the connection done.
Save the code and close the script task.
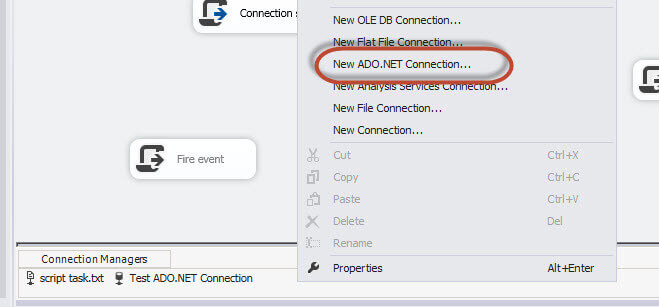
In the Connection Managers, right click and select New ADO.NET Connection...
In the Server Name, enter the SQL Server Name and then select the database. In this example, we are using the localhost (.) and the master database.
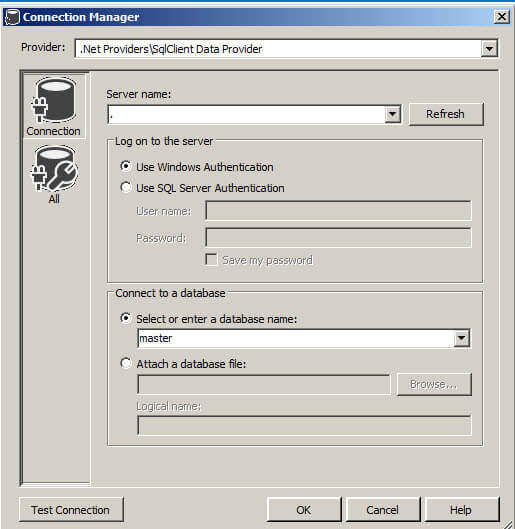
Rename the connection to Test ADO.NET Connection to match the script task code.

Once finished, right click on the task and select Execute Task.
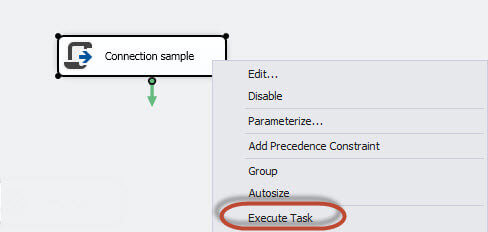
If everything is OK, a new database named db12 will be created.
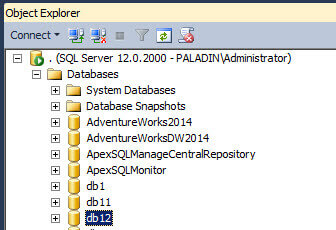
You may ask yourself if it is not better to use the T-SQL Task instead of the Script Task. For this particular example yes, but sometimes there are more complex needs or you may already have C# or VB code written that you can use.
Example 3 - SMO with the SSIS Script Task
This is the last example. SMO is the SQL Management Object. With SMO you can program any SQL Server administration task like configuring, changing properties, etc. Today we will program the classic backup.
In order to start, drag and drop the Script Task and rename to SMO Backup or any name of your preference.
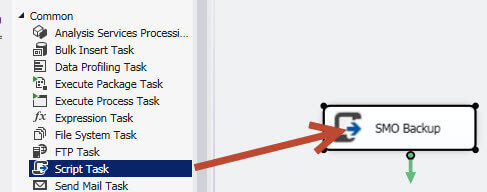
Double click on the task and press the Edit Script button. In the region Namespaces add the using.Microsoft.SqlServer.Management.Smo;
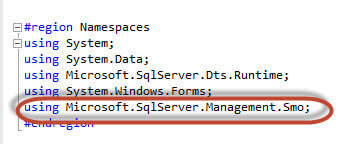
using.Microsoft.SqlServer.Management.Smo;
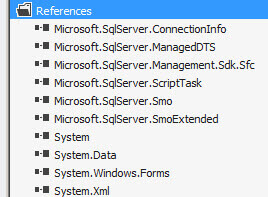
In the Solution Explorer right click on References and select the Add Reference option.
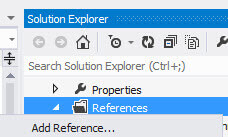
In Assemblies > Extensions, check off the following libraries:
- Microsoft.SqlServer.ConnectionInfo
- Microsoft.SqlServer.Management.Sdk.Sfc
- Microsoft.SqlServer.Smo
- Microsoft.SqlServer.SmoExtended

The final libraries will be as follows:
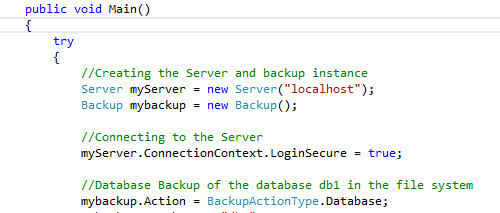
In the script, add the following code in the public void Main():
try
{
   //Creating the Server and backup instance
   Server myServer = new Server("localhost");
   Backup mybackup = new Backup();

   //Connecting to the Server
   myServer.ConnectionContext.LoginSecure = true;

   //Database Backup of the database db1 in the file system
   mybackup.Action = BackupActionType.Database;
   mybackup.Database = "db1";
   mybackup.MediaName = "FileSystem";

   //Create a new device and specify the path
   BackupDeviceItem myDeviceItem = new BackupDeviceItem();
   myDeviceItem.DeviceType = DeviceType.File;
   myDeviceItem.Name = "C:\Program Files\Microsoft SQL Server\MSSQL12.MSSQLSERVER\MSSQL\Backup\db1_test2.bak";
   mybackup.Devices.Add(myDeviceItem);

   //Start the backup
   mybackup.Initialize = true;
   mybackup.SqlBackup(myServer);

   Dts.TaskResult = (int)ScriptResults.Success;
}
catch (Exception ex)
{
   MessageBox.Show(ex.ToString());

   Dts.TaskResult = (int)ScriptResults.Failure;
}
This code creates an instance of the Server and the backup. Then the ConnectionContext connects using trusted authentication (Windows Authentication). Then the action is to create a backup of the database named db1 in the file system. The next step is to create the device and specify the path. Once done, the backup is executed using the Server information.
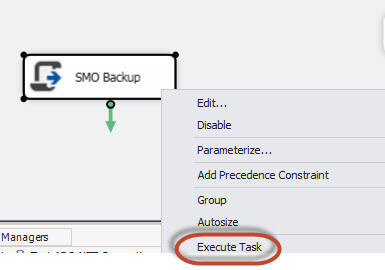
Save the code, close and accept the Script Task changes and execute the task.
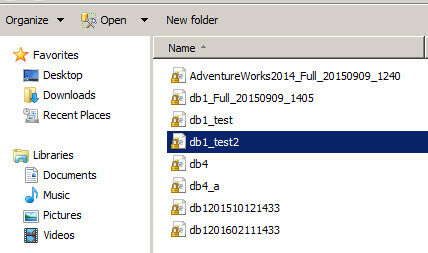
If everything is OK, a new backup will be created in the path specified.
Conclusion
If you do not have experience with C# or VB, you will not be able to fully take advantage of the Script Task. However, with this small demo you should now be aware of some of the capabilities.