From:http://www.dotnetcurry.com/ShowArticle.aspx?ID=208
Note: This article is written based on a pre-release version of Silverlight and could change in future.
In Silverlight, we often come across a very common requirement to consume Cross Domain Services. In order to support Cross Domain Services in Silverlight, we have to add 'Cross Domain Policy' file at the root of the web server. But if that Service is hosted in a Console Application or a WPF Application or a Windows Service, then how do we go about it? Where do we look for the Policy file?
In this article, we will discuss one approach to do so. We will be discussing the following steps in the order given below:
1) We will create a WCF Service to consume in a Console Project.
2) We will create another Service which will be used to provide the Policy File at that Particular URI.
3) We will edit our App.Config to be able to expose the service and will test run our Console Application.
4) We will then finally create a Silverlight Client Project which will consume this WCF Service.
Note: I will discuss a step by step approach for a Console Application. In a similar manner, you can also expose services from a Windows Service or WPF application.
Create a WCF Service to consume in a Console Project
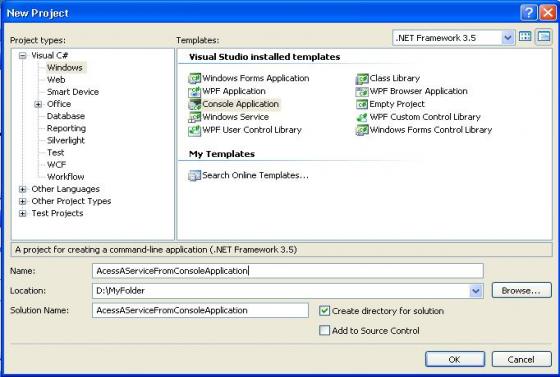
Step 1: Open Visual Studio 2008 > File > New Project > Select the language (C# or VB.NET) > Select ‘Windows’ in the Project Types > Select ‘Console Application’ from Templates > Target type ‘.NET Framework 3.5’ > Type a name ‘AccessAServiceFromConsoleApplication’ (for C#) or ‘AccessAServiceFromConsoleApplicationVB’ (for VB) and location for the project and click ok. (Check the screenshot below)
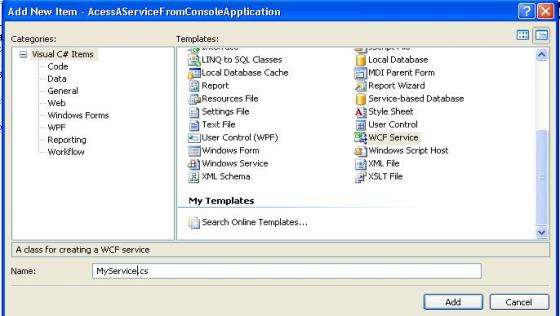
Step 2: If you have performed the above step correctly, you will be having only a Program.cs or Module1.vb file in this Project. Now Right Click on the Project > click Add > click New Items. A window will appear displaying different templates. Select ‘WCF Service’ from the templates and name it as ‘MyService.cs’ or ‘MyService.vb’ (See Screenshot below). Now click on Add.
It will add two .cs (named IMyService.cs and MyService.cs) or .vb files (named IMyService.vb and MyService.vb)
Step 3: We will now make some modifications to the [OperationContract] by changing the return type of default method (DoWork which will be added by default) in the IMyService.cs or IMyService.vb interface from void to string. IMyService.cs or IMyService.vb will look like this:
C#
namespace AccessAServiceFromConsoleApplication
{
[ServiceContract]
public interface IMyService
{
[OperationContract]
string DoWork();
}
}
VB.NET
<ServiceContract()> _
Public Interface IMyService
<OperationContract()> _
Function DoWork() As String
End Interface
Step 4: Since the ‘MyService’ class is implementing ‘IMyService’, we will make a small change in it also. In the ‘DoWork()’ method we will return a simple string.
MyService will look like this.
C#
namespace AccessAServiceFromConsoleApplication
{
public class MyService : IMyService
{
public string DoWork()
{
return "This is A Sample From DotNetCurry.com";
}
}
}
VB.NET
Public Class MyService
Implements IMyService
Public Function DoWork() As String Implements IMyService.DoWork
Return "This is A Sample From DotNetCurry.com"
End Function
End Class
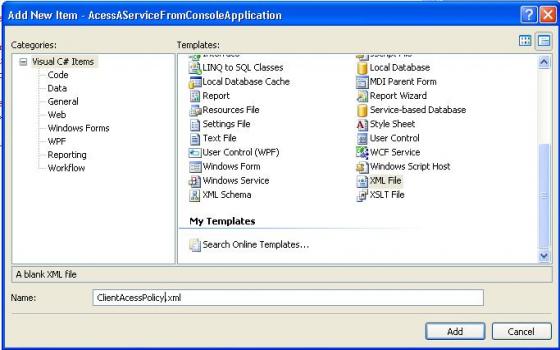
Step 5: Now Right Click on the Project > click Add > click New Items. A window will appear displaying different templates. Select “XML File” from the templates and name the xml file as ClientAccessPolicy.xml (See Screenshot below). Click Add.
Add the following contents to the ClientAccessPolicy.xml. You can get the content of this file from Microsoft’s site.
<?xml version="1.0" encoding="utf-8"?>
<access-policy>
<cross-domain-access>
<policy>
<allow-from http-request-headers="*">
<domain uri="*"/>
</allow-from>
<grant-to>
<resource path="/" include-subpaths="true"/>
</grant-to>
</policy>
</cross-domain-access>
</access-policy>
Before moving ahead, please build the solution and copy the ClientAccessPolicy.xml to the \bin directory of the Console Application. If you are unable to view the \bin folder, click on ‘Show All Files’ in the Solution Explorer.
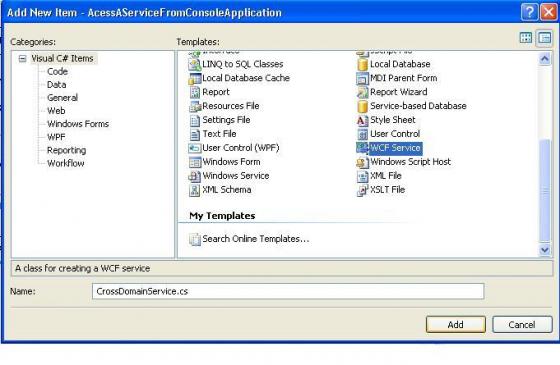
Step 6: Now Right Click on Project > click Add > click New Items. A window will appear displaying different templates. Select WCF service from that and name that as CrossDomainService (See screenshot below). Click on Add.
It will add two .cs files (named ICrossDomainService.cs and CrossDomainService.cs) or two .vb files (named ICrossDomainService.vb and CrossDomainService.vb)
Provide the Policy File at that Particular URI
Step 7: We will now change the default implementation of this service. Here we have to serve the cross domain file manually. To do so, we will use REST Service (Representational State Transfer) using WCF to provide the clientaccesspolicy.xml file. Using this approach, we will make our file available at a particular root URI.
Note: WCF 3.5 provides the new Web Programming Model that is made for building REST services. I have observed that doing REST style coding in WCF proves very handy.
Here our return type will be the message. So replace the contents of the ICrossDomainService.cs or .vb with the following. Our ICrossDomainService.cs or ICrossDomainService.vb will look like this.
C#
using System.ServiceModel.Web;
using System.ServiceModel.Channels;
namespace AccessAServiceFromConsoleApplication
{
// NOTE: If you change the interface name "ICrossDomainService" here, you must also update the reference to "ICrossDomainService" in App.config.
[ServiceContract]
public interface ICrossDomainService
{
[OperationContract]
[WebGet(UriTemplate = "ClientAccessPolicy.xml")]
Message ProvidePolicyFile();
}
}
VB.NET
Imports System.ServiceModel.Web
Imports System.ServiceModel.Channels
<ServiceContract()> _
Public Interface ICrossDomainService
<OperationContract(), WebGet(UriTemplate:="ClientAccessPolicy.xml")> _
Function ProvidePolicyFile() As Message
End Interface
WebGet provides a mechanism to map an HTTP GET operation to a specific method. It will look for that method according to the URI specified in UriTemplate. So actually when we will type the <baseaddress> provided in our app.config file, followed by Uri Template string, it will execute this method.
For eg: You can try this here by typing http://localhost:8731/clientaccesspolicy.xml when your application is ready.
Note: For some reason, if you get the "The type or namespace name 'WebGetAttribute' could not be found", make sure you have added a reference to the System.ServiceModel.Web.
Step 8: Our CrossDomainService.cs or .vb will look like this. Here we are reading an Xml file and returning that.
C#
using System.Xml;
using System.ServiceModel.Channels;
namespace AccessAServiceFromConsoleApplication
{
public class CrossDomainService : ICrossDomainService
{
public System.ServiceModel.Channels.Message ProvidePolicyFile()
{
FileStream filestream = File.Open(@"ClientAccessPolicy.xml", FileMode.Open);
// Either specify ClientAccessPolicy.xml file path properly
// or put that in \Bin folder of the console application
XmlReader reader = XmlReader.Create(filestream);
System.ServiceModel.Channels.Message result = Message.CreateMessage(MessageVersion.None, "", reader);
return result;
}
}
}
VB.NET
Imports System.IO
Imports System.Xml
Imports System.ServiceModel.Channels
Public Class CrossDomainService
Implements ICrossDomainService
Public Function ProvidePolicyFile() As System.ServiceModel.Channels.Message Implements ICrossDomainService.ProvidePolicyFile
Dim filestream As FileStream = File.Open("ClientAccessPolicy.xml", FileMode.Open)
' Either specify ClientAccessPolicy.xml file path properly
' or put that in \Bin folder of the console application
Dim reader As XmlReader = XmlReader.Create(filestream)
Dim result As System.ServiceModel.Channels.Message = Message.CreateMessage(MessageVersion.None, "", reader)
Return result
End Function
End Class
Note: Don’t forget to paste your ClientAccessPolicy.xml file in the \Bin folder, since in this sample, we have specified to look for the xml file in that location. We can also read the xml file using different methods; like by giving the absolute path, embedding the file etc.
Edit AppConfig to be able to expose the service will test run our Console Application
Step 9: Now we will modify our AppConfig. Do not forget to change the Binding to basicHttpBinding. Here we are specifying the Base address of CrossDomainService as "http://localhost:8731/" and base address of MyService as http://localhost:8731/AccessAServiceFromConsoleApplication/MyService.
If you observe carefully, both the services ‘base address root’ is the same. CrossDomainService will make our Policy file available at http://localhost:8731/clientaccesspolicy.xml". When our Silverlight application will try to access the Service, it will look in that URI as (http://localhost:8731/clientaccesspolicy.xml) and will get an access to it.
Note: We can change the Base Adresses in the app.config file for both the services, but make sure both the base address are pointing to the same root URI, i.e. “http://localhost:portnumber/” is the same.
The app.config will look similar to the following:
<?xml version="1.0" encoding="utf-8" ?>
<configuration>
<system.serviceModel>
<serviceHostingEnvironment aspNetCompatibilityEnabled="true"/>
<behaviors>
<serviceBehaviors>
<behavior name="AccessAServiceFromConsoleApplication.MyServiceBehavior">
<serviceMetadata httpGetEnabled="true" />
<serviceDebug includeExceptionDetailInFaults="false" />
</behavior>
</serviceBehaviors>
<endpointBehaviors>
<behavior name="CrossDomainServiceBehavior">
<webHttp/>
</behavior>
</endpointBehaviors>
</behaviors>
<services>
<service behaviorConfiguration=
"AccessAServiceFromConsoleApplication.MyServiceBehavior"
name="AccessAServiceFromConsoleApplication.MyService">
<endpoint address="" binding="basicHttpBinding" contract="AccessAServiceFromConsoleApplication.IMyService">
</endpoint>
<endpoint address="mex" binding="mexHttpBinding" contract="IMetadataExchange" />
<host>
<baseAddresses>
<add baseAddress=
/MyService" />
</baseAddresses>
</host>
</service>
<service name="AccessAServiceFromConsoleApplication.CrossDomainService">
<host>
<baseAddresses>
<add baseAddress="http://localhost:8731/" />
</baseAddresses>
</host>
<endpoint address="" binding="webHttpBinding" contract=
"AccessAServiceFromConsoleApplication.ICrossDomainService" behaviorConfiguration="CrossDomainServiceBehavior"/>
</service>
</services>
</system.serviceModel>
</configuration>
Step 10: The last step is to code the main method and open the service host to test if it is running. Write the following code in Program.cs or Module1.vb
C#
using System.ServiceModel;
namespace AccessAServiceFromConsoleApplication
{
class Program
{
static void Main(string[] args)
{
ServiceHost myserviceHost = new ServiceHost(typeof(MyService));
ServiceHost crossDomainserviceHost = new ServiceHost(typeof(CrossDomainService));
myserviceHost.Open();
crossDomainserviceHost.Open();
Console.WriteLine("Service is Running");
Console.ReadLine();
}
}
}
VB.NET
Imports System.ServiceModel
Module Module1
Sub Main()
Dim myserviceHost As ServiceHost = New ServiceHost(GetType(MyService))
Dim crossDomainserviceHost As ServiceHost = New ServiceHost(GetType(CrossDomainService))
myserviceHost.Open()
crossDomainserviceHost.Open()
Console.WriteLine("Service is Running")
Console.ReadLine()
End Sub
End Module
The WCF Service is now ready. Run your application. If you have followed all the steps correctly up till here, you should see a message ‘Service is Running’ on the console. We will now create a Silverlight Client for accessing this WCF Service.
Create a Silverlight Client Project which will consume this WCF Service
Step 1: Open Visual Studio 2008 > File > New Project > Select the language (C# or VB.NET) > Select ‘Silverlight’ in the Project Types > from the templates, select ‘Silverlight Application’.
Step 2: Type a name (ConsumeWCFFromConsoleApplication) and location for the project and click ok. Choose the first option ‘Add a new Web to the solution for hosting the control’ and the project type as ‘Web Site’ and click OK. You will see that two projects are created: ConsumeWCFFromConsoleApplicationWeb and ConsumeWCFFromConsoleApplication.
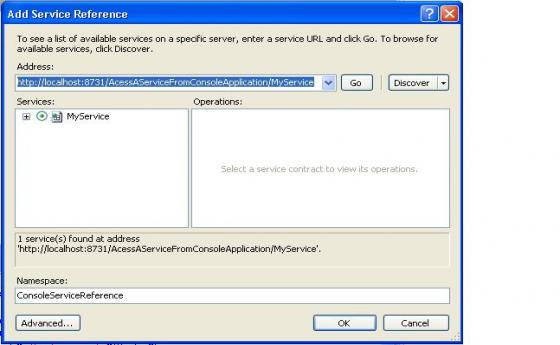
Step 3: Now add a Service Reference of your Service .Right Click on Silverlight Project > click Add Service Reference >the ‘Add Service Reference’ dialog will appear. Give the Service URI mentioned in your App.Config of the console application. Paste it in Address Box > click Go.
Add a NameSpace. Here I have given the namespace as ‘ConsoleServiceReference’. Click on Ok (See Image Below)
Note: Make sure that when you are adding a reference to the service or you are running your Silverlight application, your Service is also running i.e. your Console Application should also be running.
Step 4: Now in your Page.Xaml.cs, refer to the Service. To test the data coming from our service, we will add a TextBlock whose ‘Text’ will be populated from our Service.
Page.Xaml will look like this:
<UserControl x:Class="ConsumeWCFFromConsoleApplication.Page"
xmlns="http://schemas.microsoft.com/winfx/2006/xaml/presentation"
xmlns:x="http://schemas.microsoft.com/winfx/2006/xaml"
Width="400" Height="300">
<Grid x:Name="LayoutRoot" Background="White">
</Grid>
</UserControl>
The Page.Xaml.cs or Page.Xaml.vb will look like this:
C#
namespace ConsumeWCFFromConsoleApplication
{
public partial class Page : UserControl
{
public Page()
{
InitializeComponent();
ConsoleServiceReference.MyServiceClient consoleClient = new ConsumeWCFFromConsoleApplication.ConsoleServiceReference.MyServiceClient();
consoleClient.DoWorkCompleted += new EventHandler<ConsumeWCFFromConsoleApplication.ConsoleServiceReference
.DoWorkCompletedEventArgs>(consoleClient_DoWorkCompleted);
consoleClient.DoWorkAsync();
}
void consoleClient_DoWorkCompleted(object sender, ConsumeWCFFromConsoleApplication.ConsoleServiceReference
.DoWorkCompletedEventArgs e)
{
if (e.Result != null)
{
TextBlock serviceText = new TextBlock();
serviceText.Text = e.Result;
LayoutRoot.Children.Add(serviceText);
}
}
}
}
VB.NET
Namespace ConsumeWCFFromConsoleApplication
Public Partial Class Page
Inherits UserControl
Public Sub New()
InitializeComponent()
Dim consoleClient As ConsoleServiceReference.MyServiceClient = New ConsumeWCFFromConsoleApplication.ConsoleServiceReference.MyServiceClient()
AddHandler consoleClient.DoWorkCompleted, AddressOf Of ConsumeWCFFromConsoleApplication.ConsoleServiceReference
.DoWorkCompletedEventArgs
consoleClient.DoWorkAsync()
End Sub
Private Sub consoleClient_DoWorkCompleted(ByVal sender As Object, ByVal e As ConsumeWCFFromConsoleApplication.ConsoleServiceReference
.DoWorkCompletedEventArgs)
If Not e.Result Is Nothing Then
Dim serviceText As TextBlock = New TextBlock()
serviceText.Text = e.Result
LayoutRoot.Children.Add(serviceText)
End If
End Sub
End Class
End Namespace
In the code above, when our service call completes, we are creating a TextBlock control and setting the Text property of that TextBlock to the message returned from the service. We finally add the TextBlock to the Children collection of Layout Root.
Run the application and you will be able to access the WCF Service hosted in Console Application using a Silverlight Client. I hope this article was useful and I thank you for viewing it.