一、选择拍照或文件
HTML:
使用<input>标签,
type设为"file"选择文件,
accept设为"image/*"选择文件为图片类型和相机拍摄,
设置multiple支持多选。
<div class="add-image">
          <input class="file" type="file" accept="image/*" multiple @change="onFileChange">
          <div class="add" >
            <img src="../../assets/add/icon_addphoto.png" alt>
            <p>添加照片</p>
          </div>
</div>
样式:
设置opacity为0,使用自定义div覆盖于上面
.add-image{
      width: 148px;
      height: 148px;
      position: relative;

      .file{
        position: absolute;
        top: 0;
        left: 0;
        width: 148px;
        height: 148px;
        opacity: 0;
      }
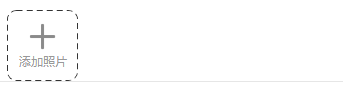
效果:
二、图片预览
VUE数据驱动更新前端所展示图片
两种方式:
1、使用本地URL(如果项目需要整理服务器图片地址作为表单提交,则本地URL不可以使用,操作删除不便)
URL.createObjectURL方法可创建一个本地的 URL 路径指向本地资源对象,下面使用该接口创建所选图片的地址并展示。
let url=window.URL.createObjectURL(file)
this.goods.goodsImageList.push(url)
2、使用服务器返回路径(缺点:如果上传失败就无法显示)
上传图片请求成功后,服务器返回一个url,使用该url进行字符串拼接,然后加入goods.goodsImageList数组。
三、图片旋转
通过相机拍摄的图片,由于拍摄时手持相机的方向问题,导致拍摄的图片可能存在旋转,需要进行纠正。纠正旋转需要知道图片的旋转信息,这里借助了一个叫 exif-js 的库,该库可以读取图片的 EXIF 元数据,其中包括拍摄时相机的方向,根据这个方向可以推算出图片的旋转信息。
下面是 EXIF 旋转标志位,总共有 8 种,但是通过相机拍摄时只能产生1、3、6、8 四种,分别对应相机正常、顺时针旋转180°、逆时针旋转90°、顺时针旋转90°时所拍摄的照片。

纠正图片旋转角度,只要读取图片的 EXIF 旋转标志位,判断旋转角度,在画布上对图片进行旋转后,重新导出新的图片即可。
/**
 * 修正图片旋转角度问题
 * @param {file} 原图片
 * @return {Promise} resolved promise 返回纠正后的新图片
 */
function fixImageOrientation (file) {
  return new Promise((resolve, reject) => {
    // 获取图片
    const img = new Image();
    img.src = window.URL.createObjectURL(file);
    img.onerror = () => resolve(file);
    img.onload = () => {
      // 获取图片元数据(EXIF 变量是引入的 exif-js 库暴露的全局变量)
      EXIF.getData(img, function() {
        // 获取图片旋转标志位
        var orientation = EXIF.getTag(this, "Orientation");
        // 根据旋转角度,在画布上对图片进行旋转
        if (orientation === 3 || orientation === 6 || orientation === 8) {
          const canvas = document.createElement("canvas");
          const ctx = canvas.getContext("2d");
          switch (orientation) {
            case 3: // 旋转180°
              canvas.width = img.width;
              canvas.height = img.height;
              ctx.rotate((180 * Math.PI) / 180);
              ctx.drawImage(img, -img.width, -img.height, img.width, img.height);
              break;
            case 6: // 旋转90°
              canvas.width = img.height;
              canvas.height = img.width;
              ctx.rotate((90 * Math.PI) / 180);
              ctx.drawImage(img, 0, -img.height, img.width, img.height);
              break;
            case 8: // 旋转-90°
              canvas.width = img.height;
              canvas.height = img.width;
              ctx.rotate((-90 * Math.PI) / 180);
              ctx.drawImage(img, -img.width, 0, img.width, img.height);
              break;
          }
          // 返回新图片
          canvas.toBlob(file => resolve(file), 'image/jpeg', 0.92)
        } else {
          return resolve(file);
        }
      });
    };
  });
}
四、图片压缩
现在手机拍照质量越来越高,拍出来的照片多达几M甚至十几M,直接上传原图不合理,容易上传失败,且后台对请求体大小有限制,后续加载图片展示也会变得慢,所以要求我们前端在上传之前进行图片的压缩。
下面函数实现了对图片的压缩,原理是在画布上绘制缩放后的图片,最终从画布导出压缩后的图片。方法中有两处可以对图片进行压缩控制:一处是控制图片的缩放比;另一处是控制导出图片的质量。
// 压缩图片
        compressImage(file) {
            return new Promise((resolve, reject) => {
                const img = new Image();
                img.src = window.URL.createObjectURL(file);
                img.onerror = error => reject(error);
                img.onload = () => {
                    const canvas = document.createElement('canvas');
                    const ctx = canvas.getContext('2d');
                    canvas.width = Math.min(img.width, 200);//控制图片大小
                    const radio = canvas.width / img.width;
                    canvas.height = img.height * radio;  //等比缩放
                    ctx.drawImage(img, 0, 0, canvas.width, canvas.height);
                    const quality = 0.8; //控制输出图片质量
                    canvas.toBlob(file => {
                        let files = new window.File([file], 'file.jpg', { type: file.type });
                        resolve(files);
                    }, 'image/jpeg', quality);
                };
            });
        },
这里有个要注意的点,toBlob之后是一个Blob对象,但是请求要求传入file文件,所以我们要将blob对象转为file
let files = new window.File([this.blob], file.name, {type: file.type})
五、图片上传
通过FormData创建表单数据,发起 ajax POST请求即可,下面函数实现了上传文件。
// 上传图片
        uploadFile(file) {
            return request({
                method: 'post',
                postType: 'file',
                url: '//...域名.../upload/comments',
                data: {
                    file: file
                }
            });
        },
export function formData(obj) {
    let formData = new FormData();

    Object.keys(obj).forEach(key => {
        let val = obj[key];
        val = val == null ? '' : val;
        if (typeof val === 'object') {
            if (val instanceof window.File) {
                formData.append(key, val);
            } else {
                formData.append(key, JSON.stringify(val));
            }
        } else {
            formData.append(key, val);
        }
    });
    return formData;
}
export function request(options) {
    return new Promise((resolve, reject) => {
        let {
            method,
            url,
            data,
            params,
            headers = {},
            withCredentials = false,
            // file || ''
            postType = ''
        } = options;

        const xhr = new XMLHttpRequest();
        let sendData = null;
        method = (method || 'GET').toUpperCase();

        const urlParse = /?/.test(url) ? parseString(url) : {};
        const querys = { timestamp: Math.round(new Date() / 1000), app_id: values.app_id, ...urlParse, ...params };

        // 验签
        let keys = Object.keys(querys);
        keys.push('app_secret');
        const api_sign = sha1(keys.sort().map(key => querys[key] || values[key]).join(''));

        // console.log('api_sign', api_sign);

        headers.api_sign = api_sign;

        url +=
        (/?/.test(url) ? '&' : '?') +
        Object.keys(querys)
            .map(key => `${key}=${escape(querys[key])}`)
            .join('&');

        xhr.open(method, url, true);

        // 处理sendData
        // postType file
        if (method === 'POST') {
            if (postType === 'file') {
                sendData = data ? formData(data) : null;
            } else {
                headers['Content-Type'] = headers['Content-Type'] || 'application/json;charset=UTF-8';
                sendData = data ? JSON.stringify(data) : null;
            }
        }

        Object.keys(headers).forEach(key => {
            xhr.setRequestHeader(key, headers[key]);
        });

        xhr.onreadystatechange = function() {
            if (xhr.readyState === 4 && xhr.status === 200) {
                // options.success(xhr.responseText);
                let response = {
                    status: xhr.status,
                    data: {}
                };
                try {
                    response.data = JSON.parse(xhr.responseText);
                } catch (e) {
                    console.warn('request error:', e);
                }

                if (response) {
                    resolve(response);
                } else {
                    reject(new Error('cancel by response interceptor'));
                }
            }
        };
        xhr.onerror = reject;

        // withCredentials默认为true
        xhr.withCredentials = withCredentials;

        // console.log(url, headers, sendData);
        xhr.send(sendData);
    });
}
六、合并上传
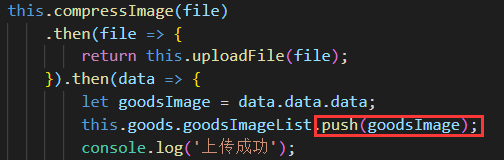
onFileChange(e) {
            const files = Array.prototype.slice.call(e.target.files);
            files.forEach(file => {
                // 本地预览
                // let url=window.URL.createObjectURL(file)
                // this.photo.push(url)
                this.compressImage(file)
                    .then(file => {
                        return this.uploadFile(file);
                    }).then(data => {
                        let goodsImage = data.data.data;
                        this.goods.goodsImageList.push(goodsImage);
                        console.log('上传成功');
                        // console.log(this.goods.goodsImageList);
                    }).catch(error => {
                        console.log('上传失败');
                    });
            });
        },
最终效果: