vue应该是前端主流框架中的集大成者,它吸取了knockout,angular,react设置avalon的经验,支持各种模式写法,入门很简单,从本章开始,会记录学习vue中的点点滴滴,以笔记的形式形成博文。
1、Hello World
和任何框架一样,使用前必先引入,我们这里直接使用cdn资源,创建index.html,编写如下代码:
<!DOCTYPE html>
<html lang="en">
<head>
    <meta charset="UTF-8">
    <meta name="viewport" content="width=device-width, initial-scale=1.0">
    <meta http-equiv="X-UA-Compatible" content="ie=edge">
    <title>demo1</title>
    <script src="https://cdn.bootcss.com/vue/2.4.1/vue.js"></script>
</head>
<body>
    <div id="app">
        {{message}}
    </div>
    <script>
        new Vue({
            el:'#app',
            data:{
                message:'hello world'
            }
        })
    </script>
</body>
</html>
双击文件运行:
咱们分析一下上述代码,一句简单的{{message}},就把数据绑定到到了dom中,我不会说好神奇,因为我熟悉angular,我知道angular也是简单一个指令就可以做到,这里和angular在使用上做一个类比,可以看到,在当前的代码中创建Vue对象的时候,传递的参数{el:'#id',data:{message:'hellow'}},其中el是vue挂载的元素,也就是作用的范围和anglar中ng-app的概念类似,都是创建一个根作用域,data对象可以类比angular中的$scope,$scope对象在angular中是连接controller和view的桥梁,那么data对象就是代理vue对象中数据和template的桥梁。
2、TODO LIST
由于有angular的经验,不会按部就班的过vue的文档,那样也没什么意思,这里以todolist作为Hello world的延伸,由于和angular类似的数据驱动的特点,我们不需要关注如何操作dom,我们只要设计viewmode即可,todolist,首先我们要有todo item ,所以
   var todoItem=function(title,desc){
            this.title=title;
            this.desc=desc;
        }
另外todolist 是包含CURD的,所以我们需要一个表单,用来新增todoItem,基于此修改index.html,添加表单部分:
  <div id="app">
        <form>
            <input type="text" v-model="title"> <br>
            <input type="text" v-model="desc"> <br/>
            <input type="button" value="add todo item" v-on:click="addItem()" />
        </form>
    </div>
对上述代码做一下简单说明:v-model类似angular中ng-model,实现双向数据绑定,当然这里都是语法糖,vue内部做了很多工作,和angular2+中的[(ngModel)]类似,通过属性和事件实现了双向绑定效果,v-on:click="addItem()" ,其中v-on:是事件绑定指令,后面click是参数,可以缩写为@click="addItem()" ,可以类比angular中ng-click。
接下来,继续完善我们的viewmodel,todoitem已经设计完成,现在我们增加todolist结构,todolist中包含多个todoitem,是todoitem集合,在javascript中,体现为Array,基于此修改我们的代码,如下:
<!DOCTYPE html>
<html lang="en">

<head>
    <meta charset="UTF-8">
    <meta name="viewport" content="width=device-width, initial-scale=1.0">
    <meta http-equiv="X-UA-Compatible" content="ie=edge">
    <title>demo1</title>
    <script src="https://cdn.bootcss.com/vue/2.4.1/vue.js"></script>
</head>

<body>
    <div id="app">
        <form>
            title:<input type="text" v-model="title"> <br>
            desc:<input type="text" v-model="desc"> <br/>
            <input type="button" value="add todo item" v-on:click="addItem()" />
        </form>
    </div>
    <script>
        var TodoItem = function (title, desc) {
            this.title = title;
            this.desc = desc;
        }
        new Vue({
            el: '#app',
            data: {
                todolist:[],
                title:'',
                desc:''
            },
            methods:{
                addItem:function(){
                    this.todolist.push(new TodoItem(this.title,this.desc))

                    this.title=this.desc='';

                    console.log(JSON.stringify(this.todolist));
                }
            }
        })
    </script>
</body>

</html>
上述代码中出现了新的属性methods,和angular中不同,angular中事件也是绑定在$scope对象中的,只不过值是function而已,在vue中,对事件绑定和属性绑定进行了区分,分别使用data和methods代理,这样也在逻辑上更清晰,指责上更单一,所以事件绑定的回调函数都代理在methods中。
刷新页面,输入表单项,打开控制台可以看到输出项,运行结果入下图所示:
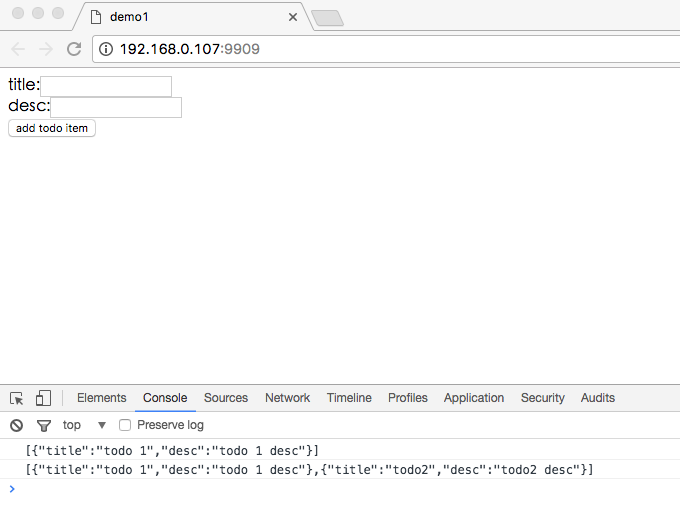
结果和我们预期的一样,接着我们把结果以列表的形式渲染出来,在angular中,我们一般通过ng-repeat指令,实现列表渲染,那么在vue中,有没有类似的指令呢,查文档发现的确有一指令叫做v-for,用法和作用都和ng-repeat类似,基于ng-repeat经验,我们使用v-for对todolist进行渲染,修改代码如下:
 <table style="300px;border-collapse:collapse" border="1">
            <tr>
                <th>title</th>
                <th>desc</th>
            </tr>
            <tr v-for="todoItem in todolist">
                <td>{{todoItem.title}}</td>
                <td>{{todoItem.desc}}</td>
            </tr>
        </table>
刷新运行,在表单中输入后,点击add todo item,向数组添加元素,及动态刷新了列表:

有添加就有删除,接下来,我们列表中,增加删除操作,和所有mvvm框架一样,我们考虑的出发点一定要规避dom,一定要从数据驱动UI的方式来思考,如果删掉UI项,那么根据数据驱动UI的理念那么就是删掉数组项,框架会自动帮我们处理dom,基于此修改代码如下:
 <table style="300px;border-collapse:collapse" border="1">
            <tr>
                <th>title</th>
                <th>desc</th>
                <th></th>
            </tr>
            <tr v-for="(todoItem,index) in todolist">
                <td>{{todoItem.title}}</td>
                <td>{{todoItem.desc}}</td>
                <td><input type="button" value="remove" @click="remove(index)" /></td>
            </tr>
        </table>
如果按照我们以前angular的使用经验,这里增加的方式有些区别,angular在ng-repeat中有内置变量$index,所以在事件处理上,我们就会通过$index作为数组项索引,事件绑定也会类似ng-click="remove($index)",在vue中就有些区别了,但是却符合数组遍历的方式,大家应该知道数组方法,比如map等,参数是一个function,其中包含两个参数,第一个参数是value,第二个参数是index是一个道理,从这一点上说,这样写很符合道理,因为这本身就是一个循环遍历,同样vue对象methods中添加remove方法。
 new Vue({
            el: '#app',
            data: {
                todolist:[],
                title:'',
                desc:''
            },
            methods:{
                addItem:function(){
                    this.todolist.push(new TodoItem(this.title,this.desc))

                    this.title=this.desc='';

                },
                remove:function(index){
                    this.todolist.splice(index,1);
                }

            }
        })
刷新运行页面:
完整代码如下:


<!DOCTYPE html>
<html lang="en">

<head>
    <meta charset="UTF-8">
    <meta name="viewport" content="width=device-width, initial-scale=1.0">
    <meta http-equiv="X-UA-Compatible" content="ie=edge">
    <title>demo1</title>
    <script src="https://cdn.bootcss.com/vue/2.4.1/vue.js"></script>
    <style>
        table{
            margin-top: 5px;
            width:300px;
            border-collapse: collapse;
            border: 1px solid #ccc;
        }
        table > tr>th,table>tr>td{
            height: 25px;
            line-height: 25px;
        }

    </style>
</head>

<body>
    <div id="app">
        <form>
            title:<input type="text" v-model="title"> <br>
            desc:<input type="text" v-model="desc"> <br/>
            <input type="button" value="add todo item" v-on:click="addItem()" />
        </form>
        <table style="300px;border-collapse:collapse" border="1">
            <tr>
                <th>title</th>
                <th>desc</th>
                <th></th>
            </tr>
            <tr v-for="(todoItem,index) in todolist">
                <td>{{todoItem.title}}</td>
                <td>{{todoItem.desc}}</td>
                <td><input type="button" value="remove" @click="remove(index)" /></td>
            </tr>
        </table>
    </div>
    <script>
        var TodoItem = function (title, desc) {
            this.title = title;
            this.desc = desc;
        }
        new Vue({
            el: '#app',
            data: {
                todolist:[],
                title:'',
                desc:''
            },
            methods:{
                addItem:function(){
                    this.todolist.push(new TodoItem(this.title,this.desc))

                    this.title=this.desc='';

                },
                remove:function(index){
                    this.todolist.splice(index,1);
                }

            }
        })
    </script>
</body>

</html>
今天就先到这里,增删改查,查询和修改还没有,放在(二)中进行添加吧,敬请期待。