swagger 配置 - ssm
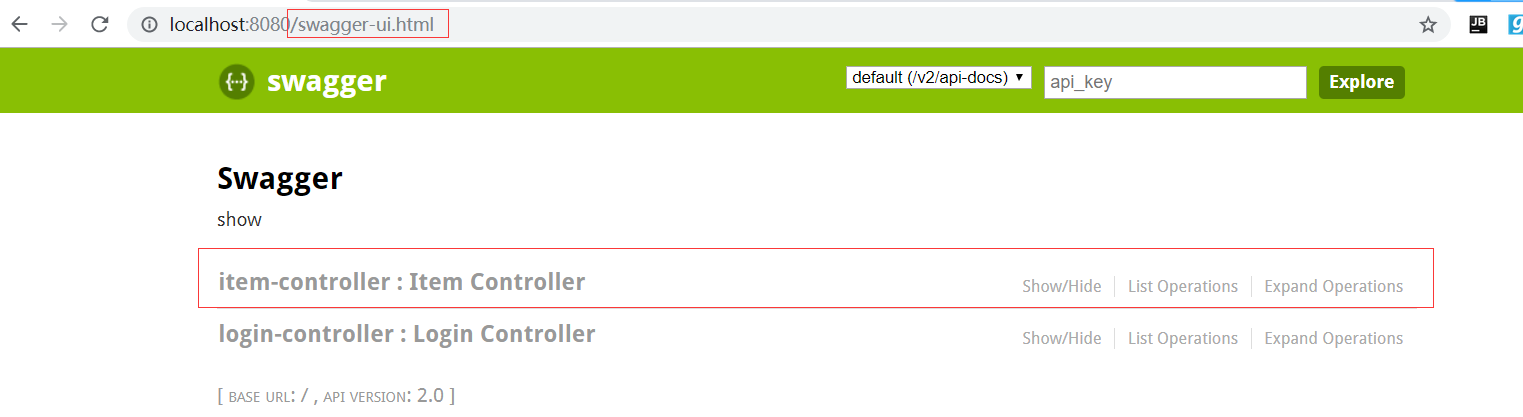
swagger 是一个用来看接口的工具,具体效果如下,这里用的是swagger2
1、porm.xml
<dependency>
	<groupId>io.springfox</groupId>
	<artifactId>springfox-swagger2</artifactId>
	<version>2.5.0</version>
</dependency>
<dependency>
	<groupId>io.springfox</groupId>
	<artifactId>springfox-swagger-ui</artifactId>
	<version>2.5.0</version>
	</dependency>
<dependency>
	<groupId>com.mangofactory</groupId>
	<artifactId>swagger-springmvc</artifactId>
	<version>0.9.5</version>
</dependency>
2、swagger 配置
import org.springframework.context.annotation.Bean;
import org.springframework.context.annotation.Configuration;
import org.springframework.web.servlet.config.annotation.EnableWebMvc;

import springfox.documentation.builders.ApiInfoBuilder;
import springfox.documentation.builders.PathSelectors;
import springfox.documentation.builders.RequestHandlerSelectors;
import springfox.documentation.service.ApiInfo;
import springfox.documentation.spi.DocumentationType;
import springfox.documentation.spring.web.plugins.Docket;
import springfox.documentation.swagger2.annotations.EnableSwagger2;


@Configuration
@EnableSwagger2
@EnableWebMvc
public class Swagger2 {

    @Bean
    public Docket createRestApi() {
        return new Docket(DocumentationType.SWAGGER_2)
                .apiInfo(apiInfo())
                .select()
                .apis(RequestHandlerSelectors.basePackage("com.common.base.modules"))
                .paths(PathSelectors.any())
                .build();
    }

    private ApiInfo apiInfo() {
        return new ApiInfoBuilder().title("Swagger").description("show").termsOfServiceUrl("no terms of service")
                .version("2.0")
                .build();
    }

}
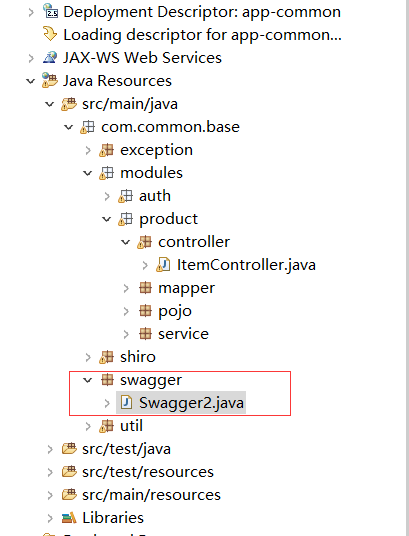
3、在spring-mvc.xml的配置文件里面配置扫描到上面那个 swagger 2 文件
<context:component-scan base-package="com.common.base.swagger" />
4、controller 配置例 - 配置 Api
@RestController
@RequestMapping("/items")
public class ItemController {

	@Autowired
	private ItemService itemService;


	@RequestMapping(value="/queryItems", method=RequestMethod.GET)
	@ApiOperation(value="Items",notes="Items")
        public JSONObject queryItems(HttpServletRequest request) {
                 return itemService.queryItem((CommonUtil.request2Json(request)));
        }
}
5、完成 ip + 端口: swagger-ui.html
(注:如果 shiro 拦截的话在shiro的xml配置文件的 filterChain 里面加入以下,但是接口还是会被拦截, 怎么解啊
或者 注释掉 web.xml 的shiro 拦截)

<!-- swagger设置匿名访问 -->
/swagger-ui.html/** = anon
/swagger-resources/** = anon
/v2/api-docs  = anon