你的eclipse需要先安装
Spring Tool Suite™
第一种方法(不建议,之所以贴上是因为探索的过程)
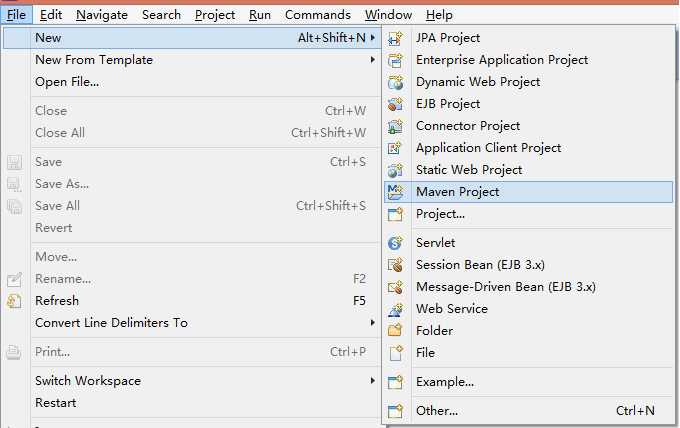
首先新建Maven工程
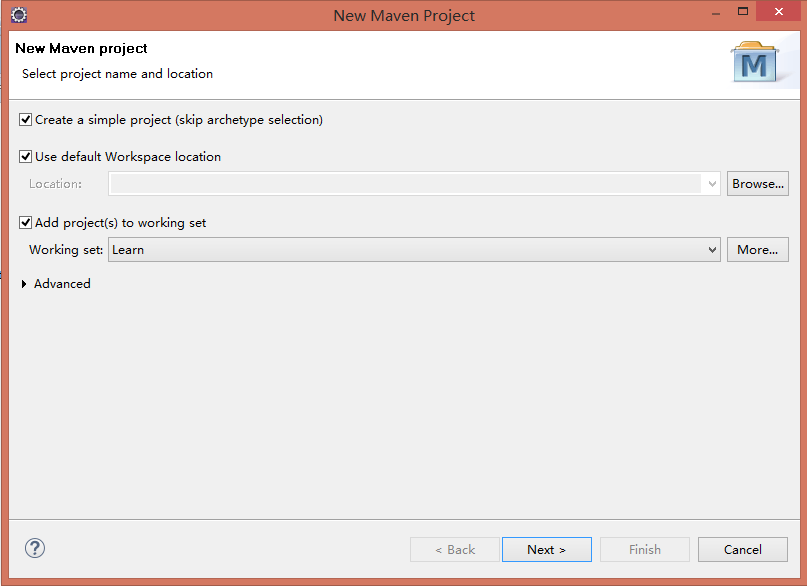
勾选第一个按钮,第三个是选择working set ,你可以不选
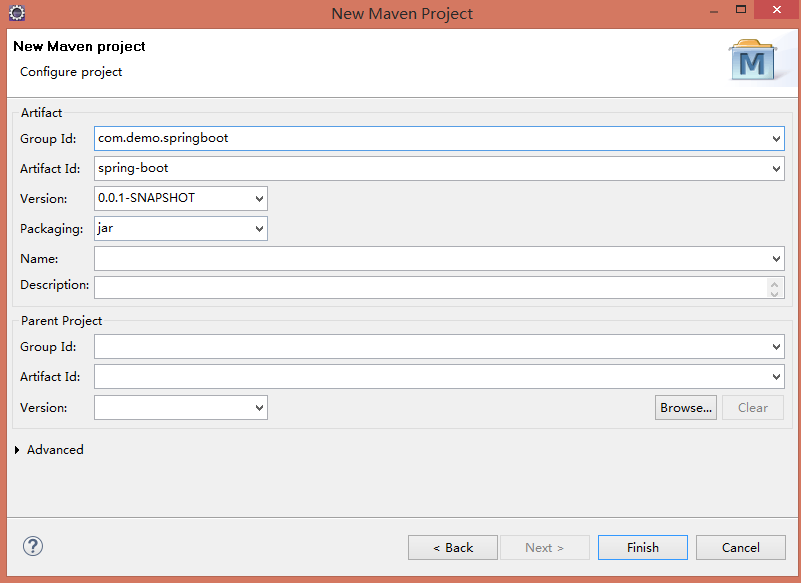
下一步,配置工程信息,注意打包为jar
打开pom.xml文件,添加spring-boot依赖
    <parent>
        <groupId>org.springframework.boot</groupId>
        <artifactId>spring-boot-starter-parent</artifactId>
        <version>1.5.9.RELEASE</version>
    </parent>
    <dependencies>
        <dependency>
            <groupId>org.springframework.boot</groupId>
            <artifactId>spring-boot-starter</artifactId>
        </dependency>
        <dependency>
            <groupId>org.springframework.boot</groupId>
            <artifactId>spring-boot-starter-web</artifactId>
        </dependency>
    </dependencies>

    <build>
        <plugins>
            <plugin>
                <groupId>org.springframework.boot</groupId>
                <artifactId>spring-boot-maven-plugin</artifactId>
            </plugin>
        </plugins>
    </build>
新建文件src/main/hello/HelloController.java
package hello;

import org.springframework.web.bind.annotation.RequestMapping;
import org.springframework.web.bind.annotation.RestController;

@RestController
public class HelloController {

    @RequestMapping("/")
    public String hello(){
        return "Greetings from Spring Boot!";
    }
}
新建src/main/hello/Application.java
package hello;

import org.springframework.boot.SpringApplication;
import org.springframework.boot.autoconfigure.SpringBootApplication;

@SpringBootApplication
public class Application {

    public static void main(String[] args) {
        // http://localhost:8080/
        SpringApplication.run(Application.class, args);
    }
}
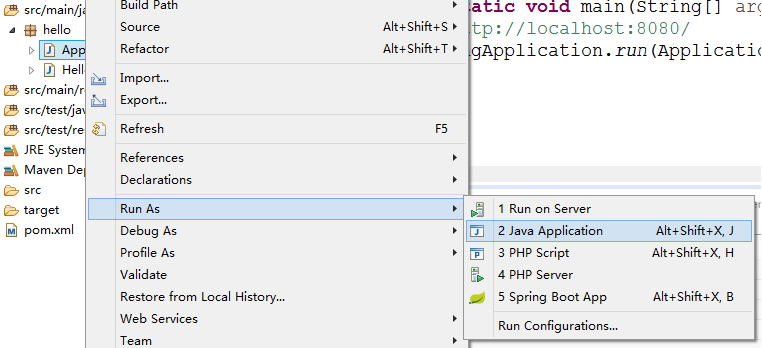
运行Application
出现一堆:

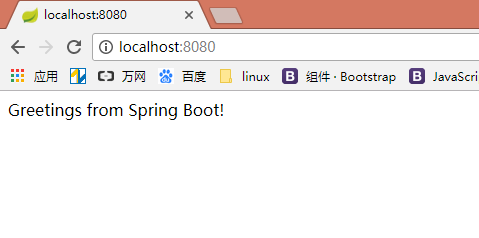
访问localhost:8080/
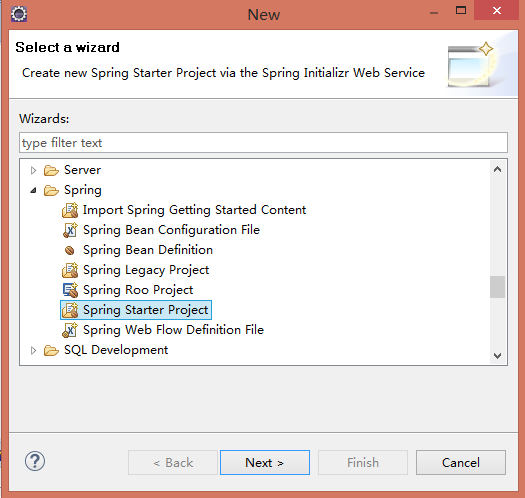
第二种方法(推荐)
File-》new-》other

选择starter项目
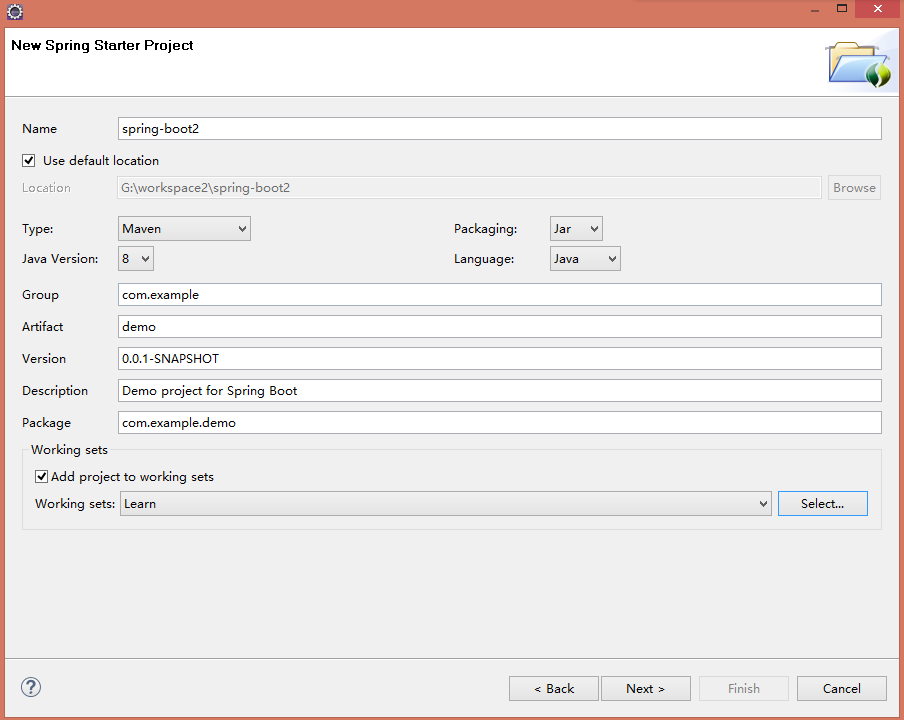
下一步
下一步
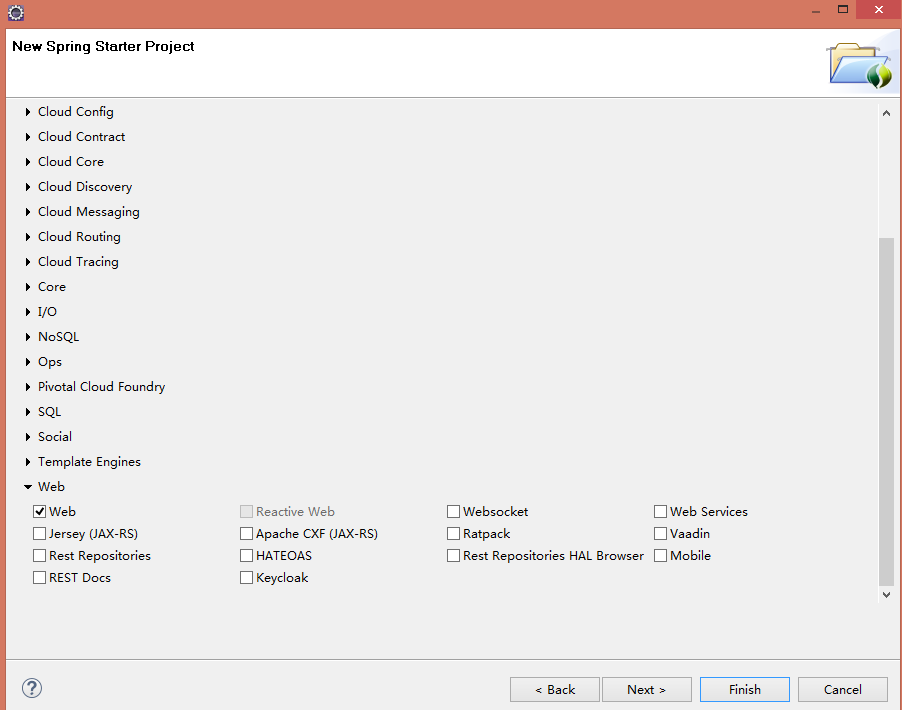
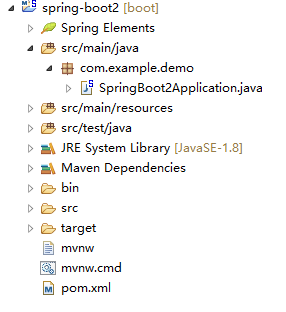
勾选Web,Finish。可以看到项目结构与我们自己建的Maven有些不一样。
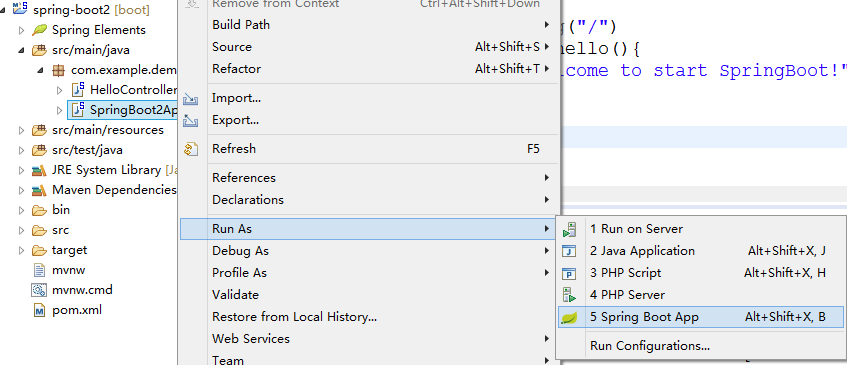
新建一个Controller
package com.example.demo;

import org.springframework.web.bind.annotation.RequestMapping;
import org.springframework.web.bind.annotation.RestController;

@RestController
public class HelloController {

    @RequestMapping("/")
    public String hello(){
        return "Welcome to start SpringBoot!";
    }
}
运行
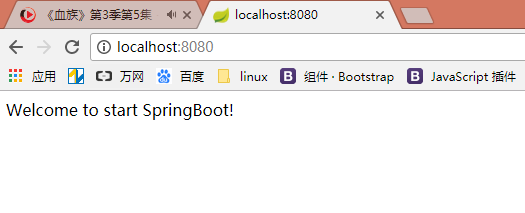
运行结果
比起原来的Spring项目,构建过程简单多了