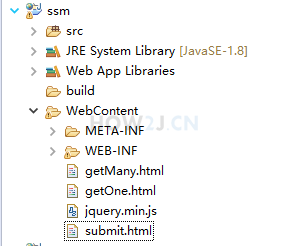
步骤1:先运行,看到效果,再学习
步骤2:模仿和排错
步骤3:本知识点效果
步骤4:jquery.min.js
步骤5:json中文问题
步骤6:CategoryController
步骤7:submit.html
步骤8:getOne.html
步骤9:getMany.html
步骤 1 : 先运行,看到效果,再学习
老规矩,先下载下载区(点击进入)的可运行项目,配置运行起来,确认可用之后,再学习做了哪些步骤以达到这样的效果。
步骤 2 : 模仿和排错
在确保可运行项目能够正确无误地运行之后,再严格照着教程的步骤,对代码模仿一遍。
模仿过程难免代码有出入,导致无法得到期望的运行结果,此时此刻通过比较正确答案 ( 可运行项目 ) 和自己的代码,来定位问题所在。
采用这种方式,学习有效果,排错有效率,可以较为明显地提升学习速度,跨过学习路上的各个槛。
推荐使用diffmerge软件,进行文件夹比较。把你自己做的项目文件夹,和我的可运行项目文件夹进行比较。
这个软件很牛逼的,可以知道文件夹里哪两个文件不对,并且很明显地标记出来
这里提供了绿色安装和使用教程:diffmerge 下载和使用教程
步骤 3 : 本知识点效果
本知识点效果有三个,分别是以json方式:提交,获取单个和获取多个
提交
|
http://localhost:8080/ssm/submit.html
|
获取单个
|
http://localhost:8080/ssm/getOne.html
|
获取多个
|
http://localhost:8080/ssm/getMany.html
|
步骤 4 : jquery.min.js
因为要使用jquery进行提交和解析json格式数据,所以需要在把下载区(点击进入)的jquery.mini.js复制到WebContent目录下先
步骤 5 : json中文问题
虽然在spring mvc 中文问题里已经提供了过滤器进行ssm的中文处理,但是json处理还要加点额外的内容。
把原本的
|
<mvc:annotation-driven />
|
修改为如下:
|
<mvc:annotation-driven >
<mvc:message-converters register-defaults="true">
<bean class="org.springframework.http.converter.StringHttpMessageConverter">
<property name="supportedMediaTypes" value="text/plain;charset=UTF-8" />
</bean>
</mvc:message-converters>
</mvc:annotation-driven>
|
|
<?xml version="1.0" encoding="UTF-8"?>
<beans xmlns="http://www.springframework.org/schema/beans"
xmlns:xsi="http://www.w3.org/2001/XMLSchema-instance"xmlns:aop="http://www.springframework.org/schema/aop"
xmlns:tx="http://www.springframework.org/schema/tx"xmlns:jdbc="http://www.springframework.org/schema/jdbc"
xmlns:context="http://www.springframework.org/schema/context"
xmlns:mvc="http://www.springframework.org/schema/mvc"
xsi:schemaLocation="http://www.springframework.org/schema/jdbc http://www.springframework.org/schema/jdbc/spring-jdbc-3.0.xsd
http://www.springframework.org/schema/aop http://www.springframework.org/schema/aop/spring-aop-3.0.xsd
http://www.springframework.org/schema/beans http://www.springframework.org/schema/beans/spring-beans-3.0.xsd
http://www.springframework.org/schema/context http://www.springframework.org/schema/context/spring-context-3.0.xsd
http://www.springframework.org/schema/tx http://www.springframework.org/schema/tx/spring-tx-3.0.xsd
http://www.springframework.org/schema/mvc http://www.springframework.org/schema/mvc/spring-mvc-3.2.xsd">
<context:annotation-config/>
<context:component-scan base-package="com.how2java.controller">
<context:include-filter type="annotation"
expression="org.springframework.stereotype.Controller"/>
</context:component-scan>
<mvc:annotation-driven >
<mvc:message-converters register-defaults="true">
<bean class="org.springframework.http.converter.StringHttpMessageConverter">
<property name="supportedMediaTypes" value="text/plain;charset=UTF-8" />
</bean>
</mvc:message-converters>
</mvc:annotation-driven>
<mvc:default-servlet-handler />
<bean
class="org.springframework.web.servlet.view.InternalResourceViewResolver">
<property name="viewClass"
value="org.springframework.web.servlet.view.JstlView" />
<property name="prefix" value="/WEB-INF/jsp/" />
<property name="suffix" value=".jsp" />
</bean>
</beans>
|
步骤 6 : CategoryController
控制器里提供3个方法,分别用来处理json 提交,json获取单个对象,json获取多个对象
|
package com.how2java.controller;
import java.util.ArrayList;
import java.util.List;
import org.springframework.stereotype.Controller;
import org.springframework.web.bind.annotation.RequestBody;
import org.springframework.web.bind.annotation.RequestMapping;
import org.springframework.web.bind.annotation.ResponseBody;
import com.alibaba.fastjson.JSONObject;
import com.how2java.pojo.Category;
// 告诉spring mvc这是一个控制器类
@Controller
@RequestMapping("")
public class CategoryController {
@ResponseBody
@RequestMapping("/submitCategory")
public String submitCategory(@RequestBody Category category) {
System.out.println("SSM接受到浏览器提交的json,并转换为Category对象:"+category);
return "ok";
}
@ResponseBody
@RequestMapping("/getOneCategory")
public String getOneCategory() {
Category c = new Category();
c.setId(100);
c.setName("第100个分类");
JSONObject json= new JSONObject();
json.put("category", JSONObject.toJSON(c));
return json.toJSONString();
}
@ResponseBody
@RequestMapping("/getManyCategory")
public String getManyCategory() {
List<Category> cs = new ArrayList<>();
for (int i = 0; i < 10; i++) {
Category c = new Category();
c.setId(i);
c.setName("分类名称:"+i);
cs.add(c);
}
return JSONObject.toJSON(cs).toString();
}
}
|
步骤 7 : submit.html
提交成功后,在tomcat控制台查看使用json方式提交的数据
注: 不要在eclipse自带的浏览器里面点击,自带的浏览器有bug,有时候不能识别jquery, 会导致点击没有反应。 使用独立的浏览器,比如chrome,firefox点击测试

|
<!DOCTYPE html>
<html>
<head>
<meta http-equiv="Content-Type" content="text/html; charset=utf-8">
<title>用AJAX以JSON方式提交数据</title>
<script type="text/javascript" src="jquery.min.js"></script>
</head>
<body>
<form >
id:<input type="text" id="id" value="123" /><br/>
名称:<input type="text" id="name" value="category xxx"/><br/>
<input type="button" value="提交" id="sender">
</form>
<div id="messageDiv"></div>
<script>
$('#sender').click(function(){
var id=document.getElementById('id').value;
var name=document.getElementById('name').value;
var category={"name":name,"id":id};
var jsonData = JSON.stringify(category);
var page="submitCategory";
$.ajax({
type:"post",
url: page,
data:jsonData,
dataType:"json",
contentType : "application/json;charset=UTF-8",
success: function(result){
}
});
alert("提交成功,请在Tomcat控制台查看服务端接收到的数据");
});
</script>
</body>
</html>
|
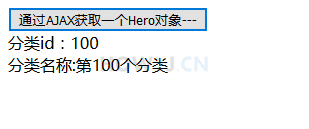
步骤 8 : getOne.html
点击按钮,获取json数据
|
<!DOCTYPE html>
<html>
<head>
<meta http-equiv="Content-Type" content="text/html; charset=utf-8">
<title>用AJAX以JSON方式获取数据</title>
<script type="text/javascript" src="jquery.min.js"></script>
</head>
<body>
<input type="button" value="通过AJAX获取一个Hero对象---" id="sender">
<div id="messageDiv"></div>
<script>
$('#sender').click(function(){
var url="getOneCategory";
$.post(
url,
function(data) {
var json=JSON.parse(data);
var name =json.category.name;
var id = json.category.id;
$("#messageDiv").html("分类id:"+ id + "<br>分类名称:" +name );
});
});
</script>
</body>
</body>
</html>
|
步骤 9 : getMany.html
点击按钮,获取多个json数据
|
<!DOCTYPE html>
<html>
<head>
<meta http-equiv="Content-Type" content="text/html; charset=utf-8">
<title>用AJAX以JSON方式获取数据</title>
<script type="text/javascript" src="jquery.min.js"></script>
</head>
<body>
<input type="button" value="通过AJAX获取多个Hero对象111" id="sender">
<div id="messageDiv"></div>
<script>
$('#sender').click(function(){
var url="getManyCategory";
$.post(
url,
function(data) {
console.log(data);
var categorys = $.parseJSON(data);
console.log(categorys.length);
for(i in categorys){
var old = $("#messageDiv").html();
var category = categorys[i];
$("#messageDiv").html(old + "<br>"+category.id+" ----- "+category.name);
}
});
});
</script>
</body>
</body>
</html>
|
更多内容,点击了解: https://how2j.cn/k/ssm/ssm-json/1575.html


