技术在于交流、沟通,本文为博主原创文章转载请注明出处并保持作品的完整性。
向量容器vector是一个动态数组,内存连续,它是动态分配内存,且每次扩张的原来的二倍.
他的结构如下

一 定义
vector< 类型 > 标识符(最大容量,初始所有值)
vector是一种类模板,那么他有很多行为与类相似
头文件 #include <vector>
    //a.定义 vector<typeName> v;
    vector<int> v;

    //b.拷贝构造 vector<typeName> v1(v); 例:vector<int> v1(v);
    vector<int> v1(v);

    //c.赋值拷贝
    v1 = v; //如果v的size比v1的size大,则自动扩充v1的空间,反之亦然

    //d.按指定元素个数定义
    vector<int> v2(5); //v2含有5个值为0的元素

    //e.指定元素个数及类型
    vector<int> v3(5,10);//v3包含5个值为10的int类型元素

    //f.与array间的转换
    int a[3]={0,1,2}; vector<int> v4(a,a+3);
二 基本使用
   vector<int> v;
    //在vector尾端插入元素
    //但是没有在前面插入元素,上面的vector结构图中,我们可以看出来vector是一种向后扩充的容器,
    //如果在前面插入,那后面所有的元素将后移,造成巨大的消耗,所以没有push_front()
    //同理没有pop_front()
    v.push_back(1);

    //删除最后一个元素
    v.pop_back();

    //返回元素个数
    int count = v.size();

    //重新设定vector的size
    v.resize(2*(v.size()));

    //判断容器是否为空
    bool isEmpty = v.empty();

    //[index]操作,返回下表为index的元素
    int tmp = v[1];

    //定义迭代器
    vector<int> ::iterator iter = v.begin();

    for(int i = 0; i<3; i++ )
    {
        v.push_back(1); // 1 1 1
    }
    //在 v的前面插入两个 5
    v.insert(iter, 2, 5); // 5 5 1 1 1

    //在头部插入3
    v.insert(v.begin(), 3);//3 5 5 1 1 1

    //在尾部插入3
    v.insert(v.end(), 3);//3 5 5 1 1 1 3

    //下表5的前面插入3
    v.insert(v.begin()+5, 3);//3 5 5 1 1 3  1 3

    //删除指定下标元素
    v.erase(v.begin()+1); //3 5 1 1 3 1 3

    //清空
    v.clear();

    //起始地址
    v.data();

    //最后一个元素后面的地址
    v.end();

    //实际内存大小
    v.capacity();

    //at(下标)
    v.at(1);

    //返回最后一个元素
    v.back();

    //返回第一个元素
    v.front();

    //将指定区间内的元素赋值给v
    v.assign(v.begin()+1, v.begin()+2);

    //赋值 将三个 1 赋值给v 那么vecotr将变为 1 1 1
    v.assign(3, 1);

  //最大内存
   v.max_size();

    //输出
    for(auto iii : v)
    {
        cout << iii <<endl;
    }
三 vector支持的算法
增加头文件#include<algorithm> //算法
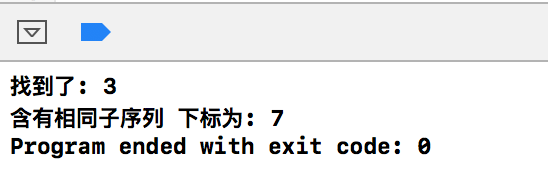
#include <algorithm>
int main()
{
    //可以使用的全局算法有
    //搜索算法:find() 、search() 、count() 、find_if() 、search_if() 、count_if()
    //分类排序:sort() 、merge()
    //删除算法:unique() 、remove()
    //生成和变异:generate() 、fill() 、transformation() 、copy()
    //关系算法:equal() 、min() 、max()
    vector<int> c;

    for(int i = 0; i<10; i++ )
    {
        c.push_back(i); //
    }

    //查找函数 find(begin,end, searchItem)
    auto pItem = ::find(c.begin(), c.end(), 3);

    if(pItem != c.end())
        cout << "找到了: " << *pItem << endl;
    else
        cout << "没找到" << endl;


    vector<int> c1;

    for(int i = 0; i<10; i++ )
    {
        c1.push_back(i+10); //
    }

    //查找函数search 是否包含子序列容器向量 如果包含 返回包含位置
    auto pItem1 = ::search(c.begin(), c.end(), c1.begin()+2, c1.begin()+5);

    if(pItem1 != c.end())
        cout << "找到了: " << *pItem1 << endl;
    else
        cout << "没找到" << endl;

    //算法就不一一举例了
    return 0;
}
输出结果
四 内存管理
上面提到过vector的扩充是以2倍的形式扩充,它的扩充过程可以理解成 if (v.size()元素个数 > v.capacity()实际内存) v.resize(2*v.capacity())
当vector发现元素个数大于实际内存时, vector将重新申请一块内存为原来的内存2倍的空间 然后将原来的元素一一copy过去,我们都知识申请内存是非常耗时的,所以我们一定要把握好vector的内存尺度
下面来测试一下
    void vector_test_capactity()
    {
        //创建vector
        std::vector<int> v;
        for(int i = 0; i<10 ; i++)
        {
            cout<<"容器内元素个数: " << v.size() << " "<<"vector内存大小: " << v.capacity()<<endl;
            v.push_back(i);
        }
    }
输出结果

Source Code
下图是vector类图,类图中的函数为vector一些常用函数,现在来分析一下这些函数

下面是我在Qt中找出的vector的源代码
_Vector_base<_Tp>与_Vector_impl<_Tp>
 1   template<typename _Tp, typename _Alloc>
 2         struct _Vector_base
 3         {
 4             typedef typename __gnu_cxx::__alloc_traits<_Alloc>::template
 5             rebind<_Tp>::other _Tp_alloc_type;
 6             typedef typename __gnu_cxx::__alloc_traits<_Tp_alloc_type>::pointer
 7             pointer;
 8
 9             struct _Vector_impl
10             : public _Tp_alloc_type
11             {
12                 pointer _M_start;
13                 pointer _M_finish;
14                 pointer _M_end_of_storage;
15                 ...
16             }
17
18             pointer
19             _M_allocate(size_t __n)//申请内存
20             {
21                 typedef __gnu_cxx::__alloc_traits<_Tp_alloc_type> _Tr;
22                 return __n != 0 ? _Tr::allocate(_M_impl, __n) : 0;
23             }
24
25             void
26             _M_deallocate(pointer __p, size_t __n)//释放内存
27             {
28                 typedef __gnu_cxx::__alloc_traits<_Tp_alloc_type> _Tr;
29                 if (__p)
30                     _Tr::deallocate(_M_impl, __p, __n);
31             }
32         }
你会发现_Vector_base中has a(组合)一个_Vector_impl类,这个类里面包含三个指针分别是_M_start,_M_finish,_M_end_of_storage,结合一下下图你就会明白这三个指针的含义
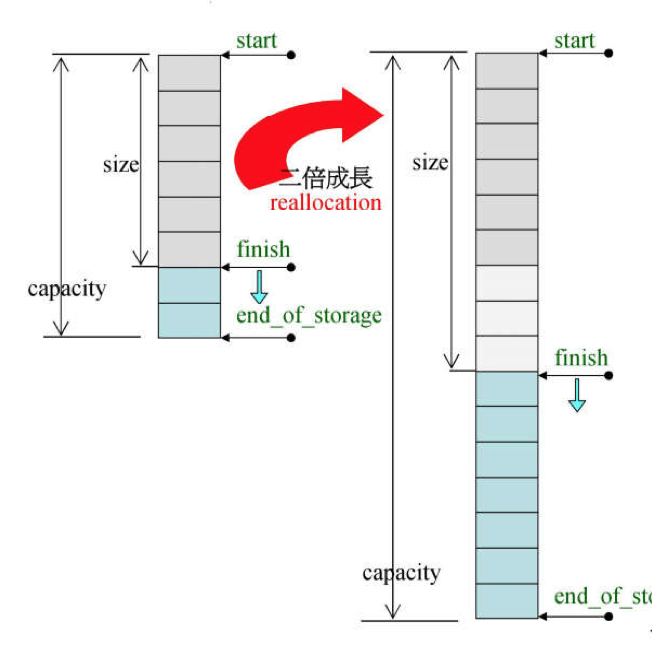
图中的start和finish,end_of_storage分别是上面的三个指针
这个时候我们看下面的源代码begin(),end(),capacity()是不是很容易理解了,_GLIBCXX_NOEXCEPT是不抛出任何异常
    iterator
    begin() _GLIBCXX_NOEXCEPT
    { return iterator(this->_M_impl._M_start); }//返回它的start指针

    ...

    const_iterator
    end() const _GLIBCXX_NOEXCEPT
    { return const_iterator(this->_M_impl._M_finish); }//返回finish指针

    ...

    size_type
    capacity() const _GLIBCXX_NOEXCEPT
    { return size_type(this->_M_impl._M_end_of_storage//返回start-finish
                       - this->_M_impl._M_start);
    }
下面我们来看一看vector<_Tp>类,几个相对常用的函数push_back(), operator=和insert()
    template<typename _Tp, typename _Alloc = std::allocator<_Tp> >
    class vector : protected _Vector_base<_Tp, _Alloc>
    {
        ...
     void
     push_back(const value_type& __x)()
     ...
     vector&
     operator=(const vector& __x);
        ...
        iterator
        insert(const_iterator __position, size_type __n, const value_type& __x)
    }
1.push_back()
      void
      push_back(const value_type& __x)
      {
        if (this->_M_impl._M_finish != this->_M_impl._M_end_of_storage)//如果不需要申请内存
          {
             _Alloc_traits::construct(this->_M_impl, this->_M_impl._M_finish,__x);//将x赋给finish
             ++this->_M_impl._M_finish; // => ++finish
          }
        else
        #if __cplusplus >= 201103L
            _M_emplace_back_aux(__x);
        #else
            _M_insert_aux(end(), __x);
        #endif
      }
_M_emplace_back_aux
#if __cplusplus >= 201103L
  template<typename _Tp, typename _Alloc>
    template<typename... _Args>
      void
      vector<_Tp, _Alloc>::
      _M_emplace_back_aux(_Args&&... __args)
      {
    const size_type __len =
      _M_check_len(size_type(1), "vector::_M_emplace_back_aux");
    pointer __new_start(this->_M_allocate(__len));//申请一段新的内存,将新的start指针指向新内存的起始位置
    pointer __new_finish(__new_start);//初始化finish指针
    __try
      {
        _Alloc_traits::construct(this->_M_impl, __new_start + size(),
                     std::forward<_Args>(__args)...);
        __new_finish = 0;

        __new_finish
          = std::__uninitialized_move_if_noexcept_a
          (this->_M_impl._M_start, this->_M_impl._M_finish,
           __new_start, _M_get_Tp_allocator());//将finish指针指向新内存的尾端

        ++__new_finish;
      }
    __catch(...)
      {
        if (!__new_finish)//申请不成功销毁
          _Alloc_traits::destroy(this->_M_impl, __new_start + size());
        else
          std::_Destroy(__new_start, __new_finish, _M_get_Tp_allocator());
        _M_deallocate(__new_start, __len);
        __throw_exception_again;
      }
    std::_Destroy(this->_M_impl._M_start, this->_M_impl._M_finish,
              _M_get_Tp_allocator());//销毁旧内存
    _M_deallocate(this->_M_impl._M_start,
              this->_M_impl._M_end_of_storage
              - this->_M_impl._M_start);
    this->_M_impl._M_start = __new_start;
    this->_M_impl._M_finish = __new_finish;
    this->_M_impl._M_end_of_storage = __new_start + __len;
      }
2.operator=,运用assign函数重新赋值vector
      vector&
      operator=(initializer_list<value_type> __l)
      {
        this->assign(__l.begin(), __l.end());
        return *this;
      }
3.insert(),参数,插入坐标,内存大小,插入变量
      iterator
      insert(const_iterator __position, size_type __n, const value_type& __x)
      {
        difference_type __offset = __position - cbegin();//获取间隔
        _M_fill_insert(begin() + __offset, __n, __x);//插入变量
        return begin() + __offset;//返回插入位置
      }
参考<<侯捷STL标准库>>