上一篇对块,语句、段落、列表进行了演示,本篇将对更高级的对象Anchor、Image、Chapter、Section的使用方法进行演示。
一、Anchor
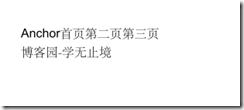
Anchor对象可以在文档内部或向外部跳转。内部跳转常见的应用就是目录,外部跳转就是跳转到指定的文件或网页。下面代码演示文档内部跳转和跳转到博客园点。
1: public class AnchorDemo : TestBase
2: {
3: protected override void WriteDocument(Document document, PdfWriter writer)
4: {
5: Paragraph p = new Paragraph();
6: p.Add("这是一个Anchor测试演示示例:");
7:
8: Anchor anchor = new Anchor("首页",Normal);
9: anchor.Name = "first";
10: var anchor2 = new Anchor("第二页", Normal);
11: anchor2.Reference = "#second";
12: var anchor3 = new Anchor("第三页", Normal);
13: anchor3.Reference = "#third";
14: p.Add(anchor);
15: p.Add(anchor2);
16: p.Add(anchor3);
17:
18: var anchor10 = new Anchor("博客园-学无止境", Normal);
19: anchor10.Reference = "http://www.cnblogs.com/LifelongLearning/";
20: document.Add(p);
21: document.Add(anchor10);
22:
23: document.NewPage();
24: var anchor1 = new Anchor("第二页", Normal);
25: anchor1.Name = "second";
26: document.Add(anchor1);
27:
28: var anchor4 = new Anchor("回到首页", Normal);
29: anchor4.Reference = "#first";
30: document.Add(anchor4);
31:
32: document.NewPage();
33: var anchor5 = new Anchor("第三页", Normal);
34: anchor5.Name = "third";
35: document.Add(anchor5);
36:
37: var anchor6 = new Anchor("回到首页", Normal);
38: anchor6.Reference = "#first";
39: document.Add(anchor6);
40: }
41: }
本节对演示代码进行了重构,基类代码请查看:一步一步 IText.Sharp
上面的代码演示结果如下:
Chunk也可以创建跳转链接,
Chunk.SetLocalDestination 设置本地描述名称,可以说它是当前锚点的名称
Chunk.SetLocalGoto 设置本地跳转到锚点
Chunk.SetRemoteGoto 设置远程跳转,如url
示例代码如下:
1: public class GoTopDemo : TestBase
2: {
3: protected override void WriteDocument(Document document, PdfWriter writer)
4: {
5: Paragraph p = new Paragraph();
6: Chunk top = new Chunk("Country List", Bolditalic);
7: top.SetLocalDestination("top");
8: p.Add(top);
9: document.Add(p);
10: Chunk imdb =
11: new Chunk("博客园", Bolditalic);
12: imdb.SetAnchor(new Uri("http://www.cnblogs.com/"));
13: p = new Paragraph("点击每页的返回首页,将返回到第一页,",Normal);
14: p.Add(imdb);
15: p.Add(".");
16: document.Add(p);
17: p = new Paragraph("This list can be found in a ");
18: Chunk page1 = new Chunk("分割文档(本地文档跳转)", Normal);
19: page1.SetRemoteGoto("helloworld2.pdf", 1);
20: p.Add(page1);
21: p.Add(".");
22: document.Add(p);
23:
24: document.NewPage();
25: p = new Paragraph("返回", Normal);
26: top = new Chunk("首页", Normal);
27: top.SetLocalGoto("top");
28: p.Add(top);
29: p.Add(".");
30: document.Add(p);
31: document.NewPage();
32: p = new Paragraph("返回", Normal);
33: top = new Chunk("首页", Normal);
34: top.SetLocalGoto("top");
35: p.Add(top);
36: p.Add(".");
37: document.Add(p);
38:
39: document.NewPage();
40: p = new Paragraph("返回", Normal);
41: top = new Chunk("首页", Normal);
42: top.SetLocalGoto("top");
43: p.Add(top);
44: p.Add(".");
45: document.Add(p);
46:
47: document.NewPage();
48: p = new Paragraph("返回");
49: top = new Chunk("首页");
50: top.SetLocalGoto("top");
51: p.Add(top);
52: p.Add(".");
53: document.Add(p);
54:
55: document.NewPage();
56: p = new Paragraph("返回");
57: top = new Chunk("首页");
58: top.SetLocalGoto("top");
59: p.Add(top);
60: p.Add(".");
61: document.Add(p);
62: }
63: }
二、Chapter与Section
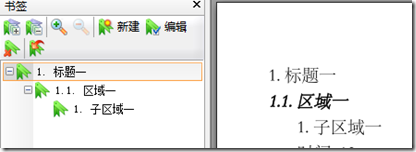
Chapter和Section用来创建书签和文档结构非常有用。同时使用PdfOutline也可以创建书签,默认情况下,生成章节和分区使用的是数字标识,如下所示:
代码如下:
1: public class ChapterDemo2 : TestBase
2: {
3: protected override void WriteDocument(Document document, PdfWriter writer)
4: {
5: string[] contries = new string[] { "美国", "英国", "中国", "朝鲜", "日本" };
6:
7: Paragraph title = null;
8: Chapter chapter = null;
9: Section section = null;
10: Section subsection = null;
11: title = new Paragraph("标题一", Normal);
12: chapter = new Chapter(title, 1);
13: title = new Paragraph("区域一", Bolditalic);
14: section = chapter.AddSection(title, 2);
15: title = new Paragraph("子区域一", Normal);
16: subsection = section.AddSection(title);
17:
18: subsection.IndentationLeft = (20);
19: subsection.NumberDepth = (1);
20: subsection.Add(new Paragraph("时间: " + 12, Normal));
21: subsection.Add(new Paragraph("导演(s):", Normal));
22: subsection.Add(GetDirectorList(contries));
23: subsection.Add(new Paragraph("国家:", Normal));
24: subsection.Add(GetDirectorList(contries));
25:
26: document.Add(chapter);
27: }
28:
29: private List GetDirectorList(string[] list)
30: {
31: List result = new List();
32: foreach (var c in list)
33: {
34: result.Add(new ListItem(c, Normal));
35: }
36:
37:
38: return result;
39: }
40: }
三、Image
在ITextSharp中使用Image.getInstance方法创建Image对象,支持的文件类型包括:
Jpeg, PngImage, GifImage,
TiffImage
itextsharp会自动调整图文的内容,以让页面显示更多的内容,如果要禁用这种情况,就要使用如下方法:
1: PdfWriter.GetInstance(document,new FileStream(filename)).StrictImageSequence = true;
强制使用添加顺序。
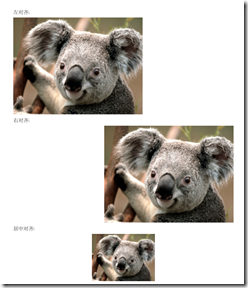
图像有对象方式,有如下几种:左对齐、右对齐、居中对齐、自动调整,
图像的位置可以通过,上下左右来设置控制,同时可以通过:ScalePercent,ScaleToFit,
ScaleAbsolute,scaleAbsoluteWidth,scaleAbsoluteHeight调整图像显示大小,对于布局的控制非常方便。
备注:如果同一个图像创建多次并都添加到文档中,文档的大小就增长很快,如果一个图像要在多个地方使用,只要生成一个Image对象,在添加到文档前,设置其属性就可以了,没有必要创建多份。
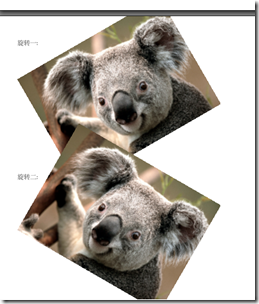
图像还支持旋转:
RotationDegrees,这个是设置旋转的角度,可以设置正负数。
演示示例效果如下:
代码如下:
1: public class ImageDemo : TestBase
2: {
3: protected override void WriteDocument(Document document, PdfWriter writer)
4: {
5: writer.StrictImageSequence = true;
6: document.Add(new Paragraph("左对齐:", Normal));
7: Image image = CreateImageObject();
8: image.Alignment = Image.ALIGN_LEFT;
9: image.ScalePercent(30);
10: document.Add(image);
11:
12: document.Add(new Paragraph("右对齐:", Normal));
13: //image = CreateImageObject();
14: image.ScalePercent(30);
15: image.Alignment = Image.ALIGN_RIGHT;
16: document.Add(image);
17:
18: document.Add(new Paragraph("居中对齐:", Normal));
19: //image = CreateImageObject();
20: image.Alignment = Image.ALIGN_MIDDLE;
21: image.ScaleToFit(150,300);
22: document.Add(image);
23:
24: document.Add(new Paragraph("适合页面对齐:", Normal));
25: //image = CreateImageObject();
26: image.Alignment = Image.ALIGN_JUSTIFIED_ALL;
27: image.ScalePercent(30);
28: document.Add(image);
29: document.NewPage();
30: var p = new Paragraph("旋转一:", Normal);
31: p.Add(Chunk.NEWLINE);
32:
33: p.Add(Chunk.NEWLINE);
34: p.Add(Chunk.NEWLINE);
35: p.Add(Chunk.NEWLINE);
36: p.Add(Chunk.NEWLINE);
37: p.Add(Chunk.NEWLINE);
38: p.Add(Chunk.NEWLINE);
39: p.Add(Chunk.NEWLINE);
40: p.Add(Chunk.NEWLINE);
41: p.Add(Chunk.NEWLINE);
42: p.Add(Chunk.NEWLINE);
43: p.Add(Chunk.NEWLINE);
44: p.Add(Chunk.NEWLINE);
45: image.Alignment = Image.ALIGN_JUSTIFIED_ALL;
46: image.ScalePercent(30);
47: image.RotationDegrees = 30;
48: p.Add(new Chunk(image, 0, -30));
49: document.Add(p);
50:
51: p = new Paragraph("旋转二:", Normal);
52: p.Add(Chunk.NEWLINE);
53: p.Add(Chunk.NEWLINE);
54: p.Add(Chunk.NEWLINE);
55: p.Add(Chunk.NEWLINE);
56: p.Add(Chunk.NEWLINE);
57: p.Add(Chunk.NEWLINE);
58: p.Add(Chunk.NEWLINE);
59: p.Add(Chunk.NEWLINE);
60: p.Add(Chunk.NEWLINE);
61: p.Add(Chunk.NEWLINE);
62: p.Add(Chunk.NEWLINE);
63: p.Add(Chunk.NEWLINE);
64: p.Add(Chunk.NEWLINE);
65: image.Alignment = Image.ALIGN_JUSTIFIED_ALL;
66: image.ScalePercent(30);
67: image.RotationDegrees = -30;
68: p.Add(new Chunk(image, 0, -15));
69: document.Add(p);
70: }
71:
72: private Image CreateImageObject()
73: {
74: return Image.GetInstance(@"C:\Users\Public\Pictures\Sample Pictures\123.jpg");
75: }
76: }


