最近学到数据可视化到了词云图,正好学到爬虫,各种爬网站
【实验名称】 爬取豆瓣电影《千与千寻》的评论并生成词云
1. 利用爬虫获得电影评论的文本数据
2. 处理文本数据生成词云图
第一步,准备数据
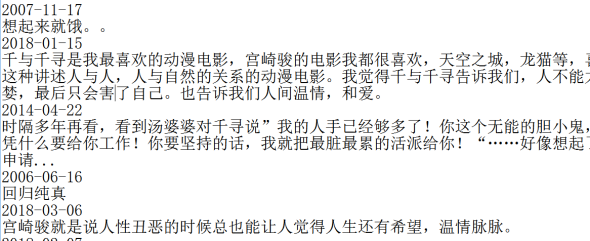
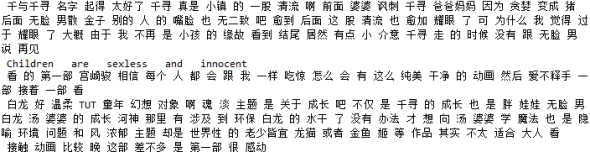
需要登录豆瓣网站才能够获得短评文本数据https://movie.douban.com/subject/1291561/comments
首先获取cookies,使用爬虫强大的firefox浏览器

将cookies数据复制到cookies.txt文件当中备用,
2.第二步,编写爬虫代码
#coding = utf-8
import requests
import time
import random
from bs4 import BeautifulSoup

abss = 'https://movie.douban.com/subject/1291561/comments'
firstPag_url = 'https://movie.douban.com/subject/1291561/comments?start=20&limit=20&sort=new_score&status=P&percent_type='
url = 'https://movie.douban.com/subject/1291561/comments?start=0&limit=20&sort=new_score&status=P'
header = {
'User-Agent':'Mozilla/5.0 (Windows NT 6.1; Win64; x64; rv:57.0) Gecko/20100101 Firefox/57.0',
'Connection':'keep-alive'
}

def get_data(html):
    # 获取所需要的页面数据
    soup = BeautifulSoup(html, 'lxml')
    comment_list = soup.select('.comment > p')
    next_page = soup.select('#paginator > a')[2].get('href')
    date_nodes = soup.select('..comment-time')
    return comment_list, next_page, date_nodes

def get_cookies(path):
    # 获取cookies
    f_cookies = open(path, 'r')
    cookies ={}
    for line in f_cookies.read().split(';'): # 将Cookies字符串其转换为字典
        name ,value = line.strip().split('=', 1)
        cookies[name] = value
    return cookies

if __name__ == '__main__':
    cookies = get_cookies('cookies.txt') # cookies文件保存的前面所述的cookies
    html = requests.get(firstPag_url, cookies=cookies,headers=header).content
    comment_list, next_page, date_nodes = get_data(html) #首先从第一个页面处理
    soup = BeautifulSoup(html, 'lxml')
    while (next_page): #不断的处理接下来的页面
        print(abss + next_page)
        html = requests.get(abss + next_page, cookies=cookies, headers=header).content
        comment_list, next_page, date_nodes = get_data(html)
        soup = BeautifulSoup(html, 'lxml')
        comment_list, next_page,date_nodes = get_data(html)
        with open("comments.txt", 'a', encoding='utf-8')as f:
            for ind in range(len(comment_list)):
                comment = comment_list[ind];
                date = date_nodes[ind]
                comment = comment.get_text().strip().replace("
", "")
                date= date.get_text().strip()
                f.writelines(date+u'
' +comment + u'
')
        time.sleep(1 + float(random.randint(1, 100)) / 20)
每一页都会有20条的短评,所以我们依次遍历每一页a

第二步,处理爬到的数据,在第一步当中已经将数据存档到了commit.txt文件当中,
# -*- coding:utf-8 -*-
import jieba
import matplotlib.pyplot as plt
from wordcloud import WordCloud,ImageColorGenerator
from scipy.misc import imread
f_comment = open("comments.txt",'rb')
words = []
for line in f_comment.readlines():
if(len(line))==12:
continue
A = jieba.cut(line)
words.append(" ".join(A))
# 去除停用词
stopwords = [',','。','【','】', '”','“',',','《','》','!','、','?','.','…','1','2','3','4','5','[',']','(',')',' ']
new_words = []
for sent in words :
word_in = sent.split(' ')
new_word_in = []
for word in word_in:
if word in stopwords:
continue
else:
new_word_in.append(word)
new_sent = " ".join(new_word_in)
new_words.append(new_sent)
final_words = []
for sent in new_words:
sent = sent.split(' ')
final_words +=sent
final_words_flt = []
for word in final_words:
if word == ' ':
continue
else:
final_words_flt.append(word)
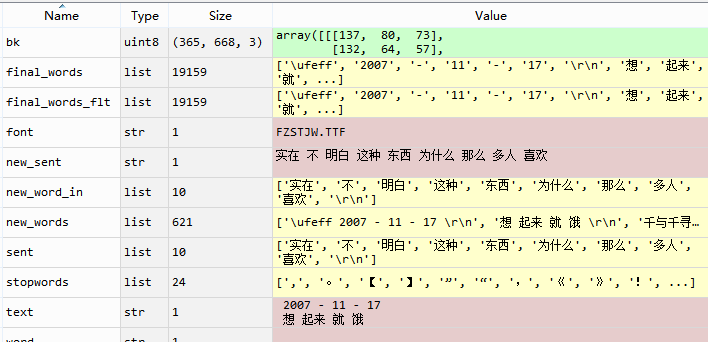
text = " ".join(final_words_flt)
处理完数据之后得到带有空格的高频词
第三步,生成词云图:
首先安装python的wordcloud库
pip install wordcloud

在第二步text后面加上下面代码生成词云图
font = r'C:WindowsFontsFZSTK.TTF'
bk = imread("bg.png") # 设置背景文件
wc = WordCloud(collocations=False, mask = bk, font_path=font, width=1400, height=1400, margin=2).generate(text.lower())
image_colors = ImageColorGenerator(bk) # 读取背景文件色彩
plt.imshow(wc.recolor(color_func=image_colors))
plt.axis("off")
plt.figure()
plt.imshow(bk, cmap=plt.cm.gray)
plt.axis("off")
plt.show()
wc.to_file('word_cloud1.png')
wordcloud作为对象是为小写,生成一个词云文件大概需要三步:
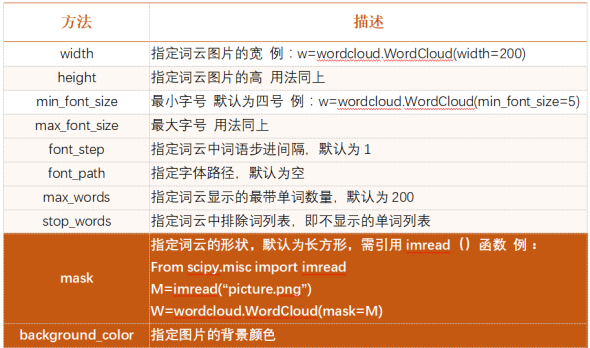
- 配置词云对象参数
- 加载词文本
- 输出词云文件(如果不加说明默认图片大小是400*200
-
方法
描述
Wordcloud.generate(text)
向wordcloud对象中加载文本text,例如:wordcloud.genertae(“python && wordclooud”)
Wordcloud.to_file(filename)
将词云输出为图像元件以.png .jpg格式保存,例wordcloud.to_file(“picture.png”)
- 具体的方法上面
wordcloud做词频统计时分为下面几步:
- 分割,以空格分割单词
- 统计:单词出现的次数并过滤
- 字体:根据统计搭配相应的字号
- 布局
最后我么可以看到短评当中处理过后的高频词
我们随便照一张图片读取背景颜色

最后生成的词云图就出来了:
