要做一些关于 GlusterFS 的工作,所以又开了一个坑:-)
本篇主要简单介绍 Gluster,之后记录一下安装过程。
Gluster 简介
GlusterFS is a scalable network filesystem suitable for data-intensive tasks such as cloud storage and media streaming. GlusterFS is free and open source software and can utilize common off-the-shelf hardware.
Get Started!
英语好的同学可以直接看原文档了,比我说的好得多。GlusterFS Quick Start Guide
Step1 Have at least three nodes
-
Fedora 30 (or later) on 3 nodes named "server1", "server2" and "server3". centos7 应该也是可以的。
-
A working network connection. 能联网。
-
至少两块虚拟磁盘,一块用来安装 OS,一块用来提供 GlusterFS 的存储服务。安装过程。又因为我直接安装了3个 centos7 的虚拟机,需要在每台虚拟机上再增加一块虚拟硬盘,一共需要 3*2 = 6 块虚拟硬盘。
-
重要:在每一台虚拟机上设置 NTP 服务,目的是获取文件系统上层的一些必要服务。
ntp 的安装方法:
rpm -q ntp
// 检查 ntp 是否已经安装
yum -y install ntp
// 如果没安装,使用该命令安装。如果提示需要 root 权限,可以使用 su 命令切换到 root 用户。
systemctl enable ntpd
systemctl start ntpd
// 设置 ntp 开机启动并启动 ntp。
Note:因为 GlusterFS 直接向 var/lib/glusterd 中动态写入配置文件,当它无法写入这些文件时会导致一些不稳定的行为发生。推荐为 var/log/ 之类的目录创建新的分区,减少类似情况的发生。
Step2 Format and mount the bricks
设置 XFS 文件系统来支持后端块(backend bricks),GlusterFS 工作在文件系统的上层,所以支持一些扩展的属性。
设置 sdb 分区:
主要用 fdisk 命令进行划分。如下图所示,划红线的部分是需要输入的命令。关于文件系统的更多内容,详见《Linux命令行与shell编程大全》第八章。
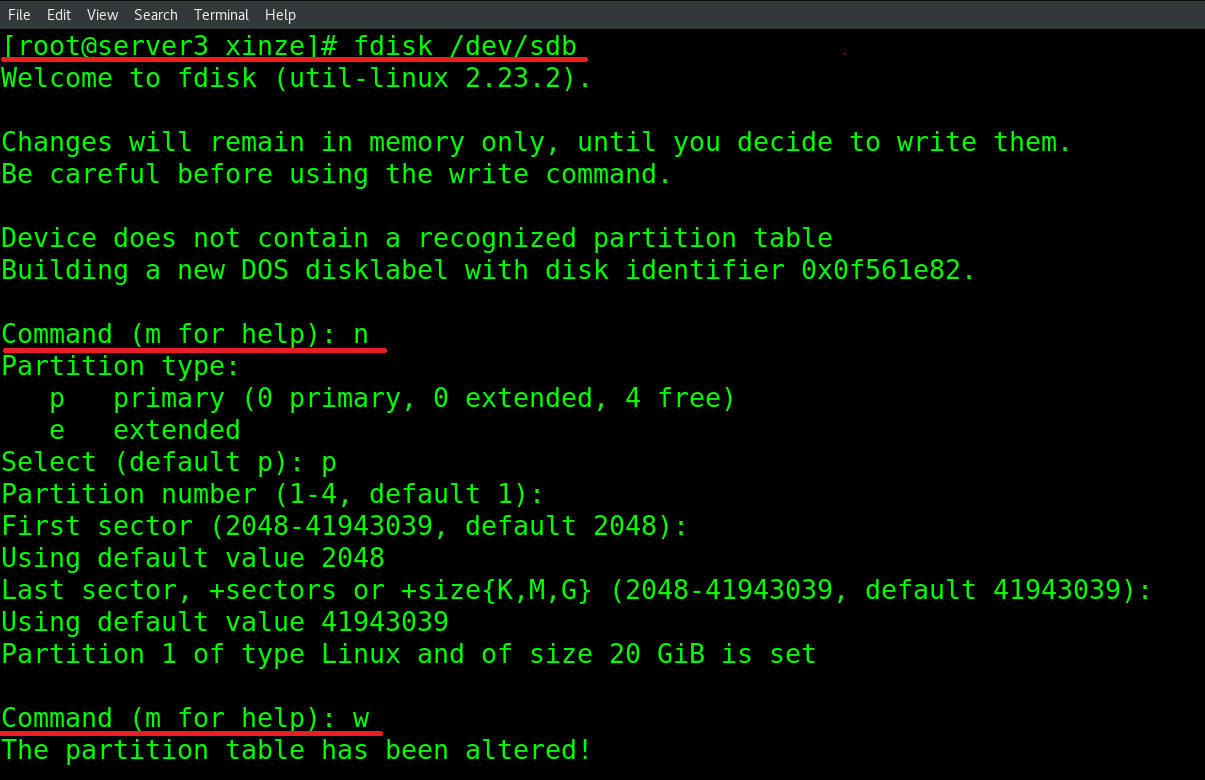
教程里给的例子默认 bricks 驻留在 sdb1 上,如果在安装时增加了一块硬盘,这个时候 sdb 硬盘应该是没有分配过的。
mkfs.xfs -i size=512 /dev/sdb1
mkdir -p /data/brick1
echo '/dev/sdb1 /data/brick1 xfs defaults 1 2' >> /etc/fstab
mount -a && mount
可以使用 df -a 查看:

发现 sdb1 确实已经挂载到 /data/brick1 目录下。
Step3 Installing GlusterFS
官方文档给的很简单:yum install glusterfs-server
但是直接敲命令会得到如下的结果:

原因在于 glusterfs-server 这个包在一个很奇怪的位置:http://mirror.centos.org/centos/7/storage/x86_64/gluster-4.1/
但是原来的 etc/yum.repos.d/CentOS-Base.repo 中完全没有这个地址,所以我们需要在这个文件的后面加上下面的这部分代码。不过别急,先备份一手:
sudo cp /etc/yum.repos.d/CentOS-Base.repo /etc/yum.repos.d/CentOS-Base.repo.bak
复制好了之后,就可以在 CentOS-Base.repo 里加上下面的代码了。
# CentOS-Gluster-6.repo
#
# Please see http://wiki.centos.org/SpecialInterestGroup/Storage for more
# information

[centos-gluster6]
name=CentOS-$releasever - Gluster 6
mirrorlist=http://mirrorlist.centos.org?arch=$basearch&release=$releasever&repo=storage-gluster-6
#baseurl=http://mirror.centos.org/$contentdir/$releasever/storage/$basearch/gluster-6/
gpgcheck=0
enabled=1
gpgkey=file:///etc/pki/rpm-gpg/RPM-GPG-KEY-CentOS-SIG-Storage

[centos-gluster6-test]
name=CentOS-$releasever - Gluster 6 Testing
baseurl=http://buildlogs.centos.org/centos/$releasever/storage/$basearch/gluster-6/
gpgcheck=0
enabled=0
gpgkey=file:///etc/pki/rpm-gpg/RPM-GPG-KEY-CentOS-SIG-Storage
来源:Glusterfs的安装、创建卷、配置和优化卷、挂载使用
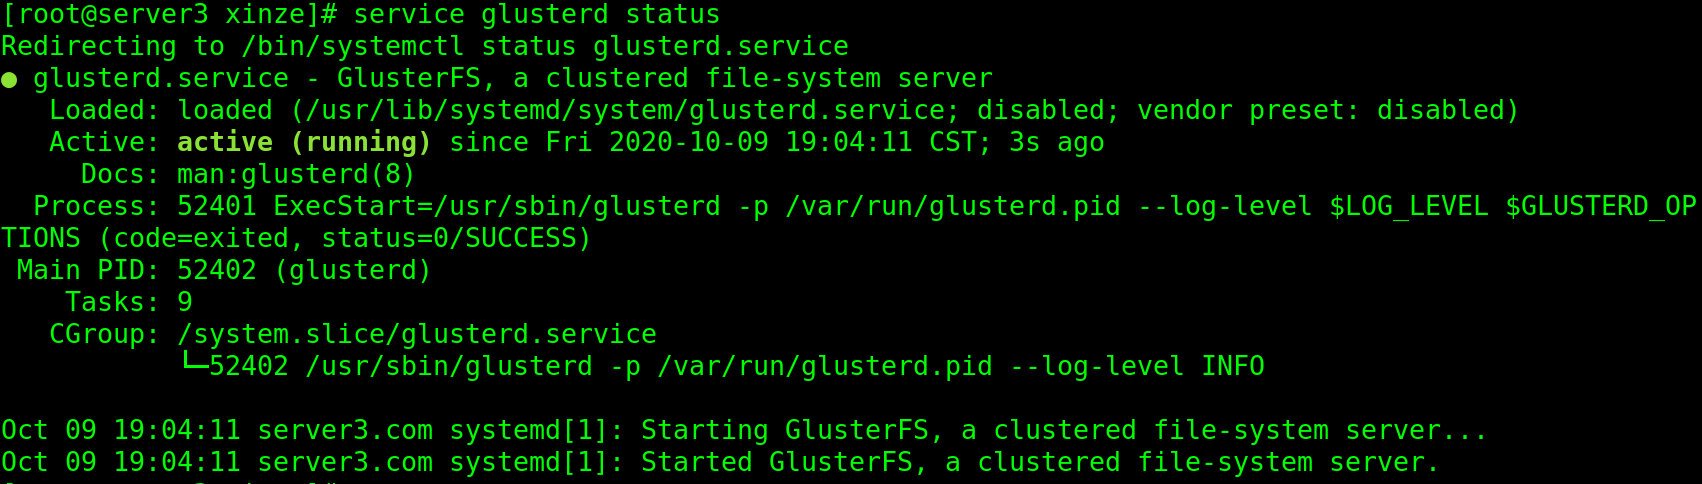
安装成功后启动 gluster 的服务,并查看状态:
service glusterd start
service glusterd status
Step4 Configure the firewall
iptables -I INPUT -p all -s <ip-address> -j ACCEPT
这里的 ip-address 是 “the address of the other node”,注意这里是 node 不是 nodes,所以我是这样设置的:
- 第一台虚拟机:iptables -I INPUT -p all -s ip-addr2 -j ACCEPT
- 第二台虚拟机:iptables -I INPUT -p all -s ip-addr3 -j ACCEPT
- 第三台虚拟机:iptables -I INPUT -p all -s ip-addr1 -j ACCEPT
Step5 Configure the trusted pool
在全部的 servers 上执行:
echo "ip_addr1    server1" >> /etc/hosts
echo "ip_addr2    server2" >> /etc/hosts
echo "ip_addr3    server3" >> /etc/hosts
我在 server1 上执行了:
gluster peer probe ip-addr2
gluster peer probe ip-addr3
结果在 server1 上执行 gluster peer status 得到了:

发现一顿瞎比操作之后都变成 disconnected 了QAQ,难顶。。
百度了一下,发现只要执行这几条命令之后就可以了:
firewall-cmd --zone=public --add-port=24007-24008/tcp --permanent
firewall-cmd --zone=public --add-port=24009/tcp --permanent
firewall-cmd --zone=public --add-service=nfs --add-service=samba --add-service=samba-client --permanent
firewall-cmd --zone=public --add-port=111/tcp --add-port=139/tcp --add-port=445/tcp --add-port=965/tcp --add-port=2049/tcp --add-port=38465-38469/tcp --add-port=631/tcp --add-port=111/udp --add-port=963/udp --add-port=49152-49251/tcp --permanent
firewall-cmd --reload
可能需要每次开机都执行一遍?还没试验,如果是的话就写个脚本算了。。。
Step 6 Set up a GlusterFS volume
确保三台机器彼此之间互相连接。
在三台机器上均执行:
mkdir -p /data/brick1/gv0
在其中任意一台机器上执行:
gluster volume create gv0 replica 3 server1:/data/brick1/gv0 server2:/data/brick1/gv0 server3:/data/brick1/gv0
# output: volume create: gv0: success: please start the volume to access data
gluster volume start gv0
# output: volume start: gv0: success
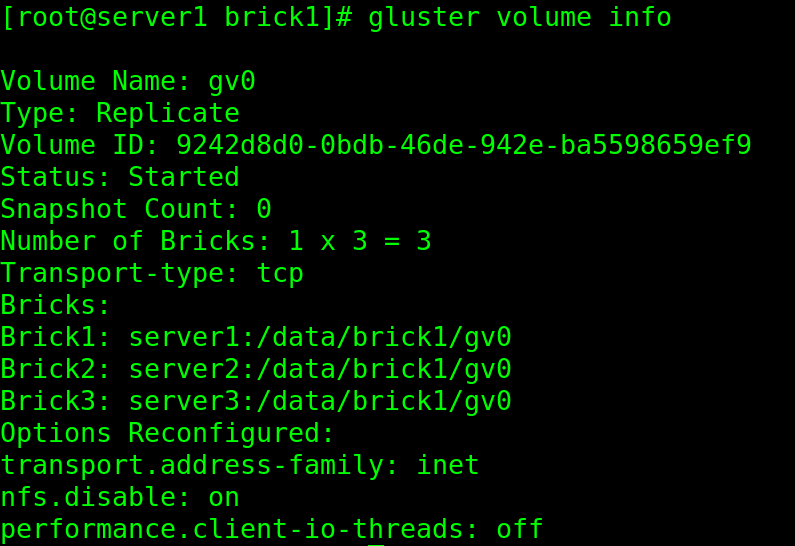
最后执行 gluster volume info,得到结果如下图:
Step 7 Testing the GlusterFS volume
创建好卷之后,当然要来尝试一下:
首先将 server1 上的卷(volume)挂载在 /mnt/ 文件夹下,之后在 /mnt/ 中创建 100 个临时测试文件。
mount -t glusterfs server1:/gv0 /mnt
for i in `seq -w 1 100`; do cp -rp /var/log/messages /mnt/copy-test-$i; done
先检查一下 mnt 中的文件数量:ls -lA /mnt/copy* | wc -l,结果是 100。
再检查一下 gv0 中的文件数量:ls -lA /data/brick1/gv0/copy*,结果也是 100。
而且检查 server2 和 server3 中的 gv0 文件夹,执行同样的命令,结果也都是 100。
因为我们之前创建卷的时候添加了一个 replica 属性,如果去掉这个属性,那么在每个 server 的卷中会有大概 33 个文件。
试验没有 replica 属性的命令:
mkdir -p /data/brick1/gv1    # for all servers

# 以下命令都在 server1 上执行:

gluster volume create gv1 server1:/data/brick1/gv1 server2:/data/brick1/gv1 server3:/data/brick1/gv1    # for any server
gluster volume start gv1
mkdir mnt1    # 让 gv1 挂载到 mnt1 上
mount -t glusterfs server1:/gv1 /mnt1
for i in `seq -w 1 100`; do cp -rp /var/log/messages /mnt1/copy-test-$i; done
ls -lA /mnt1/copy* | wc -l
查看 gv1 的属性:

发现 gv1 的 type 是 distributed,而不是 gv0 的 replicate。
server1 中 gv1 中文件列表:
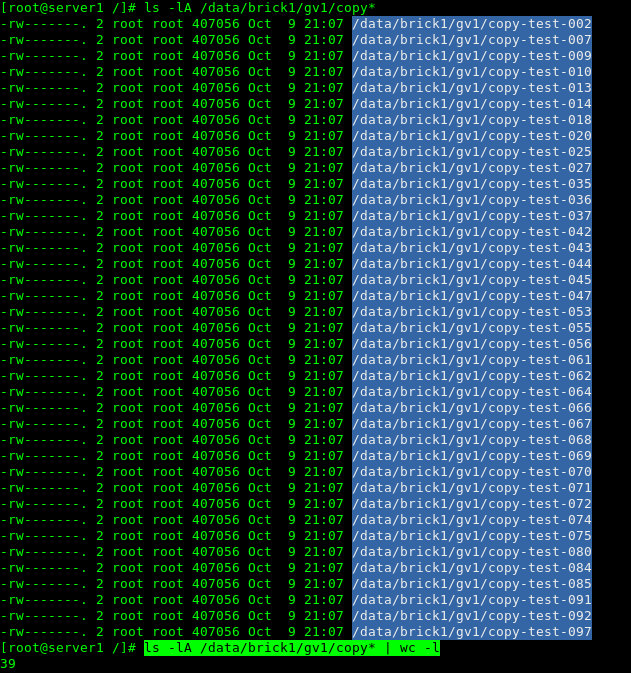
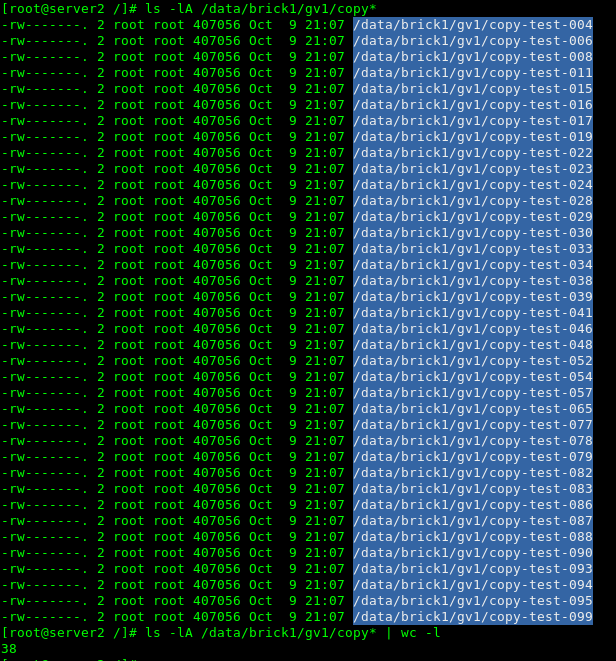
server2 中 gv1 中文件列表:
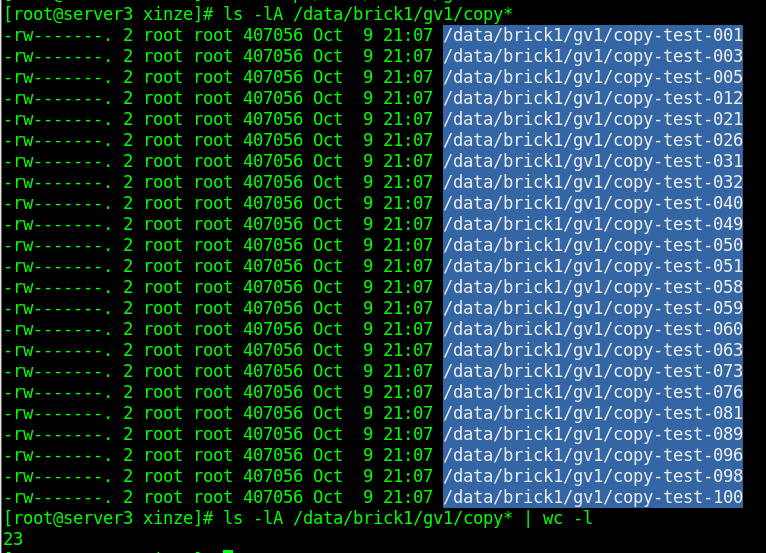
server3 中 gv1 中文件列表:
结语
gluster 的安装以及配置尝试就到这里,下一篇啥时候更新,看缘分吧:-)
参考资料:
gluster 官方文档
VMWare 安装 CentOS7 详细教程
解决无法创建volume的问题
glusterfs测试
glusterfs画图