http://www.cnblogs.com/xuerong/p/6796600.html
技术点
1.基础框架-ssm (SpringMVC +Spring +MyBatis)
2.数据库MySqQL
3.前端框架-bootstrap快速搭建简洁美观的界面
4.项目的依赖管理-Maven
5.分页-pagehelper
6.逆向工程-MyBatis Generator
------------------------------------------------------------------------------------------------------------------------------
基础环境搭建
1.创建一个maven工程
2.引入项目依赖的jar包
spring
springmvc
mybatis
数据库连接池,驱动包
其他(jstl,servlet-api,junit)
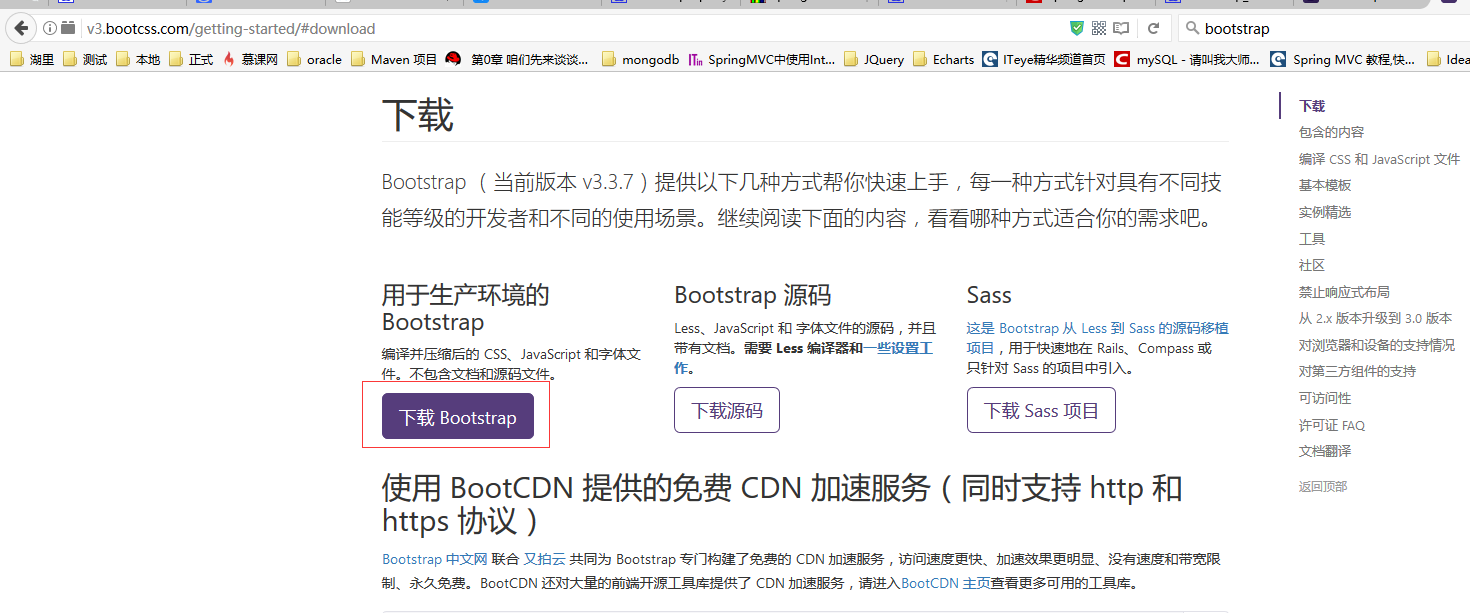
3.引入bootstrap前端框架
4.编写ssm整合的关键配置文件
web.xml,spring,springmvc,mybatis
------------------------------------------------------------------------------------------------------------------------------
1、修改settings.xml
这下面是阿里巴巴的仓库。这样下载jar包会比较快

 <mirrors>
    <!-- mirror
     | Specifies a repository mirror site to use instead of a given repository. The repository that
     | this mirror serves has an ID that matches the mirrorOf element of this mirror. IDs are used
     | for inheritance and direct lookup purposes, and must be unique across the set of mirrors.
     | -->
    <mirror>
      <id>alimaven</id>
      <name>aliyun maven</name>
      <url>http://maven.aliyun.com/nexus/content/groups/public/</url>
      <mirrorOf>central</mirrorOf>
   </mirror>

  </mirrors>
在profiles中加入jdk的版本,这样编译时就不会报一些莫名其妙的错误
 <profiles>
 <profile>
         <id>jdk-1.7</id>
         <activation>
             <activeByDefault>true</activeByDefault>
             <jdk>1.7</jdk>
         </activation>
         <properties>
             <maven.compiler.source>1.7</maven.compiler.source>
             <maven.compiler.target>1.7</maven.compiler.target>
             <maven.compiler.compilerVersion>1.7</maven.compiler.compilerVersion>
         </properties>
     </profile>
  </profiles>
依赖包pom.xml:

查找jar包的时候自己注意下。查的哪个下面的。得找对了
2、引入jar包
<project xmlns="http://maven.apache.org/POM/4.0.0" xmlns:xsi="http://www.w3.org/2001/XMLSchema-instance"
         xsi:schemaLocation="http://maven.apache.org/POM/4.0.0 http://maven.apache.org/maven-v4_0_0.xsd">
    <modelVersion>4.0.0</modelVersion>
    <groupId>com.dotcore</groupId>
    <artifactId>ssm</artifactId>
    <packaging>war</packaging>
    <version>1.0-SNAPSHOT</version>
    <!--引入项目依赖的jar包 -->
    <dependencies>
        <!--版本对应都是用4.3.7.RELEASE -->
        <!--SpringMVC、Spring -->
        <!-- https://mvnrepository.com/artifact/org.springframework/spring-webmvc -->
        <dependency>
            <groupId>org.springframework</groupId>
            <artifactId>spring-webmvc</artifactId>
            <version>4.3.7.RELEASE</version>
        </dependency>
        <!--Spring JDBC -->
        <!-- https://mvnrepository.com/artifact/org.springframework/spring-jdbc -->
        <dependency>
            <groupId>org.springframework</groupId>
            <artifactId>spring-jdbc</artifactId>
            <version>4.3.7.RELEASE</version>
        </dependency>
        <!--Spring 面向切面编程 -->
        <!-- https://mvnrepository.com/artifact/org.springframework/spring-aspects -->
        <dependency>
            <groupId>org.springframework</groupId>
            <artifactId>spring-aspects</artifactId>
            <version>4.3.7.RELEASE</version>
        </dependency>
        <!--MyBatis -->
        <!-- https://mvnrepository.com/artifact/org.mybatis/mybatis -->
        <dependency>
            <groupId>org.mybatis</groupId>
            <artifactId>mybatis</artifactId>
            <version>3.4.2</version>
        </dependency>
        <!--MyBatis整合Spring的适配包 -->
        <!-- https://mvnrepository.com/artifact/org.mybatis/mybatis-spring -->
        <dependency>
            <groupId>org.mybatis</groupId>
            <artifactId>mybatis-spring</artifactId>
            <version>1.3.0</version>
        </dependency>
        <!--数据库连接池 -->
        <!-- https://mvnrepository.com/artifact/c3p0/c3p0 -->
        <!-- 这里是用c3p0的方式,查询的时候是c3p0下的c3p0-->
        <dependency>
            <groupId>c3p0</groupId>
            <artifactId>c3p0</artifactId>
            <version>0.9.1.2</version>
        </dependency>
        <!--数据库驱动 -->
        <!-- https://mvnrepository.com/artifact/mysql/mysql-connector-java -->
        <dependency>
            <groupId>mysql</groupId>
            <artifactId>mysql-connector-java</artifactId>
            <version>5.1.41</version>
        </dependency>
        <!--jstl、servlet-api、junit -->
        <!-- https://mvnrepository.com/artifact/jstl/jstl -->
        <dependency>
            <groupId>jstl</groupId>
            <artifactId>jstl</artifactId>
            <version>1.2</version>
        </dependency>
        <!-- https://mvnrepository.com/artifact/javax.servlet/servlet-api -->
        <dependency>
            <groupId>javax.servlet</groupId>
            <artifactId>servlet-api</artifactId>
            <!--服务器里有,发布到服务器上不需要这个包 -->
            <scope>provided</scope>
            <version>2.5</version>
        </dependency>
        <!-- https://mvnrepository.com/artifact/junit/junit -->
        <dependency>
            <groupId>junit</groupId>
            <artifactId>junit</artifactId>
            <version>4.12</version>
        </dependency>

    </dependencies>
</project>
3、引入bootstrap前端框架
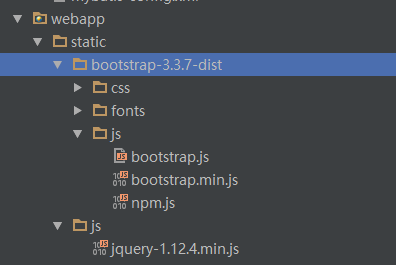
页面用到bootstrap插件的引用
<html>
<body>
<!--引入JQuery -->
<script src="static/js/jquery-1.12.4.min.js"></script>
<!--引入样式 -->
<link href="static/bootstrap-3.3.7-dist/css/bootstrap.min.css" rel="stylesheet">
<script src="static/bootstrap-3.3.7-dist/js/bootstrap.min.js"></script>
<h2>Hello World!</h2>
</body>
</html>
4、编写ssm整合的关键配置文件(重点来了)
web.xml文件配置
<?xml version="1.0" encoding="UTF-8"?>
<web-app xmlns="http://xmlns.jcp.org/xml/ns/javaee"
         xmlns:xsi="http://www.w3.org/2001/XMLSchema-instance"
         xsi:schemaLocation="http://xmlns.jcp.org/xml/ns/javaee http://xmlns.jcp.org/xml/ns/javaee/web-app_3_1.xsd"
         version="3.1">
  <!--1. 启动Spring的容器-->
  <context-param>
    <param-name>contextConfigLocation</param-name>
    <param-value>classpath:applicationContext.xml</param-value>
  </context-param>
  <listener>
    <listener-class>org.springframework.web.context.ContextLoaderListener</listener-class>
  </listener>
  <!--2.springmvc的前端控制器,拦截所有请求 -->
  <servlet>
    <servlet-name>dispatcherServlet</servlet-name>
    <servlet-class>org.springframework.web.servlet.DispatcherServlet</servlet-class>
    <!--<init-param>-->
      <!--<param-name>contextConfigLocation</param-name>-->
      <!--<<param-value>location</param-value>-->
    <!--</init-param>-->
    <load-on-startup>1</load-on-startup>
  </servlet>
  <servlet-mapping>
    <servlet-name>dispatcherServlet</servlet-name>
    <url-pattern>/</url-pattern>
  </servlet-mapping>

  <!--3.字符编码过滤器 ,一定放在所有的过滤器之前-->
  <filter>
    <filter-name>CharacterEncodingFilter</filter-name>
    <filter-class>org.springframework.web.filter.CharacterEncodingFilter</filter-class>
    <init-param>
      <param-name>encoding</param-name>
      <param-value>utf-8</param-value>
    </init-param>
    <init-param>
      <param-name>forceRequestEncoding</param-name>
      <param-value>true</param-value>
    </init-param>
    <init-param>
      <param-name>forceResponseEncoding</param-name>
      <param-value>true</param-value>
    </init-param>
  </filter>
  <filter-mapping>
    <filter-name>CharacterEncodingFilter</filter-name>
    <url-pattern>/*</url-pattern>
  </filter-mapping>

  <!--4.使用Rest风格的URI,将页面的普通post请求转为制定的delete请求或者put请求 -->
  <filter>
    <filter-name>hiddenHttpMethodFilter</filter-name>
    <filter-class>org.springframework.web.filter.HiddenHttpMethodFilter</filter-class>
  </filter>
  <filter-mapping>
    <filter-name>hiddenHttpMethodFilter</filter-name>
    <url-pattern>/*</url-pattern>
  </filter-mapping>
</web-app>
web.xml文件配置完了后,就开始配置springmvc的配置文件(dispatcherServlet-servlet.xml)
<?xml version="1.0" encoding="UTF-8"?>
<beans xmlns="http://www.springframework.org/schema/beans"
       xmlns:xsi="http://www.w3.org/2001/XMLSchema-instance" xmlns:p="http://www.springframework.org/schema/p"
       xmlns:context="http://www.springframework.org/schema/context"
       xmlns:mvc="http://www.springframework.org/schema/mvc"
       xsi:schemaLocation="http://www.springframework.org/schema/beans
                            http://www.springframework.org/schema/beans/spring-beans-4.0.xsd
                            http://www.springframework.org/schema/context
                            http://www.springframework.org/schema/context/spring-context-4.0.xsd
                            http://www.springframework.org/schema/mvc
                            http://www.springframework.org/schema/mvc/spring-mvc-4.0.xsd">


   <!--SpringMVC的配置文件,包含网站跳转逻辑的控制,配置 (跟网站逻辑有关的,放在这)-->
    <context:component-scan base-package="com.dotcore" use-default-filters="false">
        <!--只扫描控制器  得把默认的改为false-->
        <context:include-filter type="annotation" expression="org.springframework.stereotype.Controller"/>
    </context:component-scan>

    <!--配置视图解析器 -->
    <bean class="org.springframework.web.servlet.view.InternalResourceViewResolver">
        <property name="prefix" value="/WEB-INF/views"/>
        <property name="suffix" value=".jsp"/>
    </bean>

    <!--两个标准配置 -->
    <!--将Springmvc不能处理的请求交给tomcat -->
    <mvc:default-servlet-handler/>
    <!--能支持springmvc更高级的一些功能,JSR303,快捷的ajax请求 -->
    <mvc:annotation-driven/>
</beans>
配置dbconfig.properties数据源的常量
jdbc.jdbcUrl = jdbc:mysql://localhost:3306/ssm_crud
jdbc.driverClass = com.mysql.jdbc.Driver
jdbc.user=root
jdbc.password=123456
SSM整合配置_配置Spring
<?xml version="1.0" encoding="UTF-8"?>
<beans xmlns="http://www.springframework.org/schema/beans"
       xmlns:xsi="http://www.w3.org/2001/XMLSchema-instance"
       xmlns:context="http://www.springframework.org/schema/context"
       xmlns:aop="http://www.springframework.org/schema/aop"
       xmlns:tx="http://www.springframework.org/schema/tx"
       xsi:schemaLocation="http://www.springframework.org/schema/beans
                            http://www.springframework.org/schema/beans/spring-beans-4.0.xsd
                            http://www.springframework.org/schema/context
                            http://www.springframework.org/schema/context/spring-context-4.0.xsd
                            http://www.springframework.org/schema/aop
                            http://www.springframework.org/schema/aop/spring-aop-4.0.xsd
                            http://www.springframework.org/schema/tx
                            http://www.springframework.org/schema/aop/spring-tx-4.0.xsd">


    <!--这边不扫描控制器 -->
    <context:component-scan base-package="com.dotcore">
        <context:exclude-filter type="annotation" expression="org.springframework.stereotype.Controller"/>
    </context:component-scan>

    <!--    spring的配置文件,这里主要配置和业务逻辑有关的-->
    <!--    数据源,事务处理xxxx-->
    <context:property-placeholder location="classpath:dbconfig.properties"/>

    <bean id="pooledDataSource" class="com.mchange.v2.c3p0.ComboPooledDataSource">
        <property name="jdbcUrl" value="${jdbc.jdbcUrl}"/>
        <property name="driverClass" value="${jdbc.driverClass}"></property>
        <property name="user" value="${jdbc.user}"></property>
        <property name="password" value="${jdbc.password}"></property>
    </bean>
    <!--    数据源,事务处理xxxx-->

    <!--配置和mybatis的整合 -->
    <bean id="sqlSessionFactory" class="org.mybatis.spring.SqlSessionFactoryBean">
        <!--指定mybatis全局配置文件的位置-->
        <property name="configLocation" value="classpath:mybatis-config.xml"></property>
        <property name="dataSource" ref="pooledDataSource"/>
        <!--指定mybatis,mapper文件的位置-->
        <property name="mapperLocations" value="classpath:mapper/*.xml"/>
    </bean>

       <!--配置扫描器,将mybatis接口的实现加入到ioc容器中-->
    <bean class="org.mybatis.spring.mapper.MapperScannerConfigurer">
       <!-- 扫描所有dao接口的实现,加入到ioc容器中-->
        <property name="basePackage" value="com.dotcore.dao"></property>
    </bean>
    <!--配置和mybatis的整合 -->

    <!--事务控制的配置-->
    <!--事务管理器 -->
    <bean id="transactionManager" class="org.springframework.jdbc.datasource.DataSourceTransactionManager">
        <!--控制住数据源-->
        <property name="dataSource" ref="pooledDataSource"/>
    </bean>

    <!-- 开启基于注解的事务,使用xml配置形式的事务(必要主要的都是使用配置式) -->
    <aop:config>
        <!--切入点表达式-->
        <aop:pointcut id="txPoint" expression="execution(* com.dotcore.service..*(..))"></aop:pointcut>
        <!--配置事务增强-->
        <aop:advisor advice-ref="txAdvice" pointcut-ref="txPoint"/>
    </aop:config>

    <!--配置事务增强,事务如何切入-->
    <tx:advice id="txAdvice" transaction-manager="transactionManager">
        <tx:attributes>
            <!--所有方法都是事务方法-->
            <tx:method name="*"/>
            <!--以get开始的所有方法-->
            <tx:method name="get*" read-only="true"/>
        </tx:attributes>
    </tx:advice>
    <!--事务控制的配置-->

<!--    Spring配置文件的核心点(数据源,与mybatis的整合,事务控制)-->
</beans>
最后mybatis的配置文件
<?xml version="1.0" encoding="UTF-8" ?>
<!DOCTYPE configuration
        PUBLIC "-//mybatis.org//DTD Config 3.0//EN"
        "http://mybatis.org/dtd/mybatis-3-config.dtd">
<configuration>
    <!--驼峰命名规则-->
    <settings>
        <setting name="mapUnderscoreToCamelCase" value="true"/>
    </settings>
    <!--别名-->
    <typeAliases>
        <package name="com.dotcore.model"/>
    </typeAliases>
</configuration>
这样,相关的配置文件都配置完毕了
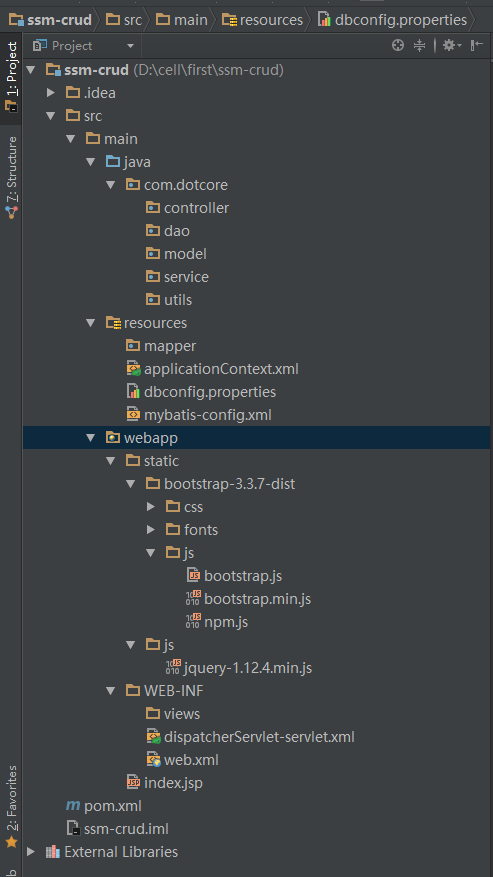
最后配置一张项目的结构图