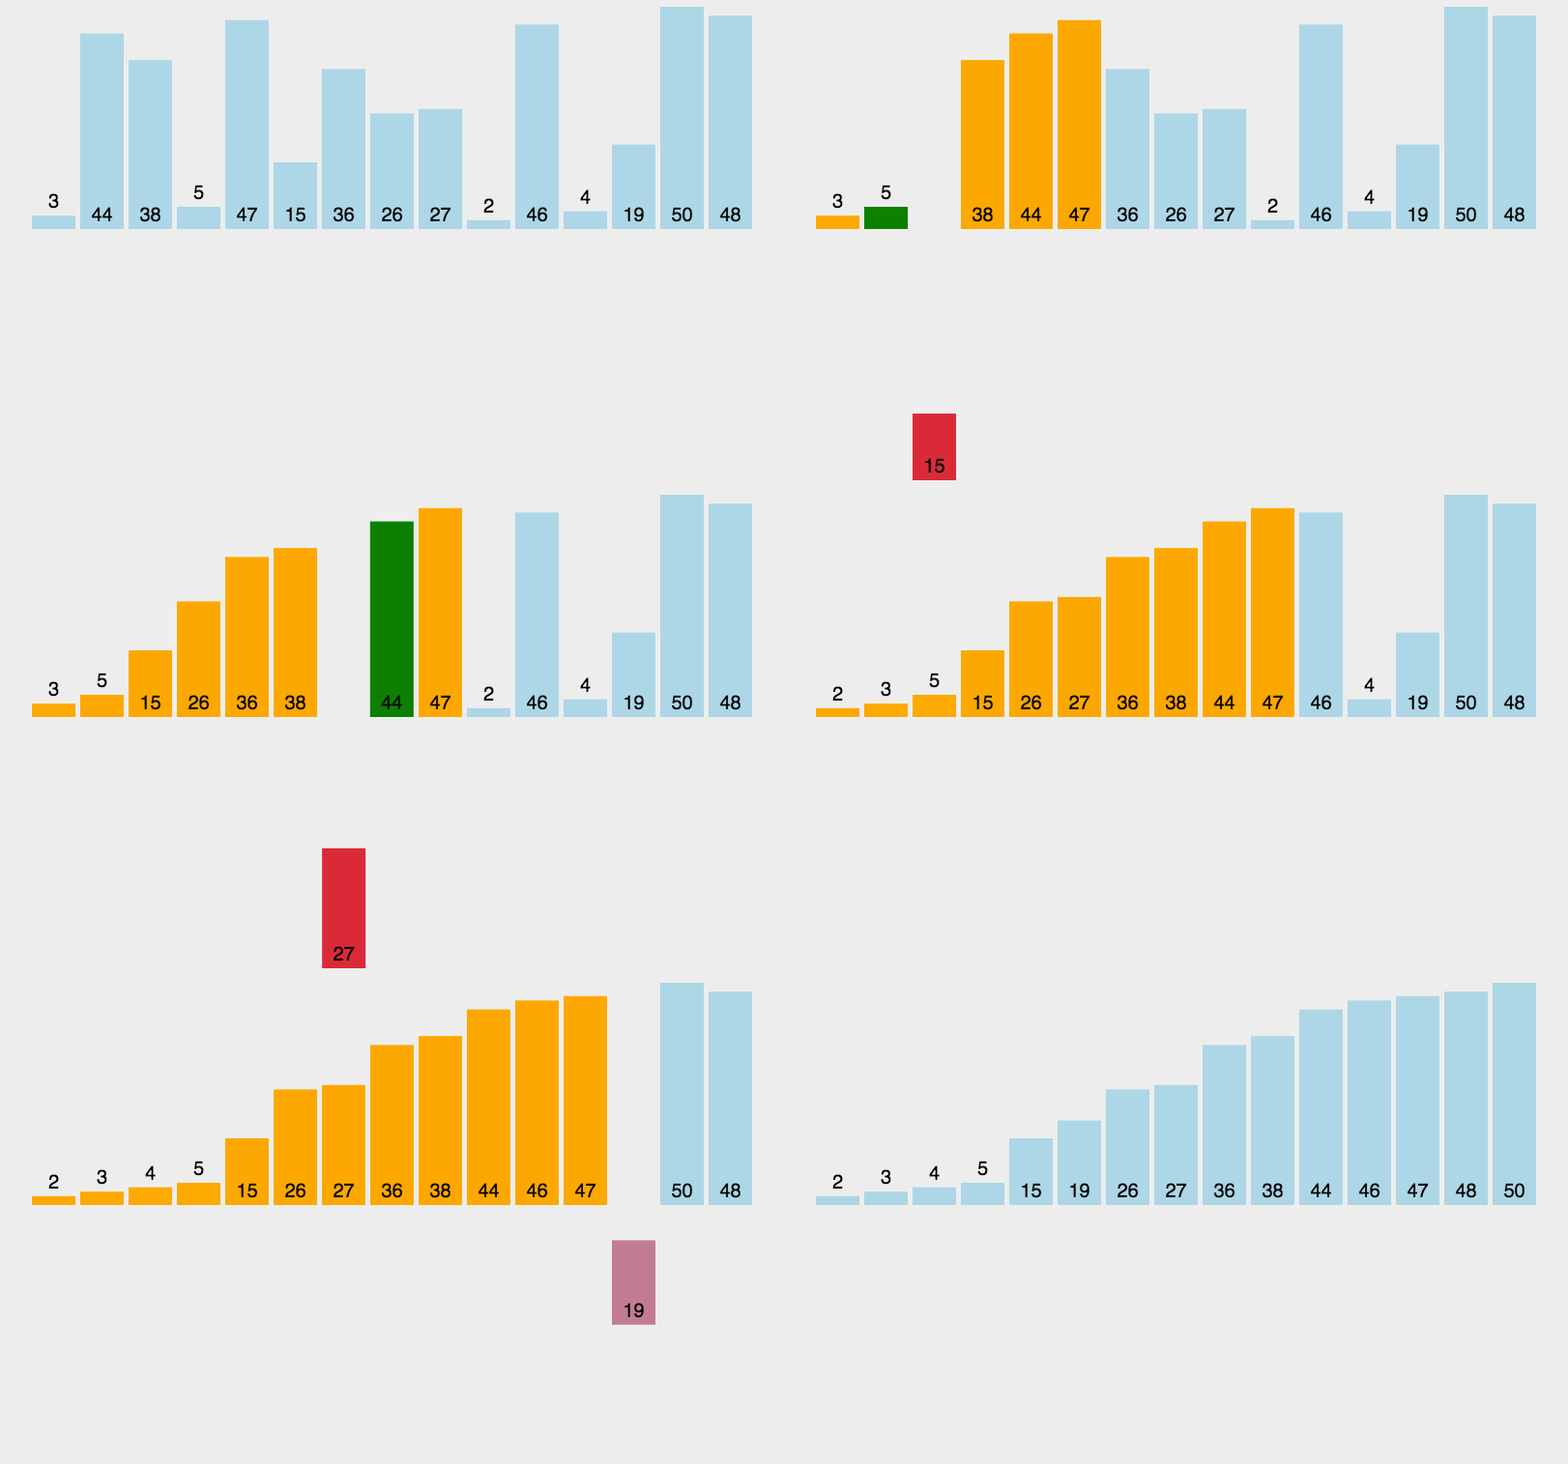
1.插入排序(Insertion Sort)基本思想
- 把n个待排序的元素看成为一个有序表和一个无序表
- 开始时有序表中只包含一个元素,无序表中包含有n-1个元素
- 排序过程中每次从无序表中取出第一个元素,把它的排序码依次与有序表元素的排序码进行比较,将它插入到有序表中的适当位置
- 使之成为新的有序表。
插入排序的时间复杂度为:O(n2)
2.图解

3. 代码实现
1)循环实现
//插入排序
public static void insertSort(int[] arr) {
    int insertVal = 0;
    int insertIndex = 0;

    for(int i = 1; i < arr.length; i++) {
        //定义待插入的数
        insertVal = arr[i];
        insertIndex = i - 1; // 即arr[1]的前面这个数的下标

        // 给insertVal 找到插入的位置
        // 说明
        // 1. insertIndex >= 0 保证在给insertVal 找插入位置,不越界
        // 2. insertVal < arr[insertIndex] 待插入的数,还没有找到插入位置
        // 3. 就需要将 arr[insertIndex] 后移
        while (insertIndex >= 0 && insertVal < arr[insertIndex]) {
            arr[insertIndex + 1] = arr[insertIndex];// arr[insertIndex]
            insertIndex--;
        }
        // 当退出while循环时,说明插入的位置找到, insertIndex + 1
        //这里我们判断是否需要赋值
        if(insertIndex + 1 != i) {
            arr[insertIndex + 1] = insertVal;
        }
    }
}
2)逐步推导:
{101, 34, 119, 1}
第1轮 {101, 34, 119, 1}; => {34, 101, 119, 1}
{101, 34, 119, 1}; => {101,101,119,1}
{101,101,119,1}; => {34,101,119,1}
第2轮 {34, 101, 119, 1}; => {34, 101, 119, 1}
第3轮 {34, 101, 119, 1}; => {1, 34, 101, 119}
{34, 101, 119, 1}; => {34, 101, 119, 119}
{34, 101, 119, 119}; => {34, 101, 101, 119}
{34, 101, 101, 119}; => {34, 34, 101, 119}
{34, 34, 101, 119}; => {1, 34, 101, 119}

//使用逐步推导的方式来讲解,便利理解
//第1轮 {101, 34, 119, 1};  => {34, 101, 119, 1}


//{101, 34, 119, 1}; => {101,101,119,1}
//定义待插入的数
int insertVal = arr[1];
int insertIndex = 1 - 1; //即arr[1]的前面这个数的下标

//给insertVal 找到插入的位置
//说明
//1. insertIndex >= 0 保证在给insertVal 找插入位置,不越界
//2. insertVal < arr[insertIndex] 待插入的数,还没有找到插入位置
//3. 就需要将 arr[insertIndex] 后移
while(insertIndex >= 0 && insertVal < arr[insertIndex] ) {
    arr[insertIndex + 1] = arr[insertIndex];// arr[insertIndex]
    insertIndex--;
}
//当退出while循环时,说明插入的位置找到, insertIndex + 1
//举例:理解不了,我们一会 debug
arr[insertIndex + 1] = insertVal;

System.out.println("第1轮插入");
System.out.println(Arrays.toString(arr));

//第2轮
insertVal = arr[2];
insertIndex = 2 - 1;

while(insertIndex >= 0 && insertVal < arr[insertIndex] ) {
    arr[insertIndex + 1] = arr[insertIndex];// arr[insertIndex]
    insertIndex--;
}

arr[insertIndex + 1] = insertVal;
System.out.println("第2轮插入");
System.out.println(Arrays.toString(arr));


//第3轮
insertVal = arr[3];
insertIndex = 3 - 1;

while (insertIndex >= 0 && insertVal < arr[insertIndex]) {
    arr[insertIndex + 1] = arr[insertIndex];// arr[insertIndex]
    insertIndex--;
}

arr[insertIndex + 1] = insertVal;
System.out.println("第3轮插入");
System.out.println(Arrays.toString(arr));
3)时间测试
public static void main(String[] args) {
    //int[] arr = {101, 34, 119, 1, -1, 89};
    // 创建要给80000个的随机的数组
    int[] arr = new int[80000];
    for (int i = 0; i < 80000; i++) {
        arr[i] = (int) (Math.random() * 8000000); // 生成一个[0, 8000000) 数
    }

    System.out.println("插入排序前");
    Date data1 = new Date();
    SimpleDateFormat simpleDateFormat = new SimpleDateFormat("yyyy-MM-dd HH:mm:ss");
    String date1Str = simpleDateFormat.format(data1);
    System.out.println("排序前的时间是=" + date1Str);

    insertSort(arr); //调用插入排序算法

    Date data2 = new Date();
    String date2Str = simpleDateFormat.format(data2);
    System.out.println("排序前的时间是=" + date2Str);

    //System.out.println(Arrays.toString(arr));
}
