在学习了Android studio的基本使用方法和了解了APP的基本结构后,准备开始开发一个家庭记账本app,就算是对假期学习的一个小小的总结。由于刚接触app方面的知识,所以目前只能开发出一个简单的app项目。
思路构想:用户打开app进入主页 ,会给用户提供两个选择按钮,如果选择“今天花钱了” ,app首先会跳转到账单页并且显示当前所有的消费记录(以商品、购买日期、价格形式显示)。在此页面,用户点击添加按钮后会弹出一个文本框,用户可以依次输入购买的商品名,价格,选择购买日期,来添加消费记录。当用户选择“确定”,则确定添加,同时会回到账单页,并刷新出用户所添加的信息。用户还可以点击“删除所有”按钮来删除数据。至于“今天赚钱了”也类似于“今天花钱了”
下面是app的功能流程图:

今天完成了页面的跳转,代码如下:
1、在layout下创建一个skip_layout.xml文件
<?xml version="1.0" encoding="utf-8"?>
<androidx.constraintlayout.widget.ConstraintLayout xmlns:android="http://schemas.android.com/apk/res/android"
    xmlns:app="http://schemas.android.com/apk/res-auto"
    xmlns:tools="http://schemas.android.com/tools"
    android:layout_width="match_parent"
    android:layout_height="match_parent"
    tools:context=".SkipActivity">

    <TextView
        android:layout_width="wrap_content"
        android:layout_height="wrap_content"
        android:text="跳转的界面!"
        app:layout_constraintBottom_toBottomOf="parent"
        app:layout_constraintLeft_toLeftOf="parent"
        app:layout_constraintRight_toRightOf="parent"
        app:layout_constraintTop_toTopOf="parent" />

</androidx.constraintlayout.widget.ConstraintLayout>
2、编写SkipActivity.java文件,修改启动的界面为skip_layout
package com.example.togglepages;

import android.os.Bundle;

import androidx.appcompat.app.AppCompatActivity;

public class SkipActivity extends AppCompatActivity {

    @Override
    protected void onCreate(Bundle savedInstanceState) {
        super.onCreate(savedInstanceState);
        setContentView(R.layout.skip_layout);
    }
}
3、编辑好SkipActivity.java文件后,要在AndroidMainifest.xml里面注册SkipActivity,注册的代码如下
<?xml version="1.0" encoding="utf-8"?>
<manifest xmlns:android="http://schemas.android.com/apk/res/android"
    package="com.example.mm">

    <application
        android:allowBackup="true"
        android:icon="@mipmap/ic_launcher"
        android:label="@string/app_name"
        android:roundIcon="@mipmap/ic_launcher_round"
        android:supportsRtl="true"
        android:theme="@style/AppTheme.NoActionBar">
        <activity android:name=".MainActivity">
            <intent-filter>
                <action android:name="android.intent.action.MAIN" />

                <category android:name="android.intent.category.LAUNCHER" />
            </intent-filter>
        </activity>
        <activity android:name="com.example.mm.SkipActivity">
    </activity>
        <activity android:name="com.example.mm.SkipActivity1">
        </activity>
    </application>

</manifest>
4、在layout下创建begin_layout.xml并且添加按钮等组件,用来实现点击后跳转界面。
<?xml version="1.0" encoding="utf-8"?>
<RelativeLayout
    xmlns:android="http://schemas.android.com/apk/res/android"
    xmlns:app="http://schemas.android.com/apk/res-auto"
    xmlns:tools="http://schemas.android.com/tools"
    android:layout_width="match_parent"
    android:layout_height="match_parent"
    android:background="#abd5f5"
    android:paddingLeft="30dp"
    android:paddingRight="30dp"
    tools:context=".MainActivity">

    <LinearLayout
        android:id="@+id/top"
        android:layout_width="match_parent"
        android:layout_height="wrap_content"
        android:orientation="vertical"
        android:layout_marginTop="200dp"
        android:layout_marginLeft="5dp"
        android:layout_marginRight="5dp">
           <TextView
               android:layout_width="wrap_content"
               android:layout_height="wrap_content"
               android:layout_gravity="center"
               android:textSize="30sp"
               android:text="记账本">
           </TextView>
    </LinearLayout>

    <Button
        android:id="@+id/btn"
        android:layout_width="match_parent"
        android:layout_height="wrap_content"
        android:layout_below="@+id/top"
        android:layout_marginTop="150dp"
        android:layout_marginLeft="5dp"
        android:layout_marginRight="5dp"
        android:text="今天花钱了"
        android:background="#abd5f5"
        android:gravity="center" />

    <Button
        android:id="@+id/btn1"
        android:layout_width="match_parent"
        android:layout_height="wrap_content"
        android:layout_below="@+id/btn"
        android:layout_marginLeft="5dp"
        android:layout_marginTop="30dp"
        android:layout_marginRight="5dp"
        android:gravity="center"
        android:background="#abd5f5"
        android:text="今天赚钱了" />

</RelativeLayout>
5、添加了按钮后,修改MainActivity.java文件,在onCreate中获取刚刚在界面文件中添加的按钮,并且实现点击事件监听。并在事件触发处理函数中添加界面跳转的代码,实现界面跳转使用了Intent,具体的代码如下
package com.example.togglepages;

import androidx.appcompat.app.AppCompatActivity;

import android.content.Intent;
import android.os.Bundle;
import android.view.View;
import android.widget.Button;

public class MainActivity extends AppCompatActivity {

    @Override
    protected void onCreate(Bundle savedInstanceState) {
        super.onCreate(savedInstanceState);
        setContentView(R.layout.activity_main);

        Button btn=findViewById(R.id.btn);
        btn.setOnClickListener(new View.OnClickListener(){
            @Override
            public void onClick(View v){
                Intent it=new Intent();
                it.setClass(MainActivity.this,SkipActivity.class);
                        MainActivity.this.startActivity(it);

            }
        });
    }
}
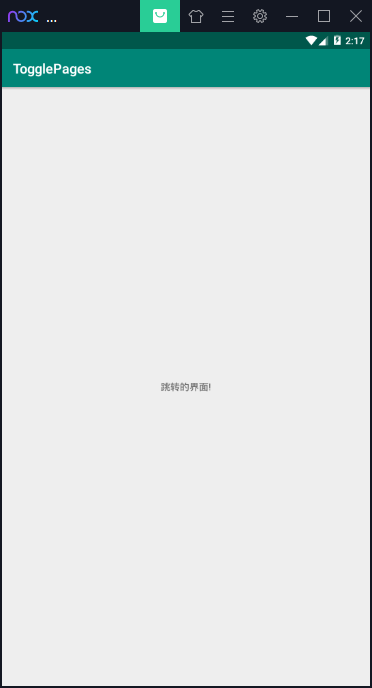
效果图: