BroadcastRecevier广播有两种类型分别是:
标准广播(sendBroadcast(intent)):标准广播是异步执行的广播,广播发出后,所有的广播接收者都是同一时刻接收到通知。
有序广播(sendOrderedBroadcasr(intent,null)):有序广播是同步执行的广播,广播发出后,只有一个广播接收者能接收到,当前接收到的广播接收者执行完逻辑后,广播才会传递给下一个广播接收者。如果上一个接收者截断广播的传递,后面的接收者都不会接收到广播(在清单文件“Intent-filter”通过“android:priority="100"”设置优先级,值越大优先级越高越先收到广播,而且还可以通过BroadcastReceiver类下的“abortBroadcast()”方法截断广播的传递,优先级可选值:-1000 ~ 1000之间)。
广播的注册方式有两种,分别为:
动态注册:需要在代码中指定“IntentFilter”,然后根据自己的需求添加“Action”,记得调用“unregisterReceiver”让广播取消注册。
静态注册:动态注册方式需要程序启动下才能接受到广播,静态注册就弥补了该缺点。静态注册需要在“AndroidManifest”中制定<IntentReceiver>,程序在未启动的情况下就能接受到广播。
动态注册实例:
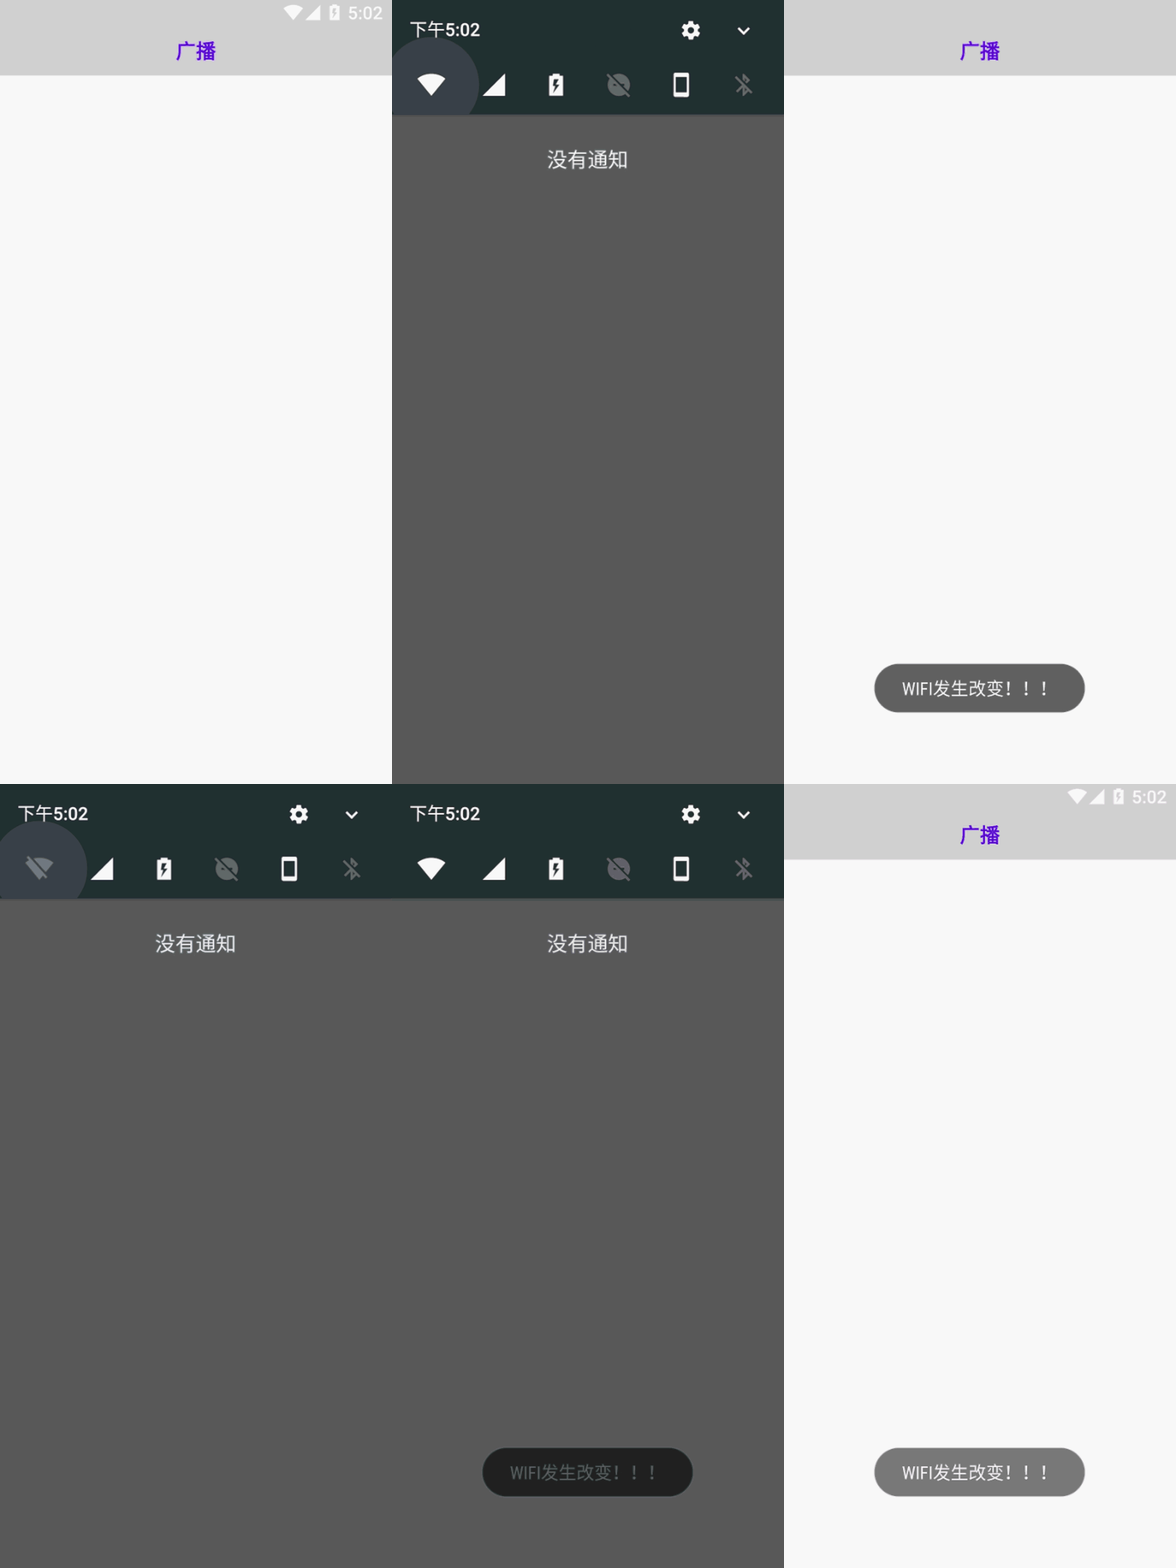
效果图(监听修改WIFI):

代码:
创建一个MyRecevier类,然后在onReceive()方法中实现广播需要处理的事务。

1 public class MyReceiver extends BroadcastReceiver {
2     @Override
3     public void onReceive(Context context, Intent intent) {
4         Toast.makeText(context, "WIFI发生改变!!!", Toast.LENGTH_SHORT).show();
5     }
6 }
在Activity中需要注册广播,最后通过“unregisterReceiver”取消广播。

 1 public class TestActivity extends AppCompatActivity{
 2
 3     private MyReceiver receiver;
 4
 5     @Override
 6     protected void onCreate(Bundle savedInstanceState) {
 7         super.onCreate(savedInstanceState);
 8         setContentView(R.layout.activity_test);
 9         initView();
10     }
11
12     private void initView(){
13         receiver = new MyReceiver();
14         IntentFilter filter = new IntentFilter();
15         filter.addAction("android.net.conn.CONNECTIVITY_CHANGE");
16         registerReceiver(receiver,filter);
17     }
18
19     protected void onDestroy() {
20         super.onDestroy();
21         unregisterReceiver(receiver);
22     }
23 }
静态注册实例:
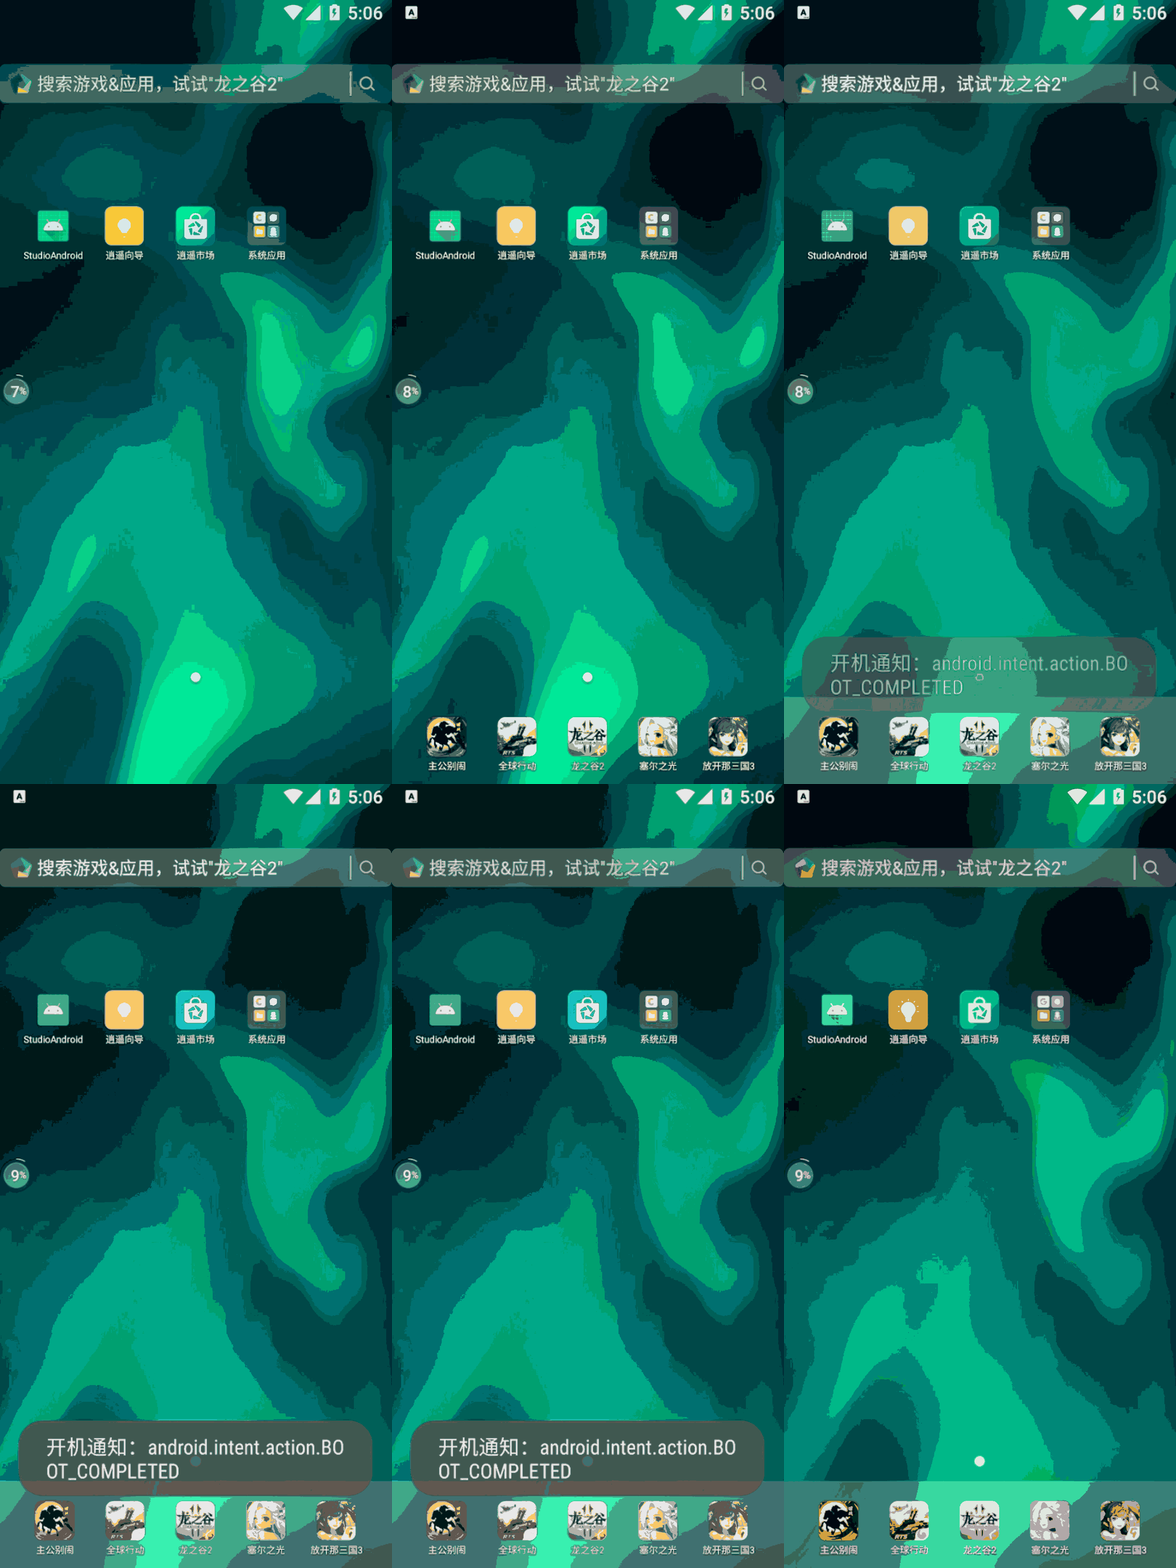
效果图(监听开机):

代码:
创建一个BootRecevier类,然后在onReceive()方法中实现广播需要处理的事务。

1 public class BootRecevier extends BroadcastReceiver {
2     private String BOOT = "android.intent.action.BOOT_COMPLETED";
3     @Override
4     public void onReceive(Context context, Intent intent) {
5         if(intent.getAction().equals(BOOT))
6             Toast.makeText(context, "开机通知:" + intent.getAction(), Toast.LENGTH_SHORT).show();
7     }
8 }
在“AndroidManifest”中加入权限“android.RECEIVE_COMPLETED”,制定<IntentReceiver>,注册刚刚创建的“BootReceiver”,代码如下:

1 <!--静态注册权限-->
2 <uses-permission android:name="android.permission.RECEIVE_BOOT_COMPLETED" />
3
4 <receiver android:name=".BootRecevier">
5     <intent-filter>
6         <action android:name="android.intent.action.BOOT_COMPLETED" />
7     </intent-filter>
8 </receiver>
注:不能再广播里添加过多的耗时操作逻辑,广播不允许开辟线程。onReceive()方法运行时间过长(超过10秒)还没有结束,程序就会报错(ANR),广播的更多用处是打开组件(Service、Notification提示、Activity...)
标准广播实例:
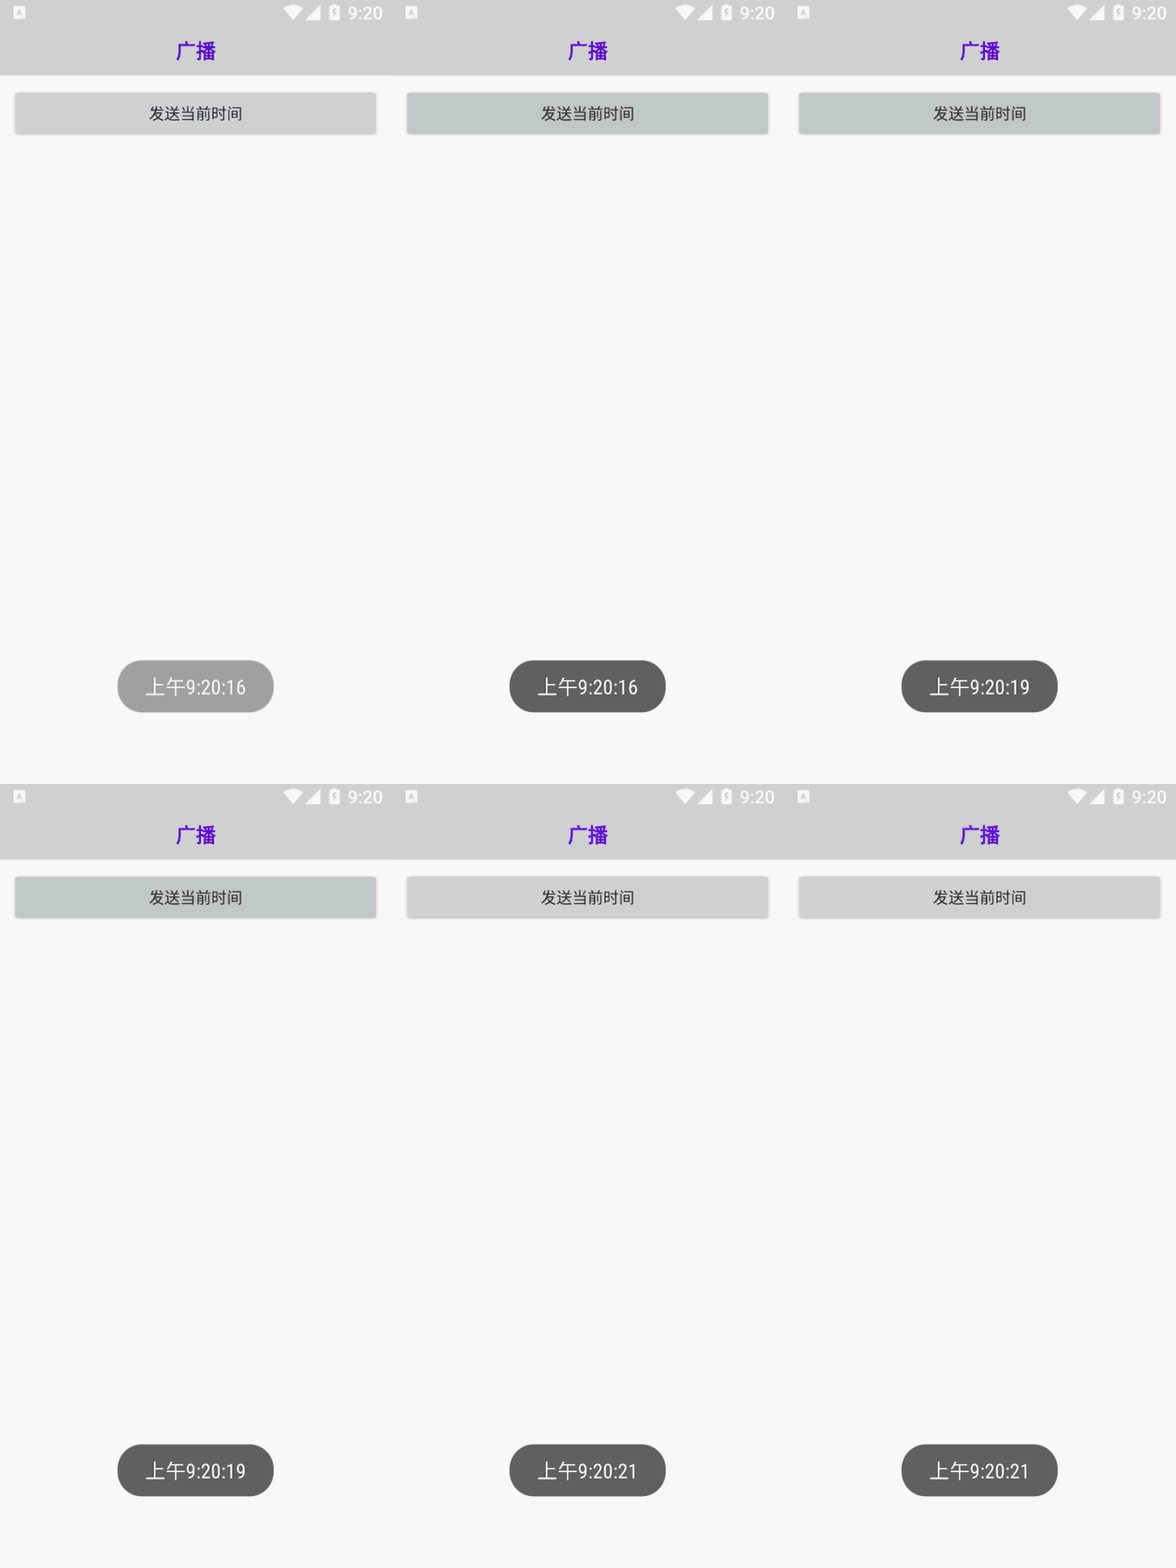
效果图(自定义发送广播):

代码:
创建一个CustomRecevier类,然后在onReceive()方法中实现Toast事务。

1 public class CustomRecevier extends BroadcastReceiver {
2     @Override
3     public void onReceive(Context context, Intent intent) {
4         if(intent.getAction().equals("test"))
5             Toast.makeText(context, intent.getStringExtra("msg"), Toast.LENGTH_SHORT).show();
6     }
7 }
在“AndroidManifest”中定制<IntentFilter>

1 <receiver android:name=".CustomRecevier">
2     <intent-filter>
3           <action android:name="test"/>
4     </intent-filter>
5 </receiver>
Activity中使用“sendBroadcast(intent)”

 1 public class TestActivity extends AppCompatActivity implements View.OnClickListener {
 2     @Override
 3     protected void onCreate(Bundle savedInstanceState) {
 4         super.onCreate(savedInstanceState);
 5         setContentView(R.layout.activity_test);
 6         initView();
 7     }
 8
 9     private void initView(){
10         Button btn = findViewById(R.id.btnTime);
11         btn.setOnClickListener(this);
12     }
13
14     @Override
15     public void onClick(View v) {
16         String time = DateFormat.getTimeInstance().format(new Date());
17         Intent intent = new Intent("test");
18         intent.putExtra("msg",time);
19         sendBroadcast(intent);
20     }
21 }
layout代码

 1 <?xml version="1.0" encoding="utf-8"?>
 2 <LinearLayout xmlns:android="http://schemas.android.com/apk/res/android"
 3     xmlns:app="http://schemas.android.com/apk/res-auto"
 4     xmlns:tools="http://schemas.android.com/tools"
 5     android:layout_width="match_parent"
 6     android:layout_height="match_parent"
 7     android:orientation="vertical"
 8     tools:context=".TestActivity">
 9     <TextView
10         android:text="广播"
11         android:textStyle="bold"
12         android:textSize="18sp"
13         android:textColor="@color/colorPrimary"
14         android:background="@color/colorPrimaryDark"
15         android:gravity="center"
16         android:layout_width="match_parent"
17         android:layout_height="45dp"/>
18
19     <Button
20         android:id="@+id/btnTime"
21         android:text="发送当前时间"
22         android:layout_margin="10dp"
23         android:layout_width="match_parent"
24         android:layout_height="wrap_content"/>
25 </LinearLayout>
