前提简介:这里之后即使基于IDEA进行开发的,风格与之前有些不同之处!
1、服务端的开发
1、创建新的项目
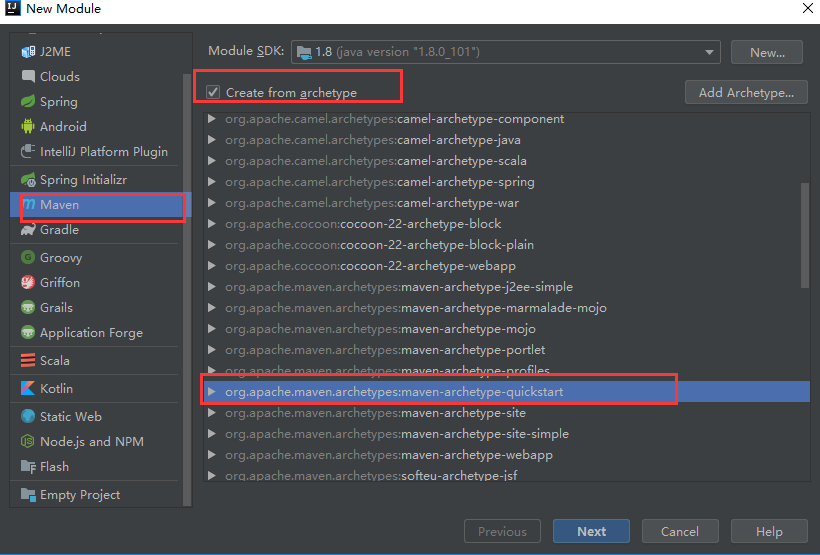
2、pom.xml
添加开发时所需要的依赖
<?xml version="1.0" encoding="UTF-8"?>
<project xmlns="http://maven.apache.org/POM/4.0.0" xmlns:xsi="http://www.w3.org/2001/XMLSchema-instance"
  xsi:schemaLocation="http://maven.apache.org/POM/4.0.0http://maven.apache.org/xsd/maven-4.0.0.xsd">
  <modelVersion>4.0.0</modelVersion>

  <groupId>com.cr</groupId>
  <artifactId>jaxws_server</artifactId>
  <version>1.0-SNAPSHOT</version>

  <name>jaxws_server</name>
  <!-- FIXME change it to the project's website -->
  <url>http://www.example.com</url>

  <properties>
    <project.build.sourceEncoding>UTF-8</project.build.sourceEncoding>
    <maven.compiler.source>1.7</maven.compiler.source>
    <maven.compiler.target>1.7</maven.compiler.target>
  </properties>


  <dependencies>
    <dependency>
      <groupId>org.apache.cxf</groupId>
      <artifactId>cxf-rt-frontend-jaxws</artifactId>
      <version>3.0.1</version>
    </dependency>

    <!-- 内置jetty服务器 -->
    <dependency>
      <groupId>org.apache.cxf</groupId>
      <artifactId>cxf-rt-transports-http-jetty</artifactId>
      <version>3.0.1</version>
    </dependency>

    <!--日志-->
    <dependency>
      <groupId>org.slf4j</groupId>
      <artifactId>slf4j-log4j12</artifactId>
      <version>1.7.12</version>
      <scope>test</scope>
    </dependency>

    <dependency>
      <groupId>junit</groupId>
      <artifactId>junit</artifactId>
      <version>4.11</version>
      <scope>test</scope>
    </dependency>
  </dependencies>

  <build>
    <pluginManagement><!-- lock down plugins versions to avoid using Maven defaults (may be moved to parent pom) -->
      <plugins>
        <!-- clean lifecycle, see https://maven.apache.org/ref/current/maven-core/lifecycles.html#clean_Lifecycle -->
        <plugin>
          <artifactId>maven-clean-plugin</artifactId>
          <version>3.1.0</version>
        </plugin>
        <!-- default lifecycle, jar packaging: see https://maven.apache.org/ref/current/maven-core/default-bindings.html#Plugin_bindings_for_jar_packaging -->
        <plugin>
          <artifactId>maven-resources-plugin</artifactId>
          <version>3.0.2</version>
        </plugin>
        <plugin>
          <artifactId>maven-compiler-plugin</artifactId>
          <version>3.8.0</version>
        </plugin>
        <plugin>
          <artifactId>maven-surefire-plugin</artifactId>
          <version>2.22.1</version>
        </plugin>
        <plugin>
          <artifactId>maven-jar-plugin</artifactId>
          <version>3.0.2</version>
        </plugin>
        <plugin>
          <artifactId>maven-install-plugin</artifactId>
          <version>2.5.2</version>
        </plugin>
        <plugin>
          <artifactId>maven-deploy-plugin</artifactId>
          <version>2.8.2</version>
        </plugin>
        <!-- site lifecycle, see https://maven.apache.org/ref/current/maven-core/lifecycles.html#site_Lifecycle -->
        <plugin>
          <artifactId>maven-site-plugin</artifactId>
          <version>3.7.1</version>
        </plugin>
        <plugin>
          <artifactId>maven-project-info-reports-plugin</artifactId>
          <version>3.0.0</version>
        </plugin>
        <plugin>
          <groupId>org.apache.maven.plugins</groupId>
          <artifactId>maven-compiler-plugin</artifactId>
          <version>3.2</version>
          <configuration>
             <source>1.8</source>
              <target>1.8</target>
             <encoding>UTF-8</encoding>
            <showWarnings>true</showWarnings>
          </configuration>
        </plugin>
      </plugins>
    </pluginManagement>
  </build>
</project>
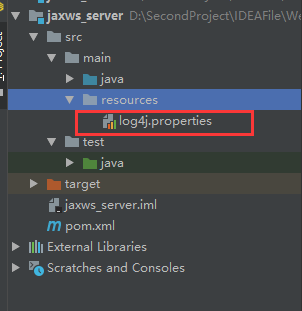
3、工程目录:

4、类的设计
接口类:在客户端的接口类需要和服务端的接口类再同一个包中
helloService.java
package com.cr.service;
import javax.jws.WebService;
//对外发布的接口
@WebService
public interface helloService {
    //对外发布服务接口的方法
    public String  sayHello(String name);
}
接口实现类
helloSericeImpl.java
package com.cr.service.impl;
import com.cr.service.helloService;

public class helloSericeImpl implements helloService {
    @Override
    public String sayHello(String name) {
        return "欢迎"+name;
    }
}
发布服务:
package com.cr;

import com.cr.service.impl.helloSericeImpl;
import org.apache.cxf.jaxws.JaxWsServerFactoryBean;

public class serverTest {

    public static void main(String[] args) {

        //发布服务的工厂
        JaxWsServerFactoryBean factory = new JaxWsServerFactoryBean();
        //设置服务地址
        factory.setAddress("http://localhost:8000/ws/hello");
        //设置服务类、
        factory.setServiceBean(new helloSericeImpl());
        //发布服务
        factory.create();
        System.out.println("发布服务成功....");
    }
}
此时的控制台的输出情况:

5、查看wsdl地址内容

浏览器输入地址+ ?wsdl
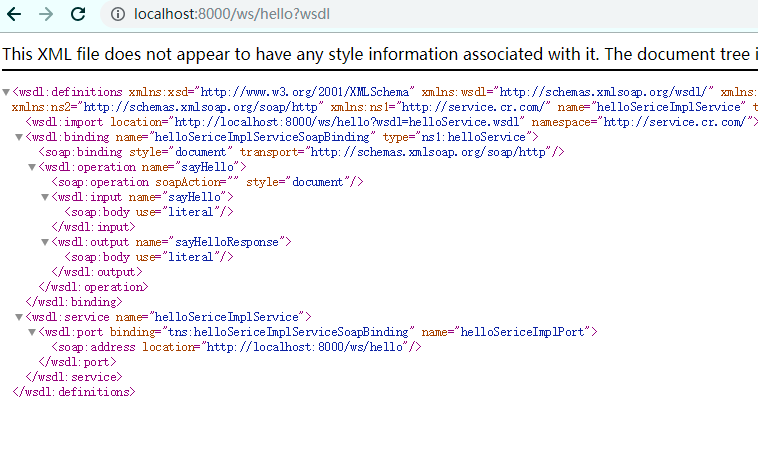
阅读顺序自下向上
此时若需要读懂wsdl文件方向是自下向上
2、客户端的开发
1、创建项目(同上,以及pom文件的依赖)
2、工程结构
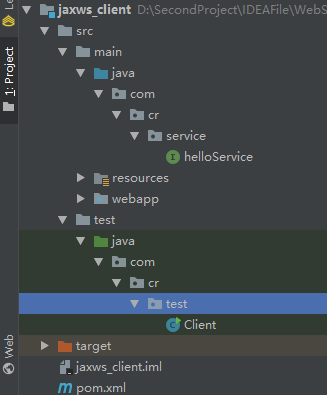
3、类的实现
接口类:这里的接口的包名需要和服务端的接口类报名保持一致
helloService.java
package com.cr.service;


import javax.jws.WebService;
//对外发布服务的接口
@WebService
public interface helloService {
  //对外发布服务接口的方法
  public String sayHello(String name);
 }
测试类:
package com.cr.test;

import com.cr.service.helloService;
import org.apache.cxf.jaxws.JaxWsProxyFactoryBean;


public class Client {
    public static void main(String[] args) {

        //服务接口访问地址http://localhost:8000/ws/hello

        //创建cxf代理工厂
        JaxWsProxyFactoryBean factory= new JaxWsProxyFactoryBean();

        //设置服务的地址
        factory.setAddress("http://localhost:8000/ws/hello");

        //设置接口类型
        factory.setServiceClass(helloService.class);

        //对接口生成代理对象
        helloService helloService = factory.create(helloService.class);

        System.out.println(helloService.getClass());

        //远程访问服务端方法
        String qq = helloService.sayHello("qq");
        System.out.println(qq);
    }
}
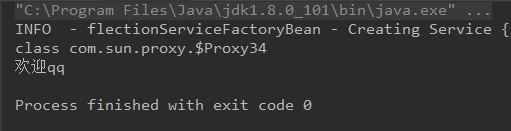
这里的代理时时JDK代理class com.sun.proxy.$Proxy34
java中的代理:
1、静态代理
2、动态代理
动态代理包括:
1、jdk接口代理:$Proxy34
2、cglib代理:¥CGLIB123
问题:我们想要知道数据交互的格式:
在服务的添加log4j日志文件
log4j.appender.Stdout=org.apache.log4j.ConsoleAppender
log4j.appender.Stdout.layout=org.apache.log4j.PatternLayout
log4j.appender.Stdout.layout.conversionPattern=%-5p - %-26.26c{1} - %m


log4j.rootLogger=INFO,Stdout

log4j.logger.org.apache.wicket=INFO
log4j.logger.org.apache.wicket.protocol.http.HttpSessionStore=INFO
log4j.logger.org.apache.wicket.version=INFO
log4j.logger.org.apache.wicket.RequestCycle=INFO

log4j.appender.LOGFILE=org.apache.log4j.FileAppender
log4j.appender.LOGFILE.File=d:file.log
log4j.appender.LOGFILE.Append=true
log4j.appender.LOGFILE.layout=org.apache.log4j.PatternLayout
在测试的代码中:
package com.cr;

import com.cr.service.impl.helloSericeImpl;
import org.apache.cxf.interceptor.LoggingInInterceptor;
import org.apache.cxf.interceptor.LoggingOutInterceptor;
import org.apache.cxf.jaxws.JaxWsServerFactoryBean;

public class serverTest {

    public static void main(String[] args) {

        //发布服务的工厂
        JaxWsServerFactoryBean factory = new JaxWsServerFactoryBean();

        //设置服务地址
        factory.setAddress("http://localhost:8000/ws/hello");

        //设置服务类、
        factory.setServiceBean(new helloSericeImpl());

        //设置日志输入、输出拦截器、观察soap请求的相应内容
        factory.getInInterceptors().add(new LoggingInInterceptor());
        factory.getOutInterceptors().add(new LoggingOutInterceptor());

        //发布服务
        factory.create();

        System.out.println("发布服务成功....");
    }
}
此时再次请求Client
控制台中

ID: 1
Address: http://localhost:8000/ws/hello
Encoding: UTF-8
Http-Method: POST
Content-Type: text/xml; charset=UTF-8
Headers: {Accept=[*/*], Cache-Control=[no-cache], connection=[keep-alive], Content-Length=[188], content-type=[text/xml; charset=UTF-8], Host=[localhost:8000], Pragma=[no-cache], SOAPAction=[""], User-Agent=[Apache CXF 3.0.1]}
Payload: <soap:Envelope xmlns:soap="http://schemas.xmlsoap.org/soap/envelope/"><soap:Body><ns2:sayHello xmlns:ns2="http://service.cr.com/"><arg0>qq</arg0></ns2:sayHello></soap:Body></soap:Envelope>
--------------------------------------
INFO  - helloService               - Outbound Message
---------------------------
ID: 1
Response-Code: 200
Encoding: UTF-8
Content-Type: text/xml
Headers: {}
Payload: <soap:Envelope xmlns:soap="http://schemas.xmlsoap.org/soap/envelope/"><soap:Body><ns2:sayHelloResponse xmlns:ns2="http://service.cr.com/"><return>欢迎qq</return></ns2:sayHelloResponse></soap:Body></soap:Envelope>
--------------------------------------
此时可以看出请求与响应的相关消息!!