开发环境 :
IDe :iDEA
JDK:1.8
使用的框架技术:Mybtais ,Spring,Spring MVC 数据源选用Dbcp
首先贴上我们的项目结构,很简单的一个Demo层次分明
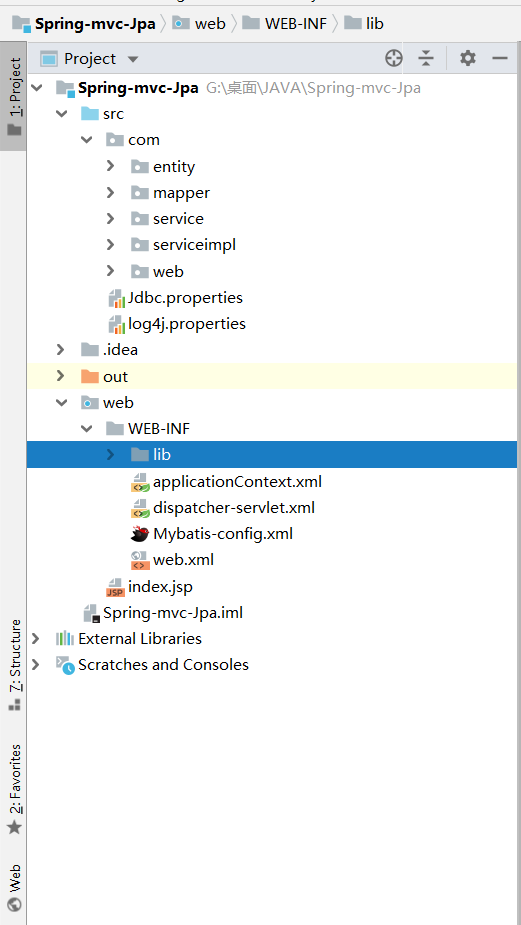
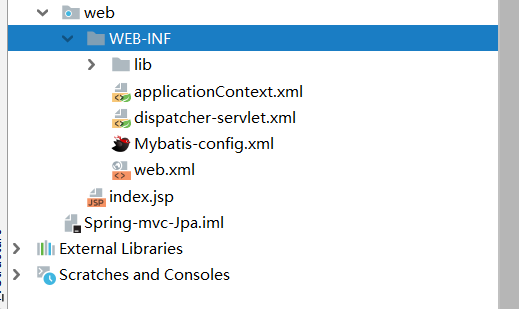
当我们使用IDea创建Spring MVC项目时Idea会自动为我们加入Web组件 我们可以看到我们的配置文件并没有像myeclipse一样在Src下 ,IDea默认给我们的配置文件放到了Web/web-inf文件夹下
上面这些JAr是我们自己导入的,让我们来看一下

以下的Jar包为Idea自动为我们下载并且添加到项目中的,在这里不多做阐述
按照Mvc的流程来说项目对应实体结构如下
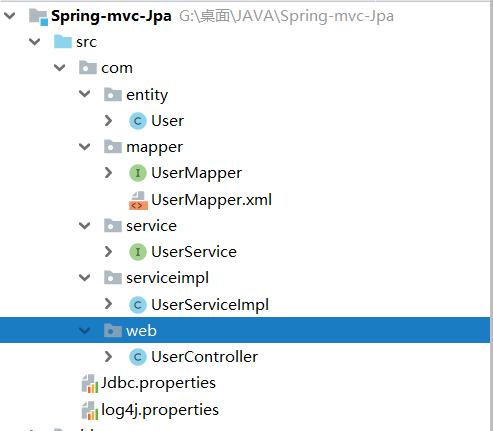
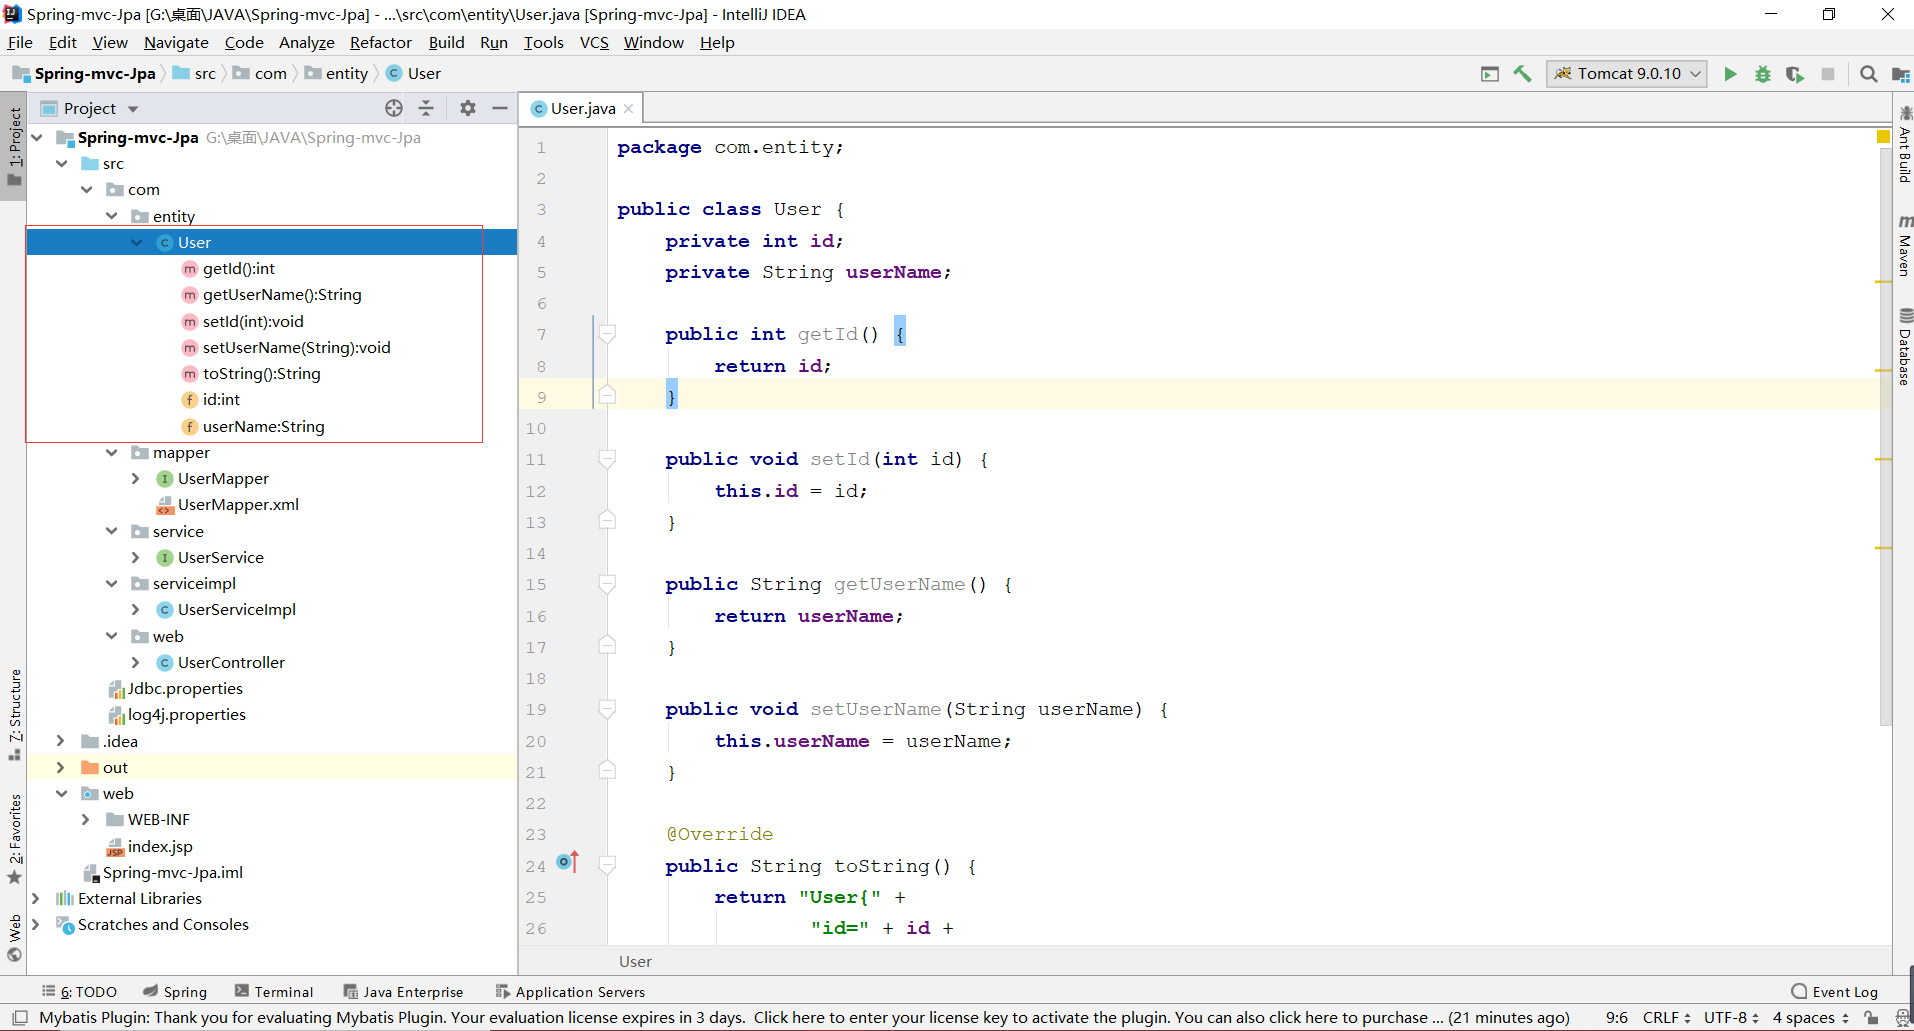
我们在entity包中创建我们与数据库相连接,并且指定对应表内字段的一一对应。
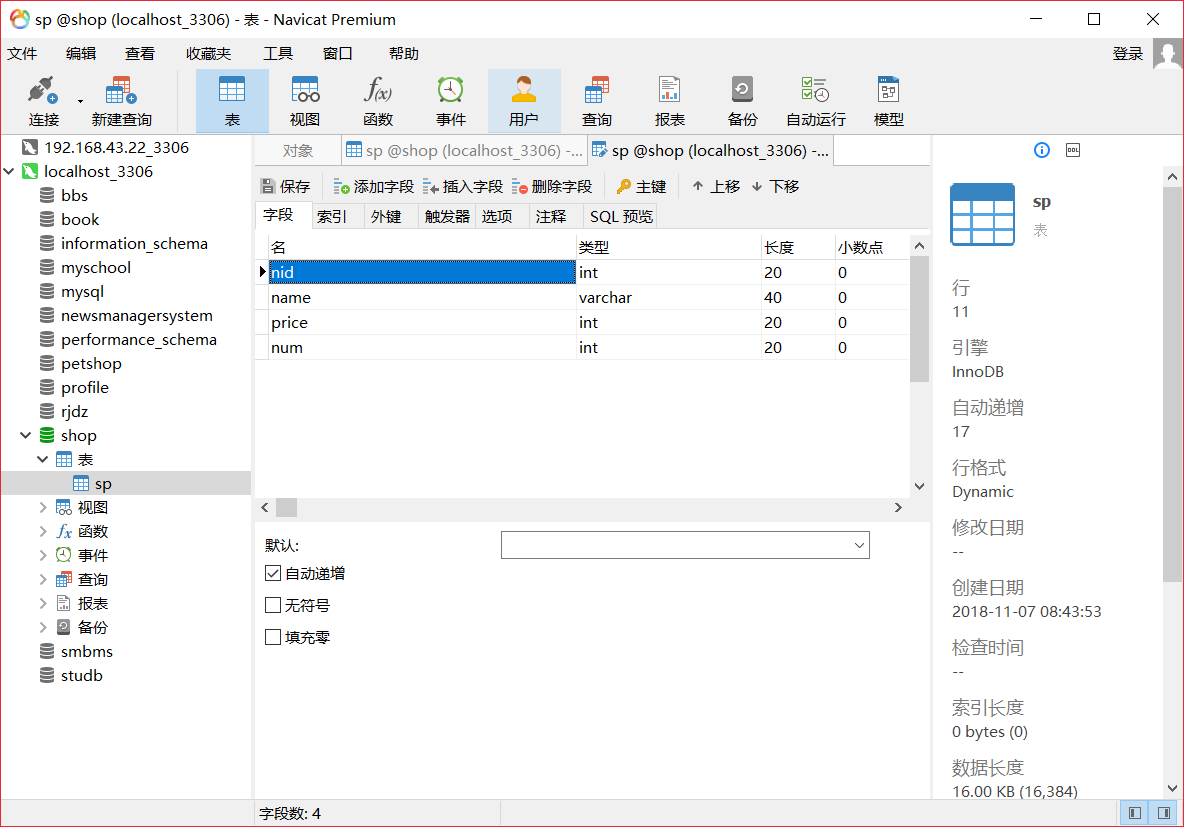
数据库字段如下
通常的执行流程为:Serviceimpl调用和对应Mapper 来实现对数据库的增删改查等一系列功能
这里演示了一个简单的查询全部,并且使用 El 和JStl将查询的数据显示到JSp页面上,
Mapper
 1 package com.mapper;
 2
 3 import com.entity.User;
 4 import org.springframework.stereotype.Repository;
 5
 6 import java.util.List;
 7 @Repository
 8 public interface UserMapper {

  与下面对应Mapper中的Id向对应
 9     List<User> cxall();
10 }
于是便引入今天的第一个配置,对对应Mapper的操作映射
<?xml version="1.0" encoding="UTF-8"?>
<!DOCTYPE mapper PUBLIC "http://mybatis.org/dtd/mybatis-3-mapper.dtd" "mybatis-3-mapper.dtd" >

引入对对应Mapper操作的命名空间,来告诉Mybatis 我们要对哪一个Mapper执行什么样的操作
<mapper namespace="com.mapper.UserMapper">
简单查询,id对应Mapper中的查询方法名, 返回结果集也是一个User类型的
    <select id="cxall" resultType="User">
        select * from smbms_user
    </select>
</mapper>
Service:
 1 package com.service;
 2
 3 import com.entity.User;
 4 import org.springframework.stereotype.Repository;
 5
 6 import java.util.List;
 7
 8 public interface UserService {
 9     List<User> cxall();
10 }
以及Service的实现:
package com.serviceimpl;

import com.entity.User;
import com.mapper.UserMapper;
import com.service.UserService;
import org.springframework.beans.factory.annotation.Autowired;
import org.springframework.stereotype.Service;

import java.util.List;
@Service
public class UserServiceImpl implements UserService {
  使用自动注入将UserMapper注入到当前Service的实现中,调用其方法
    @Autowired
    private UserMapper userMapper;
    @Override
    public List<User> cxall() {
        return userMapper.cxall();
    }
}
controller:
 1 package com.web;
 2
 3 import com.alibaba.fastjson.JSON;
 4 import com.entity.User;
 5 import com.service.UserService;
 6 import org.springframework.beans.factory.annotation.Autowired;
 7 import org.springframework.stereotype.Controller;
 8 import org.springframework.web.bind.annotation.RequestMapping;
 9 import org.springframework.web.bind.annotation.ResponseBody;
10
11 import java.util.List;
12 @RequestMapping("/user")
13 @Controller
14 public class UserController {
  注入Service 调用其子类的实现15     @Autowired
16     private UserService userService;
17
  结果返回页面的Json格式乱码的问题
18     @RequestMapping(value = "/cx.do",produces = {"text/javascript;charset=UTF-8"})
19     @ResponseBody
20     public String cx(){
21         List<User> cxall = userService.cxall();
22         String JSon= JSON.toJSONString(cxall);
23         return JSon;
24     }
25 }
如上便是这个小Demo的经典三层实现,下面我们来说说为什么通过这么简单的操作就可以达到我们所要的效果呢?
首先我们来看一下我们的Jdbc配置文件
jdbc.properties
1 jdbc.driver=com.mysql.jdbc.Driver
2 jdbc.uri=jdbc:mysql://localhost:3306/smbms?useUnicode=true&characterEncoding=utf8
3 jdbc.name=root
4 jdbc.pwd=1234
Log4J.properties
log4j.rootLogger=debug, stdout,logfile

log4j.appender.stdout=org.apache.log4j.ConsoleAppender
log4j.appender.stdout.Target=System.err
log4j.appender.stdout.layout=org.apache.log4j.SimpleLayout

log4j.appender.logfile=org.apache.log4j.FileAppender
log4j.appender.logfile.File=jbit.log
log4j.appender.logfile.layout=org.apache.log4j.PatternLayout
log4j.appender.logfile.layout.ConversionPattern=%d{yyyy-MM-dd HH:mm:ss}%l %F %p %m%n
org.apache.jasper.servlet.TldScanner.level = FINE
重点在下面,我们看一下Idea自动在为我们配置了什么,我们想当这个项目启动的时候,就自动为启动我们SpringMvc的组件,那么我们这个Demo是一个Web工程,并不需要对应的Main方法之类,那我们究竟改怎么做呢?
我们来看一下Web.xml文件
<?xml version="1.0" encoding="UTF-8"?>
<web-app xmlns="http://xmlns.jcp.org/xml/ns/javaee"
         xmlns:xsi="http://www.w3.org/2001/XMLSchema-instance"
         xsi:schemaLocation="http://xmlns.jcp.org/xml/ns/javaee http://xmlns.jcp.org/xml/ns/javaee/web-app_4_0.xsd"
         version="4.0">
    配置上下文参数,在项目启动的时候自动加载Spring的配置文件
    <context-param>
        <param-name>contextConfigLocation</param-name>
        <param-value>/WEB-INF/applicationContext.xml</param-value>
    </context-param>
    同理,自动加载Mvc配置文件,加载位置是在Web/web-inf/文件夹下,通常我们在Myeclipse中的配置文件是在Src下 ,这里不要搞混淆
    <context-param>
        <param-name>spring</param-name>
        <param-value>/WEB-INF/dispatcher-servlet.xml</param-value>
    </context-param>
    配置过滤器
    <filter>
        <filter-name>filter</filter-name>
        <filter-class>org.springframework.web.filter.CharacterEncodingFilter</filter-class>
        <init-param>
            <param-name>encoding</param-name>
            <param-value>UTF-8</param-value>
        </init-param>
    </filter>
    <filter-mapping>
        <filter-name>filter</filter-name>
        <url-pattern>/*</url-pattern>
    </filter-mapping>
   配置了监听器
    <listener>
        <listener-class>org.springframework.web.context.ContextLoaderListener</listener-class>
    </listener>
    配置了前端控制器
    <servlet>
        <servlet-name>dispatcher</servlet-name>
        <servlet-class>org.springframework.web.servlet.DispatcherServlet</servlet-class>
        <load-on-startup>1</load-on-startup>
    </servlet>
     对所有访问为.do的访问进行拦截处理
    <servlet-mapping>
        <servlet-name>dispatcher</servlet-name>
        <url-pattern>*.do</url-pattern>
    </servlet-mapping>
</web-app>
Spring配置文件
 1 <?xml version="1.0" encoding="UTF-8"?>
 2 <beans xmlns="http://www.springframework.org/schema/beans"
 3        xmlns:xsi="http://www.w3.org/2001/XMLSchema-instance"
 4        xmlns:context="http://www.springframework.org/schema/context"
 5        xsi:schemaLocation="http://www.springframework.org/schema/beans
 6         http://www.springframework.org/schema/beans/spring-beans.xsd
 7          http://www.springframework.org/schema/context
 8           http://www.springframework.org/schema/context/spring-context.xsd">

        加载类路径下的Jdbc配置文件
 9     <context:property-placeholder location="classpath:Jdbc.properties"></context:property-placeholder>
10
      配置Dbcp数据源
11     <bean id="dataSource" class="org.apache.commons.dbcp2.BasicDataSource">
12         <property name="driverClassName" value="${jdbc.driver}"></property>
13         <property name="url" value="${jdbc.uri}"></property>
14         <property name="username" value="${jdbc.name}"></property>
15         <property name="password" value="${jdbc.pwd}"></property>
16     </bean>
17       配置SqlsessionFactory用来创建Sqlsession
18     <bean id="SqlSessionFactory" class="org.mybatis.spring.SqlSessionFactoryBean">
19     <property name="dataSource" ref="dataSource"></property>
    对该包下的实体类起别名  不需要用全类名的方法要标记
20     <property name="typeAliasesPackage" value="com.entity"></property>
      扫描对应的Mapper.xml  需要引入的Mapper.Xml
21         <property name="mapperLocations">
22             <list>
23                 <value>classpath*:com/mapper/UserMapper.xml</value>
24             </list>
25         </property>
26     </bean>
27       配置Mapper扫描,对指定mAooer包下的的Mapper生成对应的实现,并且注入Spring容器
28     <bean class="org.mybatis.spring.mapper.MapperScannerConfigurer">
29         <property name="basePackage" value="com.mapper"></property>
30     </bean>
31
32 </beans>
mvc配置:
 1 <?xml version="1.0" encoding="UTF-8"?>
 2 <beans xmlns="http://www.springframework.org/schema/beans"
 3        xmlns:xsi="http://www.w3.org/2001/XMLSchema-instance"
 4        xmlns:context="http://www.springframework.org/schema/context"
 5        xmlns:mvc="http://www.springframework.org/schema/mvc"
 6        xsi:schemaLocation="http://www.springframework.org/schema/beans
 http://www.springframework.org/schema/beans/spring-beans.xsd
 http://www.springframework.org/schema/cache
 http://www.springframework.org/schema/cache/spring-cache.xsd
 http://www.springframework.org/schema/context
 http://www.springframework.org/schema/context/spring-context.xsd
 http://www.springframework.org/schema/mvc http://www.springframework.org/schema/mvc/spring-mvc.xsd">
 7     <!--mvc自动配置-->
 8     <mvc:annotation-driven/>
     扫描对应文件夹下的所有类 开启注解
 9     <context:component-scan base-package="com"></context:component-scan>
10     <!-- 视图解析器 -->
11     <bean class="org.springframework.web.servlet.view.InternalResourceViewResolver">
12         <property name="viewClass" value="org.springframework.web.servlet.view.JstlView"/>
13         <property name="prefix" value="/"/>
14         <property name="suffix" value=".jsp"/>
15     </bean>
16 </beans>
上述有一点需要注意的是:在我们开启Mvc配置的时候一定要导入Mvc的命名空间,
实例:
项目运行测试:
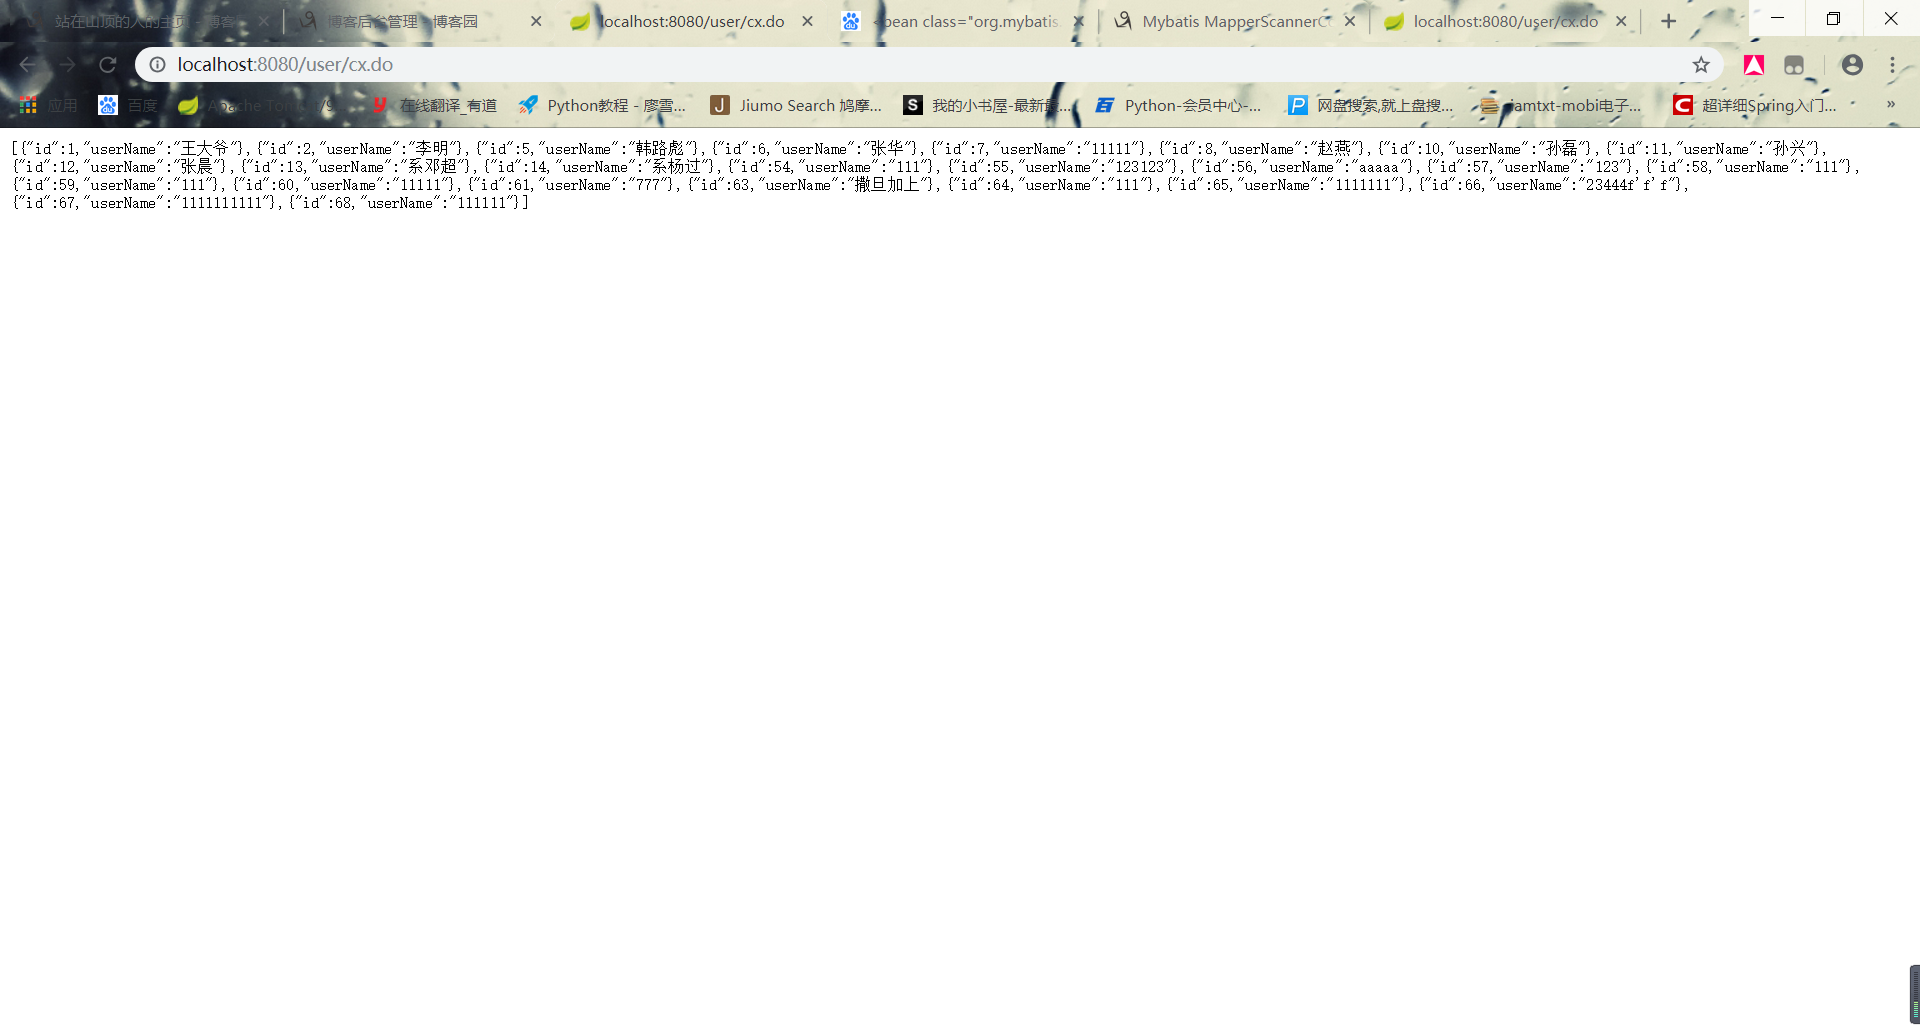
前台以Json格式返回。没有进行多余的操作。若有问题敬请大佬指正,想要一起学习交流的欢迎加入Java交流群:682677231