一、部署jar包
1.在项目目录下,输入mvn install
2.输入以下命令运行
java -jar target/demo_zhang-0.0.1-SNAPSHOT.jar
二、部署war包
1.application新加@ServletComponentScan注解,且继承SpringBootServletInitializer
package com.example.demo_zhang;

import org.springframework.boot.SpringApplication;
import org.springframework.boot.autoconfigure.SpringBootApplication;
import org.springframework.boot.web.servlet.ServletComponentScan;
import org.springframework.boot.web.servlet.support.SpringBootServletInitializer;

@SpringBootApplication
@ServletComponentScan
public class DemoZhangApplication extends SpringBootServletInitializer {
    public static void main(String[] args) {
        SpringApplication.run(DemoZhangApplication.class, args);
    }

}
2.pom.xml修改
在
<packaging>war</packaging>
在<dependencies>中填入
<dependency>
    <groupId>org.springframework.boot</groupId>
    <artifactId>spring-boot-starter-tomcat</artifactId>
    <scope>provided</scope>
</dependency>
3.在项目目录下,输入如下命令
mvn clean package
4.在项目目录的target中,找到demo_zhang-0.0.1-SNAPSHOT.war,修改名称为ROOT.war,然后移到Tomcat的webapps目录下。
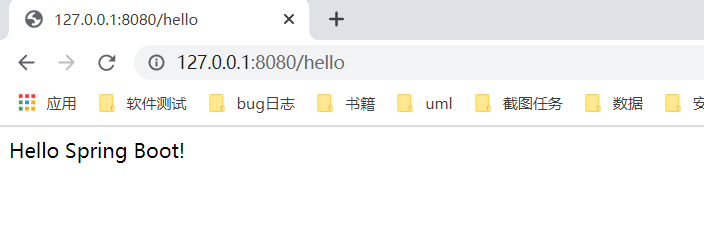
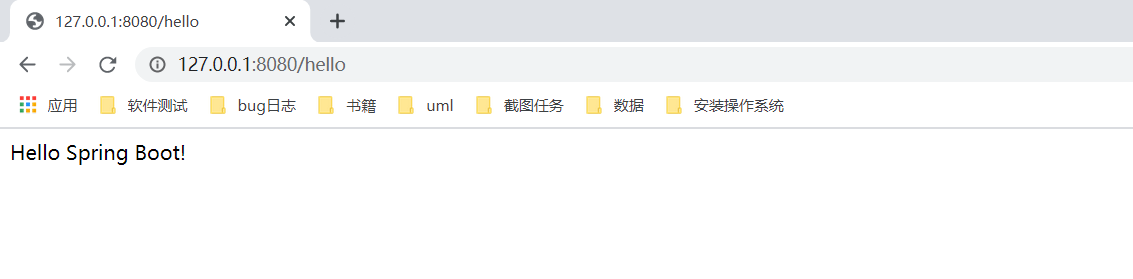
5.运行Tomcat,并访问http://127.0.0.1:8080/hello