一.部署环境
系统:CentOS 6.4x64 最小化安装
IP:192.168.52.131
git默认使用SSH协议,在服务器上基本上不用怎么配置就能直接使用。但是如果面向团队服务,需要控制权限的话,还是用gitolite方便些。
首先用x-shell 工具链接centos 系统
二.安装基础依赖包
[root@nginx ~]#yum install curl-devel expat-devel gettext-devel openssl-devel zlib-devel perl-devel -y
三.在线安装git
[root@bogon ~]# yum -y install git
下载安装包安装方式:

[root@bogon git-2.2.0]#tar xf git-2.2.0.tar.gz
[root@bogon git-2.2.0]#cd  git-2.2.0/
[root@bogon git-2.2.0]#make prefix=/usr/local/git all
[root@bogon git-2.2.0]#make prefix=/usr/local/git install

增加软连接
[root@bogon git-2.2.0]#ln -s /usr/local/git/bin/* /usr/bin/

验证结果,显示出版本号,表示安装成功
[root@bogon git-2.2.0]#git --version
git version 2.2.0
五.创建git用户
[root@bogon ~]# useradd git
# 切换到git用户
[root@bogon ~]# su - git
[git@bogon ~]$ pwd                 #查看当前位置
/home/git
# 确认.ssh/authorized_key是否存在
[git@bogon ~]$ ls -a
.  ..  .bash_logout  .bash_profile  .bashrc  .gnome2  .mozilla
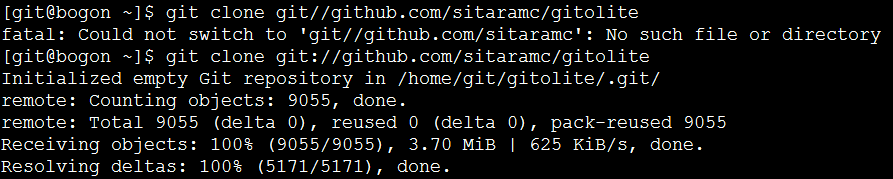
六.获取git版本库并安装
[git@bogon ~]$ git clone https://github.com/sitaramc/gitolite
然后创建bin目录并安装gitolite 到bin目录($ 表示普通用户)
[git@bogon ~]$ mkdir $HOME/bin
[git@bogon ~]$ gitolite/install -to $HOME/bin
[git@bogon ~]$ cd bin/
[git@bogon bin]$ ls
commands  gitolite  gitolite-shell  lib  syntactic-sugar  triggers  VERSION  VREF
七.配置gitolite管理员
gitolite 使用特殊的版本库gitolite-admin 来管理用户和版本库,所以需要创建一个管理员来管理所有的用户和版本库
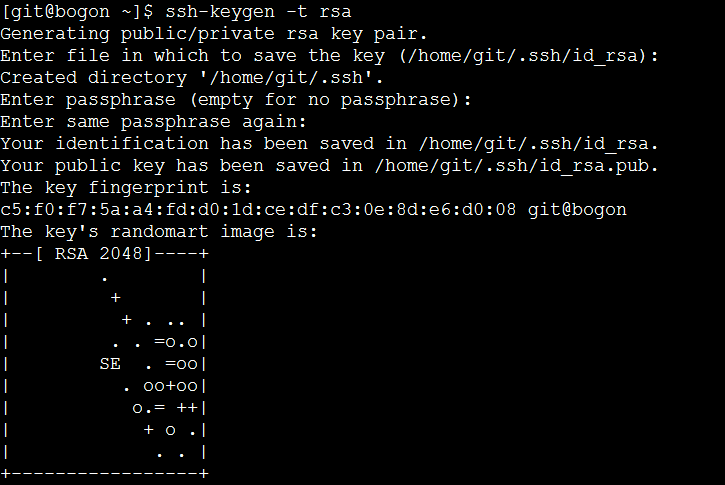
7.1 用git用户生成公钥(注:如果你是接着上面一直做下来的,那么只需要输入cd ,然后回车,则就进入了该用户的目录,如果不是git用户,则需要输入su – git,来切换到git用户)
[git@bogon ~]cd
[git@bogon ~]$ ssh-keygen -t rsa
7.2 修改.ssh/id_rsa.pub 为admin.pub(为什么要改成admin.pub 因为gitolite根据这个文件名来设立帐号.我这里用admin
[git@bogon ~]$ mv .ssh/id_rsa.pub admin.pub
7.3 使用管理员公钥安装gitolite(然后去/home/git/repositories 里面,可以看见仓库文件.gitolite-admin.git 和test.git 一个是管理仓库的,一个是测试用)
[git@bogon ~]$ $HOME/bin/gitolite setup -pk admin.pub

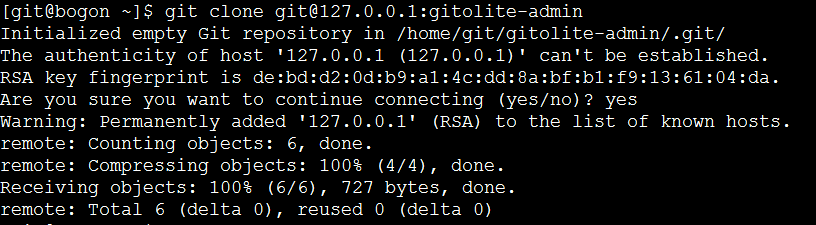
7.4 生成管理员管理仓库(不需要输密码)
[git@bogon ~]$ git clone git@127.0.0.1:gitolite-admin
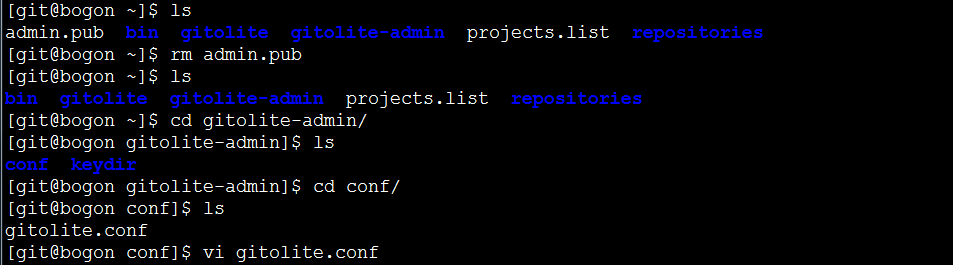
进入仓库后可以看到conf 和keydir ,conf/gitolite.conf 是添加用户/仓库的配置, keydir 是放对应用户的公想·x钥.并且此时,admin.pub这个公钥可以删除了
7.5 编辑gitolite.conf
[git@bogon ~]$ vim gitolite-admin/conf/gitolite.conf
也可以你找下图操作:
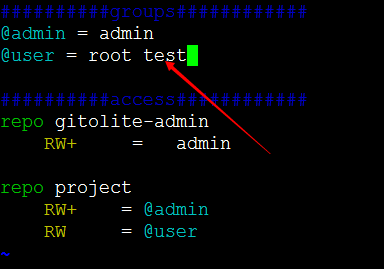
打开图按照下图添加:
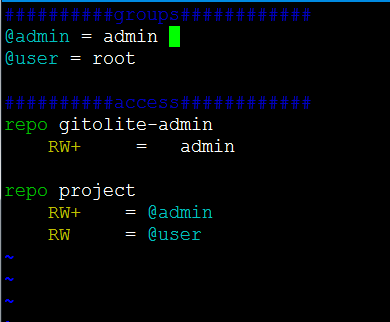
上面的配置含义是:
定义两个用户组: admin 和 user
定义两个版本库: gitolite-admin 和 project
用户admin 对 这两个版本库有(读 写 删除)RW+ 权限
user组对project 有 (读 写)RW 权限
也可按照格式,添加多个组,多个版本库
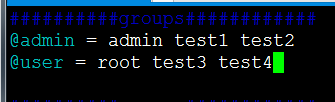
如有一个组中有多个用户,则以空格为分割,如下图:
7.6 然后提交修改(注:修改用户或者增加版本库后在下图中的目录中提交修改,否则会提示修改失败)

提交修改:
[git@bogon conf]$ git add keydir/test.pub conf/gitolite.conf
[git@bogon conf]$ git add . [git@bogon conf]$ git commit -am "new project"
[git@bogon conf]$ git push origin master
# 注:所有的提交修改都是这三条命令,在客户端上提交文件也是这三个命令第二条命令后面引号中的 可以是任意,最好是能体现是做了什么修改

7.7 提交完后,查看管理仓库中多了一个project.git
[git@bogon ~]$ cd repositories/
[git@bogon repositories]$ ls
gitolite-admin.git  project.git
这个时候,服务器已经搭建完毕了,只需要添加用户并给用户添加权限就可以了。下面我们添加用户测试
7.8 权限控制
[root@nginx gitolite-admin]# git status    #查看git库状态
On branch master
Your branch is up-to-date with 'origin/master'.
Changes not staged for commit:
(use "git add <file>..." to update what will be committed)
(use "git checkout -- <file>..." to discard changes in working directory)

    modified:   conf/gitolite.conf        #表示该文件被修改
Untracked files:  (use "git add <file>..." to include in what will be committed)
    keydir/test.pub        #增加的文件
no changes added to commit (use "git add" and/or "git commit -a")

#将有改动的文件添加到git库
[root@nginx gitolite-admin]# git add keydir/test.pub conf/gitolite.conf
[root@nginx gitolite-admin]# git status
On branch master
Your branch is up-to-date with 'origin/master'.
Changes to be committed:  (use "git reset HEAD <file>..." to unstage)
    modified:   conf/gitolite.conf
    new file:   keydir/test.pub
    #这里表示已添加#在第一次执行git commit命令时会有以下提示,需要使用者表明身份

[root@nginx gitolite-admin]# git commit -m "add repo mytest; add user test"
*** Please tell me who you are.Run
    git config --global user.email "you@example.com"
    git config --global user.name "Your Name"to set your account's default identity.
Omit --global to set the identity only in this repository.
fatal: unable to auto-detect email address (got 'root@nginx.(none)')

#在这里我们执行以下2条命令
[root@nginx gitolite-admin]# git config --global user.email "lyao@aaa.com"
[root@nginx gitolite-admin]# git config --global user.name "lyao"

#再重新执行git commit命令
[root@nginx gitolite-admin]# git commit -m "add repo mytest; add user test"
[master 7b877e7] add repo mytest;
add user test 2 files changed, 5 insertions(+)
create mode 100644 keydir/test.pub

#执行完以上命令后,修改的文件只是提交在本地了,并没有提交到git server中,还需要执行git push命令
[root@nginx gitolite-admin]# git push origin master    #推送到远端的master分支
Counting objects: 6, done.Compressing objects: 100% (5/5), done.
Writing objects: 100% (6/6), 817 bytes | 0 bytes/s, done.
Total 6 (delta 0), reused 0 (delta 0)
remote: Initialized empty Git repository in /home/git/repositories/mytest.git
/To git@192.168.3.27:gitolite-admin
3554f3d..7b877e7  master -> maste
八、客户端验证
8.1 centos客户端验证
[root@ipython ~]# git clone git@192.168.3.27:/mytest.git
Initialized empty Git repository in /root/mytest/.git/
warning: You appear to have cloned an empty repository.
[root@ipython ~]# ll
total 3240
drwxr-xr-x 3 root root    4096 Apr 17 14:45 mytest
[root@ipython ~]# cd mytest/
[root@ipython mytest]# git status
# On branch master#
# Initial commit
#nothing to commit (create/copy files and use "git add" to track)

#创建1个文件1.txt并添加到git
[root@ipython mytest]# touch 1.txt
[root@ipython mytest]# git add 1.txt
[root@ipython mytest]# git commit "add file 1.txt"

#第一次使用需要表明身份
[root@ipython mytest]# git commit -m "add file 1.txt"
[master (root-commit) 08e9a37] add file 1.txt
Committer: root <root@ipython.(none)>
Your name and email address were configured automatically based
on your username and hostname. Please check that they are accurate.
You can suppress this message by setting them explicitly:
    git config --global user.name "Your Name"
    git config --global user.email you@example.com
If the identity used for this commit is wrong, you can fix it with:
   git commit --amend --author='Your Name <you@example.com>'
    0 files changed, 0 insertions(+), 0 deletions(-)
    create mode 100644 1.txt

[root@ipython mytest]# git config --global user.email test@aaa.com
[root@ipython mytest]# git config --global user.name test

[root@ipython mytest]# git commit -m "add file 1.txt"
# On branch masternothing to commit (working directory clean)

[root@ipython mytest]# git status
# On branch masternothing to commit (working directory clean)

[root@ipython mytest]# ll
total 0-rw-r--r-- 1 root root 0 Apr 17 14:47 1.txt

[root@ipython mytest]# git push origin master
Counting objects: 3, done.Writing objects: 100% (3/3), 206 bytes, done.
Total 3 (delta 0), reused 0 (delta 0)To git@192.168.3.27:/mytest.git
 * [new branch]      master -> master
8.2 windows客户端验证
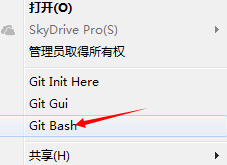
1)在客户机上安装安正的git程序,在D盘新建一个文件夹 test ,右键选择Git Bash
2)打开一个DOS栏,输入 ssh-keygen.exe。这里可以用Tab键补全,然后有提示输入y后一直回车到结束
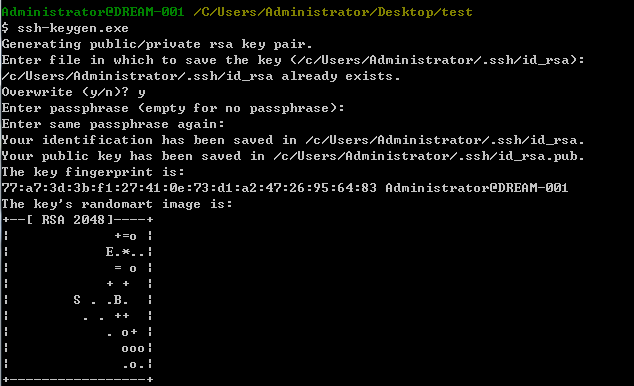
3)然后打开客户机用户目录下的 .ssh 中能看到id_rsa 私钥
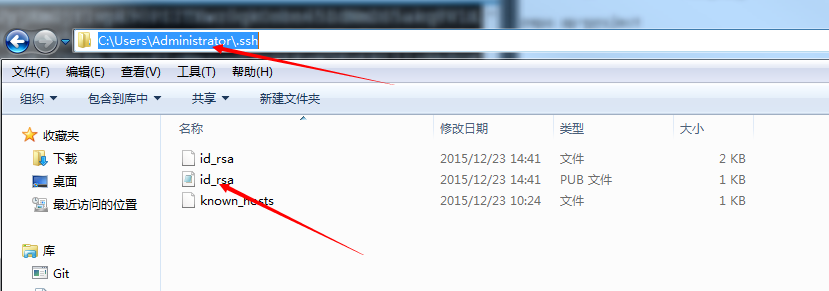
4)然后把id_rsa 这个私钥文件上传到服务器的/home/git/gitolite-admin/keydir 目录中
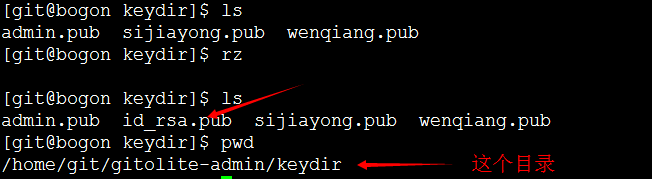
5)然后把这个新传上来的私钥改名

[git@bogon conf]$ vi gitolite.conf
这里表示test用户对project.git 版本库有读写的权限。也可以直接在版本库下面添加用户权限
6)提交修改
[git@bogon conf]$ git add .
[git@bogon conf]$ git commit -am "new project"
[git@bogon conf]$ git push origin master
7)回客户端
打开Bash 窗口,输入
git clone git@192.168.52.131:project.git
链接服务器中的project.git 版本库,其中IP地址是自己服务器的IP地址,冒号后面需要访问也是刚刚给该用户有权限访问的版本库
然后会同步下来一个文件夹名为project 的文件,这个就是版本库,打开这个文件夹,创建一个任意文件
在客户机上提交修改文件:
打开project文件夹,创建一个任意文件,然后打开Bash 窗口,输入提交修改命令
[git@bogon conf]$ git add .
[git@bogon conf]$ git commit -am "new project"
[git@bogon conf]$ git push origin master
这样,修改过的数据就上传到服务器上去了,其他用户同样可以同步下来
从服务器上往别的客户机上同步更改后的版本库的命令是:
git pull