1.安装轻量级网络仿真工具Mininet
-
从GitHub上获取mininet源码
/* sudo git clone git://github.com/mininet/mininet -
安装时可选择的mininet版本
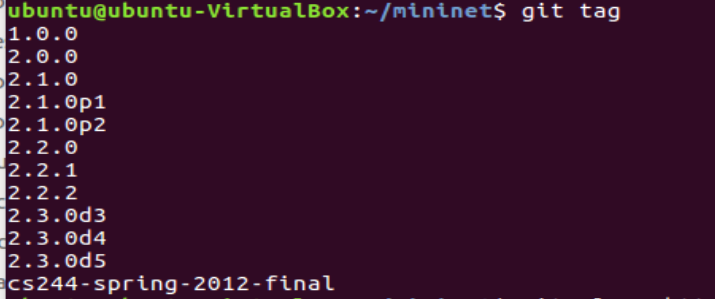
-
进入mininet/util/目录下进行安装
mininet/util/install.sh [options] -a: 全部安装 -nfv:仅安装MINIENT OPENFLOW引用多SWITCH 和OPEN VSWITCH -s mydir: 指定目录 -
安装成功后进行最小拓扑测试

2.用字符命令搭建如下拓扑,要求写出命令

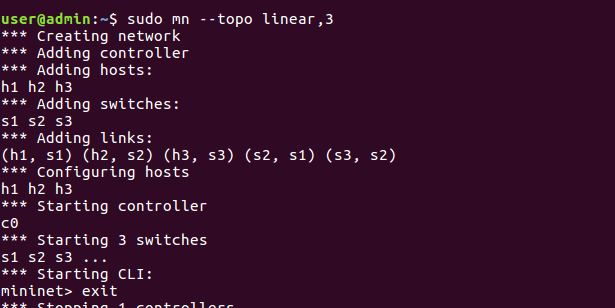
输入如下命令行字符可产生上图拓扑:
/* sudo mn --topo linear,3
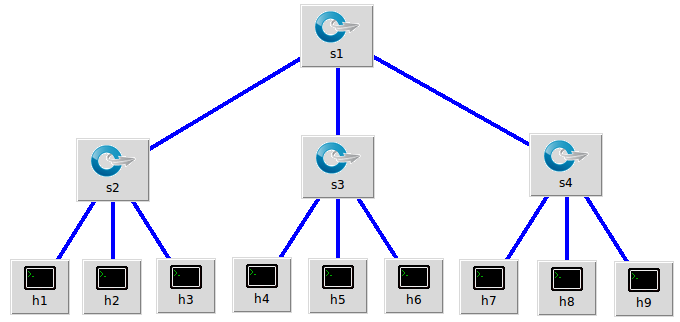
输入如下命令行字符可产生上图拓扑:
/* sudo mn --topo tree,fanout=3,depth=2

3.利用可视化工具搭建如下拓扑
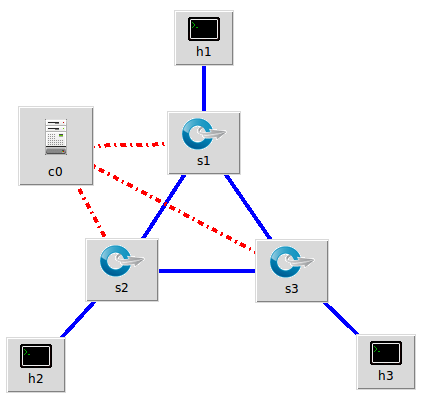
在终端打开miniedit.py文件后弹出可视化拓扑工具miniedit

拖动控件建立所需的拓扑结构,并将h1,h2,h3的IP地址分别设置为10.0.0.10,10.0.0.11,10.0.0.12
点击Run按钮,观察终端窗口情况。如下表示建立成功。

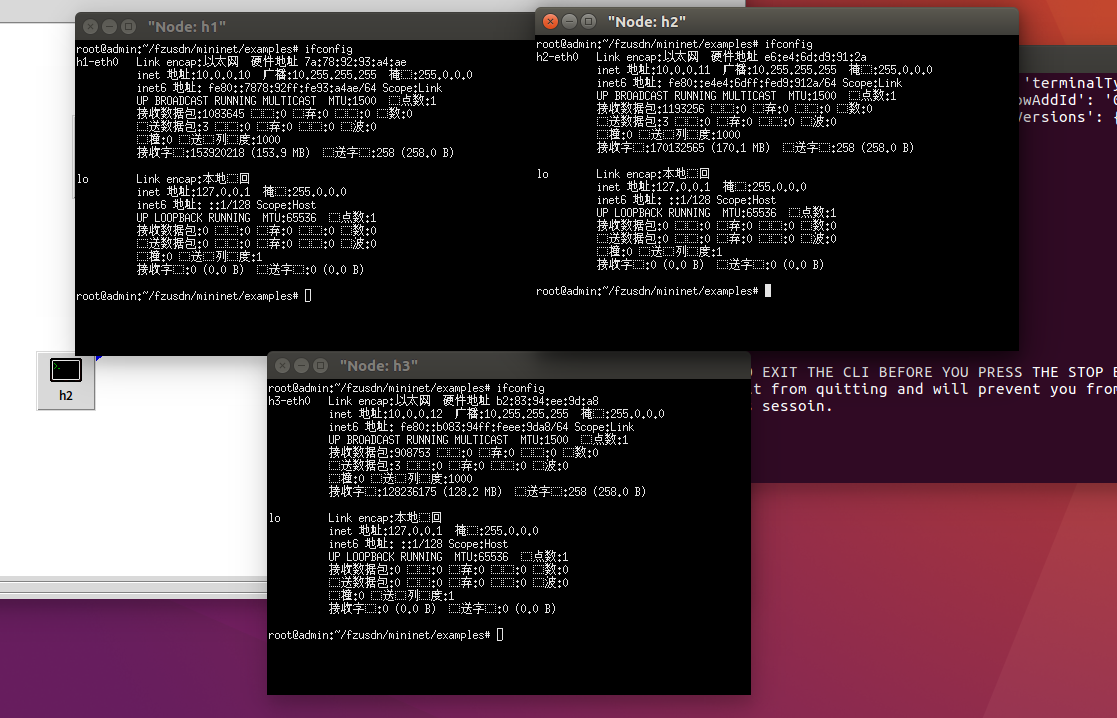
在miniedit工具中开启CLI后再度运行,进入mininet工作区域,输入xterm h1 h2 h3打开这三台主机的控制台。在控制台可使用ifconfig命令查看当前网络配置,检查是否与预期结果相符。

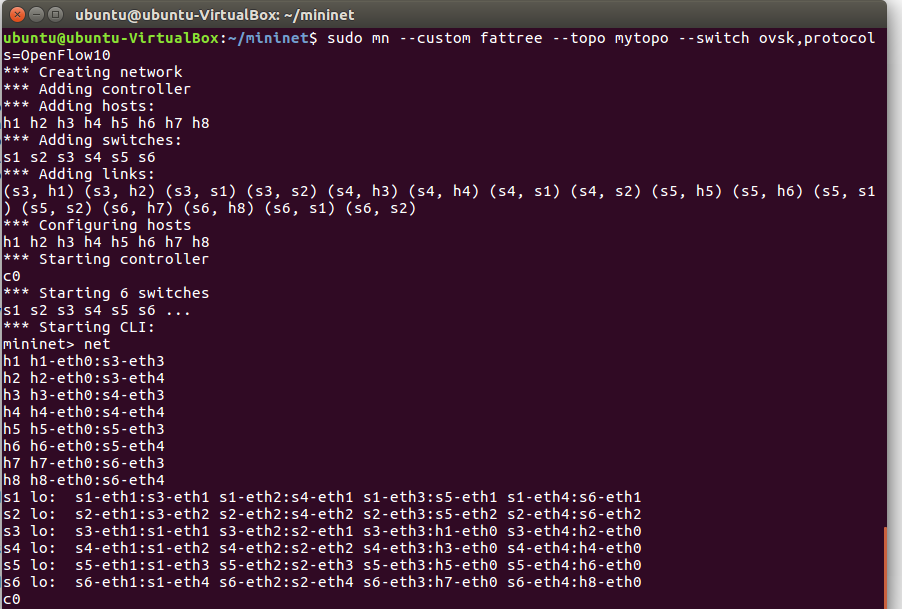
4.利用Python脚本完成如下图所示的一个Fat-tree型的拓扑
更改过后符合题意的代码片段如下:
#!/usr/bin/python
#创建网络拓扑
"""Custom topology example
Adding the 'topos' dict with a key/value pair to generate our newly defined
topology enables one to pass in '--topo=mytopo' from the command line.
"""

from mininet.topo import Topo
from mininet.net import Mininet
from mininet.node import RemoteController,CPULimitedHost
from mininet.link import TCLink
from mininet.util import dumpNodeConnections

class MyTopo( Topo ):
    "Simple topology example."

    def __init__( self ):
        "Create custom topo."

        # Initialize topology
        Topo.__init__( self )
        L1 = 2
        L2 = L1 * 2
        L3 = L2
        c = []
        a = []
        e = []

        # add core ovs
        for i in range( L1 ):
                sw = self.addSwitch( 's{}'.format( i + 1 ) )
                c.append( sw )

        # add aggregation ovs
        for i in range( L2 ):
                sw = self.addSwitch( 's{}'.format( L1 + i + 1 ) )
                a.append( sw )

        # add links between core and aggregation ovs
        for i in range( L1 ):
                sw1 = c[i]
                for sw2 in a[i/2::L1/2]:
                # self.addLink(sw2, sw1, bw=10, delay='5ms', loss=10, max_queue_size=1000, use_htb=True)
			            self.addLink( sw2, sw1 )


        #add hosts and its links with aggregation ovs
        count = 1
        for sw1 in a:
                for i in range(2):
                	host = self.addHost( 'h{}'.format( count ) )
                	self.addLink( sw1, host )
                	count += 1
topos = { 'mytopo': ( lambda: MyTopo() ) }
调用python脚本文件创建预期的网络拓扑
