实现一个DICOM浏览工具——显示图像
在通过fo-dicom解析图像后,需要把图像显示到窗体中,在xaml中添加Image控件,命名为 DcmImage。
  public async Task OpenAsync(string filename)
      {
          var file = await DicomFile.OpenAsync(filename);
          if (file.Dataset.Contains(DicomTag.PixelData))
          {
              var dicomImage = new DicomImage(file.Dataset);
              // fo-dicom中默认是用WinFormImageManager进行图像管理的,如果想在wpf中使用,需要指定为WpfImageManager类
              // 之所以要在这里指定ImageMnager,是因为在DicomImage的RenderImage方法中会调用ImageManager实现类的CreateImageImpl方法获取相对应的图像数据
              ImageManager.SetImplementation(ViewerImageManager.Instance);
              var frames = Enumerable.Range(0, dicomImage.NumberOfFrames)
                  .Select(frame => dicomImage.RenderImage(frame).As<ImageSource>())
                  .ToList();
              if (frames.Count > 0)
              {
                  DcmImage.Source = frames[0];
              }
          }
      }
在fo-dicom源码中包含了WPFImageManager,但是我通过nuget安装后的找不到这个类,不知道为什么,后边没办法,只能参考github上边的自己写了一个ImageManager类,用来做图像处理的管理工具,具体代码如下:
namespace DcmViewer
    {
    using Dicom.Imaging;
    public sealed class ViewerImageManager : ImageManager
    {
        #region FIELDS
        public static readonly ImageManager Instance;
        #endregion

        #region CONSTRUCTORS

        static ViewerImageManager()
        {
            Instance = new ViewerImageManager();
        }

        #endregion

        #region PROPERTIES
        public override bool IsDefault {
            get
            {
                return false;
            }
        }
        #endregion


        #region METHODS

        protected override IImage CreateImageImpl(int width, int height)
        {
            return new ViewerImage(width, height);
        }

        #endregion

    }
  }
上边的ViewerImageManager还缺少一个对应的ViewerImage类,代码如下:
namespace DcmViewer
{
    public sealed class ViewerImage : ImageBase<WriteableBitmap>
    {
        #region FIELDS
        private const double DPI = 96;
        #endregion

        #region CONSTRUCTORS

        public ViewerImage(int width, int height): base(width, height, new Dicom.IO.PinnedIntArray(width * height), null)
        {
        }

        private ViewerImage(int widht, int height, PinnedIntArray pixels, WriteableBitmap image) : base(widht, height, pixels, image)
        {
        }
        #endregion

        #region METHODS

        public override void Render(int components, bool flipX, bool flipY, int rotation)
        {
            var bitmap = CreateBitMap(width, height, components, pixels.Data);
            image = ApplyFlipRotate(bitmap, flipX, flipY, rotation);
        }

        public override void DrawGraphics(IEnumerable<IGraphic> graphics)
        {
            foreach (var graphic in graphics)
            {
                var layer = graphic.RenderImage(null).As<WriteableBitmap>();

                var overlay = new int[graphic.ScaledWidth * graphic.ScaledHeight];
                var stride = 4 * graphic.ScaledWidth;
                layer.CopyPixels(overlay, stride, 0);

                image.WritePixels(
                    new Int32Rect(
                        graphic.ScaledOffsetX,
                        graphic.ScaledOffsetY,
                        graphic.ScaledWidth,
                        graphic.ScaledHeight),
                    overlay,
                    stride,
                    0);
            }
        }

        public override IImage Clone()
        {
            return new ViewerImage(
                width,
                height,
                new PinnedIntArray(pixels.Data),
                image == null ? null : new WriteableBitmap(image));
        }

        private static WriteableBitmap CreateBitMap(int width, int height, int components, int[] pixelData)
        {
            var format = components == 4 ? PixelFormats.Bgra32 : PixelFormats.Bgr32;
            var bitmap = new WriteableBitmap(width, height, DPI, DPI, format, null);
            bitmap.Lock();
            Marshal.Copy(pixelData, 0, bitmap.BackBuffer, pixelData.Length);
            bitmap.AddDirtyRect(new Int32Rect(0, 0, width, height));
            bitmap.Unlock();
            return bitmap;
        }

        private static WriteableBitmap ApplyFlipRotate(WriteableBitmap bitmap, bool flipX, bool flipY, int rotation)
        {
            if (rotation == 0 && !flipX && !flipY)
            {
                return bitmap;
            }

            var rotFlipTransform = new TransformGroup();
            rotFlipTransform.Children.Add(new RotateTransform(rotation));
            rotFlipTransform.Children.Add(new ScaleTransform(flipX ? -1 : 1, flipY ? -1 : 1));

            return new WriteableBitmap(new TransformedBitmap(bitmap, rotFlipTransform));
        }
        #endregion
    }
}
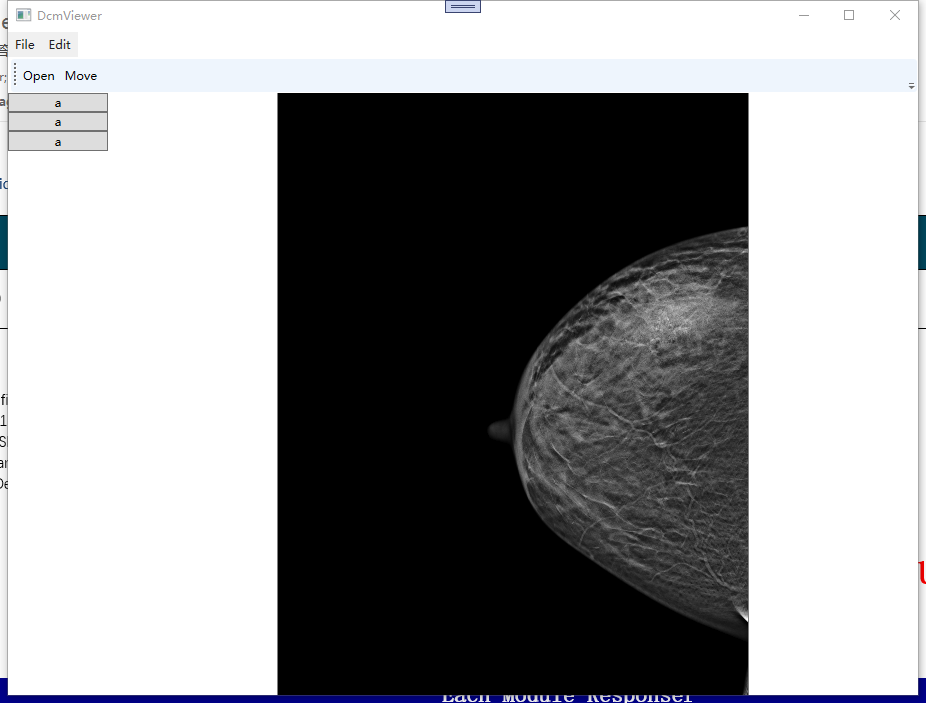
在实现类OpenButton的响应函数后,实现初步的简单显示效果如下:
